

Grow Ginger Backyard: Imagine stepping into your garden and harvesting fresh, zesty ginger whenever you need it. No more last-minute trips to the grocery store! For centuries, ginger has been prized not only for its culinary uses but also for its medicinal properties, deeply rooted in Asian cultures. From soothing upset stomachs to adding a spicy kick to your favorite dishes, ginger is a true powerhouse.
But did you know that you can easily grow ginger backyard, even if you don’t have a green thumb? I’m here to show you some simple DIY tricks and hacks that will transform your backyard into a thriving ginger patch. Many people are intimidated by the thought of growing their own ginger, thinking it requires specialized knowledge or equipment. The truth is, with a few clever techniques, you can enjoy a bountiful harvest of this incredible spice right at your fingertips.
This article is your ultimate guide to unlocking the secrets of growing ginger at home. We’ll cover everything from selecting the right ginger root to preparing your soil and protecting your plants from pests. Get ready to embark on a rewarding gardening adventure that will not only enhance your culinary creations but also bring a touch of exotic beauty to your backyard!
Growing Ginger in Your Backyard: A DIY Guide
Hey there, fellow gardening enthusiasts! I’m so excited to share my experience with growing ginger right in my backyard. It’s surprisingly easy, rewarding, and you get fresh, flavorful ginger whenever you need it. Forget those sad, shriveled pieces at the grocery store! Let’s dive in.
Choosing Your Ginger Rhizome
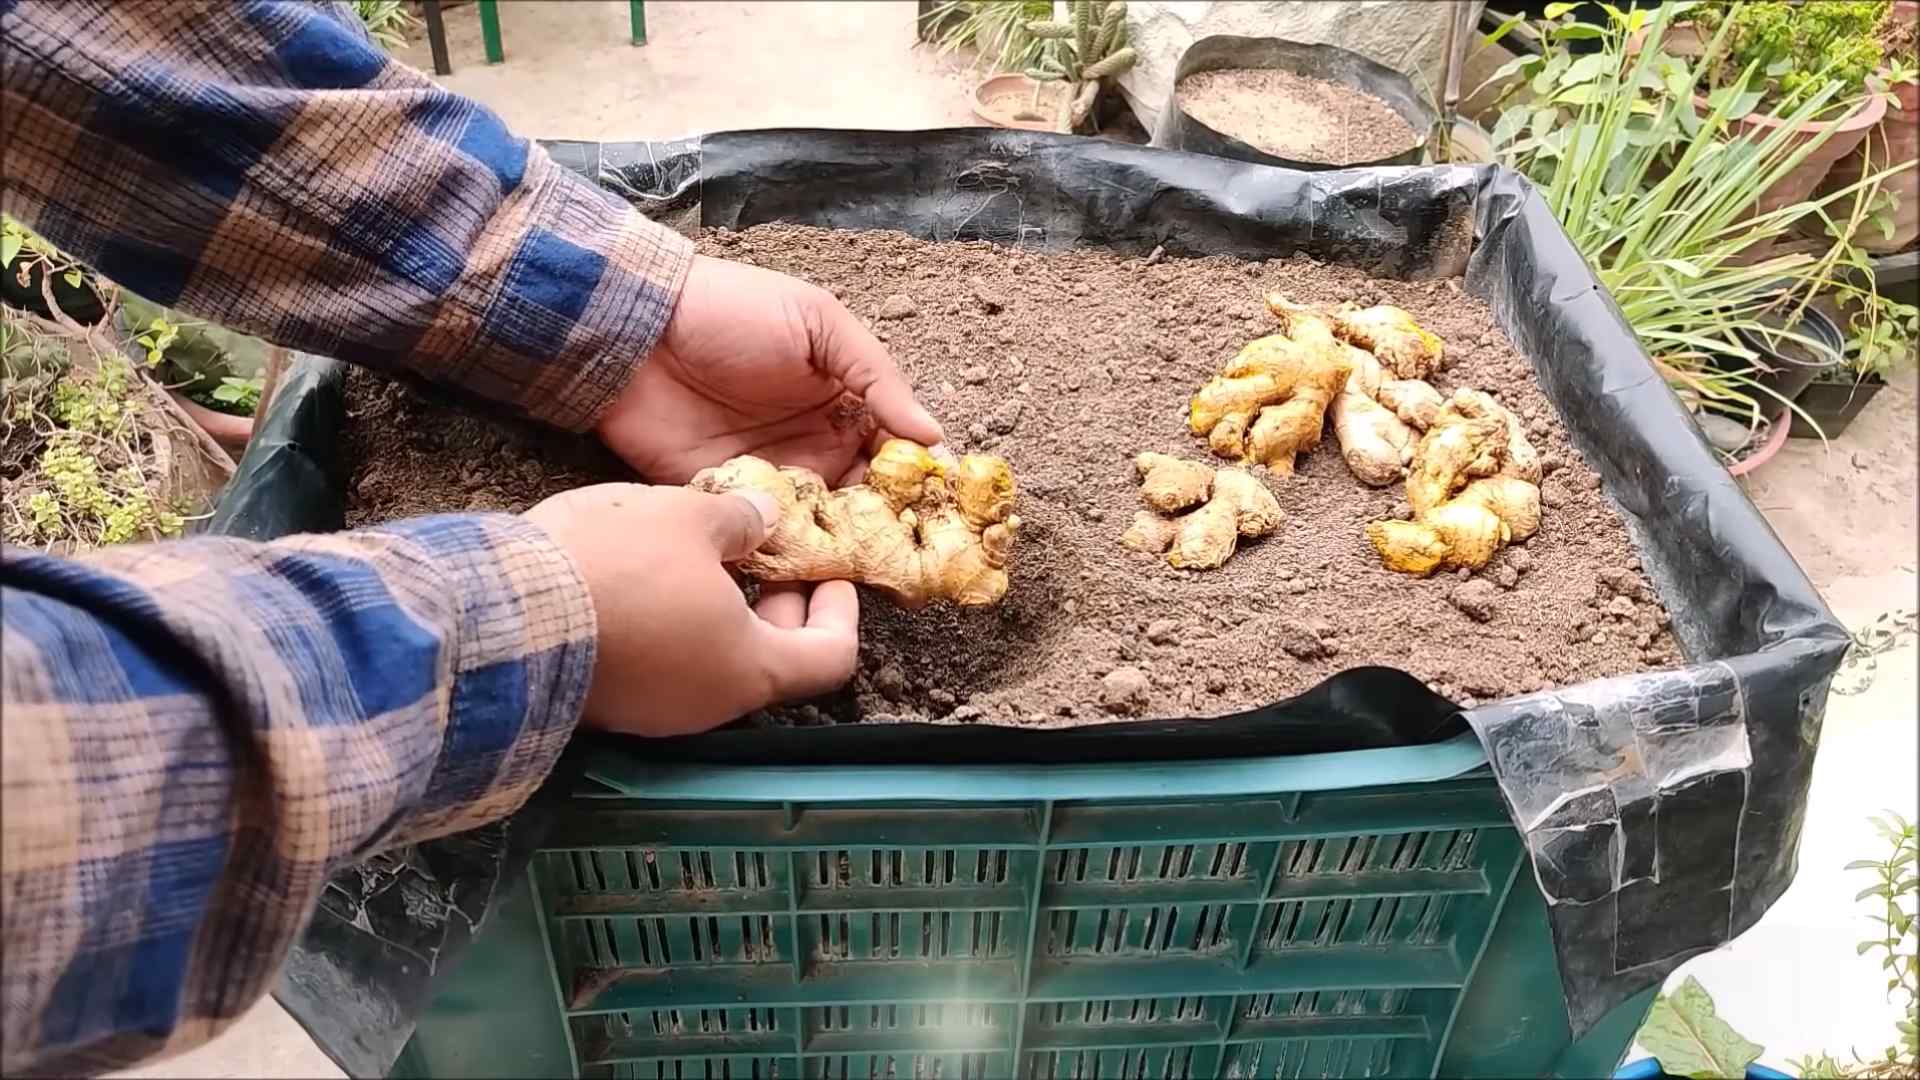
First things first, you need a ginger rhizome (that knobby root-like thing).
* Look for plumpness: The rhizome should be firm and plump, not shriveled or dried out.
* Eyes are key: Check for “eyes” – these are small buds or growth points. The more eyes, the better your chances of success.
* Organic is best: Opt for organic ginger if possible. Non-organic ginger might be treated with growth inhibitors.
* Grocery store ginger works: Don’t worry if you can’t find organic. Regular grocery store ginger can work just fine, but you might want to soak it in water overnight before planting to help wake it up.
Preparing Your Ginger for Planting
Okay, you’ve got your ginger. Now, let’s get it ready to sprout.
* Soaking (optional but recommended): I like to soak my ginger rhizome in lukewarm water for 12-24 hours. This rehydrates it and encourages those eyes to start waking up.
* Cutting (if necessary): If your rhizome is large, you can cut it into smaller pieces, ensuring each piece has at least one or two eyes. Let the cut ends callous over for a day or two before planting to prevent rot. I usually just leave mine whole if it’s not too big.
Preparing the Soil and Planting
Ginger loves warm, well-draining soil. Think tropical paradise!
* Location, location, location: Choose a spot in your backyard that gets partial shade. Ginger doesn’t like scorching sun. Morning sun and afternoon shade is ideal.
* Soil is crucial: Ginger needs rich, well-draining soil. Amend your soil with plenty of compost, aged manure, or other organic matter. I like to use a mix of potting soil, compost, and perlite for extra drainage.
* Raised beds or containers: If your soil is heavy clay, consider planting in raised beds or containers. This will improve drainage and prevent root rot.
* Planting depth: Plant the ginger rhizome about 2-4 inches deep, with the eyes facing upwards.
* Spacing: If you’re planting multiple pieces, space them about 8-12 inches apart.
* Watering: Water thoroughly after planting. The soil should be moist but not soggy.
Ginger Growing Guide: Step-by-Step
Alright, let’s get our hands dirty!
1. Prepare the Soil: Dig a hole that’s about twice the size of your ginger rhizome. Mix in plenty of compost or other organic matter. I usually use a shovel and then break up any clumps with my hands.
2. Plant the Rhizome: Place the ginger rhizome in the hole with the “eyes” (the little buds) facing upwards.
3. Cover with Soil: Gently cover the rhizome with soil, about 2-4 inches deep.
4. Water Thoroughly: Water the area well, making sure the soil is moist but not waterlogged.
5. Mulch (Optional): Add a layer of mulch around the plant to help retain moisture and suppress weeds. I like to use straw or shredded leaves.
6. Watering Schedule: Keep the soil consistently moist, especially during hot, dry weather. Water deeply when the top inch of soil feels dry to the touch.
7. Fertilizing: Feed your ginger plant every few weeks with a balanced organic fertilizer. I use a liquid seaweed fertilizer diluted according to the package instructions.
8. Pest Control: Keep an eye out for pests like aphids or spider mites. If you spot any, treat them with insecticidal soap or neem oil. I prefer organic solutions whenever possible.
9. Weed Control: Regularly remove any weeds that pop up around your ginger plant. Weeds can compete for nutrients and water.
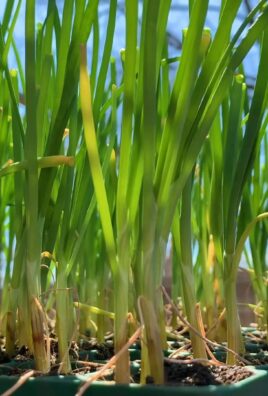
10. Be Patient: Ginger takes time to grow. You might not see any sprouts for several weeks, so don’t give up!
Caring for Your Ginger Plant
Once your ginger plant starts growing, here’s how to keep it happy and healthy:
* Watering: Ginger likes consistent moisture, but avoid overwatering. Soggy soil can lead to root rot. I usually water deeply every few days, depending on the weather.
* Fertilizing: Feed your ginger plant regularly with a balanced organic fertilizer. This will help it grow strong and produce flavorful rhizomes.
* Temperature: Ginger thrives in warm temperatures (70-90°F). If you live in a cooler climate, you can grow ginger in containers and bring them indoors during the winter.
* Humidity: Ginger also appreciates humidity. You can increase humidity by misting the leaves regularly or placing a tray of water near the plant.
* Sunlight: Remember, ginger prefers partial shade. Too much direct sunlight can scorch the leaves.
* Monitoring: Keep an eye out for any signs of pests or diseases. Address any problems promptly to prevent them from spreading.
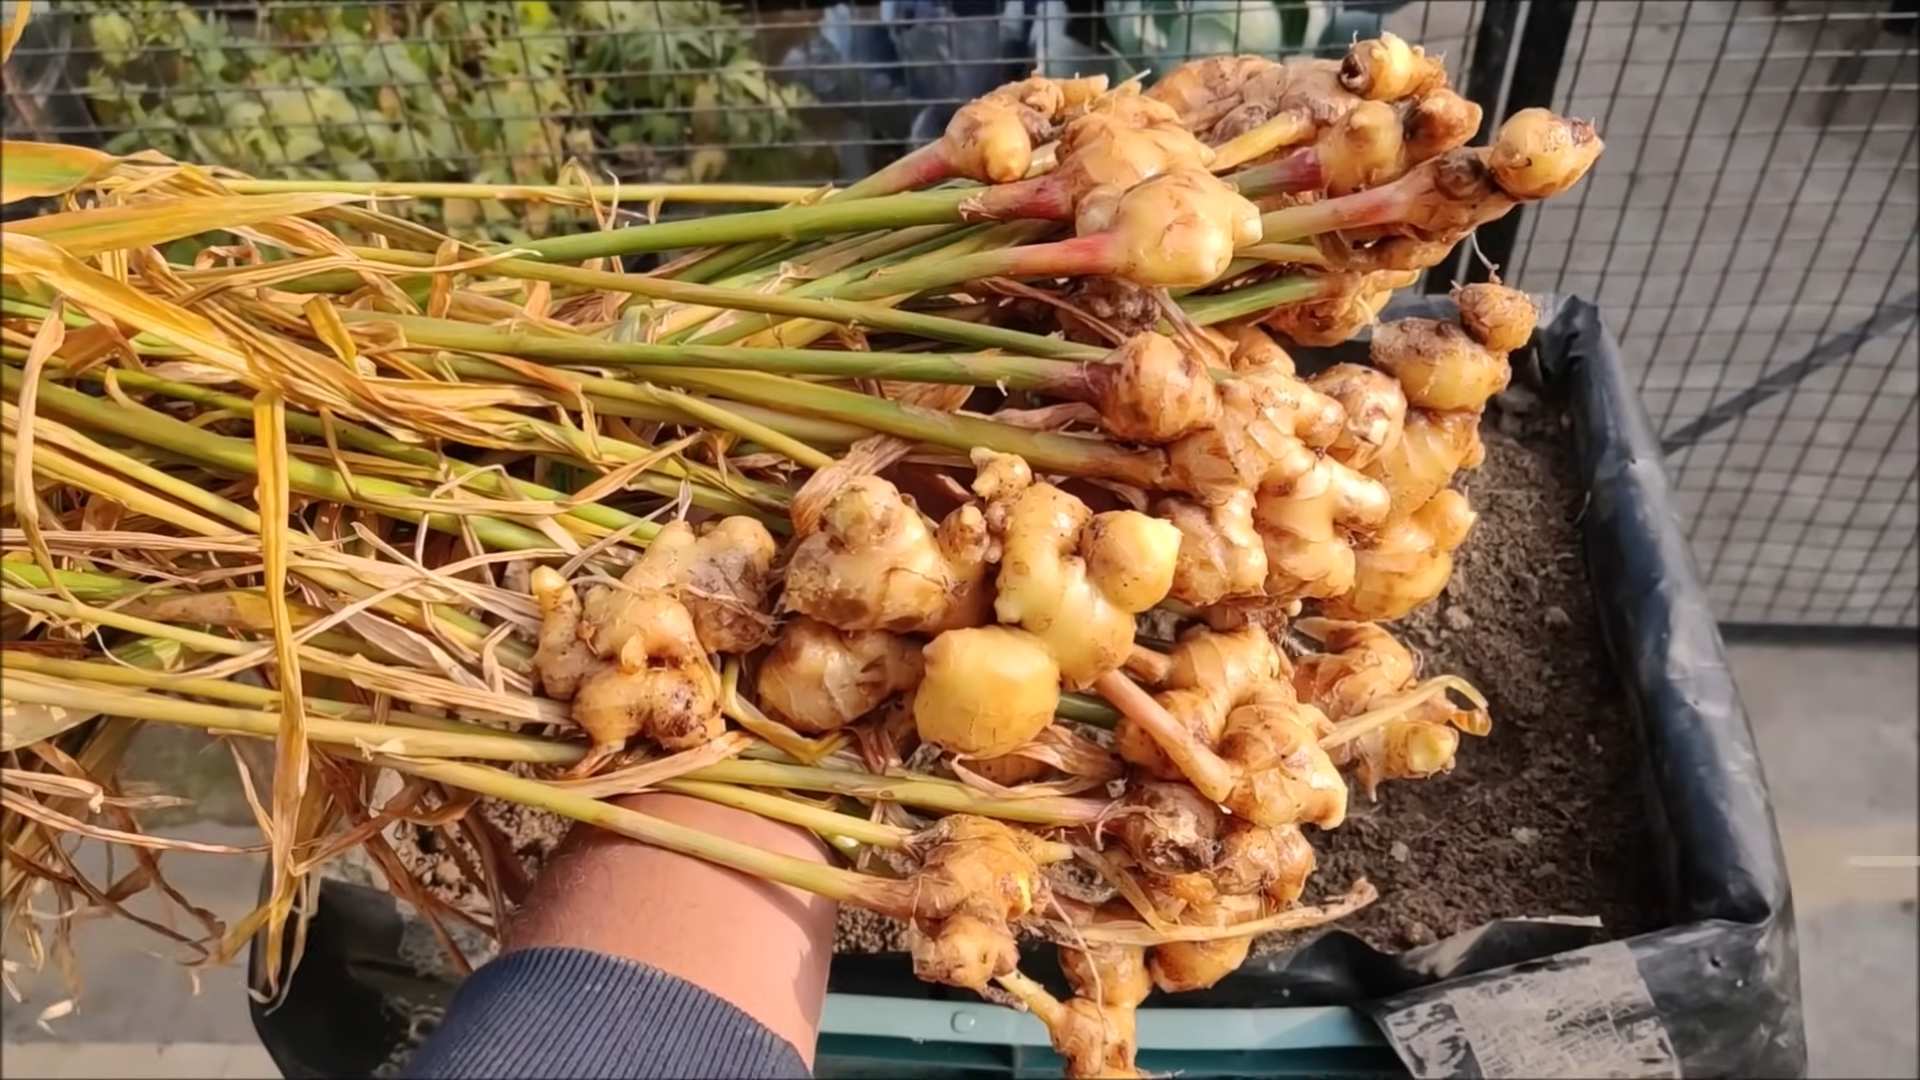
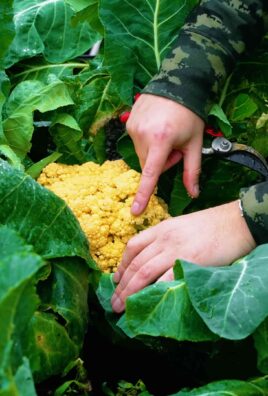
Harvesting Your Ginger
The best part! Harvesting your homegrown ginger.
* When to harvest: You can start harvesting ginger about 8-10 months after planting. The leaves will start to turn yellow and die back, indicating that the rhizomes are mature.
* Partial harvest: If you just need a little ginger, you can carefully dig around the edges of the plant and harvest a few rhizomes without disturbing the rest of the plant.
* Full harvest: For a full harvest, dig up the entire plant.
* How to harvest: Gently loosen the soil around the plant with a garden fork or shovel. Carefully lift the plant out of the ground, being careful not to damage the rhizomes.
* Cleaning: Shake off any excess soil and rinse the rhizomes with water.
* Storing: Freshly harvested ginger can be stored in the refrigerator for several weeks. You can also freeze it for longer storage. I like to grate it before freezing so I can easily add it to recipes.
Troubleshooting
Sometimes things don’t go exactly as planned. Here are a few common problems and how to fix them:
* No sprouts: If your ginger isn’t sprouting, make sure the soil is warm and moist. You can also try gently warming the soil with a heat mat.
* Yellowing leaves: Yellowing leaves can be a sign of overwatering, underwatering, or nutrient deficiency. Adjust your watering schedule and fertilize regularly.
* Root rot: Root rot is caused by soggy soil. Make sure your soil is well-draining and avoid overwatering.
* Pests: Treat any pests with insecticidal soap or neem oil.
Enjoying Your Homegrown Ginger
Now that you’ve harvested your ginger, it’s time to enjoy it!
* Cooking: Fresh ginger adds a wonderful flavor to stir-fries, soups, curries, and other dishes.
* Tea: Ginger tea is a soothing and warming beverage. Simply steep a few slices of fresh ginger in hot water.
* Candied ginger: Candied ginger is a delicious treat.
* Ginger ale: Make your own homemade ginger ale.
* Gifting: Share your homegrown ginger with friends and family!
Growing ginger in your backyard is a fun and rewarding experience. With a little patience and care, you can enjoy fresh, flavorful ginger whenever you need it. Happy gardening!
Conclusion
So, there you have it! Growing ginger in your backyard isn’t just a whimsical gardening project; it’s a gateway to fresher, more flavorful meals, a healthier lifestyle, and a deeper connection with the natural world. We’ve walked you through the simple steps, from selecting the perfect rhizome to harvesting your very own homegrown ginger.
Why is this DIY trick a must-try? Because the difference between store-bought ginger and freshly harvested, backyard-grown ginger is truly remarkable. The aroma is more intense, the flavor is brighter and more complex, and the satisfaction of nurturing something from the earth to your table is unparalleled. Plus, you’ll know exactly where your ginger came from and how it was grown, avoiding any concerns about pesticides or long-distance transportation.
But the adventure doesn’t stop there! Feel free to experiment with different varieties of ginger. Some gardeners swear by the spicier Chinese ginger, while others prefer the milder, more floral flavor of Hawaiian ginger. You can also play around with the growing medium. While we recommended a well-draining potting mix, you could try incorporating compost or other organic amendments to further enrich the soil.
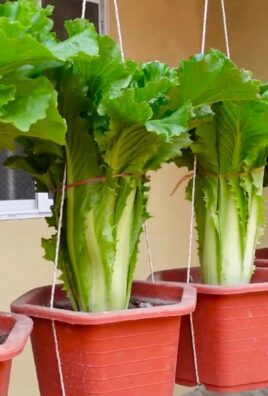
Consider companion planting to enhance your ginger’s growth. Turmeric, galangal, and cardamom are all related to ginger and thrive in similar conditions, creating a beautiful and productive mini-spice garden. You can also interplant with leafy greens like lettuce or spinach, which will benefit from the shade provided by the ginger plants.
And don’t forget about the leaves! Ginger leaves are often overlooked, but they’re incredibly versatile in the kitchen. Use them to infuse teas, flavor soups and stews, or even wrap fish or chicken for grilling. They impart a subtle, gingery aroma that’s both refreshing and delicious.
Growing ginger in your backyard is an incredibly rewarding experience, and we encourage you to give it a try. It’s easier than you might think, and the benefits are well worth the effort. Imagine the possibilities: fresh ginger tea on a chilly morning, homemade ginger ale with a spicy kick, or a vibrant ginger-infused stir-fry that will tantalize your taste buds.
We’re confident that you’ll be amazed by the results. So, grab a ginger rhizome, find a sunny spot in your backyard, and get ready to embark on a flavorful journey. And most importantly, don’t forget to share your experience with us! We’d love to hear about your successes, your challenges, and any creative variations you come up with. Post your photos and stories on social media using #BackyardGinger or leave a comment below. Let’s build a community of ginger-growing enthusiasts and inspire others to discover the joys of homegrown spices. Happy gardening!
Frequently Asked Questions (FAQ)
What is the best time of year to plant ginger?
The ideal time to plant ginger is in early spring, after the last frost has passed. Ginger thrives in warm temperatures and needs a long growing season to mature. If you live in a colder climate, you can start your ginger indoors in pots about 6-8 weeks before the last expected frost. This will give it a head start and ensure a successful harvest.
How much sunlight does ginger need?
Ginger prefers partial shade, especially in hotter climates. Direct sunlight can scorch the leaves and hinder growth. Aim for a location that receives morning sun and afternoon shade, or dappled sunlight throughout the day. If you’re growing ginger indoors, place it near a bright window but avoid direct sunlight.
What kind of soil is best for growing ginger?
Ginger needs well-draining soil that is rich in organic matter. A mixture of potting soil, compost, and perlite or vermiculite works well. The soil should be slightly acidic, with a pH between 6.0 and 6.5. Avoid heavy clay soils, as they can retain too much moisture and lead to root rot.
How often should I water my ginger plant?
Water your ginger plant regularly, keeping the soil consistently moist but not waterlogged. Allow the top inch of soil to dry out slightly between waterings. During hot, dry weather, you may need to water more frequently. Reduce watering in the fall as the plant prepares for dormancy.
How long does it take for ginger to grow?
It typically takes 8-10 months for ginger to mature and be ready for harvest. You can start harvesting small pieces of ginger after about 4 months, but the flavor will be milder. For a more intense flavor and larger rhizomes, wait until the plant has flowered and the leaves have started to turn yellow and die back.
How do I harvest ginger?
To harvest ginger, gently dig around the plant and lift the rhizomes from the soil. You can harvest the entire plant at once or selectively harvest individual rhizomes as needed. After harvesting, wash the ginger thoroughly and store it in a cool, dry place.
Can I grow ginger in a container?
Yes, ginger grows very well in containers. Choose a pot that is at least 12 inches deep and wide to allow the rhizomes plenty of room to spread. Use a well-draining potting mix and water regularly. Container-grown ginger may need more frequent watering than ginger grown in the ground.
How do I store ginger after harvesting?
Fresh ginger can be stored in the refrigerator for several weeks. Wrap it in a paper towel and place it in a plastic bag to prevent it from drying out. You can also freeze ginger for longer storage. Peel and chop the ginger into small pieces, then freeze it in a single layer on a baking sheet. Once frozen, transfer the ginger to a freezer bag or container.
What are some common problems when growing ginger?
Some common problems when growing ginger include root rot, fungal diseases, and pests such as aphids and spider mites. Root rot is caused by overwatering and poorly draining soil. Fungal diseases can be prevented by providing good air circulation and avoiding overhead watering. Pests can be controlled with insecticidal soap or neem oil.
Can I grow ginger from store-bought ginger?
Yes, you can grow ginger from store-bought ginger, but it’s important to choose a rhizome that is plump, firm, and has visible “eyes” or buds. Soak the ginger in water overnight before planting to encourage sprouting. Keep in mind that store-bought ginger may have been treated to prevent sprouting, so it may take longer to germinate. Organic ginger is more likely to sprout successfully.
Leave a Comment