

Grow Jerusalem Artichokes, and unlock a secret weapon in your home garden! Have you ever dreamed of harvesting a delicious, nutty root vegetable right from your backyard, one that’s both easy to grow and incredibly versatile in the kitchen? Well, get ready to turn that dream into reality! This DIY guide will walk you through everything you need to know to successfully cultivate these fascinating plants, also known as sunchokes.
Jerusalem Artichokes, despite their name, have no connection to Jerusalem and aren’t true artichokes. They’re actually native to North America, where indigenous peoples cultivated them for centuries. Imagine the generations who thrived on these nutritious tubers, understanding their growth cycles and culinary potential. Now, you can tap into that same knowledge and bring a piece of that history to your own garden.
In today’s busy world, many of us are looking for ways to connect with nature, eat healthier, and reduce our reliance on grocery stores. That’s where learning to grow Jerusalem Artichokes comes in. These plants are incredibly low-maintenance, making them perfect for beginner gardeners. Plus, they’re packed with nutrients and can be used in everything from soups and salads to roasted vegetable dishes. So, let’s dive in and discover the secrets to a bountiful harvest!
Growing Jerusalem Artichokes: A Beginner’s Guide
Okay, so you want to grow Jerusalem artichokes, also known as sunchokes? Awesome! They’re surprisingly easy to grow, produce delicious tubers, and are a fantastic addition to any garden. I’ve been growing them for years, and I’m excited to share my tips and tricks with you. Just be warned: they can be a bit enthusiastic, so planning is key!
Understanding Jerusalem Artichokes
Before we dive into the how-to, let’s talk a little about what we’re dealing with. Jerusalem artichokes aren’t actually artichokes, and they’re not from Jerusalem! They’re a type of sunflower native to North America. The edible part is the tuber, which looks a bit like ginger root. They have a nutty, slightly sweet flavor that’s delicious roasted, mashed, or even eaten raw.
Why grow them?
* Easy to grow: Seriously, they practically grow themselves.
* Nutritious: They’re packed with inulin, a prebiotic fiber that’s great for your gut.
* Versatile: You can cook them in so many ways!
* Beautiful flowers: They produce lovely sunflower-like blooms in late summer.
* Perennial: Plant them once, and they’ll come back year after year.
The “Enthusiastic” Part:
This is important! Jerusalem artichokes are vigorous growers and can spread quickly. Think of them like mint – you need to contain them. I’ll show you how to manage them later.
Planning Your Jerusalem Artichoke Patch
Location, location, location! Choosing the right spot is crucial for success and for keeping these guys under control.
Sunlight: They need at least 6 hours of sunlight per day. More is better!
Soil: They’re not too picky about soil, but well-drained soil is ideal. They can tolerate poor soil, but you’ll get a better yield with richer soil.
Space: Give them plenty of room! Each plant can grow quite tall (6-12 feet) and wide. I recommend spacing them at least 18-24 inches apart.
Containment: This is the most important part! Here are a few ways to keep them from taking over your garden:
* Dedicated Bed: Plant them in a raised bed or a separate area that you can easily manage.
* In-Ground Barrier: Bury a physical barrier (like metal or plastic sheeting) around the planting area, extending at least 12 inches deep. This will prevent the tubers from spreading underground.
* Regular Harvesting: Harvest the tubers diligently each year to prevent them from becoming too established.
* Avoid Planting Near Lawns: They can easily spread into your lawn, and it’s a pain to get rid of them.
Planting Jerusalem Artichokes
Okay, now for the fun part!
When to Plant:
* Spring: This is the ideal time to plant. Plant after the last frost, when the soil has warmed up.
* Fall: You can also plant in the fall, a few weeks before the ground freezes. This will give the tubers a head start in the spring.
What to Plant:
You’ll need Jerusalem artichoke tubers. You can find them at garden centers, nurseries, or even online. Make sure you’re getting healthy, firm tubers. They should look similar to small potatoes or ginger.
Planting Steps:
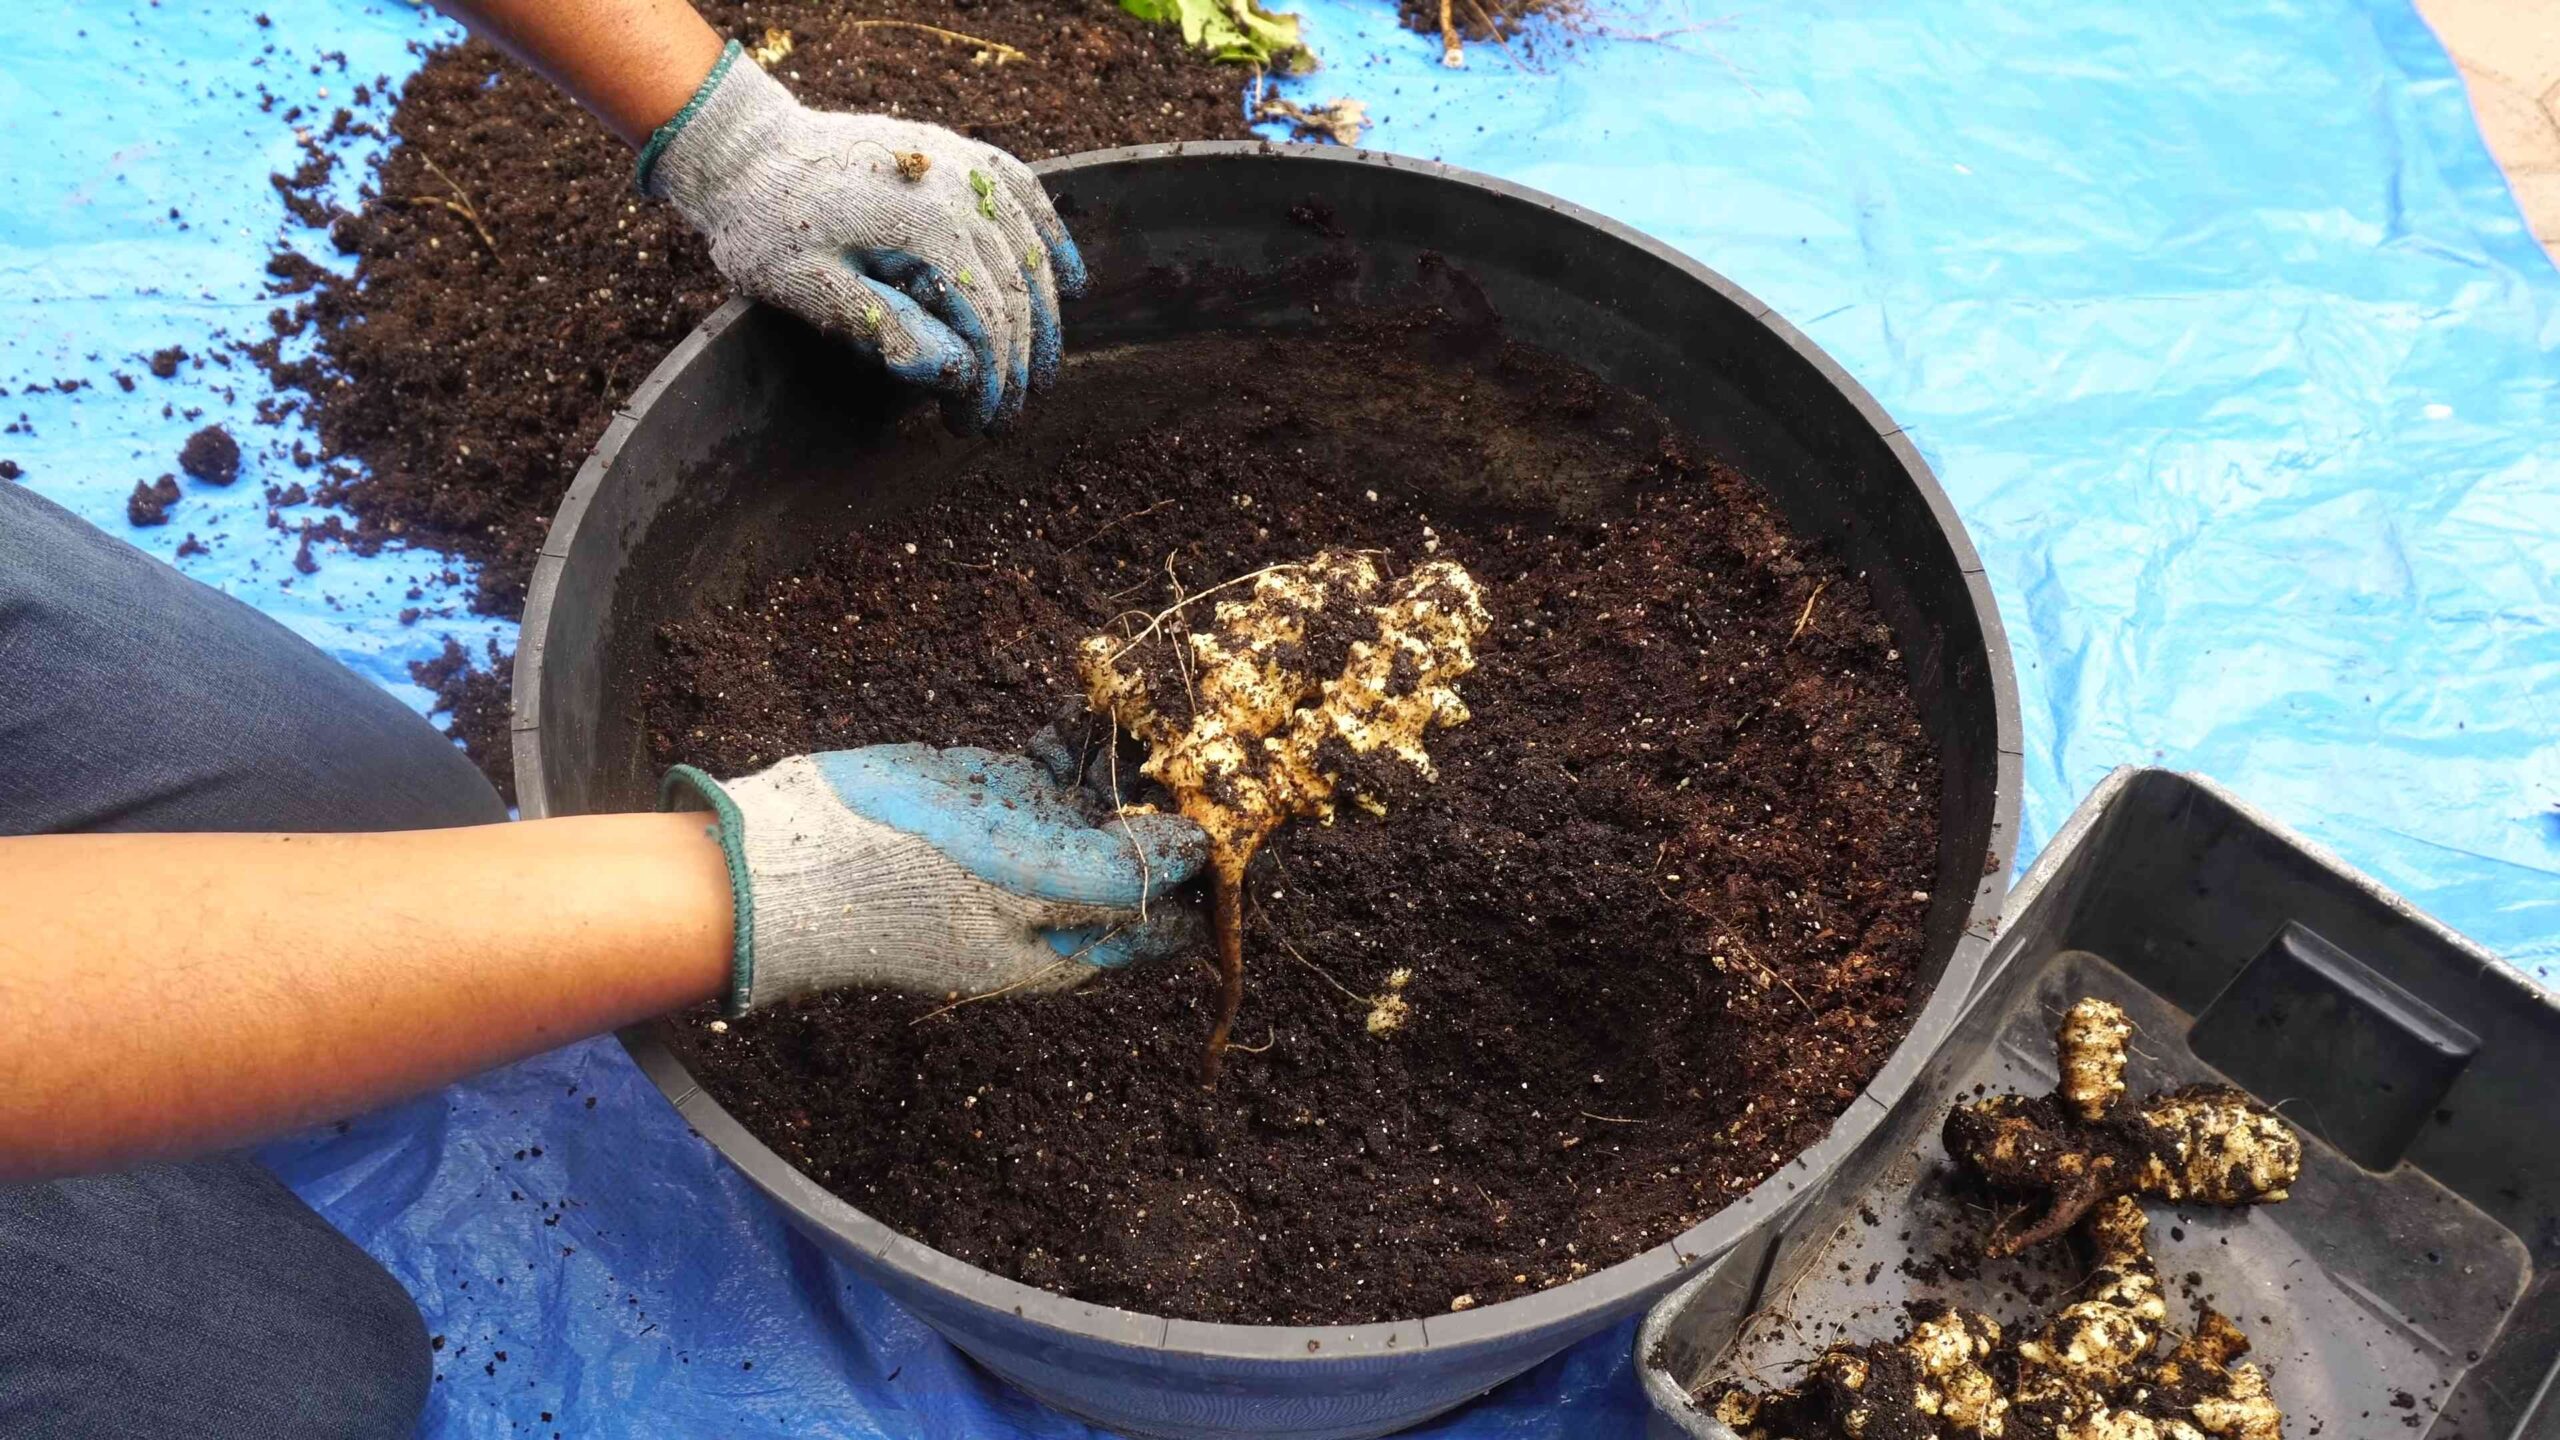
1. Prepare the Soil: Loosen the soil in your planting area and amend it with compost or other organic matter. This will improve drainage and provide nutrients for the plants.
2. Dig Holes: Dig holes about 4-6 inches deep and 18-24 inches apart.
3. Plant the Tubers: Place one tuber in each hole, with the “eyes” (small buds) facing up.
4. Cover with Soil: Cover the tubers with soil and gently pat it down.
5. Water Well: Water the planting area thoroughly.
Caring for Your Jerusalem Artichokes
Once they’re planted, Jerusalem artichokes are pretty low-maintenance.
Watering: Water regularly, especially during dry periods. They need consistent moisture to produce good tubers.
Fertilizing: You don’t need to fertilize them heavily. A light feeding of compost or organic fertilizer in the spring is usually sufficient.
Weeding: Keep the planting area free of weeds. Weeds can compete with the Jerusalem artichokes for nutrients and water.
Staking (Optional): If your plants get very tall, you may need to stake them to prevent them from falling over. This is especially important in windy areas.
Pest and Disease Control: Jerusalem artichokes are generally pest and disease-resistant. However, they can be susceptible to aphids and powdery mildew. If you notice any problems, treat them with an appropriate organic insecticide or fungicide.
Harvesting Jerusalem Artichokes
This is the best part!
When to Harvest:
* Fall: The best time to harvest is in the fall, after the first frost. The frost will sweeten the tubers.
* Winter: You can also harvest them throughout the winter, as long as the ground isn’t frozen solid.
* Spring: You can even harvest them in the spring, before the plants start to grow again. However, the tubers may be a bit smaller and less flavorful.
How to Harvest:
1. Cut Back the Stalks: Cut back the stalks to about 6 inches above the ground.
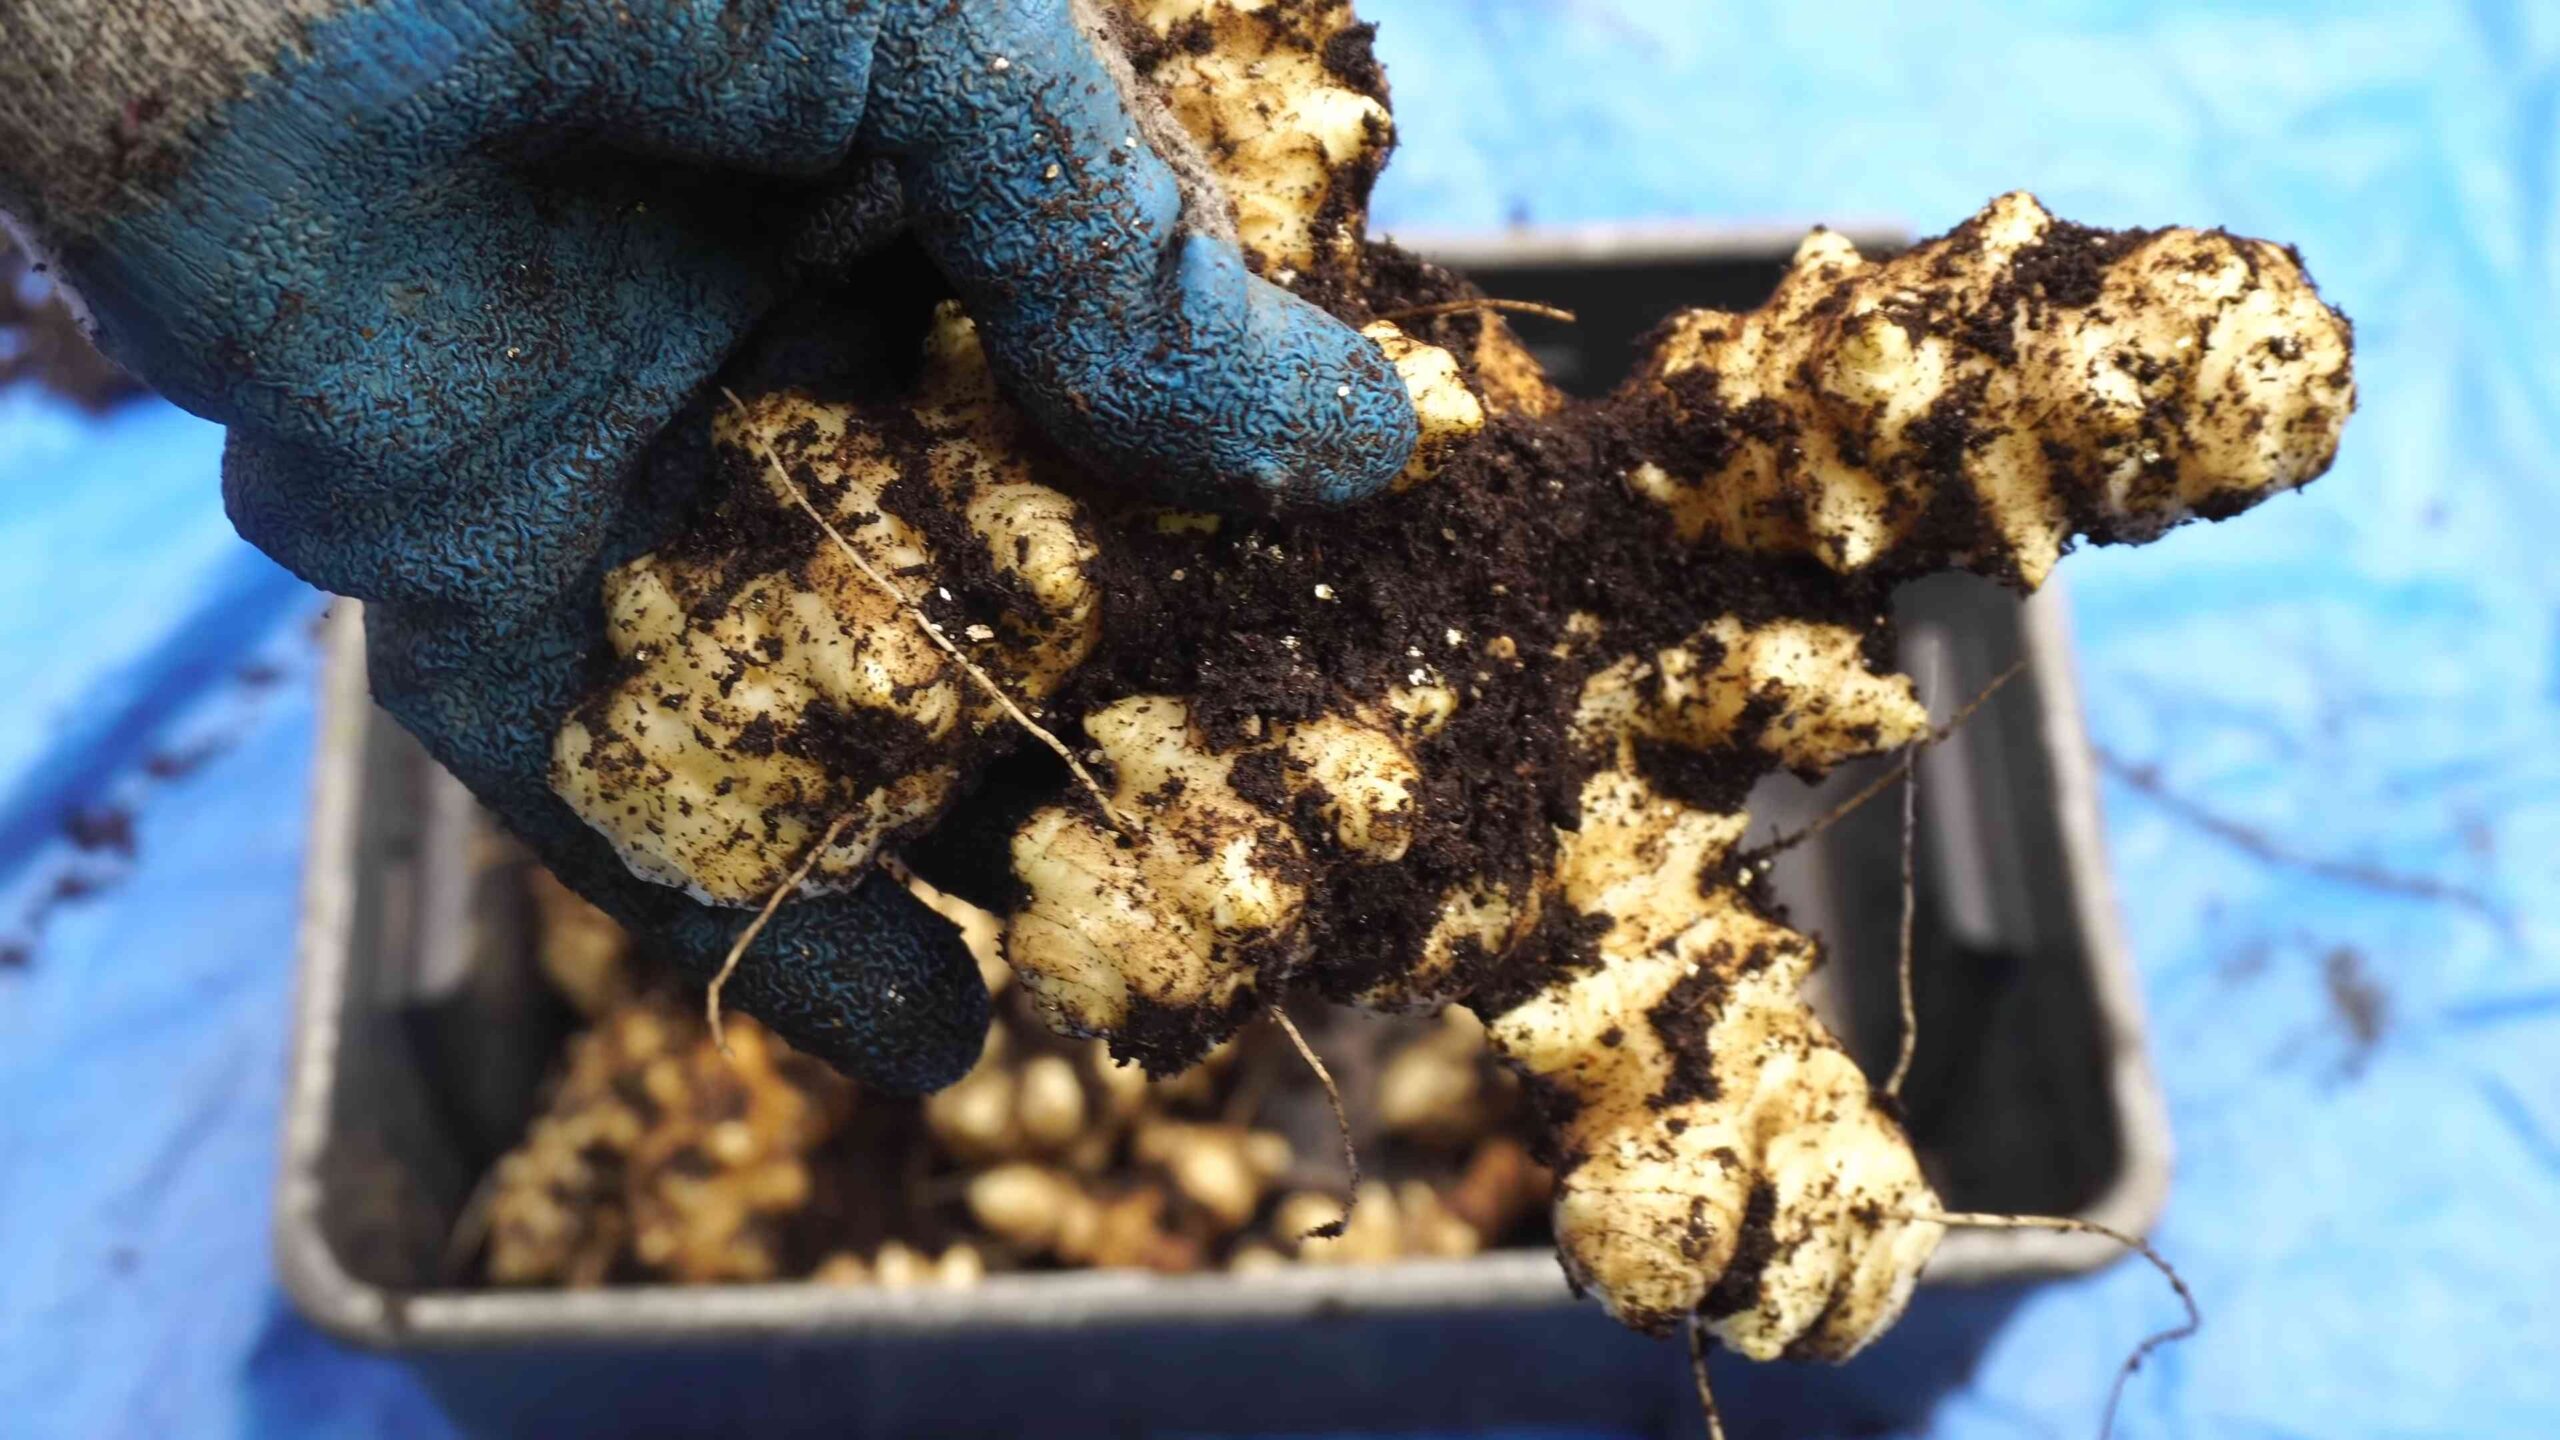
2. Dig Carefully: Use a garden fork or shovel to carefully dig around the base of the plant. Be careful not to damage the tubers.
3. Lift the Tubers: Gently lift the tubers out of the ground.
4. Clean the Tubers: Brush off any excess soil.
5. Store the Tubers: Store the tubers in a cool, dark, and dry place. They’ll keep for several months. I like to store mine in a paper bag in the refrigerator.
Controlling Spread: The Key to Happy Sunchoke Growing
Remember that “enthusiastic” part? Here’s how to keep your Jerusalem artichokes from taking over your yard.
Thorough Harvesting: The most important thing is to harvest *all* the tubers each year. Even a small piece of tuber left in the ground can sprout and grow into a new plant. I know, it’s tedious, but it’s worth it!
Barrier Maintenance: If you’re using an in-ground barrier, make sure it’s still intact and that the tubers haven’t grown over or under it.
Regular Monitoring: Keep an eye out for any stray plants that pop up outside of your designated planting area. Dig them up immediately.
Consider a “Sacrifice Zone”: If you have a large property, you could designate a small area where you don’t mind the Jerusalem artichokes spreading. This can be a good way to enjoy their abundance without having to worry about controlling them too much.
Cooking with Jerusalem Artichokes
Now that you’ve harvested your bounty, it’s time to cook! Jerusalem artichokes are incredibly versatile.
Preparation:
* Wash Thoroughly: Wash the tubers thoroughly to remove any dirt.
* Peel (Optional): You can peel them if you want, but it’s not necessary. The skin is edible and contains a lot of nutrients. I usually just scrub them well.
* Cut into Pieces: Cut the tubers into bite-sized pieces.
Cooking Methods:
* Roasting: Toss them with olive oil, salt, pepper, and your favorite herbs, and roast them in the oven at 400°F (200°C) for about 20-30 minutes, or until they’re tender and slightly browned.
* Mashing: Boil or steam them until they’re tender, then mash them with butter, milk, and seasonings.
* Soups and Stews: Add them to soups and stews for a nutty, slightly sweet flavor.
* Raw: You can even eat them raw! Slice them thinly and add them to salads. They have a crisp, refreshing flavor.
* Chips: Slice them thinly, toss with oil and spices, and bake or fry them into crispy chips.
My Favorite Recipe: Roasted Jerusalem Artichokes with Garlic and Rosemary
1. Preheat oven to 400°F (200°C).
2. Wash and scrub about 1 pound of Jerusalem artichokes. Cut into 1-inch pieces.
3. In a bowl, toss the artichokes with 2 tablespoons of olive oil, 2 cloves of minced garlic, 1 tablespoon of chopped fresh rosemary, salt, and pepper.
4. Spread
Conclusion
So, there you have it! Growing Jerusalem artichokes is not only surprisingly simple, but it’s also incredibly rewarding. Imagine harvesting your own supply of these nutty, slightly sweet tubers right from your backyard. Forget those expensive, often less-than-fresh options at the grocery store. With a little planning and effort, you can enjoy the unparalleled flavor and nutritional benefits of homegrown Jerusalem artichokes.
This DIY trick is a must-try for several reasons. First, it’s economical. A single pound of seed tubers can yield a substantial harvest, providing you with a bounty that far outweighs the initial investment. Second, it’s sustainable. You’re reducing your reliance on commercially grown produce, minimizing your carbon footprint, and contributing to a more localized food system. Third, it’s empowering. There’s a unique satisfaction that comes from nurturing a plant from start to finish and reaping the rewards of your labor.
But the benefits don’t stop there. Jerusalem artichokes are incredibly versatile in the kitchen. Roast them with herbs and garlic for a savory side dish, add them to soups and stews for a creamy texture and earthy flavor, or even pickle them for a tangy treat. The possibilities are endless!
Ready to take your Jerusalem artichoke cultivation to the next level? Consider these variations:
* Container Gardening: If you’re short on space, you can successfully grow Jerusalem artichokes in large containers. Just ensure they have adequate drainage and plenty of sunlight. Choose a pot that is at least 24 inches in diameter and depth to accommodate the tuber’s growth.
* Succession Planting: Extend your harvest season by planting tubers at intervals of a few weeks. This will ensure a continuous supply of Jerusalem artichokes throughout the fall and winter.
* Companion Planting: Plant Jerusalem artichokes alongside beneficial companions like marigolds, which deter pests, or legumes, which fix nitrogen in the soil.
* Different Varieties: Explore different varieties of Jerusalem artichokes, such as ‘Fuseau’ (known for its smooth skin and uniform shape) or ‘Red Rover’ (which has a reddish-purple skin). Each variety offers a slightly different flavor and texture.
Don’t be intimidated by the plant’s reputation for being vigorous. With proper planning and management, you can easily control its spread and enjoy a bountiful harvest year after year. Remember to harvest after the first frost for the best flavor and texture.
We encourage you to try this DIY trick and experience the joy of growing your own Jerusalem artichokes. It’s a simple, rewarding, and delicious way to connect with nature and enjoy the fruits (or rather, tubers) of your labor.
Once you’ve harvested your first crop, we’d love to hear about your experience! Share your tips, tricks, and favorite recipes in the comments below. Let’s build a community of Jerusalem artichoke enthusiasts and inspire others to embrace the joys of homegrown produce. What are you waiting for? Get planting and discover the delicious world of homegrown Jerusalem artichokes!
Frequently Asked Questions (FAQ)
What exactly are Jerusalem artichokes?
Jerusalem artichokes, also known as sunchokes, are the edible tubers of a sunflower species (Helianthus tuberosus). Despite their name, they have no relation to Jerusalem or artichokes. They are native to North America and have a nutty, slightly sweet flavor that is often compared to artichokes or water chestnuts. They are a good source of fiber, iron, and potassium.
When is the best time to plant Jerusalem artichokes?
The ideal time to plant Jerusalem artichokes is in early spring, after the last frost, or in late fall, before the ground freezes. Fall planting allows the tubers to establish roots over the winter, resulting in earlier growth in the spring. Spring planting is also effective, but you may need to provide more consistent watering during the initial growth stages.
How do I prepare the soil for planting?
Jerusalem artichokes thrive in well-drained soil that is rich in organic matter. Before planting, amend the soil with compost or well-rotted manure to improve its fertility and drainage. They prefer a slightly acidic to neutral soil pH (around 6.0 to 7.0). Avoid planting in heavy clay soil, as this can lead to tuber rot. If you have clay soil, consider adding sand or other amendments to improve drainage.
How deep and far apart should I plant the tubers?
Plant Jerusalem artichoke tubers about 4-6 inches deep and 12-18 inches apart. Space rows about 3 feet apart to allow for adequate sunlight and air circulation. When planting, make sure the “eyes” or sprouts on the tubers are facing upwards.
How much sunlight do Jerusalem artichokes need?
Jerusalem artichokes require at least 6 hours of direct sunlight per day to thrive. Choose a planting location that receives full sun for optimal growth and tuber production. If you are growing them in a partially shaded area, you may notice reduced yields.
How often should I water Jerusalem artichokes?
Water Jerusalem artichokes regularly, especially during dry periods. Keep the soil consistently moist, but avoid overwatering, which can lead to tuber rot. Water deeply and less frequently, rather than shallowly and more often. A good rule of thumb is to water when the top inch of soil feels dry to the touch.
Do I need to fertilize Jerusalem artichokes?
Jerusalem artichokes are not heavy feeders, but they will benefit from a light application of fertilizer. Apply a balanced fertilizer (such as 10-10-10) at planting time, and then again in mid-summer. Avoid over-fertilizing, as this can lead to excessive foliage growth at the expense of tuber production.
How do I control the spread of Jerusalem artichokes?
Jerusalem artichokes can be quite vigorous and tend to spread if left unchecked. To control their spread, consider planting them in a contained area, such as a raised bed or a large container. You can also dig a trench around the planting area and line it with a barrier, such as metal or plastic, to prevent the tubers from spreading. Be diligent about harvesting all the tubers each year, as any remaining tubers will sprout and grow the following season.
When and how do I harvest Jerusalem artichokes?
Jerusalem artichokes are typically harvested in the fall, after the first frost. The frost signals the plant to transfer its energy to the tubers, resulting in a sweeter and more flavorful harvest. To harvest, carefully dig around the base of the plant and lift the tubers from the soil. Use a garden fork or shovel to avoid damaging the tubers.
How do I store Jerusalem artichokes?
Jerusalem artichokes can be stored in a cool, dark, and humid place, such as a root cellar or a refrigerator. Store them in a perforated plastic bag or a container filled with moist sand or sawdust to prevent them from drying out. Properly stored Jerusalem artichokes can last for several months.
Are Jerusalem artichokes safe to eat?
Yes, Jerusalem artichokes are safe to eat. However, some people may experience gas or bloating after consuming them due to their high inulin content, a type of fiber that can be difficult to digest. To minimize these effects, start with small portions and gradually increase your intake. Cooking the tubers can also help to break down the inulin and make them easier to digest.
Can I eat the leaves and stems of Jerusalem artichokes?
While the tubers are the primary edible part of the plant, the young leaves and stems of Jerusalem artichokes are also edible, though less commonly consumed. They can be added to salads or stir-fries, but they may have a slightly bitter taste.
What are some common pests and diseases that affect Jerusalem artichokes?
Jerusalem artichokes are generally resistant to pests and diseases, but they can occasionally be affected by aphids, slugs, or powdery mildew. Aphids can be controlled with insecticidal soap or by introducing beneficial insects, such as ladybugs. Slugs can be deterred with slug bait or by hand-picking them off the plants. Powdery mildew can be prevented by ensuring good air circulation and avoiding overhead watering.
Can I grow Jerusalem artichokes in my climate?
Jerusalem artichokes are adaptable to a wide range of climates, but they thrive in temperate regions with cool summers and mild winters. They are hardy to USDA zones 3-9. In colder climates, they may need to be mulched to protect the tubers from freezing. In warmer climates, they may benefit from some afternoon shade.


Leave a Comment