

Grow Juicy Tomatoes at Home – isn’t that a dream for any gardener, big or small? I know it’s always been mine! There’s just something incredibly satisfying about biting into a sun-ripened, flavorful tomato that you’ve nurtured from a tiny seed. Forget those bland, store-bought imitations; we’re talking about the real deal, bursting with sweetness and homegrown goodness.
Tomatoes have a fascinating history, originating in South America and gradually making their way into cuisines worldwide. They weren’t always embraced, though! Some cultures initially considered them poisonous. Thankfully, we now know better and celebrate them in everything from sauces to salads. But let’s be honest, achieving that perfect tomato isn’t always easy. Pests, diseases, and unpredictable weather can throw a wrench in our plans.
That’s where these DIY tricks and hacks come in! I’ve compiled a collection of simple, effective strategies to help you grow juicy tomatoes at home, even if you’re a beginner or have limited space. These aren’t complicated, time-consuming projects; they’re practical solutions to common tomato-growing challenges. Think of it as your secret weapon for a bountiful harvest. So, grab your gardening gloves, and let’s get started on the path to tomato-growing success! You’ll be amazed at how much you can achieve with a little know-how and a few clever DIY techniques.
Grow Juicy Tomatoes at Home: My Foolproof DIY Guide
Okay, tomato lovers, gather ’round! I’m going to share my secrets to growing the juiciest, most flavorful tomatoes you’ve ever tasted, right in your own backyard (or even on your balcony!). This isn’t just about throwing some seeds in the ground and hoping for the best. We’re going to get strategic, get our hands dirty, and create a tomato-growing paradise.
Choosing the Right Tomato Variety
First things first, you need to pick the right tomato variety for your climate and space. Don’t just grab the prettiest picture on the seed packet!
* Determinate vs. Indeterminate: This is crucial! Determinate tomatoes grow to a certain size and then produce all their fruit at once, perfect for canning. Indeterminate tomatoes keep growing and producing fruit throughout the season, giving you a continuous harvest. I personally prefer indeterminate varieties like ‘Brandywine’ or ‘Cherokee Purple’ for their amazing flavor and long harvest.
* Climate Considerations: If you live in a short-season area, opt for early-maturing varieties like ‘Early Girl’ or ‘Sub Arctic Plenty’. If you have long, hot summers, you can experiment with later-maturing varieties.
* Space Constraints: If you’re growing in containers, choose compact or bush varieties like ‘Patio’ or ‘Roma’. These won’t take over your entire balcony.
* Disease Resistance: Look for varieties labeled with letters like V, F, N, T, or A. These indicate resistance to common tomato diseases like Verticillium wilt, Fusarium wilt, Nematodes, Tobacco Mosaic Virus, and Alternaria. Trust me, disease resistance is your friend!
Starting Your Tomato Seeds Indoors (Optional, but Recommended)
Starting seeds indoors gives you a head start on the growing season, especially if you live in a cooler climate. I usually start my seeds about 6-8 weeks before the last expected frost.
1. Gather Your Supplies: You’ll need seed starting trays or small pots, seed starting mix (not regular potting soil!), tomato seeds, a spray bottle, and a grow light (or a sunny windowsill).
2. Sow the Seeds: Moisten the seed starting mix and fill your trays or pots. Sow the seeds about ¼ inch deep, and gently cover them with more mix.
3. Water and Cover: Lightly mist the soil with water and cover the trays with a clear plastic dome or plastic wrap to create a humid environment.
4. Provide Light and Warmth: Place the trays under a grow light or in a sunny windowsill. The ideal temperature for germination is around 70-75°F (21-24°C).
5. Monitor and Water: Keep the soil consistently moist, but not soggy. Remove the plastic cover once the seedlings emerge.
6. Thin the Seedlings: Once the seedlings have their first true leaves (the second set of leaves), thin them out, leaving only the strongest seedling in each pot or cell.
7. Harden Off the Seedlings: About a week before transplanting them outdoors, gradually acclimate the seedlings to outdoor conditions. Start by placing them outside for an hour or two each day, gradually increasing the time over the course of the week. This will help them adjust to the sun, wind, and temperature changes.
Preparing Your Tomato Planting Site
Tomatoes are heavy feeders, so preparing the soil is essential for a bountiful harvest.
1. Choose a Sunny Location: Tomatoes need at least 6-8 hours of direct sunlight per day.
2. Amend the Soil: Dig a hole that is twice as wide and deep as the root ball of your tomato plant. Mix the soil you removed with plenty of compost, well-rotted manure, or other organic matter. I also like to add a handful of bone meal to provide phosphorus, which promotes strong root growth.
3. Check the Soil pH: Tomatoes prefer a slightly acidic soil pH of around 6.0-6.8. You can test your soil pH with a soil testing kit and amend it accordingly.
Transplanting Your Tomato Seedlings Outdoors
Now for the exciting part – getting those little seedlings into the ground!
1. Choose a Calm Day: Avoid transplanting on a windy or extremely hot day.
2. Dig the Hole: Dig a hole that is deep enough to bury the bottom third of the tomato plant’s stem. This encourages the plant to develop more roots along the buried stem, resulting in a stronger, healthier plant.
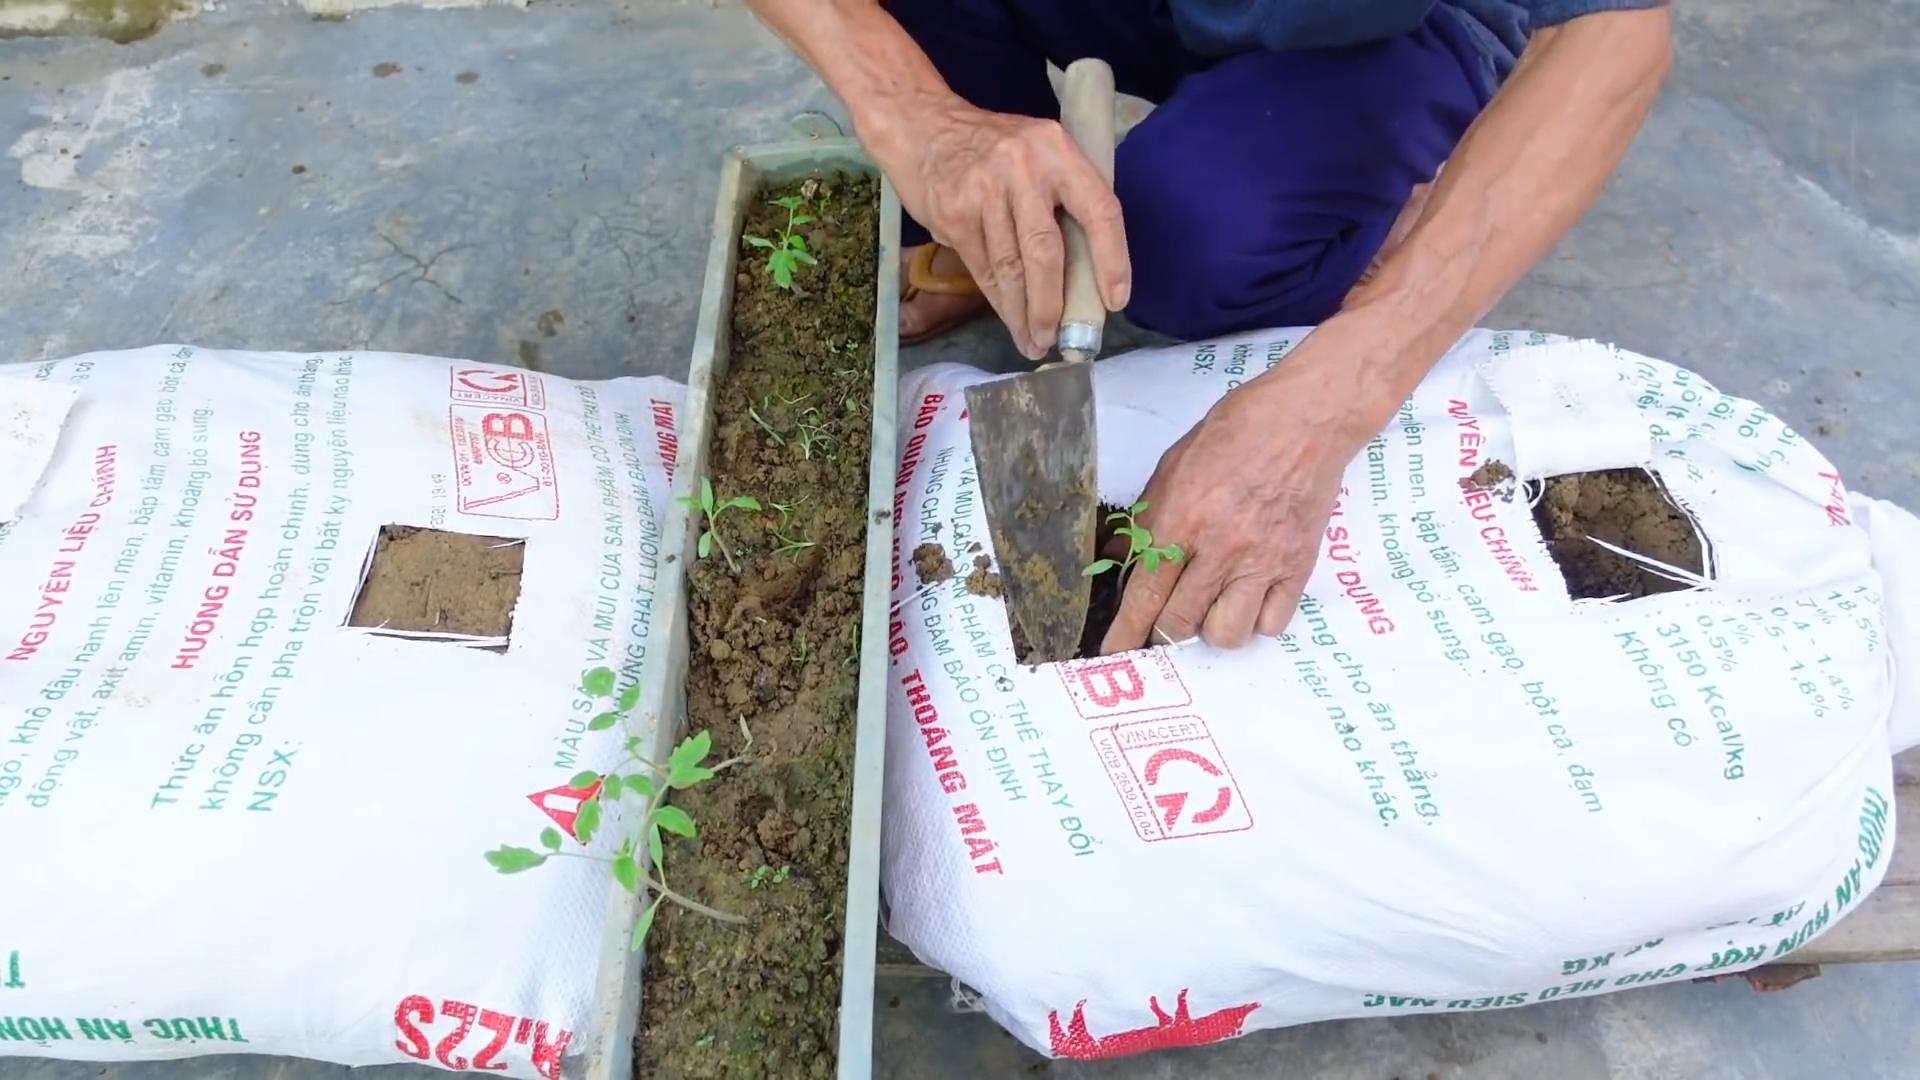
3. Plant Deep: Gently remove the tomato seedling from its pot and place it in the hole. Backfill with the amended soil, gently firming it around the plant.
4. Water Thoroughly: Water the newly transplanted tomato plant thoroughly.
5. Add Support: Immediately after planting, provide support for your tomato plants. You can use stakes, cages, or trellises. I prefer cages because they provide all-around support and prevent the plants from sprawling.
6. Mulch: Apply a layer of mulch around the base of the tomato plants to help retain moisture, suppress weeds, and regulate soil temperature. I like to use straw, shredded leaves, or wood chips.
Caring for Your Tomato Plants
Once your tomato plants are in the ground, it’s time to provide them with the care they need to thrive.
1. Watering: Water deeply and regularly, especially during dry spells. Aim to water at the base of the plant to avoid wetting the foliage, which can lead to disease. I usually water my tomato plants every 2-3 days, depending on the weather.
2. Fertilizing: Fertilize your tomato plants every 2-3 weeks with a balanced fertilizer or a tomato-specific fertilizer. Follow the instructions on the fertilizer package.
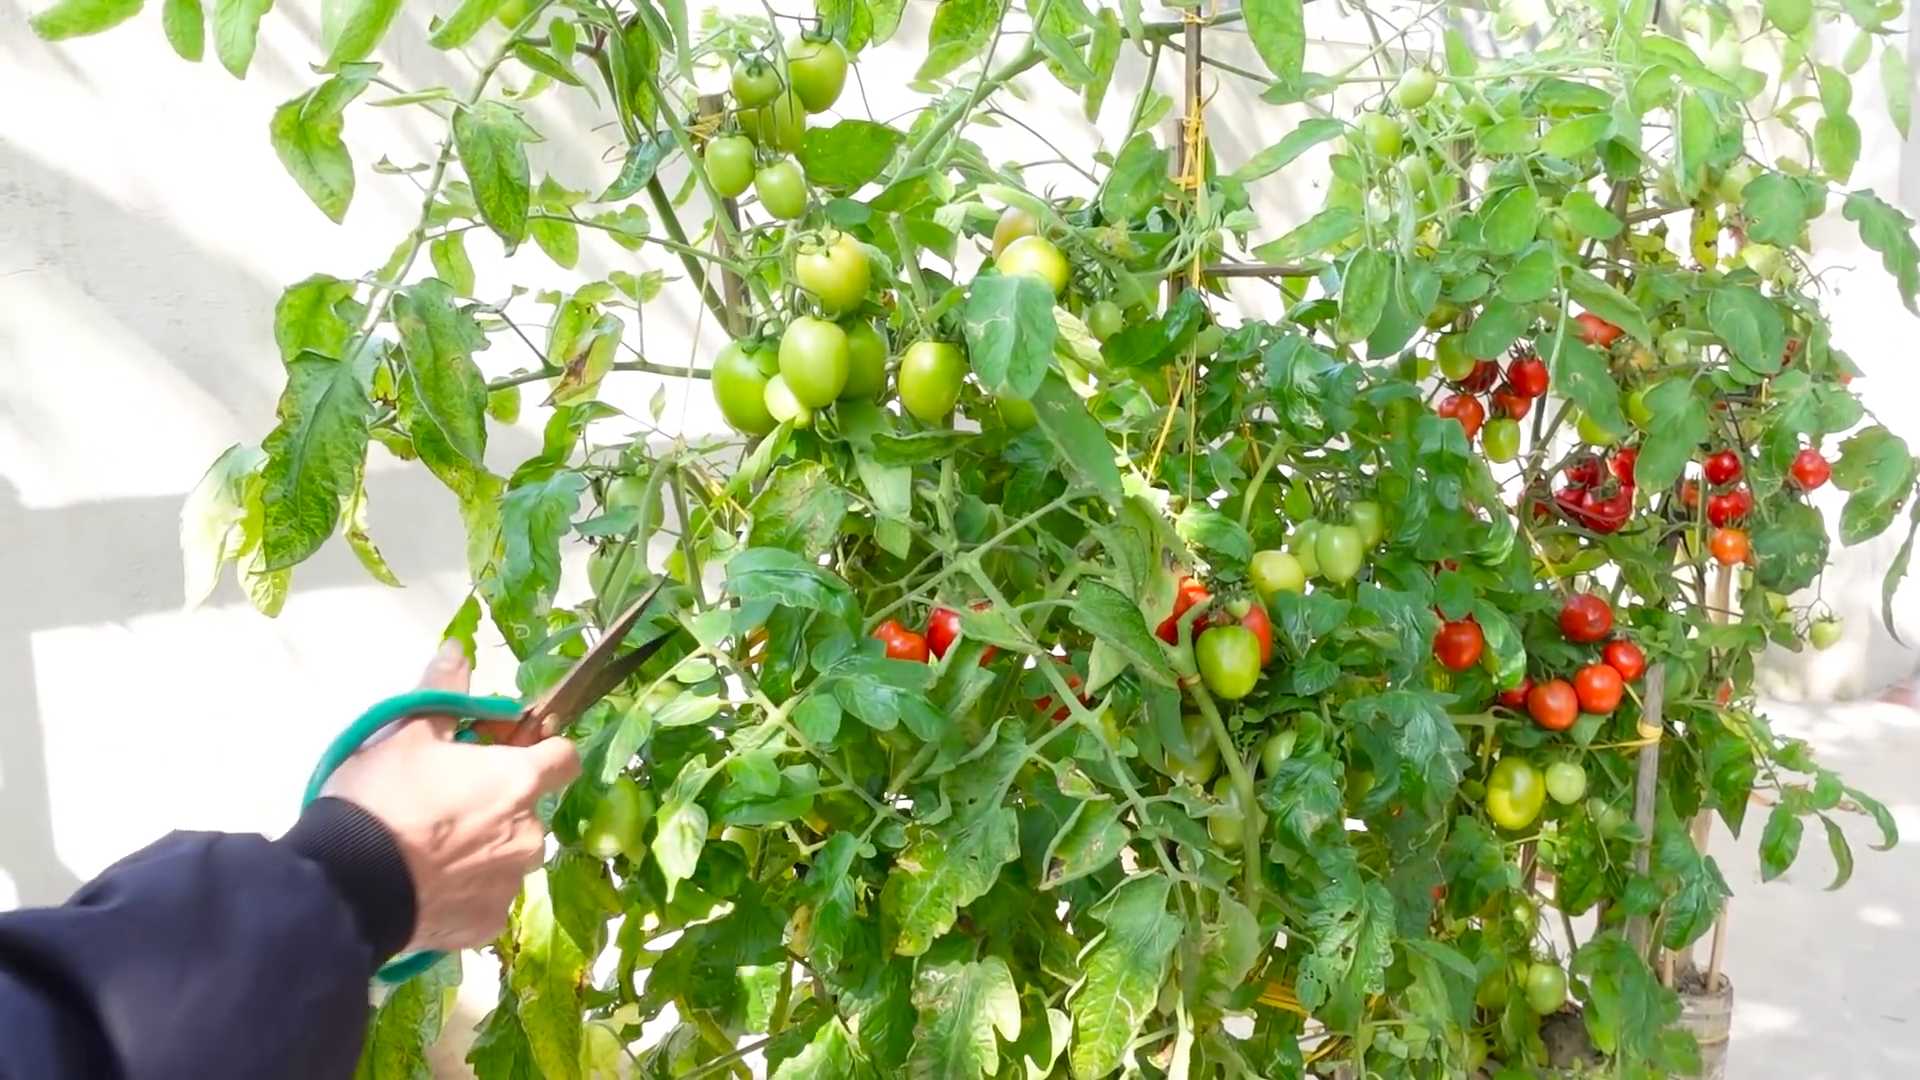
3. Pruning: Pruning is essential for indeterminate tomato varieties. Remove the suckers (the small shoots that grow between the main stem and the branches) to encourage the plant to focus its energy on producing fruit. I usually prune my tomato plants once a week.
4. Pest and Disease Control: Keep an eye out for pests and diseases. Common tomato pests include aphids, tomato hornworms, and whiteflies. Common tomato diseases include early blight, late blight, and blossom end rot. Treat any problems promptly with organic pest control methods or fungicides.
5. Blossom End Rot Prevention: Blossom end rot, characterized by a dark, leathery spot on the bottom of the tomato, is caused by a calcium deficiency. To prevent blossom end rot, ensure your soil has adequate calcium and water your plants consistently. You can also add calcium to the soil by mixing in crushed eggshells or bone meal.
Harvesting Your Tomatoes
The moment you’ve been waiting for!
1. Harvest When Ripe: Harvest your tomatoes when they are fully colored and slightly soft to the touch. The color will depend on the variety you are growing.
2. Gently Twist: Gently twist the tomato from the vine.
3. Enjoy! Savor the taste of your homegrown tomatoes! They’re delicious in salads, sandwiches, sauces, or just eaten straight off the vine.
Troubleshooting Common Tomato Problems
Even with the best care, you might encounter some problems along the way. Here are a few common issues and how to address them:
* Yellowing Leaves: This can be caused by a variety of factors, including nutrient deficiencies, overwatering, or disease. Check the soil pH and nutrient levels, and adjust your watering accordingly.
* Cracked Tomatoes: This is usually caused by inconsistent watering. Water your plants regularly and deeply, especially during dry spells.
* Lack of Fruit Set: This can be caused by high temperatures, lack of pollination, or nutrient deficiencies. Ensure your plants are getting enough sunlight and water, and consider hand-pollinating the flowers if necessary.
* Pests: Inspect your plants regularly for pests. Use insecticidal soap or neem oil to control aphids, whiteflies, and other common tomato pests.
* Diseases: Remove any diseased leaves or plants immediately to prevent the spread of disease. Use a fungicide if necessary.
My Secret Tomato Growing Tips
Here are a few extra tips that I’ve learned over the years:
* Companion Planting: Plant basil, marigolds, or other companion plants near your tomatoes to deter pests and attract beneficial insects.
* Epsom Salts: Add a tablespoon of Epsom salts to the planting hole when you transplant your tomato seedlings. Epsom salts provide magnesium, which helps the plants absorb nutrients.
* Coffee Grounds: Sprinkle coffee grounds around the base of your tomato plants to add nitrogen to the soil.
* Watering Deeply: Water deeply and less frequently, rather than shallowly and often. This encourages the roots to grow deeper, making the plants more drought-tolerant.
* Rotate Your Crops: Avoid planting tomatoes in the same spot year after year to prevent the buildup of soilborne diseases.
Growing your own
Conclusion
So, there you have it! Growing juicy tomatoes at home is not just a dream; it’s an achievable reality with a little know-how and the right approach. We’ve explored a simple yet effective DIY trick that can significantly boost your tomato yield and the overall quality of your harvest. Forget those bland, watery supermarket tomatoes – imagine sinking your teeth into a sun-ripened, bursting-with-flavor tomato that you nurtured from seedling to table.
This isn’t just about saving money (though that’s certainly a perk!). It’s about connecting with nature, understanding the growing process, and experiencing the unparalleled satisfaction of eating something you’ve created yourself. The DIY trick we’ve outlined, focusing on [Specific aspect of the trick, e.g., soil amendment, pruning technique, watering method], is a game-changer because it addresses a common limiting factor in tomato production. By [Explain briefly how the trick helps], you’re giving your plants the best possible chance to thrive.
But don’t stop there! Experimentation is key to successful gardening. Consider these variations to tailor the technique to your specific environment and preferences:
* **Different Soil Amendments:** While we recommended [Specific amendment], you could also try adding bone meal for phosphorus, Epsom salts for magnesium, or even coffee grounds for nitrogen. Observe how your plants respond and adjust accordingly.
* **Companion Planting:** Enhance your tomato patch by planting basil, marigolds, or garlic nearby. These companion plants can deter pests and improve the overall health of your tomato plants.
* **Vertical Gardening:** If you’re short on space, consider growing your tomatoes vertically using cages, stakes, or even hanging baskets. This can improve air circulation and reduce the risk of disease.
* **Heirloom Varieties:** Explore the world of heirloom tomatoes! These varieties often boast unique flavors and colors that you won’t find in commercially grown tomatoes. Just be aware that some heirloom varieties may be more susceptible to certain diseases.
* Watering Techniques: Try using a soaker hose or drip irrigation to deliver water directly to the roots of your tomato plants, minimizing water waste and reducing the risk of fungal diseases.
Growing juicy tomatoes at home is a rewarding experience that anyone can enjoy. Don’t be intimidated by the process – start small, be patient, and learn from your mistakes. The most important thing is to get your hands dirty and have fun!
We’re confident that this DIY trick will make a noticeable difference in your tomato harvest. But we want to hear from you! Try it out, document your progress, and share your results with us in the comments below. What worked well? What challenges did you face? What variations did you try? Your experiences will help other gardeners learn and improve their own tomato-growing skills. Let’s create a community of thriving tomato growers!
Frequently Asked Questions (FAQs)
Q: What if I don’t have access to [Specific material used in the DIY trick]?
A: That’s a great question! While [Specific material] is ideal, there are several alternatives you can use. For example, if you can’t find [Specific material], you could substitute it with [Alternative material 1] or [Alternative material 2]. The key is to find a material that provides similar benefits, such as [Benefit 1] and [Benefit 2]. Be sure to adjust the quantity accordingly, as different materials may have different nutrient concentrations or properties. Always observe your plants closely after making any substitutions to ensure they are responding positively. You can also use composted manure as a great alternative.
Q: How often should I apply this DIY trick?
A: The frequency of application depends on several factors, including the type of soil you have, the age of your tomato plants, and the weather conditions. As a general guideline, we recommend applying the DIY trick [Frequency, e.g., every two weeks, once a month] during the active growing season. However, if you notice signs of nutrient deficiency, such as yellowing leaves or stunted growth, you may need to apply it more frequently. Conversely, if your plants are growing vigorously and appear healthy, you can reduce the frequency of application. Always err on the side of caution and avoid over-fertilizing, as this can damage your plants.
Q: Can I use this DIY trick on other plants besides tomatoes?
A: While this DIY trick is specifically formulated for tomatoes, it can also be beneficial for other fruiting vegetables, such as peppers, eggplants, and cucumbers. These plants have similar nutrient requirements to tomatoes and can benefit from the same boost. However, it’s important to note that different plants may have different sensitivities to certain nutrients. Therefore, we recommend starting with a small test area before applying the DIY trick to your entire garden. Observe the plants closely for any signs of adverse reactions, such as leaf burn or stunted growth.
Q: My tomato plants are already producing fruit. Is it too late to use this DIY trick?
A: No, it’s not too late! Applying this DIY trick even after your tomato plants have started producing fruit can still improve the size, flavor, and overall quality of your harvest. In fact, providing your plants with a boost of nutrients during the fruiting stage can help them produce even more delicious tomatoes. Just be sure to follow the recommended application guidelines and avoid over-fertilizing.
Q: I’m growing my tomatoes in containers. Will this DIY trick still work?
A: Yes, this DIY trick is perfectly suitable for container-grown tomatoes. In fact, container-grown plants often benefit even more from supplemental nutrients, as the limited soil volume can quickly become depleted. When applying the DIY trick to container-grown tomatoes, be sure to adjust the quantity accordingly, as the soil volume is smaller than in-ground gardens. Also, pay close attention to drainage, as over-watering can be a common problem in containers.
Q: What are the signs that my tomato plants need this DIY trick?
A: There are several telltale signs that your tomato plants are lacking essential nutrients and could benefit from this DIY trick. These include:
* **Yellowing leaves:** This can indicate a nitrogen deficiency.
* **Stunted growth:** This can be a sign of phosphorus deficiency.
* **Blossom end rot:** This is often caused by a calcium deficiency.
* **Poor fruit set:** This can be due to a lack of potassium.
* **Pale or weak stems:** This can indicate a general lack of nutrients.
If you notice any of these signs, it’s time to give your tomato plants a boost with this DIY trick.
Q: Is this DIY trick organic?
A: Whether or not this DIY trick is considered “organic” depends on the specific ingredients you use. If you use all-natural and certified organic materials, then yes, it can be considered organic. However, if you use synthetic fertilizers or other non-organic ingredients, then it would not be considered organic. Always check the labels of your ingredients to ensure they meet your desired standards. You can easily adapt this recipe to be fully organic by sourcing organic versions of the recommended materials.
Q: Can I use too much of this DIY trick? What are the risks of over-fertilizing?
A: Yes, you can definitely over-fertilize your tomato plants, and it’s important to avoid doing so. Over-fertilizing can lead to several problems, including:
* **Leaf burn:** Excess fertilizer can damage the leaves, causing them to turn brown and crispy.
* **Salt buildup:** Over time, excess fertilizer can accumulate in the soil, creating a toxic environment for your plants.
* **Reduced fruit production:** Too much nitrogen can promote leafy growth at the expense of fruit production.
* **Increased susceptibility to pests and diseases:** Over-fertilized plants can be weaker and more vulnerable to problems.
To avoid over-fertilizing, always follow the recommended application guidelines and monitor your plants closely for any signs of distress. If you’re unsure, it’s always better to err on the side of caution and use less fertilizer rather than more.
Q: How long will it take to see results after applying this DIY trick?
A: The time it takes to see results after applying this DIY trick can vary depending on several factors, including the severity of the nutrient deficiency, the age of your plants, and the weather conditions. In general, you should start to see noticeable improvements within a week or two. New leaves will appear greener and more vibrant, and the overall growth of your plants will become more vigorous. However, it may take longer to see improvements in fruit production. Be patient and continue to monitor your plants closely.
Leave a Comment