

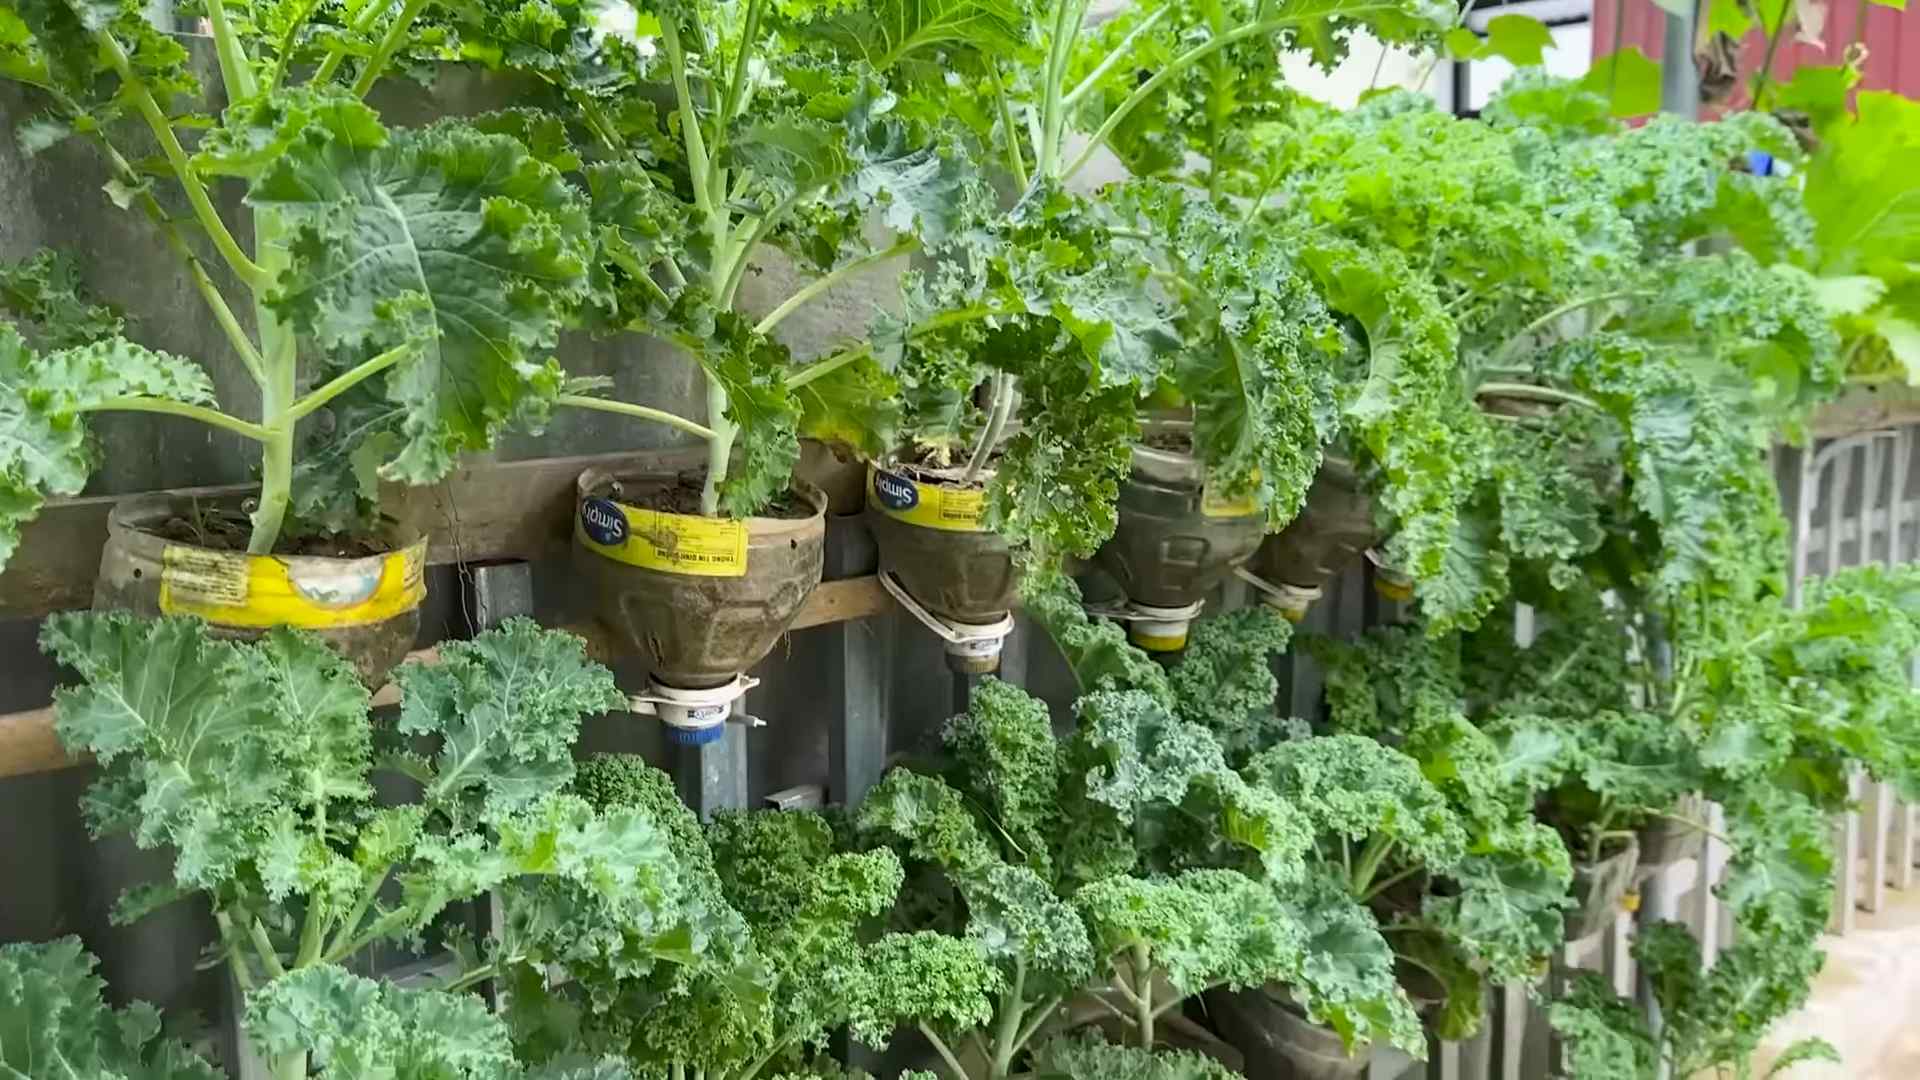
Grow Kale Benefits are something I’ve become incredibly passionate about, and I’m so excited to share some easy DIY tricks to help you experience them firsthand! Forget those wilted, sad-looking bunches at the grocery store. Imagine stepping into your own backyard and harvesting vibrant, nutrient-packed kale whenever you want. Sounds amazing, right?
Kale, with its rich history dating back to ancient Greece and Rome, wasn’t always the superstar it is today. For centuries, it was a staple crop, providing essential vitamins and minerals to communities around the world. Now, it’s experiencing a well-deserved renaissance as a superfood, and for good reason! But sometimes, growing your own can feel intimidating. That’s where these simple DIY hacks come in.
Why do you need these tricks? Because growing your own kale isn’t just about saving money; it’s about connecting with nature, knowing exactly where your food comes from, and enjoying the unparalleled taste of freshly harvested greens. Plus, understanding how to grow kale benefits your health and well-being in so many ways. From boosting your immune system to providing essential antioxidants, kale is a powerhouse of goodness. So, let’s dive into some easy, effective DIY methods that will have you harvesting your own delicious kale in no time!

Growing Kale: A Beginner’s Guide to Bountiful Harvests
Hey there, fellow garden enthusiasts! I’m so excited to share my experiences and tips on growing kale. This leafy green is a nutritional powerhouse, and honestly, it’s surprisingly easy to cultivate, even if you’re a complete beginner. I’ve had some amazing harvests over the years, and I’m confident you can too! Let’s dive in!
Why Grow Kale?
Before we get our hands dirty, let’s quickly talk about why kale is such a fantastic addition to your garden.
* Nutritional Goldmine: Kale is packed with vitamins A, C, and K, as well as calcium, antioxidants, and fiber. It’s basically a superfood in disguise!
* Easy to Grow: Seriously, kale is pretty forgiving. It tolerates a range of conditions and is relatively pest-resistant.
* Versatile in the Kitchen: From salads and smoothies to soups and stir-fries, kale can be used in countless ways.
* Long Harvest Season: With proper care, you can harvest kale leaves for months, even through the winter in some climates.
* Beautiful in the Garden: Some kale varieties, like ornamental kale, are just stunning to look at!
Choosing Your Kale Variety
There are so many different types of kale to choose from, it can be a little overwhelming! Here are a few popular options to get you started:
* Curly Kale (e.g., ‘Dwarf Blue Curled Vates’): This is probably the most common type of kale. It has frilly, curly leaves and a slightly bitter flavor.
* Lacinato Kale (also known as Dinosaur Kale or Tuscan Kale): This variety has long, dark green, almost black leaves with a slightly bumpy texture. It’s milder in flavor than curly kale.
* Red Russian Kale: This kale has flat, fringed leaves with purple stems. It’s sweeter and more tender than curly kale.
* Redbor Kale: This is a beautiful ornamental kale with deep purple, frilly leaves. It’s edible, but often grown for its visual appeal.
* Chinese Kale (Gai Lan): This variety has thick, flat, blue-green leaves and thick stems. It’s often used in Asian cuisine.
I personally love growing Lacinato and Red Russian kale because of their flavor and texture. But feel free to experiment and find your favorites!
Getting Started: Planting Kale
You can start kale from seeds or purchase seedlings from a local nursery. I’ve done both, and both methods work well.
Starting from Seeds
1. Timing is Key: Kale is a cool-season crop, so the best time to plant it is in early spring or late summer/early fall. For a spring crop, start seeds indoors 6-8 weeks before the last expected frost. For a fall crop, sow seeds directly into the garden in late summer.
2. Indoor Seed Starting (Optional): If you’re starting seeds indoors, use a seed-starting mix and sow seeds about 1/4 inch deep in small pots or trays. Keep the soil moist and provide plenty of light (a grow light is ideal).
3. Direct Sowing: If you’re sowing seeds directly into the garden, choose a sunny spot with well-drained soil. Sow seeds about 1/2 inch deep and 1-2 inches apart.
4. Thinning Seedlings: Once the seedlings have a few true leaves, thin them out so that they are spaced about 12-18 inches apart. This will give them enough room to grow.
Planting Seedlings
1. Prepare the Soil: Choose a sunny spot with well-drained soil. Amend the soil with compost or other organic matter to improve its fertility and drainage.
2. Dig Holes: Dig holes that are slightly larger than the root balls of the seedlings. Space the holes about 12-18 inches apart.
3. Plant the Seedlings: Gently remove the seedlings from their containers and loosen the roots slightly. Place the seedlings in the holes and backfill with soil. Make sure the top of the root ball is level with the soil surface.
4. Water Thoroughly: Water the seedlings thoroughly after planting.
Caring for Your Kale Plants
Once your kale plants are in the ground, here’s how to keep them happy and healthy:
1. Watering: Kale needs consistent moisture, especially during hot weather. Water deeply whenever the top inch of soil feels dry.
2. Fertilizing: Kale is a heavy feeder, so it benefits from regular fertilization. Use a balanced organic fertilizer or side-dress with compost every few weeks.
3. Weeding: Keep the area around your kale plants free of weeds. Weeds compete with kale for nutrients and water.
4. Mulching: Apply a layer of mulch around your kale plants to help retain moisture, suppress weeds, and regulate soil temperature. Straw, wood chips, or shredded leaves are all good options.
5. Pest Control: Kale is relatively pest-resistant, but it can be susceptible to aphids, cabbage worms, and flea beetles. Inspect your plants regularly and take action if you see any pests.
* Aphids: Spray aphids with a strong stream of water or use insecticidal soap.
* Cabbage Worms: Handpick cabbage worms or use Bacillus thuringiensis (Bt), a natural insecticide.
* Flea Beetles: Cover your kale plants with row covers to prevent flea beetles from reaching them. You can also use diatomaceous earth.
Harvesting Your Kale
This is the fun part! You can start harvesting kale leaves as soon as they are large enough to eat, usually about 6-8 inches long.
1. Harvesting Technique: The best way to harvest kale is to pick the outer leaves, leaving the inner leaves to continue growing. This will allow you to harvest kale for a longer period of time.
2. How to Pick: Use a sharp knife or scissors to cut the leaves off at the base of the stem.
3. Harvesting Frequency: Harvest kale leaves as needed. The more you harvest, the more the plant will produce.
4. Extending the Harvest: In colder climates, you can extend the harvest season by covering your kale plants with a cold frame or row covers. Kale can tolerate frost and even snow!
Troubleshooting Common Kale Problems
Even with the best care, you might encounter some problems while growing kale. Here are a few common issues and how to address them:
* Yellowing Leaves: Yellowing leaves can be a sign of nutrient deficiency, overwatering, or underwatering. Check the soil moisture and fertilize if necessary.
* Holes in Leaves: Holes in leaves are usually caused by pests like cabbage worms or flea beetles. Inspect your plants and take action to control the pests.
* Bolting: Bolting (when the plant starts to flower) can occur in hot weather. To prevent bolting, plant kale in a shady spot or provide shade during the hottest part of the day.
* Bitter Taste: Kale can become bitter if it’s grown in hot weather or if it’s not watered properly. Make sure to provide consistent moisture and harvest leaves in the morning when they are cooler.
Using Your Kale Harvest
Now that you have a bountiful harvest of kale, it’s time to enjoy it! Here are a few ideas:
* Salads: Massage kale leaves with olive oil and lemon juice to make them more tender and palatable for salads.
* Smoothies: Add kale to your favorite smoothie recipes for a nutritional boost.
* Soups and Stews: Kale adds a hearty flavor and texture to soups and stews.
* Stir-Fries: Sauté kale with garlic, ginger, and other vegetables for a quick and healthy stir-fry.
* Kale Chips: Toss kale leaves with olive oil and salt and bake them in the oven for crispy kale chips.
* Kale Pesto: Blend kale with nuts, garlic, Parmesan cheese, and olive oil for a delicious pesto.
Saving Kale Seeds (Advanced)
If you want to get really ambitious, you can even save kale seeds to plant next year! This is a bit more involved, but it’s a great way to save money and preserve your favorite kale varieties.
1. Choose Your Best Plants: Select the healthiest and most productive kale plants to save seeds from.
2. Allow Plants to Bolt: Let the plants bolt (flower) and produce seed pods.
3. Harvest Seed Pods: Once the seed pods are dry and brown, harvest them.
4. Extract Seeds: Open the seed pods and extract the seeds.
5. Dry Seeds: Spread the seeds out on a tray and let them dry completely.
6. Store Seeds: Store
Conclusion
So, there you have it! Cultivating your own kale isn’t just a gardening project; it’s an investment in your health, your wallet, and even the environment. We’ve explored the incredible benefits of growing kale, from its nutritional powerhouse status to the sheer satisfaction of harvesting your own fresh greens. But let’s be honest, the real magic lies in the *experience* of nurturing something from seed to table.
Why is this DIY kale growing trick a must-try? Because it empowers you to take control of your food source. You know exactly what’s going into your kale – no pesticides, no hidden chemicals, just pure, unadulterated goodness. Plus, the taste of homegrown kale is simply unparalleled. It’s sweeter, more tender, and bursting with flavor compared to store-bought varieties that have often traveled long distances and lost their vibrancy.
Beyond the basic method we’ve outlined, there’s a world of possibilities to explore. Consider experimenting with different kale varieties. From the curly leaves of common kale to the dinosaur-like texture of Lacinato (also known as Tuscan kale or cavolo nero), each offers a unique flavor profile and visual appeal. You can also tailor your growing conditions to optimize for specific outcomes. For example, exposing your kale to a light frost can actually *sweeten* its flavor, making it even more delicious in salads and smoothies.
Another exciting variation is companion planting. Kale thrives alongside certain other plants, such as marigolds (which deter pests) and herbs like rosemary and thyme (which can enhance its flavor). Researching companion planting strategies can not only improve your kale yield but also create a more biodiverse and thriving garden ecosystem.
And don’t forget about the versatility of kale in the kitchen! While salads and smoothies are popular choices, kale can also be sautéed, steamed, baked into chips, or added to soups and stews. The possibilities are truly endless. Get creative and experiment with different recipes to discover your favorite ways to enjoy your homegrown harvest.
Ultimately, the best way to understand the incredible benefits of growing kale is to simply *try it*. Don’t be intimidated if you’re a beginner gardener. Kale is a relatively hardy and forgiving plant, making it an excellent choice for novice growers. Start small, follow our tips, and watch your kale flourish.
We’re confident that once you experience the joy of harvesting your own fresh, nutritious kale, you’ll be hooked. So, grab some seeds, get your hands dirty, and embark on this rewarding gardening adventure. And most importantly, we want to hear about your experience! Share your photos, tips, and recipes with us in the comments below. Let’s build a community of kale-loving gardeners and inspire others to discover the incredible benefits of growing their own food. What are you waiting for? Start growing kale today!
Frequently Asked Questions (FAQs)
What are the specific nutritional benefits of growing kale compared to other leafy greens?
Kale is a nutritional powerhouse, packed with vitamins A, C, and K, as well as calcium, potassium, and fiber. Compared to other leafy greens like spinach or lettuce, kale generally boasts higher levels of these nutrients. For example, it’s an excellent source of vitamin K, which is crucial for blood clotting and bone health. It also contains antioxidants like beta-carotene and lutein, which protect against cell damage and support eye health. Growing your own kale ensures you’re getting the freshest, most nutrient-dense greens possible, as nutrients can degrade over time during storage and transportation. Furthermore, you control the growing environment, ensuring no harmful pesticides or chemicals are used, maximizing the health benefits.
How much space do I really need to grow kale successfully? I have a small balcony.
The beauty of kale is its adaptability. While it thrives in larger gardens, it can also be successfully grown in containers on balconies or patios. A single kale plant needs about 12-18 inches of space to grow comfortably. If you’re using containers, choose pots that are at least 12 inches in diameter and depth. You can even grow multiple kale plants in a larger container, spacing them about 12 inches apart. Consider dwarf varieties of kale, which are specifically bred for smaller spaces. Regular watering and fertilization are crucial for container-grown kale, as the soil tends to dry out faster and nutrients are depleted more quickly. With a little planning and care, you can enjoy a bountiful kale harvest even in a limited space.
What are the most common pests and diseases that affect kale, and how can I prevent them organically?
Kale, like any plant, can be susceptible to certain pests and diseases. Common pests include aphids, cabbage worms, flea beetles, and whiteflies. Diseases can include black rot, clubroot, and downy mildew. The key to organic pest and disease control is prevention. Start by choosing disease-resistant kale varieties. Practice crop rotation to prevent soilborne diseases from building up. Regularly inspect your plants for signs of pests or disease and address them promptly.
For aphids and whiteflies, try spraying your kale with a strong stream of water or using insecticidal soap. Cabbage worms can be handpicked or controlled with Bacillus thuringiensis (Bt), a natural bacterium that is safe for humans and beneficial insects. Flea beetles can be deterred with row covers or diatomaceous earth. To prevent fungal diseases, ensure good air circulation around your plants and avoid overwatering. If you notice signs of disease, remove the affected leaves immediately and dispose of them properly.
How often should I water and fertilize my kale plants?
Watering and fertilization are crucial for healthy kale growth. Water your kale plants deeply whenever the top inch of soil feels dry to the touch. The frequency of watering will depend on the weather and soil conditions, but generally, you’ll need to water every few days. Avoid overwatering, as this can lead to root rot.
Fertilize your kale plants every 2-3 weeks with a balanced organic fertilizer. You can also amend the soil with compost or aged manure to provide a slow-release source of nutrients. Avoid using synthetic fertilizers, as they can harm beneficial soil microbes and lead to nutrient imbalances. During periods of heavy growth, you may need to fertilize more frequently. Monitor your plants for signs of nutrient deficiencies, such as yellowing leaves, and adjust your fertilization schedule accordingly.
How do I know when my kale is ready to harvest, and what’s the best way to harvest it?
Kale is typically ready to harvest about 55-75 days after planting. The leaves should be a good size (around 8-10 inches long) and a deep green color. You can harvest kale leaves individually, starting with the outer leaves and working your way inwards. This allows the plant to continue producing new leaves. Alternatively, you can harvest the entire plant at once, cutting it off at the base.
To harvest individual leaves, simply grasp the leaf near the base and gently pull it away from the stem. Avoid tearing the stem, as this can damage the plant. Wash the harvested leaves thoroughly before using them. Kale can be stored in the refrigerator for up to a week. For longer storage, you can blanch and freeze the leaves.
Can I grow kale indoors during the winter months?
Yes, you can absolutely grow kale indoors during the winter months, extending your growing season and enjoying fresh greens year-round. To grow kale indoors, you’ll need a sunny location or grow lights. Kale requires at least 6 hours of sunlight per day, so a south-facing window is ideal. If you don’t have enough natural light, you can supplement with grow lights.
Use a well-draining potting mix and choose containers that are at least 12 inches in diameter and depth. Water your kale plants regularly, allowing the soil to dry out slightly between waterings. Fertilize every 2-3 weeks with a balanced organic fertilizer. Keep an eye out for pests and diseases, and address them promptly. With a little care, you can enjoy a continuous supply of fresh kale throughout the winter months.

Leave a Comment