

Grow Pears at Home? Absolutely! Imagine biting into a juicy, sun-ripened pear, bursting with flavor, knowing you nurtured it from blossom to fruit, right in your own backyard. It’s a dream many gardeners share, and with a few clever tricks and a little DIY spirit, it’s a dream you can easily make a reality.
For centuries, pears have been cherished across cultures, from ancient Rome where they were a symbol of prosperity, to the orchards of China, where they represent immortality. The pear’s rich history speaks to its enduring appeal and the satisfaction derived from cultivating this delicious fruit. But let’s be honest, growing pears can sometimes feel like a challenge. Pests, diseases, and the sheer patience required can be daunting.
That’s where this DIY guide comes in! I’m going to share some of my favorite home gardening tricks and hacks to help you grow pears at home successfully, even if you’re a beginner. We’ll cover everything from choosing the right pear variety for your climate to protecting your precious fruit from unwanted visitors. Think of it as your personal pear-growing cheat sheet, designed to make the process easier, more rewarding, and ultimately, more delicious. So, grab your gardening gloves, and let’s get started!
Growing Pears at Home: A DIY Guide to a Bountiful Harvest
Okay, so you want to grow pears at home? Awesome! I’m here to tell you it’s totally doable, and the satisfaction of biting into a pear you grew yourself is seriously unmatched. It takes a little patience and effort, but trust me, it’s worth it. This guide will walk you through everything you need to know, from choosing the right variety to harvesting your delicious pears. Let’s get started!
Choosing the Right Pear Variety
This is a crucial first step. Not all pear trees are created equal, and some are better suited to certain climates and growing conditions than others. Plus, you need to consider pollination!
* Climate Considerations: Pears generally thrive in USDA hardiness zones 4-8. Check your zone to ensure the variety you choose is a good fit. Some varieties are more cold-hardy than others.
* Pollination Needs: Most pear trees are not self-pollinating, meaning they need another pear tree of a different variety nearby to produce fruit. This is called cross-pollination.
* Choose Compatible Varieties: Do your research to ensure the varieties you choose are compatible pollinators. Some popular pairings include Bartlett with D’Anjou or Bosc.
* Consider a Self-Pollinating Variety: If you only have space for one tree, look for a self-pollinating variety like ‘Kieffer’ or ‘Seckel’. While they’ll still benefit from cross-pollination, they can produce fruit on their own.
* Disease Resistance: Some pear varieties are more resistant to common pear diseases like fire blight. This can save you a lot of headaches down the road.
* Fruit Characteristics: Think about what kind of pears you like to eat! Do you prefer a crisp, juicy pear like Bartlett, or a sweeter, more buttery pear like Bosc? Consider the flavor, texture, and size of the fruit.
* Dwarf vs. Standard Trees: Dwarf pear trees are smaller and easier to manage, making them a great option for smaller yards. Standard trees will grow larger and produce more fruit, but require more space.
Preparing the Planting Site
Alright, you’ve picked out your pear tree (or trees!). Now it’s time to get the planting site ready. This is super important for giving your tree the best possible start.
* Sunlight: Pear trees need at least 6-8 hours of direct sunlight per day. Choose a location that gets plenty of sun.
* Soil: Pears prefer well-drained soil that is slightly acidic (pH 6.0-7.0).
* Soil Testing: It’s a good idea to get your soil tested to determine its pH and nutrient levels. You can usually get a soil testing kit from your local garden center or agricultural extension office.
* Soil Amendment: If your soil is heavy clay or sandy, you’ll need to amend it with organic matter like compost or well-rotted manure. This will improve drainage, aeration, and nutrient content.
* Drainage: Poor drainage is a pear tree killer! Make sure the planting site doesn’t stay soggy after rain. If drainage is a problem, consider planting your tree on a raised mound.
* Space: Give your pear tree plenty of space to grow. Dwarf trees need about 10-15 feet between them, while standard trees need 20-25 feet. Consider the mature size of the variety you’ve chosen.
* Weed Control: Clear the planting area of weeds and grass. This will reduce competition for water and nutrients.
Planting Your Pear Tree
Okay, the moment we’ve been waiting for! Time to get that pear tree in the ground.
1. Dig the Hole: Dig a hole that is twice as wide as the root ball and just as deep. This gives the roots plenty of room to spread out.
2. Prepare the Root Ball: Gently remove the tree from its container. If the roots are circling the pot (root-bound), gently loosen them with your fingers or a sharp knife. This will encourage them to grow outward into the surrounding soil.
3. Position the Tree: Place the tree in the hole, making sure the top of the root ball is level with the surrounding soil. You don’t want to bury the trunk too deep.
4. Backfill the Hole: Backfill the hole with the amended soil, gently tamping it down as you go. This will eliminate air pockets and ensure good contact between the roots and the soil.
5. Water Thoroughly: Water the tree deeply after planting. This will help settle the soil and get the roots off to a good start.
6. Mulch: Apply a layer of mulch around the base of the tree, keeping it a few inches away from the trunk. Mulch helps retain moisture, suppress weeds, and regulate soil temperature. I like to use wood chips or shredded bark.
7. Stake (Optional): If your tree is young and spindly, you may want to stake it for the first year or two. This will help protect it from wind damage and encourage it to grow straight.
Caring for Your Pear Tree
Planting is just the beginning! Now you need to provide ongoing care to keep your pear tree healthy and productive.
* Watering: Water your pear tree regularly, especially during dry periods. Young trees need more frequent watering than established trees. Aim for deep, infrequent watering rather than shallow, frequent watering.
* Fertilizing: Fertilize your pear tree in the spring with a balanced fertilizer. Follow the instructions on the fertilizer package. Avoid over-fertilizing, as this can lead to excessive growth and reduced fruit production.
* Pruning: Pruning is essential for maintaining the shape and health of your pear tree.
* Dormant Pruning: Prune your pear tree in late winter or early spring, before new growth begins. Remove any dead, damaged, or crossing branches.
* Summer Pruning: You can also do some light pruning in the summer to remove water sprouts (vigorous, upright shoots) and improve air circulation.
* Pest and Disease Control: Keep an eye out for common pear pests and diseases, such as aphids, pear psylla, and fire blight.
* Integrated Pest Management (IPM): Use an integrated pest management approach, which involves using a combination of cultural practices, biological controls, and chemical controls to manage pests and diseases.
* Organic Options: There are many organic options for controlling pests and diseases, such as insecticidal soap, horticultural oil, and copper fungicide.
* Thinning Fruit: If your pear tree produces a heavy crop of fruit, you may need to thin it out. This will improve the size and quality of the remaining fruit. Thin the fruit when it is about the size of a dime, leaving about 6-8 inches between each pear.
Protecting Your Pear Tree
Sometimes, you need to protect your pear tree from the elements or hungry critters.
* Frost Protection: Pear blossoms are susceptible to frost damage. If a late frost is predicted, you can protect your tree by covering it with a blanket or tarp. You can also use sprinklers to create a layer of ice that will insulate the blossoms.
* Animal Protection: Deer, rabbits, and other animals can damage pear trees, especially young trees. Protect your tree by fencing it off or using tree guards.
* Sunscald Protection: Young pear trees can be susceptible to sunscald, which is damage to the bark caused by the sun. Protect the trunk of your tree by wrapping it with tree wrap or painting it with white latex paint.
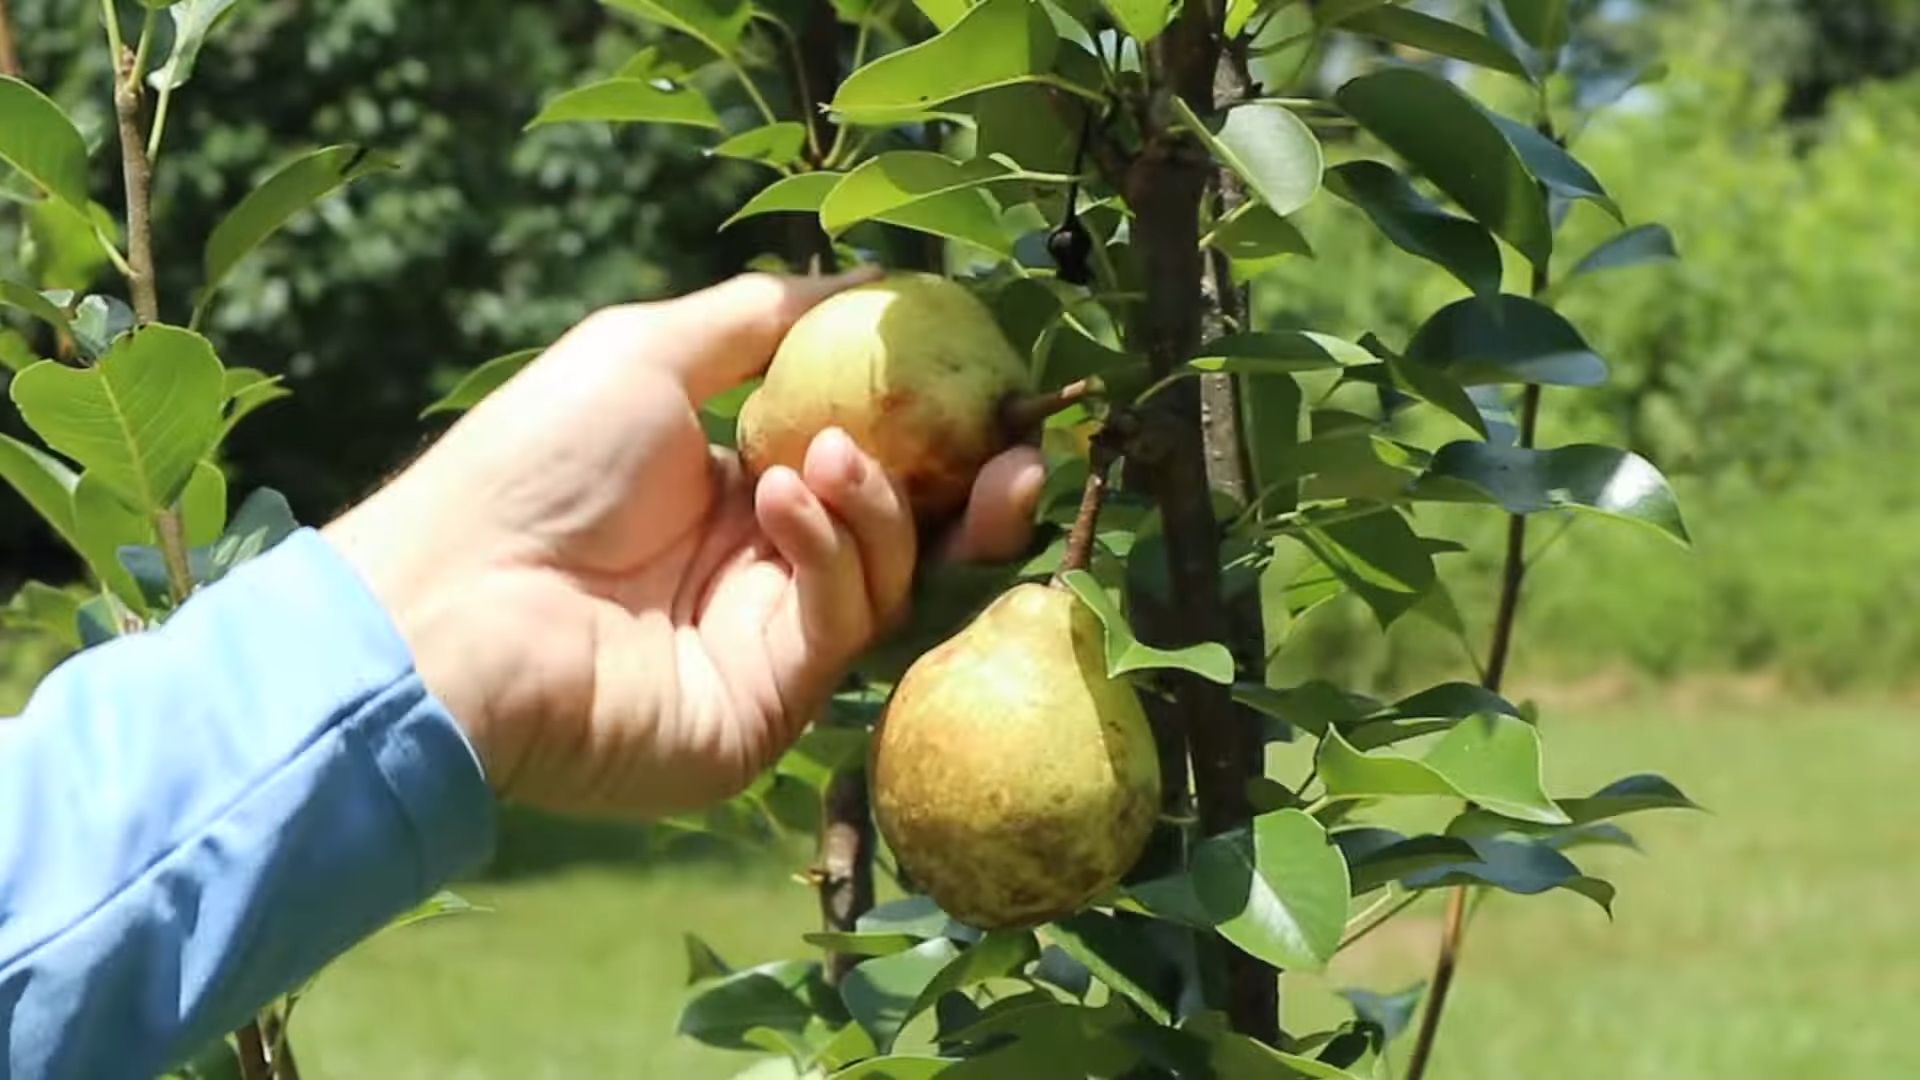
Harvesting Your Pears
Finally, the best part! Harvesting your delicious pears.
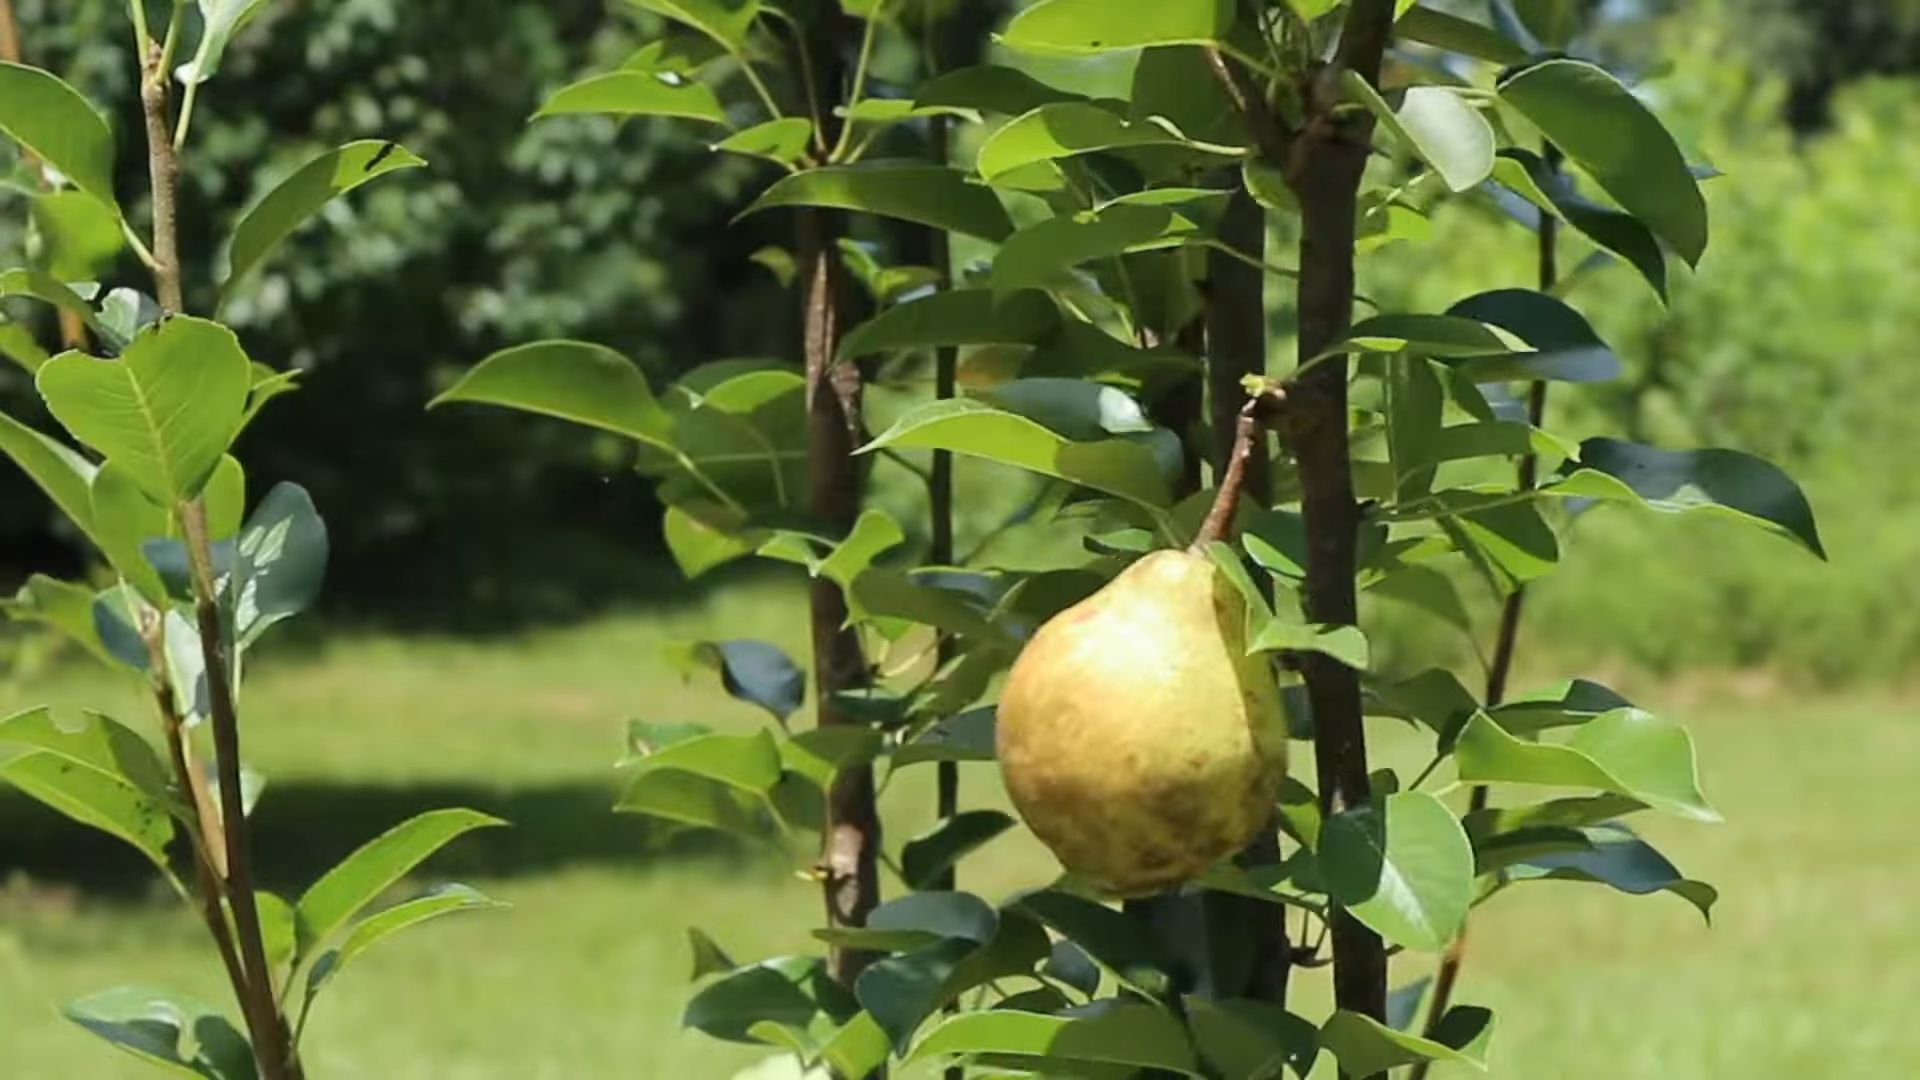
* Timing: Pears are typically harvested in late summer or early fall, depending on the variety. The exact timing will vary depending on your climate and the specific variety you’re growing.
* Ripeness: Pears are best harvested when they are mature but still firm. They will continue to ripen off the tree.
* Color Change: Look for a slight color change in the skin of the pear.
* Stem Detachment: The stem should detach easily from the branch when the pear is gently lifted.
* Taste Test: The best way to determine if a pear is ripe is to taste it!
* Harvesting Technique: Gently twist the pear from the branch. Avoid pulling or yanking, as this can damage the tree.
* Storage: Store your pears in a cool, dark place. They will continue to ripen over time. You can also refrigerate them to slow down the ripening process.
Troubleshooting Common Problems
Even with the best care, you might encounter some problems along the way. Here are a few common issues and how to deal with them:
* No Fruit Production: If your pear tree isn’t producing fruit, it could be due
Conclusion
So, there you have it! Growing pears at home, while it might seem daunting at first, is an incredibly rewarding experience. Forget those bland, often bruised pears you find at the grocery store. Imagine biting into a juicy, perfectly ripe pear, bursting with flavor, knowing you nurtured it from blossom to fruit right in your own backyard. This DIY trick, focusing on [specific aspect of pear growing from the main article, e.g., proper pruning techniques, soil amendment strategies, or pest control methods], is a game-changer because it directly addresses [the problem the trick solves, e.g., common causes of pear tree failure, low fruit yield, or pest infestations]. By implementing this simple yet effective method, you’re not just growing pears; you’re cultivating a thriving ecosystem in your garden and ensuring a bountiful harvest for years to come.
But don’t stop there! Experiment with different pear varieties to find your absolute favorite. Consider espaliering your pear tree against a sunny wall for a stunning visual display and increased fruit production. You could even try grafting different pear varieties onto a single tree for a diverse and exciting harvest. The possibilities are endless!
Growing pears at home is more than just a gardening project; it’s an investment in your health, your environment, and your overall well-being. It’s a chance to connect with nature, learn new skills, and enjoy the unparalleled satisfaction of harvesting your own delicious fruit.
We urge you to give this DIY trick a try. We’re confident that you’ll be amazed by the results. And most importantly, we want to hear about your experience! Share your photos, tips, and stories in the comments below. Let’s build a community of pear-growing enthusiasts and learn from each other’s successes (and even our failures!). Together, we can unlock the secrets to growing the most delicious pears imaginable, right in our own backyards. Don’t delay, start planning your pear-growing adventure today! You’ll be enjoying fresh, homegrown pears before you know it.
Frequently Asked Questions (FAQs)
Q: What are the best pear varieties to grow at home?
A: The “best” pear variety really depends on your climate, soil conditions, and personal preferences. However, some popular and reliable choices for home gardeners include ‘Bartlett’ (a classic all-purpose pear), ‘Anjou’ (known for its excellent storage qualities), ‘Bosc’ (a crisp and flavorful pear perfect for baking), and ‘Comice’ (considered by many to be the sweetest and most flavorful pear). For warmer climates, consider ‘Kieffer’ or ‘Orient’ pears, which are more heat-tolerant. Research which varieties are best suited for your specific USDA hardiness zone. Local nurseries are an excellent resource for finding varieties that thrive in your area.
Q: How much space do I need to grow a pear tree?
A: Pear trees can grow quite large, so it’s important to consider their mature size when planning your garden. Standard-sized pear trees can reach 15-20 feet tall and wide, requiring ample space to spread. However, dwarf and semi-dwarf varieties are available, reaching only 8-12 feet tall and wide, making them suitable for smaller gardens. Espaliering is another great option for growing pears in limited spaces, as it allows you to train the tree against a wall or fence. Regardless of the variety, ensure the tree has enough space to receive adequate sunlight and air circulation.
Q: What kind of soil is best for growing pears?
A: Pear trees thrive in well-drained, fertile soil with a slightly acidic to neutral pH (6.0-7.0). Heavy clay soils can be problematic, as they retain too much water and can lead to root rot. If you have clay soil, amend it with plenty of organic matter, such as compost, well-rotted manure, or peat moss, to improve drainage and aeration. Sandy soils, on the other hand, may drain too quickly and require frequent watering. Amending sandy soils with organic matter will help them retain moisture and nutrients. A soil test can provide valuable information about your soil’s pH and nutrient levels, allowing you to make necessary amendments before planting.
Q: How often should I water my pear tree?
A: Watering frequency depends on several factors, including the age of the tree, the climate, and the soil type. Young pear trees require more frequent watering than established trees. During the first year after planting, water deeply and regularly, especially during dry periods. Established pear trees generally need watering only during prolonged droughts. However, it’s important to monitor the soil moisture and water when the top inch or two feels dry to the touch. Avoid overwatering, as this can lead to root rot. Drip irrigation is an excellent way to provide consistent moisture to pear trees without overwatering.
Q: When and how should I prune my pear tree?
A: Pruning is essential for maintaining the health, shape, and productivity of your pear tree. The best time to prune pear trees is during late winter or early spring, before new growth begins. Pruning helps to remove dead, damaged, or diseased branches, improve air circulation, and encourage fruit production. When pruning, focus on creating an open, vase-shaped structure that allows sunlight to penetrate the canopy. Remove any suckers (shoots that grow from the base of the tree) and water sprouts (vigorous, upright shoots that grow from the branches). Consult a pruning guide or watch online tutorials for specific instructions on pruning pear trees.
Q: How do I protect my pear tree from pests and diseases?
A: Pear trees are susceptible to various pests and diseases, including aphids, pear psylla, codling moths, fire blight, and pear scab. Regular monitoring is crucial for detecting problems early. Encourage beneficial insects, such as ladybugs and lacewings, to control aphids and other pests. Use insecticidal soap or horticultural oil to treat infestations. Fire blight is a bacterial disease that can be devastating to pear trees. Prune out infected branches promptly and disinfect your pruning tools between cuts. Pear scab is a fungal disease that causes dark spots on the leaves and fruit. Apply a fungicide in early spring to prevent scab. Proper sanitation, including removing fallen leaves and fruit, can also help to reduce the risk of pests and diseases.
Q: How long does it take for a pear tree to produce fruit?
A: The time it takes for a pear tree to produce fruit depends on the variety, the rootstock, and the growing conditions. Standard-sized pear trees typically take 4-6 years to bear fruit, while dwarf and semi-dwarf varieties may start producing fruit in 3-4 years. Grafted trees often bear fruit sooner than trees grown from seed. To encourage fruit production, ensure your pear tree receives adequate sunlight, water, and nutrients. Pollination is also essential for fruit set. Most pear varieties require cross-pollination from another pear variety. Plant two different pear varieties that bloom at the same time to ensure successful pollination.
Q: How do I know when my pears are ripe?
A: Determining when pears are ripe can be tricky, as they often ripen from the inside out. Unlike some other fruits, pears don’t necessarily change color when they’re ripe. A good way to check for ripeness is to gently lift the pear and see if it separates easily from the branch. If it comes off easily, it’s likely ripe. You can also check the neck of the pear (the area near the stem). If it yields slightly to gentle pressure, the pear is ripe. Pears are best harvested slightly underripe and allowed to ripen at room temperature. This prevents them from becoming mushy or mealy.
Q: Can I grow pears in containers?
A: Yes, you can grow dwarf pear trees in containers, but it requires careful attention to watering, fertilizing, and pruning. Choose a large container (at least 20 gallons) with good drainage. Use a high-quality potting mix and amend it with compost or other organic matter. Water regularly, especially during hot weather. Fertilize regularly with a balanced fertilizer. Prune the tree to maintain its shape and size. Container-grown pear trees may need to be protected from frost during the winter.
Leave a Comment