

Grow Pechay at Home and unlock the secrets to a thriving, delicious garden right outside your door! Have you ever dreamed of snipping fresh, vibrant greens for your dinner salad just moments before eating? Or perhaps you’re tired of the wilted, overpriced vegetables at the grocery store? Well, you’re in the right place! This DIY guide is your passport to cultivating your very own pechay paradise, no matter how small your space might be.
Pechay, also known as Chinese cabbage, isn’t just a tasty vegetable; it’s a staple in many Asian cuisines, holding a special place in culinary traditions for centuries. From stir-fries to soups, its mild flavor and crisp texture make it incredibly versatile. But beyond its culinary appeal, growing your own pechay offers a sense of accomplishment and connection to nature.
In today’s world, where convenience often trumps quality, knowing exactly where your food comes from is more important than ever. Growing your own pechay allows you to control what goes into your food, ensuring it’s free from harmful pesticides and packed with nutrients. Plus, let’s be honest, there’s nothing quite like the satisfaction of harvesting something you’ve nurtured from seed to table. I’m excited to share these simple, effective tricks and hacks that will empower you to grow pechay at home successfully, even if you’re a complete beginner. Let’s get our hands dirty and start growing!
Grow Your Own Delicious Pechay at Home: A Beginner’s Guide
Hey there, fellow gardening enthusiasts! I’m so excited to share my experience and guide you through growing your own pechay (also known as bok choy) right in your backyard or even in containers. It’s surprisingly easy, rewarding, and you’ll have fresh, crisp greens ready for your favorite dishes in no time. Let’s get started!
What You’ll Need:
Before we dive into the nitty-gritty, let’s gather all the necessary supplies. Trust me, having everything ready beforehand will make the whole process smoother and more enjoyable.
* Pechay Seeds: Choose a variety that suits your climate and preferences. I personally love the ‘Black Behi’ variety for its dark green leaves and mild flavor.
* Seed Trays or Small Pots: These will be your nursery for the baby pechay plants.
* Seed Starting Mix: This is a light, well-draining soil mix specifically designed for seedlings. Don’t use regular garden soil; it’s often too heavy and can hinder germination.
* Potting Soil: Once the seedlings are ready for transplanting, you’ll need a good quality potting soil for their final home.
* Fertilizer: A balanced fertilizer (like 10-10-10) or organic fertilizer (like compost tea or fish emulsion) will provide the necessary nutrients for healthy growth.
* Watering Can or Hose: Gentle watering is key, especially for young seedlings.
* Gardening Gloves: Protect your hands from dirt and potential irritants.
* Trowel or Small Shovel: For transplanting the seedlings.
* Containers (Optional): If you’re growing pechay in containers, choose pots that are at least 6 inches deep and wide.
* Pest Control (Optional): Be prepared to deal with potential pests like aphids or cabbage worms. Insecticidal soap or neem oil are good organic options.
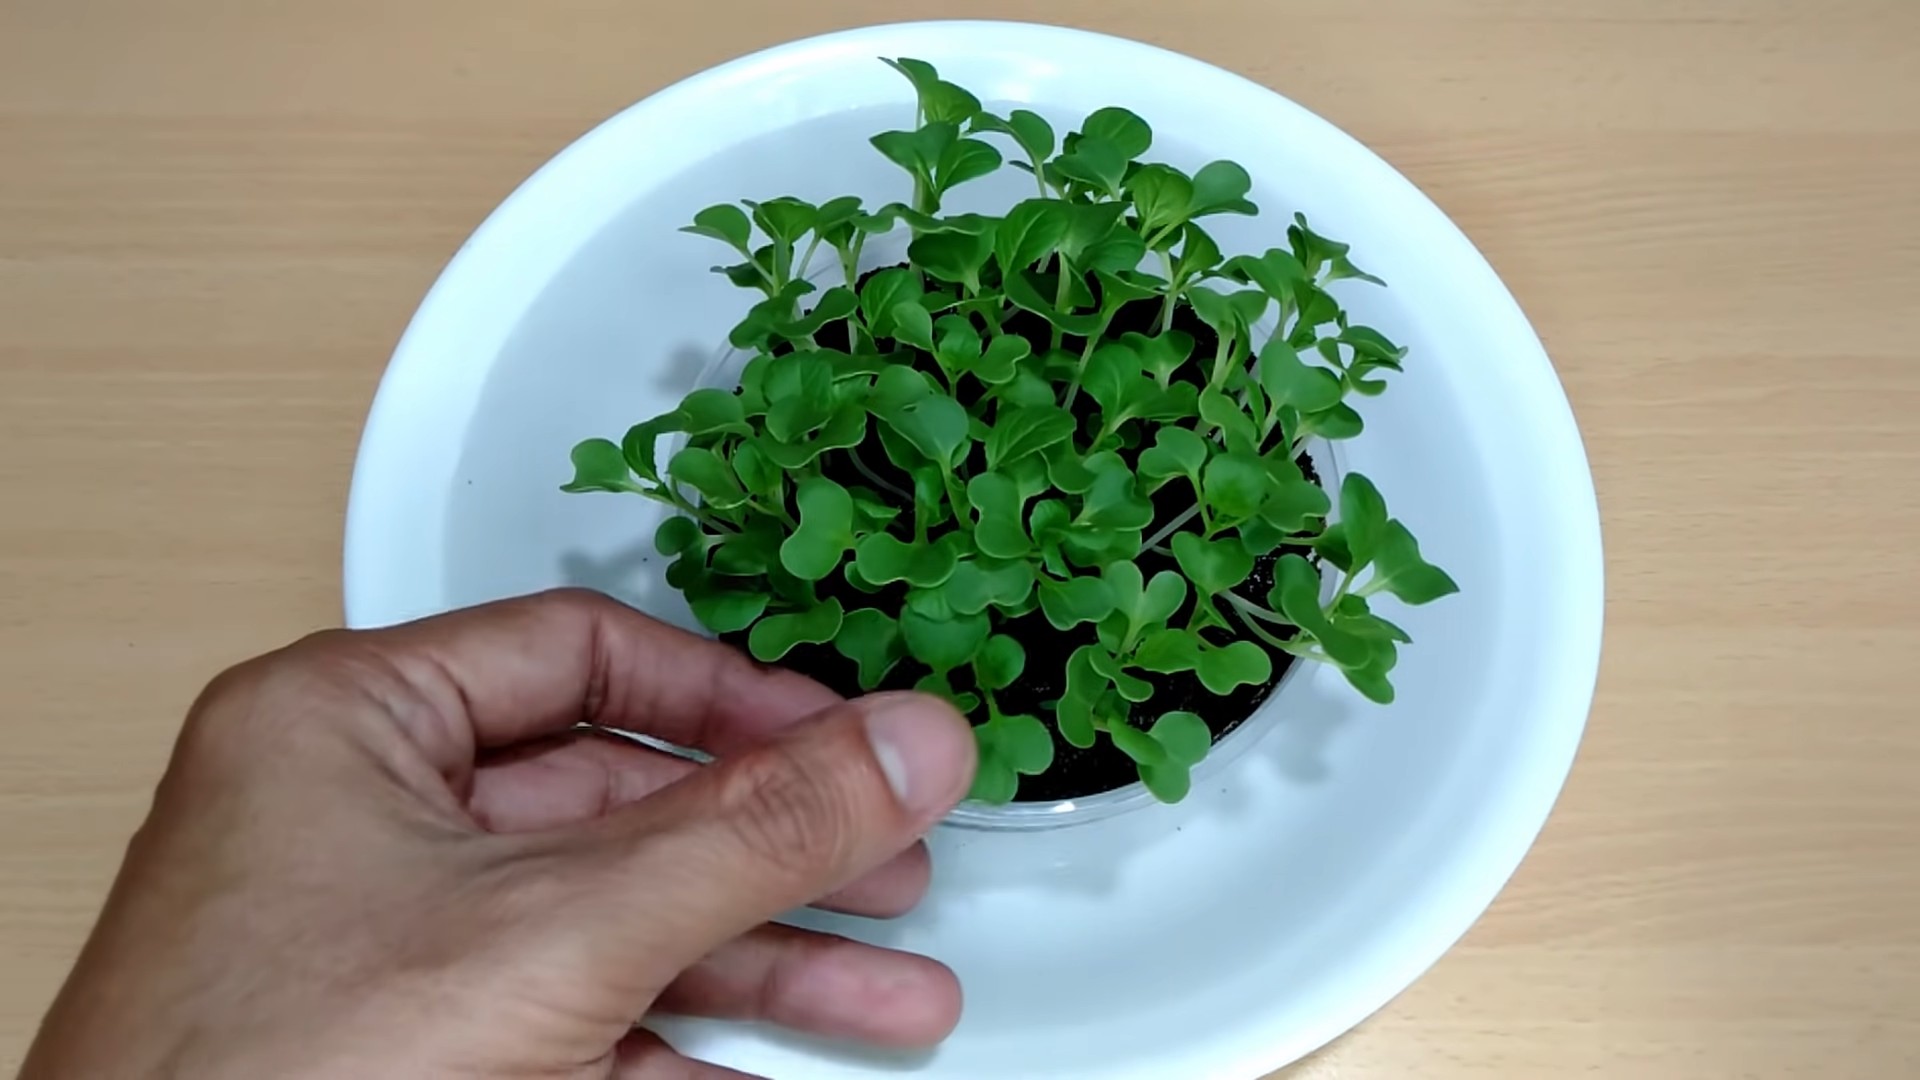
Section 1: Starting Your Pechay Seeds
This is where the magic begins! We’ll nurture those tiny seeds into healthy seedlings ready to take on the world (or, well, your garden).
1. Prepare the Seed Trays: Fill your seed trays or small pots with seed starting mix. Gently press down the soil to create a firm, even surface.
2. Sow the Seeds: Sprinkle the pechay seeds evenly over the soil surface. Aim for about 2-3 seeds per cell or pot. Don’t overcrowd them!
3. Cover the Seeds: Lightly cover the seeds with a thin layer of seed starting mix. About 1/4 inch is perfect.
4. Water Gently: Use a watering can with a gentle rose or a spray bottle to moisten the soil. Avoid overwatering, which can lead to damping-off disease.
5. Provide Warmth and Light: Place the seed trays in a warm, bright location. A sunny windowsill or a grow light works well. The ideal temperature for germination is between 60-70°F (15-21°C).
6. Keep the Soil Moist: Check the soil moisture daily and water as needed to keep it consistently moist but not soggy.
7. Wait for Germination: Pechay seeds typically germinate within 5-7 days. Be patient!
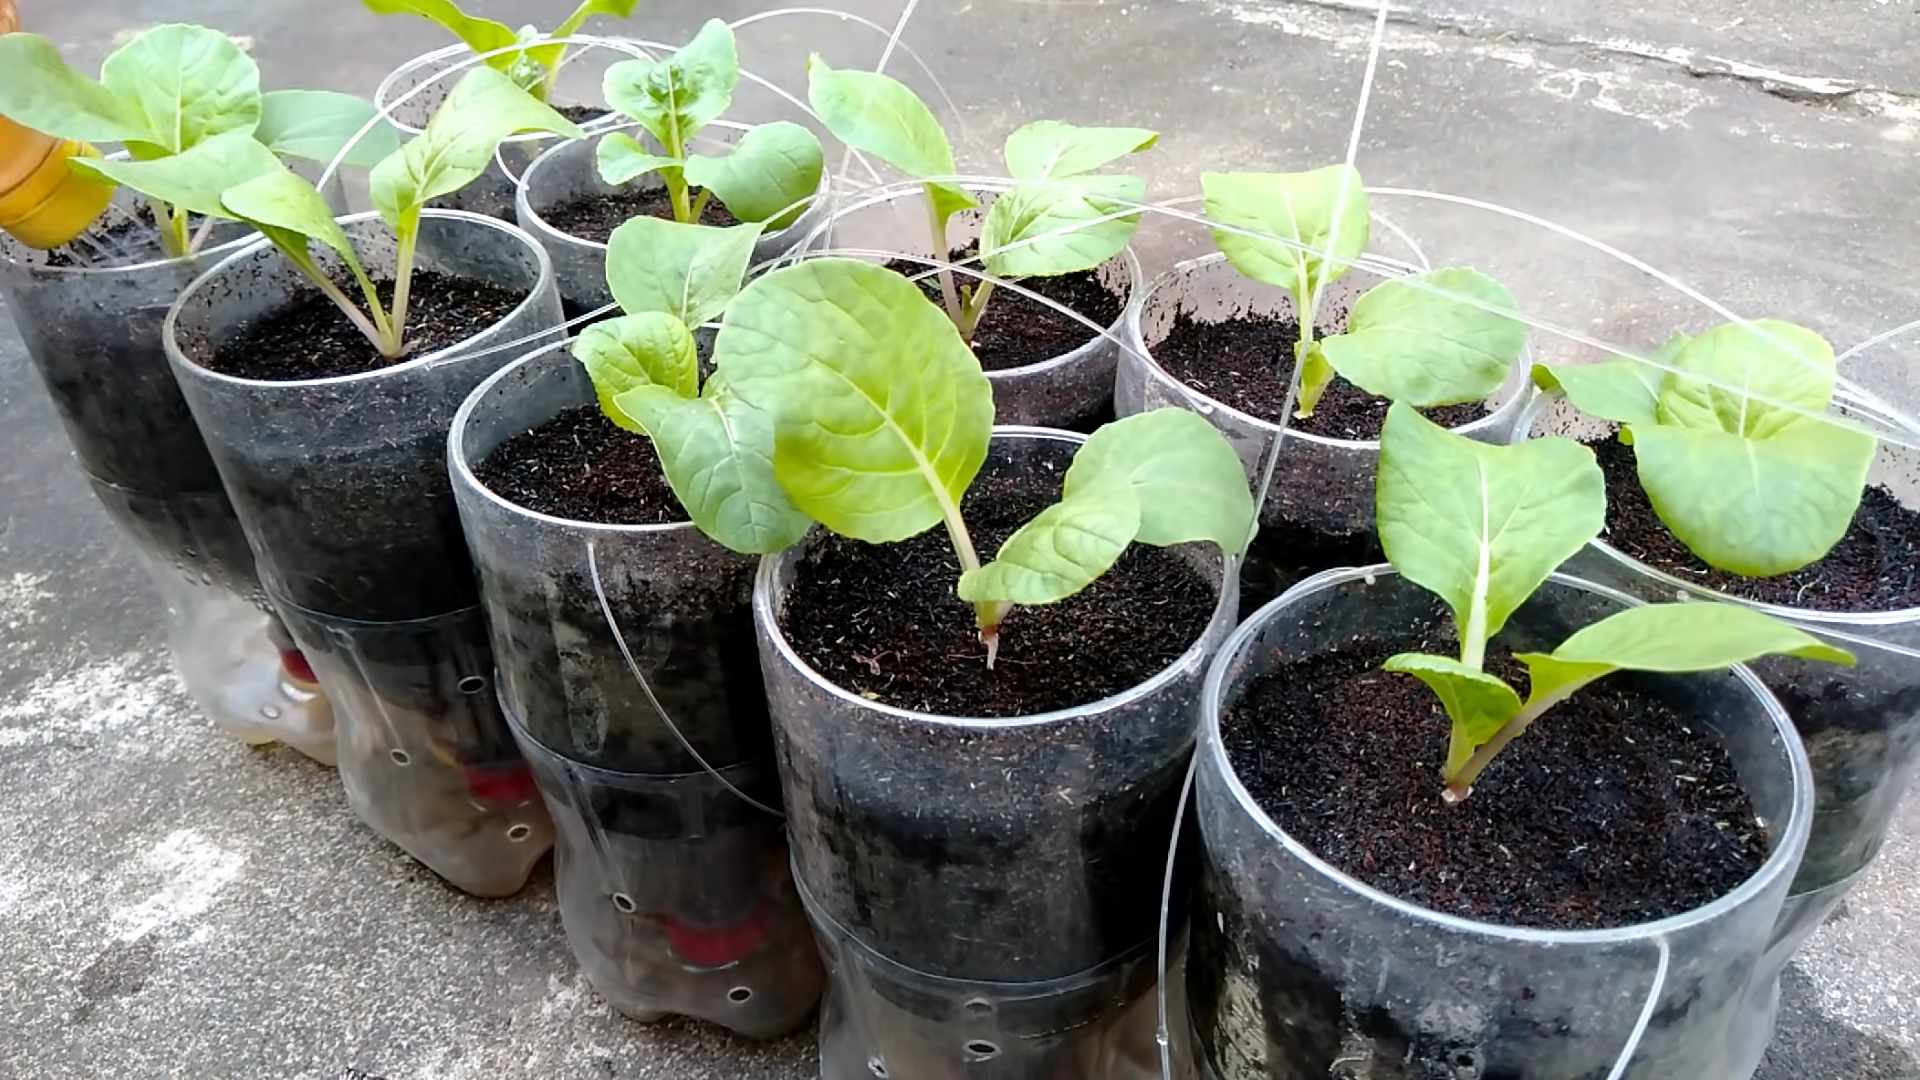
Section 2: Transplanting Your Pechay Seedlings
Once your seedlings have developed a few true leaves (the second set of leaves that appear after the initial seed leaves), they’re ready to be transplanted into their final growing location.
1. Prepare the Planting Area: Choose a sunny spot in your garden or prepare your containers. Pechay needs at least 4-6 hours of sunlight per day.
2. Amend the Soil: If you’re planting in the garden, amend the soil with compost or other organic matter to improve drainage and fertility.
3. Dig Holes: Dig holes that are slightly larger than the root balls of your seedlings. Space the holes about 6-8 inches apart.
4. Carefully Remove Seedlings: Gently remove the seedlings from the seed trays or pots. Be careful not to damage the roots. I like to use a small trowel to help loosen the soil around the roots.
5. Transplant the Seedlings: Place each seedling into a hole and gently backfill with potting soil. Make sure the top of the root ball is level with the surrounding soil.
6. Water Thoroughly: Water the transplanted seedlings thoroughly to help them settle in.
7. Mulch (Optional): Apply a layer of mulch around the plants to help retain moisture and suppress weeds. Straw, wood chips, or shredded leaves work well.
Section 3: Caring for Your Growing Pechay
Now that your pechay plants are in their new home, it’s time to provide them with the care they need to thrive.
1. Watering: Water your pechay plants regularly, especially during dry periods. Aim to keep the soil consistently moist but not waterlogged. Water deeply at the base of the plants to avoid wetting the leaves, which can lead to fungal diseases.
2. Fertilizing: Fertilize your pechay plants every 2-3 weeks with a balanced fertilizer or organic fertilizer. Follow the instructions on the fertilizer package. I personally prefer using compost tea, which is easy to make and provides a gentle boost of nutrients.
3. Weeding: Keep the planting area free of weeds, which can compete with your pechay plants for nutrients and water. Hand-pull weeds regularly or use a hoe to cultivate the soil.
4. Pest Control: Keep an eye out for pests like aphids, cabbage worms, and slugs. If you notice any pests, take action immediately. Insecticidal soap, neem oil, or hand-picking are effective control methods. For slugs, you can try beer traps or diatomaceous earth.
5. Bolting Prevention: Pechay is prone to bolting (going to seed) in hot weather. To prevent bolting, provide shade during the hottest part of the day and ensure consistent watering. You can also choose bolt-resistant varieties.
Section 4: Harvesting Your Pechay
The moment you’ve been waiting for! Harvesting your own homegrown pechay is incredibly satisfying.
1. Harvest Time: You can start harvesting pechay leaves as soon as they are large enough to eat, typically about 30-45 days after transplanting.
2. Harvesting Method: You can harvest individual leaves as needed or harvest the entire plant at once. To harvest individual leaves, simply cut them off at the base of the plant with a sharp knife or scissors. To harvest the entire plant, cut it off at the base of the stem.
3. Succession Planting: To ensure a continuous supply of pechay, sow new seeds every 2-3 weeks. This is called succession planting.
4. Storage: Store harvested pechay leaves in the refrigerator in a plastic bag or container. They will typically last for about a week.
Troubleshooting Common Pechay Problems
Even with the best care, you might encounter a few challenges along the way. Here are some common problems and how to address them:
* Damping-Off: This fungal disease can kill young seedlings. Prevent it by using a sterile seed starting mix, avoiding overwatering, and providing good air circulation.
* Aphids: These tiny insects suck sap from the leaves, causing them to curl and distort. Control them with insecticidal soap or neem oil.
* Cabbage Worms: These caterpillars chew holes in the leaves. Hand-pick them off the plants or use Bacillus thuringiensis (Bt), a biological insecticide.
* Slugs: These slimy pests can devour entire plants overnight. Use beer traps, diatomaceous earth, or slug bait to control them.
* Bolting: As mentioned earlier, bolting can occur in hot weather. Prevent it by providing shade, ensuring consistent watering, and choosing bolt-resistant varieties.
Tips for a Bountiful Pechay Harvest
Here are a few extra tips to help you maximize your pechay harvest:
* Choose the Right Variety: Select a variety that is well-suited to your climate and growing conditions.
* Provide Adequate Sunlight: Pechay needs at least 4-6 hours of sunlight per day.
* Water Regularly: Keep the soil consistently moist but not waterlogged.
* Fertilize Regularly: Provide your plants with the nutrients they need to thrive.
* Protect from Pests: Take action immediately if you notice any pests.
* Succession Plant: Sow new seeds every 2-3 weeks to ensure a continuous supply of pechay.
* Harvest Regularly: Harvesting encourages new growth.
Growing your own pechay is a rewarding experience that
Conclusion
So, there you have it! Growing your own pechay at home is not only achievable, but it’s also incredibly rewarding. From the satisfaction of nurturing a plant from seed to harvest, to the unparalleled freshness and flavor you simply can’t find in store-bought produce, this DIY project is a game-changer for any home cook or gardening enthusiast. Forget those wilted, pre-packaged greens – imagine crisp, vibrant pechay gracing your table, knowing you cultivated it yourself.
This isn’t just about saving a few dollars; it’s about connecting with your food, understanding its origins, and enjoying the fruits (or rather, the vegetables!) of your labor. Plus, you have complete control over the growing process, ensuring your pechay is free from harmful pesticides and chemicals. That’s a win for your health and the environment!
But the beauty of this DIY trick lies in its adaptability. Feel free to experiment with different varieties of pechay. Try the Shanghai Green for its mild flavor and tender texture, or the Black Behi for its slightly peppery bite. You can also adjust the growing conditions to suit your specific climate and space. If you live in a colder region, consider starting your seeds indoors and transplanting them later. If you’re short on space, vertical gardening techniques can maximize your yield.
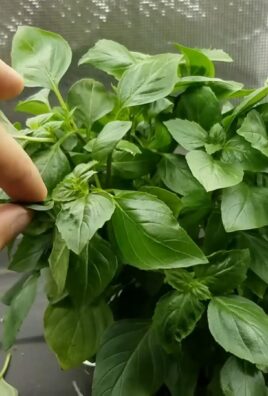
And don’t be afraid to get creative with your fertilizer. While commercial fertilizers can be effective, homemade compost or worm castings are excellent organic alternatives that will nourish your pechay and enrich your soil. You can even try companion planting, pairing your pechay with herbs like basil or mint to deter pests and enhance its flavor.
Growing pechay at home is more than just a gardening project; it’s an opportunity to learn, experiment, and connect with nature. It’s a chance to bring fresh, healthy food to your table and to experience the joy of growing your own.
We wholeheartedly encourage you to give this DIY trick a try. Whether you’re a seasoned gardener or a complete beginner, you’ll be surprised at how easy and rewarding it is to grow your own pechay. And once you’ve harvested your first batch, don’t forget to share your experience with us! We’d love to hear your tips, tricks, and favorite recipes. Post photos of your pechay garden on social media using #HomegrownPechay and inspire others to join the movement. Let’s cultivate a community of home gardeners and celebrate the deliciousness of homegrown pechay!
Frequently Asked Questions (FAQ)
What is the best time of year to plant pechay?
Pechay thrives in cooler weather, so the best time to plant it is during the early spring or late summer/early fall. Avoid planting during the hottest months of summer, as high temperatures can cause the plants to bolt (go to seed prematurely), resulting in bitter-tasting leaves. If you live in a region with mild winters, you may be able to grow pechay year-round.
How much sunlight does pechay need?
Pechay requires at least 4-6 hours of direct sunlight per day. However, it can tolerate partial shade, especially during the hottest part of the day. If you’re growing pechay indoors, make sure to provide it with adequate artificial light.
What kind of soil is best for growing pechay?
Pechay prefers well-drained, fertile soil that is rich in organic matter. The ideal soil pH is between 6.0 and 7.5. Before planting, amend your soil with compost or other organic matter to improve its drainage and fertility.
How often should I water my pechay plants?
Pechay needs consistent moisture to thrive. Water your plants regularly, especially during dry periods. Aim to keep the soil consistently moist, but not waterlogged. Overwatering can lead to root rot. A good rule of thumb is to water when the top inch of soil feels dry to the touch.
What are some common pests and diseases that affect pechay?
Common pests that can affect pechay include aphids, cabbage worms, and flea beetles. Diseases that can affect pechay include downy mildew and clubroot. To prevent pests and diseases, practice good garden hygiene, such as removing weeds and debris, and rotating your crops. You can also use organic pest control methods, such as insecticidal soap or neem oil.
How long does it take for pechay to mature?
Pechay is a fast-growing vegetable that typically matures in 45-60 days from seed. You can start harvesting the outer leaves as soon as they are large enough to eat, or you can wait until the entire plant is mature.
How do I harvest pechay?
To harvest pechay, simply cut the leaves at the base of the plant with a sharp knife. You can harvest the outer leaves as needed, or you can harvest the entire plant at once. If you harvest the outer leaves regularly, the plant will continue to produce new leaves for several weeks.
Can I grow pechay in containers?
Yes, pechay can be grown successfully in containers. Choose a container that is at least 6-8 inches deep and wide. Make sure the container has drainage holes to prevent waterlogging. Use a high-quality potting mix and fertilize regularly.
What are some ways to use pechay in cooking?
Pechay is a versatile vegetable that can be used in a variety of dishes. It can be stir-fried, steamed, boiled, or added to soups and stews. It can also be eaten raw in salads. Pechay has a mild, slightly sweet flavor that pairs well with a variety of ingredients, such as garlic, ginger, soy sauce, and sesame oil.
How do I store pechay?
To store pechay, wrap it loosely in a damp paper towel and place it in a plastic bag in the refrigerator. It will keep for up to a week. Avoid washing the pechay before storing it, as this can cause it to spoil more quickly.
Is growing pechay at home organic?
Whether your homegrown pechay is organic depends on your growing practices. If you use organic seeds, soil amendments, and pest control methods, then your pechay can be considered organic. Avoid using synthetic fertilizers, pesticides, and herbicides if you want to grow organic pechay.
What are the nutritional benefits of pechay?
Pechay is a nutritious vegetable that is low in calories and high in vitamins and minerals. It is a good source of vitamins A, C, and K, as well as calcium, iron, and potassium. Pechay is also a good source of fiber, which is important for digestive health. Growing pechay at home ensures you have access to these nutrients fresh and readily available.

Leave a Comment