

Grow Pineapples at Home? Absolutely! Imagine plucking a juicy, sun-ripened pineapple straight from your own backyard. Sounds like a tropical dream, right? Well, it’s more attainable than you might think! For centuries, pineapples have been a symbol of hospitality and luxury, gracing tables from royal banquets to welcoming feasts. Originating in South America, this delicious fruit has traveled the globe, captivating taste buds and adding a touch of the exotic wherever it goes.
But why should you bother learning how to grow pineapples at home? Let’s face it, store-bought pineapples can be expensive, and sometimes, they just don’t have that incredible, fresh flavor. Plus, there’s something incredibly rewarding about nurturing a plant from start to finish and enjoying the fruits (literally!) of your labor. This DIY guide will provide you with simple, easy-to-follow steps to cultivate your own pineapple plant, even if you don’t have a sprawling garden. I’m here to show you that with a little patience and the right know-how, you can enjoy the sweet taste of homegrown pineapple. Get ready to transform your space into a mini-tropical paradise!
Grow Your Own Tropical Paradise: A Step-by-Step Guide to Growing Pineapples at Home!
Okay, so you want to grow pineapples at home? Awesome! It’s surprisingly easier than you might think, and there’s nothing quite like the taste of a pineapple you’ve nurtured yourself. Forget those grocery store pineapples – we’re talking homegrown deliciousness! I’m going to walk you through everything you need to know, from prepping the pineapple top to harvesting your very own fruit. Let’s get started!
Choosing Your Pineapple and Preparing the Top
This is the most crucial first step. You can’t just grab any pineapple and expect it to work. Here’s what to look for:
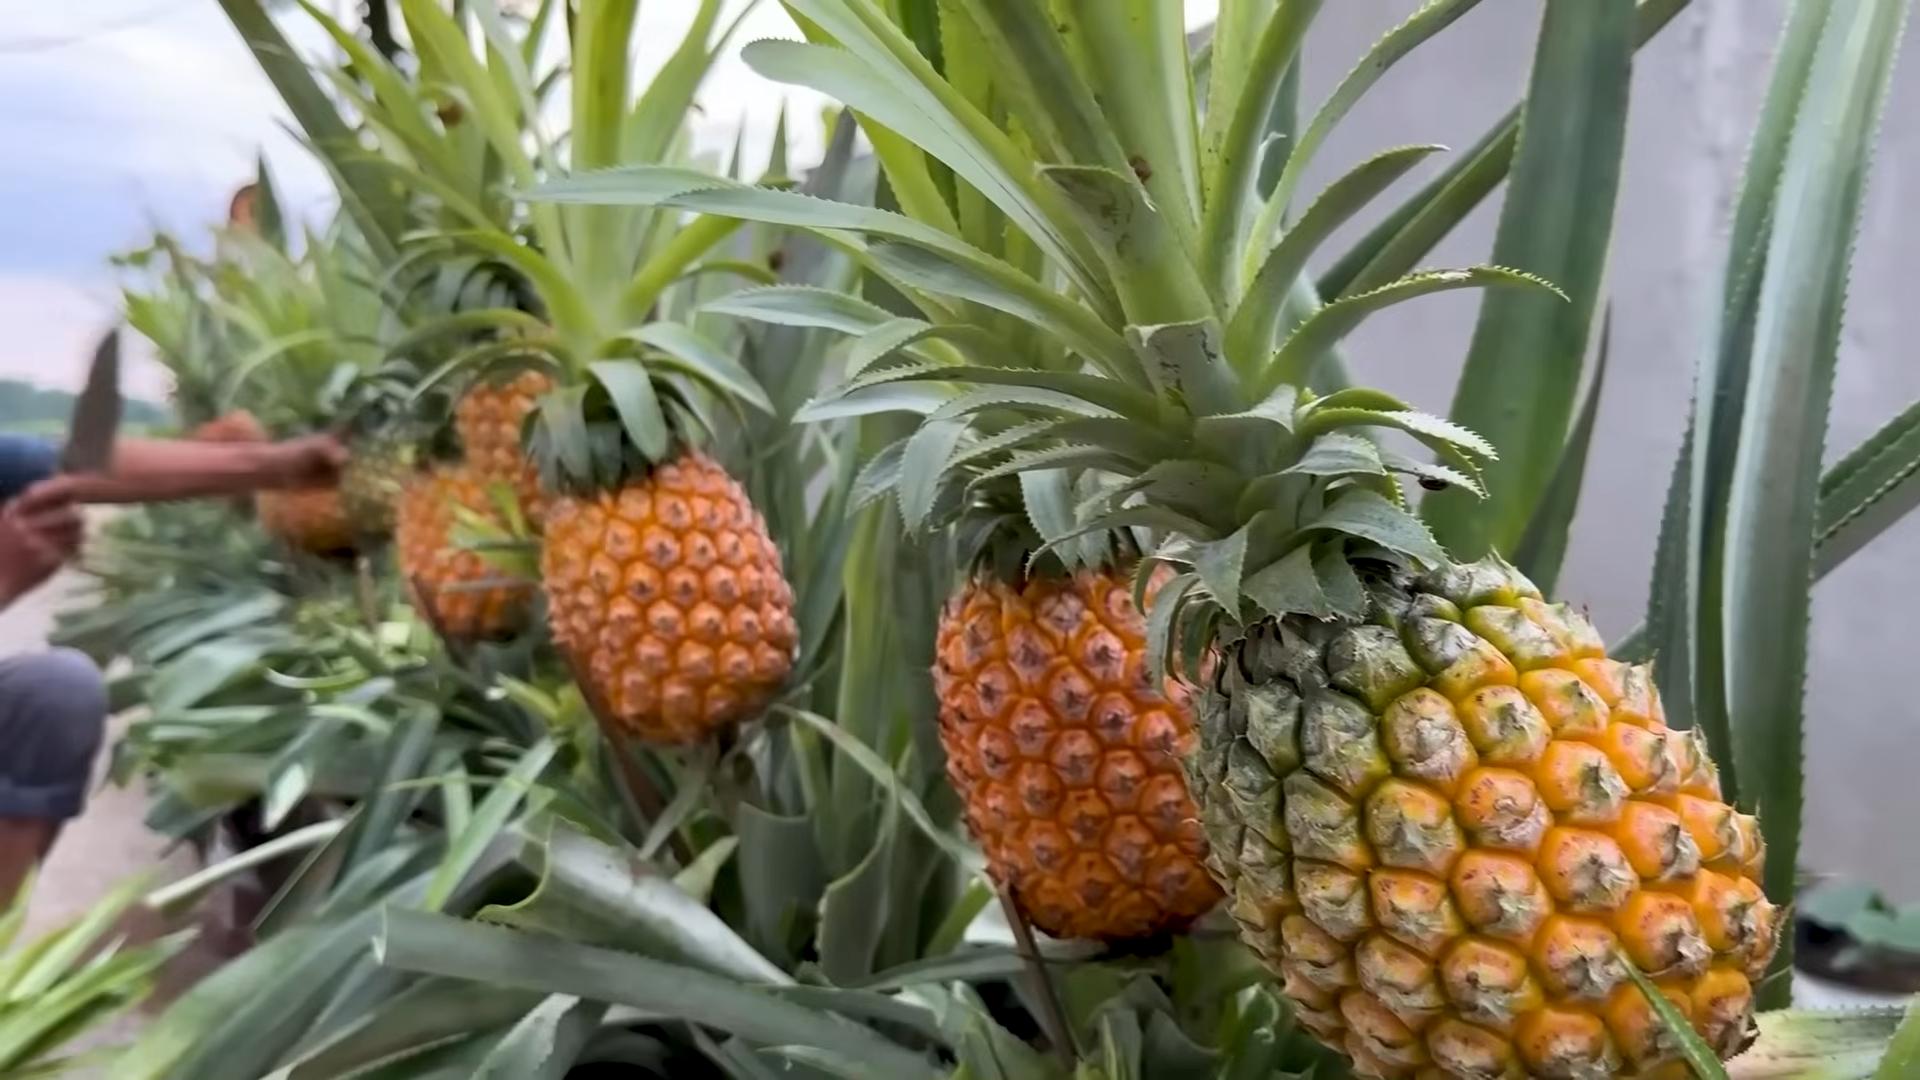
* A Healthy Pineapple: Look for a pineapple that’s ripe but not overripe. The leaves should be green and vibrant, not brown or wilted. The fruit itself should be a golden-yellow color and smell sweet. Avoid pineapples with bruises or soft spots.
* A Strong Top: The top, or crown, of the pineapple is what you’ll be planting. Make sure it’s firmly attached to the fruit and has healthy-looking leaves. Gently tug on a few leaves; they shouldn’t come off easily.
* Organic is Best: While not strictly necessary, organic pineapples are less likely to have been treated with growth inhibitors, which can hinder rooting.
Now, let’s get that top ready for planting!
1. Twist or Cut Off the Top: This is where you have a choice. You can either twist the top off the pineapple or cut it off. I prefer twisting because it tends to leave more of the stem intact, which can help with rooting. To twist, grip the base of the leaves firmly and twist the top until it separates from the fruit. If you prefer to cut, use a sharp knife to cut about an inch or two below the base of the leaves.
2. Remove Some of the Lower Leaves: This is important! You need to expose the stem so that roots can grow. Gently peel off the lower leaves, starting from the bottom and working your way up. You should remove about an inch or two of leaves, revealing the stem. Don’t worry if you accidentally break off a few leaves – it happens!
3. Let the Top Dry Out (Callousing): This step is crucial to prevent rot. Place the pineapple top in a cool, dry place for about a week. This allows the cut end to callous over, which helps to seal it and prevent fungal infections. I usually put mine on a paper towel in a well-ventilated area. You’ll know it’s ready when the cut end is dry and slightly hardened.
Rooting Your Pineapple Top
Okay, now that your pineapple top is calloused, it’s time to encourage those roots to grow! You have two main options here: rooting in water or planting directly in soil. I’ve had success with both methods, but I personally prefer rooting in water because you can actually see the roots developing.
Rooting in Water:
1. Prepare Your Water Container: Choose a clear glass or jar that’s wide enough to hold the pineapple top without it tipping over. Fill it with clean, room-temperature water. Make sure the water is chlorine-free; if you’re using tap water, let it sit out for 24 hours to allow the chlorine to evaporate.
2. Submerge the Stem: Place the pineapple top in the water, making sure that only the stem is submerged. The leaves should be above the water line. You can use toothpicks inserted around the base of the leaves to help keep the top stable and prevent it from falling into the water.
3. Find a Sunny Spot: Place the jar in a bright, sunny location. A windowsill is ideal.
4. Change the Water Regularly: Change the water every few days to prevent algae growth and keep the water fresh.
5. Be Patient: Rooting can take several weeks, so don’t get discouraged if you don’t see roots right away. You should start to see small roots emerging from the stem within a few weeks. Once the roots are about an inch or two long, it’s time to plant your pineapple top in soil!
Planting Directly in Soil:
1. Choose the Right Pot: Select a pot that’s at least 6 inches in diameter and has drainage holes. Pineapples need good drainage to prevent root rot.
2. Use Well-Draining Soil: Pineapples prefer well-draining soil that’s rich in organic matter. A mixture of potting soil, perlite, and sand works well. You can also add some compost to the mix for extra nutrients.
3. Plant the Pineapple Top: Fill the pot with soil, leaving about an inch of space at the top. Make a hole in the center of the soil and carefully plant the pineapple top, making sure that the base of the leaves is just above the soil line. Gently firm the soil around the top.
4. Water Thoroughly: Water the soil thoroughly after planting.
5. Find a Sunny Spot: Place the pot in a bright, sunny location.
6. Keep the Soil Moist: Keep the soil moist but not soggy. Water when the top inch of soil feels dry to the touch.
Caring for Your Pineapple Plant
Whether you rooted in water or planted directly in soil, the care is pretty much the same from here on out.
1. Sunlight is Key: Pineapples need plenty of sunlight to thrive. Aim for at least 6 hours of direct sunlight per day. If you live in a climate with limited sunlight, you may need to supplement with a grow light.
2. Watering: Water your pineapple plant regularly, but don’t overwater. Allow the soil to dry out slightly between waterings. Overwatering can lead to root rot, which is a common problem with pineapples. I usually water mine about once a week, but I always check the soil moisture first.
3. Fertilizing: Pineapples are heavy feeders, so they need regular fertilization. Use a balanced fertilizer (such as 10-10-10) every two to three months during the growing season (spring and summer). Follow the instructions on the fertilizer label. You can also use organic fertilizers, such as compost tea or fish emulsion.
4. Temperature: Pineapples prefer warm temperatures, ideally between 65°F and 85°F. They can tolerate temperatures as low as 60°F, but they won’t grow as quickly. Protect your pineapple plant from frost and freezing temperatures. If you live in a cold climate, you’ll need to bring your pineapple plant indoors during the winter.
5. Humidity: Pineapples like humidity, so if you live in a dry climate, you may need to increase the humidity around your plant. You can do this by misting the leaves regularly, placing a tray of water near the plant, or using a humidifier.
6. Repotting: As your pineapple plant grows, it will eventually need to be repotted into a larger pot. Repot your plant when the roots start to outgrow the pot. Choose a pot that’s a few inches larger in diameter than the current pot.
Encouraging Fruiting
This is where things get interesting! Pineapples don’t always fruit on their own, especially when grown indoors. You may need to give them a little nudge.
1. Maturity: Your pineapple plant needs to be mature enough to fruit. This usually takes about 2-3 years. Be patient!
2. Ethylene Gas: Pineapples are stimulated to fruit by ethylene gas. You can create ethylene gas by placing a ripe apple or banana near the plant, covering both with a plastic bag for a few days. The ripening fruit will release ethylene gas, which will trigger the pineapple to flower.
3. Magnesium Sulfate (Epsom Salts): Some gardeners swear by Epsom salts to encourage fruiting. Dissolve one tablespoon of Epsom salts in a gallon of water and water your pineapple plant with this solution once a month.
4. Patience, Again!: Even with these tricks, it can still take several months for a pineapple to develop after flowering.
Harvesting Your Pineapple
Finally! The moment you’ve been waiting for!
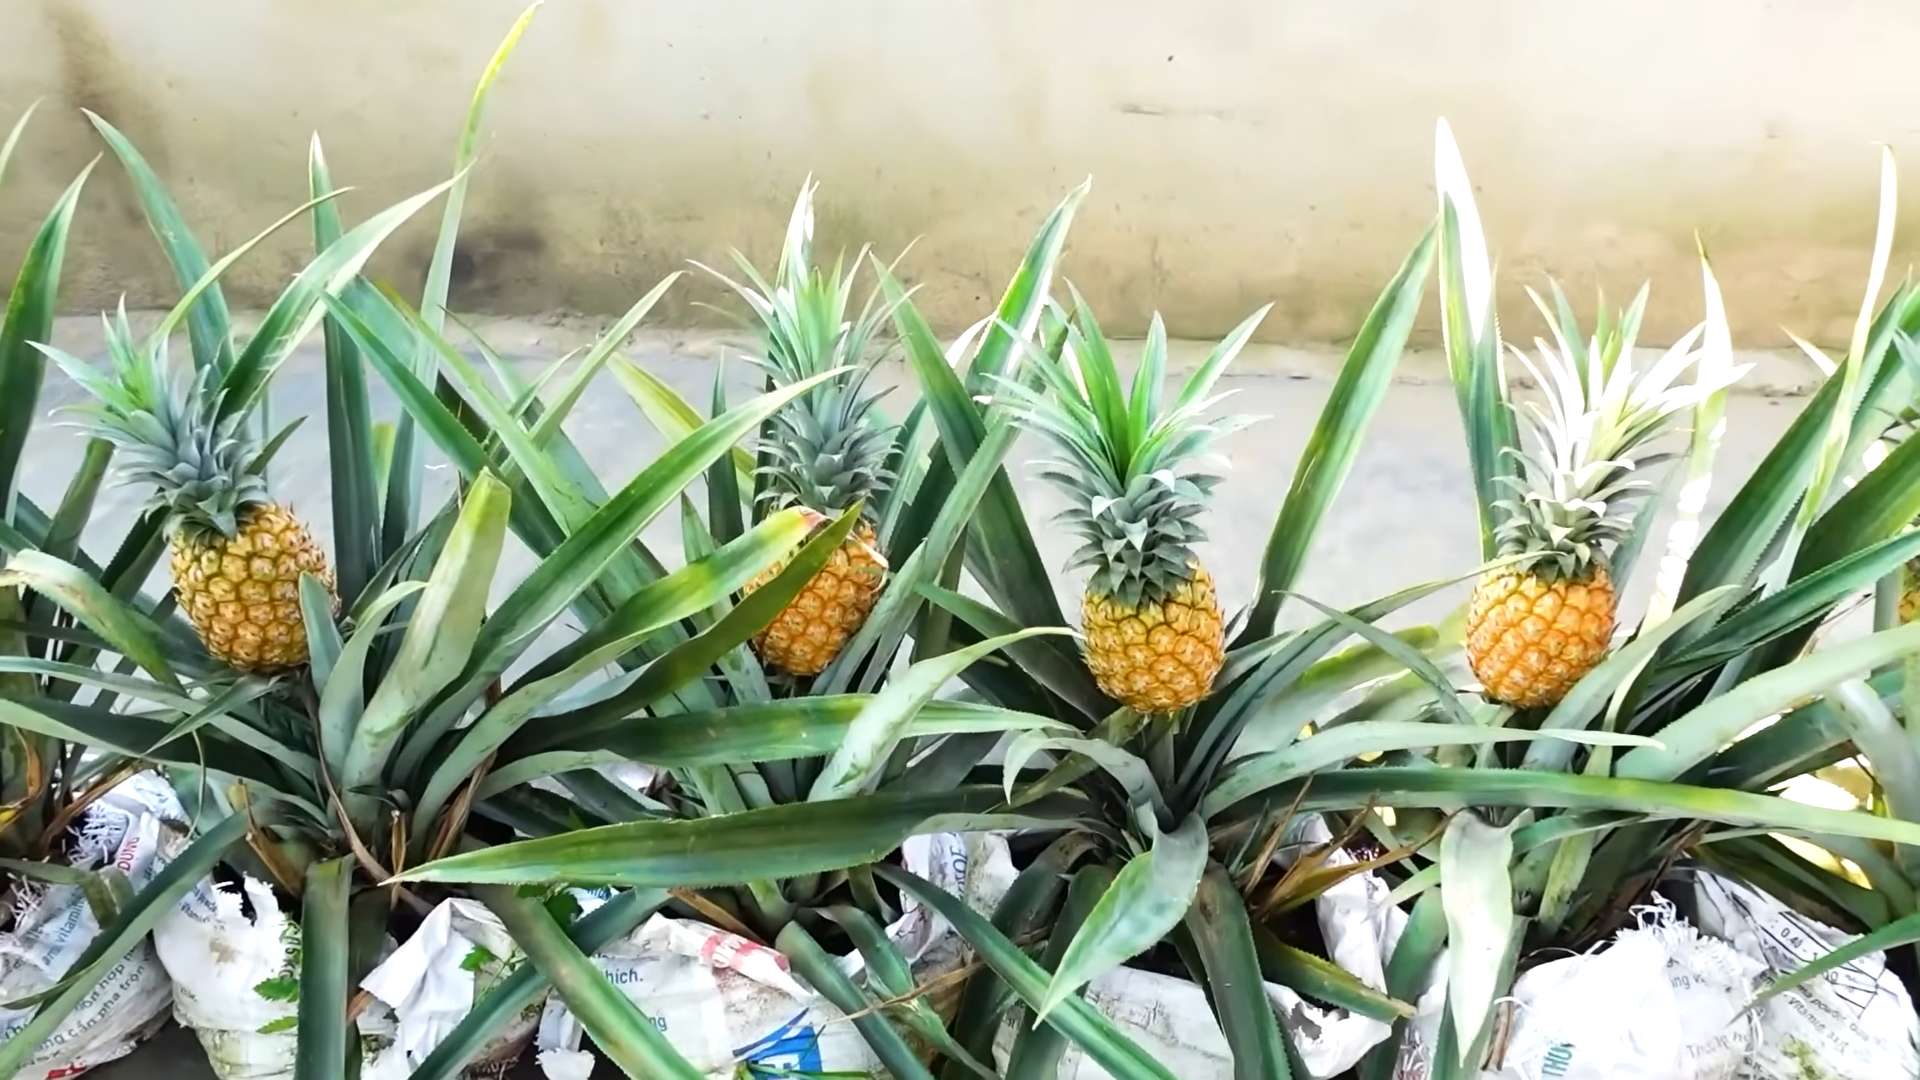
1. Color Change: The pineapple will start to turn from green to golden-yellow as it ripens.
2. Sweet Smell: A ripe pineapple will have a sweet, fragrant smell.
3. Gentle Tug: The pineapple should be slightly soft to the touch and should come off the plant with a gentle tug.
4. Cut it Off: If the pineapple doesn’t come off easily, use a sharp knife to cut it off the plant.
And there you have it! Your very own homegrown pineapple! Enjoy the fruits (literally!) of your labor. It’s a rewarding experience, and I hope this guide helps you grow your own little piece of the tropics right at home. Good luck, and happy growing!
Conclusion
So, there you have it! Growing pineapples at home, while it might seem like a tropical dream reserved for expert gardeners, is surprisingly achievable with a little patience and the right approach. This DIY trick isn’t just about saving money on store-bought fruit; it’s about experiencing the unique satisfaction of nurturing a plant from a simple pineapple top to a thriving, fruit-bearing specimen. It’s about connecting with nature, learning about plant life cycles, and ultimately, enjoying the sweet reward of your own homegrown pineapple.
Why is this a must-try? Because it’s more than just a recipe for growing fruit; it’s a recipe for a rewarding experience. Imagine the pride you’ll feel when you serve a dish featuring a pineapple you cultivated yourself. Think of the conversations it will spark, the knowledge you’ll gain, and the sheer joy of watching something grow under your care. Plus, it’s a fantastic way to reduce food waste by repurposing the pineapple top that would otherwise end up in the compost bin.
Beyond the basic method, there are several variations you can explore to tailor the process to your specific environment and preferences. For instance, if you live in a colder climate, consider growing your pineapple in a large pot that can be easily moved indoors during the winter months. Experiment with different soil mixes to find what works best for your pineapple. Some gardeners swear by a blend of potting soil, perlite, and peat moss, while others prefer a more organic mix with compost and coconut coir. You can also try different fertilizers to boost growth and fruit production. Look for a balanced fertilizer specifically formulated for tropical fruits.
Another fun variation is to try growing different varieties of pineapple. While the smooth Cayenne is the most common type found in grocery stores, there are many other delicious and interesting varieties to discover, such as the Sugarloaf, the Red Spanish, and the Queen Victoria. Each variety has its own unique flavor profile and characteristics, so experimenting with different types can add even more excitement to your pineapple-growing adventure.
Don’t be discouraged if your first attempt doesn’t yield immediate results. Growing pineapples from tops takes time and patience. It can take several months for the top to root and several years for the plant to produce fruit. But the journey is just as rewarding as the destination. Enjoy the process of nurturing your plant, observing its growth, and learning from any challenges you encounter.
We wholeheartedly encourage you to give this DIY trick a try. It’s a fun, educational, and ultimately delicious project that anyone can undertake. And once you’ve successfully grown your own pineapple, we’d love to hear about your experience! Share your photos, tips, and stories with us in the comments below. Let’s create a community of home pineapple growers and inspire others to embark on this rewarding journey. Let’s all learn how to grow pineapples at home together!
Frequently Asked Questions (FAQ)
How long does it take to grow a pineapple from a top?
Patience is key! It typically takes anywhere from 2 to 3 years for a pineapple plant grown from a top to produce fruit. The initial rooting process can take several weeks to a few months. After that, the plant needs time to mature and develop before it’s ready to flower and fruit. Factors like climate, sunlight, and soil conditions can also influence the growth rate.
What kind of soil is best for growing pineapples?
Pineapples thrive in well-draining, slightly acidic soil. A good mix would be equal parts potting soil, perlite (or coarse sand), and peat moss (or coconut coir). This combination provides good drainage, aeration, and moisture retention. Avoid heavy clay soils, as they can lead to root rot. You can also amend your soil with compost to provide additional nutrients.
How much sunlight do pineapples need?
Pineapples need plenty of sunlight to thrive. Aim for at least 6 hours of direct sunlight per day. If you’re growing your pineapple indoors, place it near a sunny window or supplement with a grow light. Insufficient sunlight can result in slow growth and reduced fruit production.
How often should I water my pineapple plant?
Water your pineapple plant regularly, especially during the growing season (spring and summer). Allow the soil to dry out slightly between waterings. Avoid overwatering, as this can lead to root rot. In the winter, reduce watering frequency. A good rule of thumb is to water thoroughly when the top inch of soil feels dry to the touch.
Do I need to fertilize my pineapple plant?
Yes, fertilizing your pineapple plant is important for healthy growth and fruit production. Use a balanced fertilizer specifically formulated for tropical fruits or bromeliads. Apply fertilizer every 2-3 months during the growing season. Follow the instructions on the fertilizer package for proper dosage.
How do I know when my pineapple is ripe?
Several signs indicate that your pineapple is ripe. The fruit will turn from green to yellow or golden-orange. The bottom of the pineapple will have a sweet, fragrant aroma. The “eyes” (the individual segments of the pineapple) will become flatter and more prominent. You can also gently tug on one of the leaves near the top of the pineapple; if it comes off easily, the fruit is likely ripe.
Can I grow a pineapple indoors?
Yes, you can grow a pineapple indoors, especially if you live in a colder climate. Choose a large pot with good drainage and place it in a sunny location. You may need to supplement with a grow light to provide sufficient light. Be sure to rotate the pot regularly to ensure even growth.
What are some common problems when growing pineapples?
Some common problems include root rot (due to overwatering), mealybugs, scale, and nutrient deficiencies. To prevent root rot, ensure your soil is well-draining and avoid overwatering. Inspect your plant regularly for pests and treat them promptly with insecticidal soap or neem oil. If your plant shows signs of nutrient deficiencies (e.g., yellowing leaves), adjust your fertilizing schedule.
How do I encourage my pineapple plant to flower?
Pineapples typically flower when they are mature enough, usually after 1-2 years of growth. However, you can sometimes encourage flowering by exposing the plant to ethylene gas. One method is to place a ripe apple near the plant and cover both with a plastic bag for a few days. The apple releases ethylene gas, which can stimulate flowering.
What do I do after harvesting my pineapple?
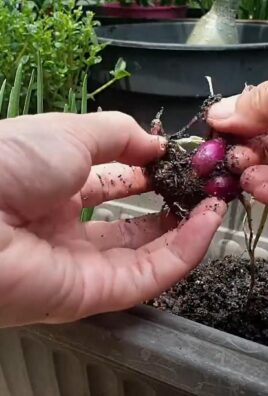
After harvesting your pineapple, the mother plant will eventually die. However, it will often produce “pups” or offshoots around its base. These pups can be separated from the mother plant and replanted to grow new pineapple plants. This allows you to continue the cycle and enjoy a continuous supply of homegrown pineapples.
Leave a Comment