

Grow Your Own Mustard: Imagine stepping into your garden and harvesting fresh, peppery mustard greens for a vibrant salad or grinding your own mustard seeds for a homemade condiment that bursts with flavor. Sounds amazing, right? Well, it’s easier than you think! For centuries, mustard has been more than just a condiment; it’s been a staple in cuisines around the world, from ancient Roman banquets to medieval European kitchens. Its versatility and relatively easy cultivation have made it a beloved plant for both home cooks and seasoned gardeners alike.
But in today’s busy world, who has time for complicated gardening projects? That’s where this DIY guide comes in! I’m going to share some simple, effective tricks and hacks that will help you grow your own mustard, even if you have limited space or experience. Whether you’re looking to add a spicy kick to your meals, save money on groceries, or simply enjoy the satisfaction of growing your own food, this article is packed with practical tips to get you started. Let’s ditch the store-bought stuff and embark on a rewarding journey of homegrown mustard goodness!
Growing Your Own Mustard: From Seed to Spice Rack
Okay, mustard lovers, gather ’round! I’m going to walk you through the surprisingly simple process of growing your own mustard. Yes, you read that right! Forget buying those little jars at the store; we’re taking control of our condiment destiny. It’s easier than you think, and the fresh, peppery flavor of homegrown mustard is absolutely worth the (minimal) effort. Plus, you get bragging rights!
Choosing Your Mustard Variety
Before we get our hands dirty, let’s talk mustard types. There are a few main varieties you can grow, each with its own unique flavor profile:
* Yellow Mustard (Sinapis alba): This is your classic, mild mustard. It’s what you’re probably used to seeing on hot dogs and sandwiches. It’s quick to mature and easy to grow, making it a great choice for beginners.
* Brown Mustard (Brassica juncea): This variety packs a bit more heat. It’s often used in Dijon mustards and Asian cuisines. Brown mustard seeds are also used to make mustard greens, which are delicious sauteed or added to salads.
* Black Mustard (Brassica nigra): This is the most pungent of the mustards. It’s not as commonly grown as the other two because it can be a bit more challenging. However, if you’re looking for a serious kick, black mustard is the way to go.
I personally recommend starting with yellow or brown mustard. They’re both relatively easy to grow and offer a good range of flavors.
What You’ll Need
Here’s a list of everything you’ll need to embark on your mustard-growing adventure:
* Mustard Seeds: Choose your variety! You can find these at most garden centers or online. Make sure you’re buying seeds specifically for growing, not just culinary mustard seeds.
* Potting Soil: A well-draining potting mix is essential. You can also amend your garden soil with compost or other organic matter.
* Containers (Optional): If you’re growing in containers, choose pots that are at least 6 inches deep.
* Garden Trowel: For planting and transplanting.
* Watering Can or Hose: For keeping your mustard plants hydrated.
* Fertilizer (Optional): A balanced fertilizer can help boost growth, but it’s not strictly necessary.
* Cheesecloth or Fine Mesh Bag: For drying your mustard seeds.
* Food Processor or Spice Grinder: For grinding your mustard seeds into powder.
* Vinegar, Water, and Other Spices: For making your own mustard paste.
Planting Your Mustard Seeds
Now for the fun part! Let’s get those seeds in the ground.
1. Prepare the Soil: Whether you’re planting in containers or directly in the ground, make sure your soil is loose and well-draining. Remove any rocks or debris.
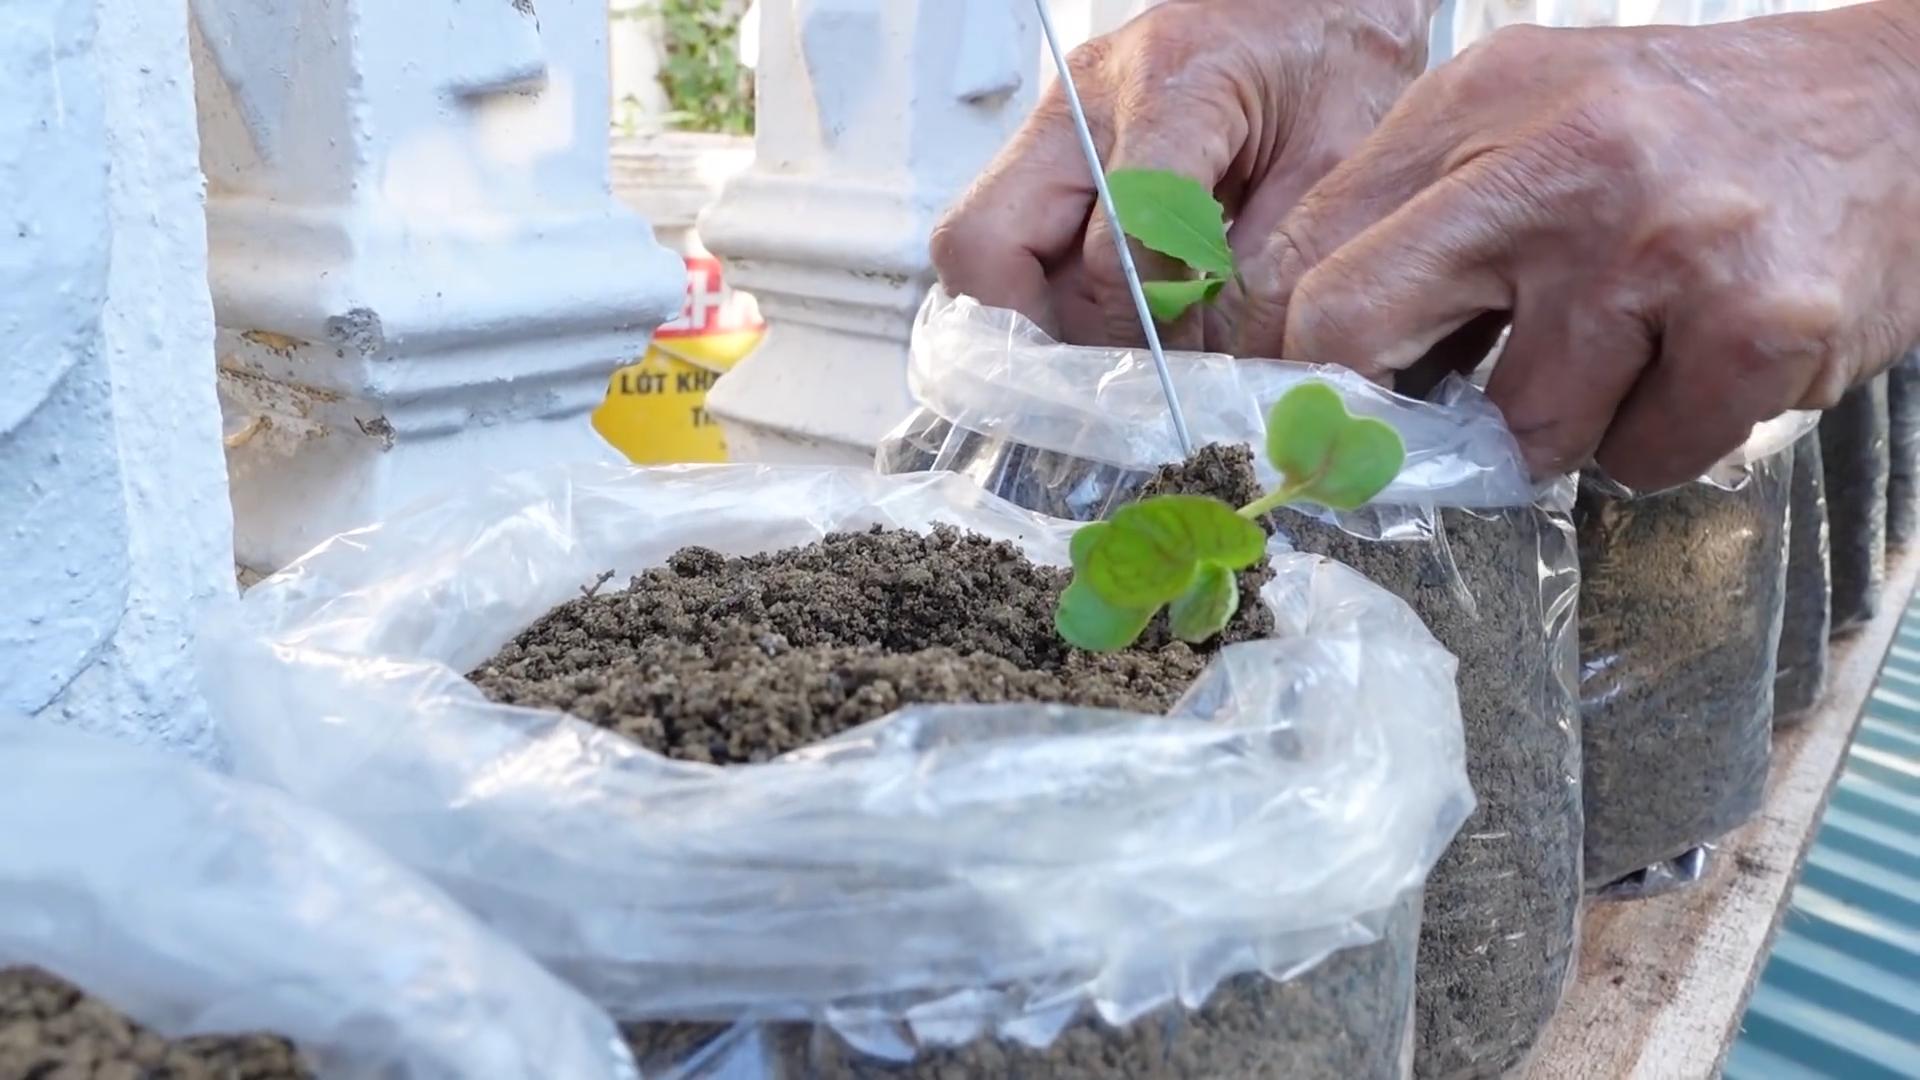
2. Sow the Seeds: Mustard seeds are small, so you don’t need to plant them very deep. Sprinkle the seeds evenly over the surface of the soil and then gently press them in. You can also lightly cover them with a thin layer of soil.
3. Water Gently: Water the soil gently so you don’t dislodge the seeds. Keep the soil consistently moist, but not soggy.
4. Provide Sunlight: Mustard plants need at least 6 hours of sunlight per day. If you’re growing indoors, place your containers near a sunny window or use a grow light.
5. Thin Seedlings (If Necessary): Once your seedlings emerge, you may need to thin them out if they’re too crowded. Aim for about 2-3 inches of space between plants.
Caring for Your Mustard Plants
Mustard plants are relatively low-maintenance, but here are a few tips to keep them happy and healthy:
* Water Regularly: Water your mustard plants whenever the soil feels dry to the touch. Avoid overwatering, as this can lead to root rot.
* Fertilize (Optional): If you want to give your mustard plants a boost, you can fertilize them every few weeks with a balanced fertilizer. Follow the instructions on the fertilizer package.
* Weed Regularly: Keep your garden bed or containers free of weeds, as they can compete with your mustard plants for nutrients and water.
* Watch for Pests: Mustard plants can be susceptible to pests like aphids and flea beetles. Inspect your plants regularly and take action if you see any signs of infestation. Insecticidal soap or neem oil can be effective treatments.
* Consider Succession Planting: To ensure a continuous supply of mustard seeds, consider planting new seeds every few weeks.
Harvesting Your Mustard Seeds
This is where the magic happens! Harvesting your own mustard seeds is incredibly rewarding.
1. Wait for Maturity: Mustard plants typically mature in about 80-90 days. You’ll know they’re ready to harvest when the seed pods turn yellow or brown and start to dry out.
2. Cut the Seed Pods: Use scissors or pruning shears to cut the seed pods from the plant.
3. Dry the Seed Pods: Place the seed pods in a cheesecloth bag or a fine mesh bag and hang them in a warm, dry place for a few weeks. This will allow the seeds to dry completely.
4. Thresh the Seeds: Once the seed pods are dry, you can thresh them to release the seeds. This can be done by gently rubbing the seed pods between your hands or by placing them in a pillowcase and stomping on them.
5. Separate the Seeds: Separate the seeds from the chaff (the dried plant material). You can do this by winnowing the seeds in a light breeze or by using a fine-mesh sieve.
6. Store the Seeds: Store your mustard seeds in an airtight container in a cool, dry place. They should last for several years.
Making Your Own Mustard Paste
Now for the grand finale! Let’s turn those seeds into delicious mustard paste.
1. Grind the Seeds: Use a food processor or spice grinder to grind your mustard seeds into a fine powder.
2. Combine Ingredients: In a bowl, combine the mustard powder with vinegar, water, and any other spices you like. The ratio of vinegar to water will affect the flavor and consistency of your mustard. Experiment to find what you like best! I usually start with a 1:1 ratio.
3. Let it Sit: This is important! Let the mixture sit for at least 15 minutes, or even longer. This allows the flavors to meld and the mustard to develop its characteristic pungency.
4. Adjust Consistency: If your mustard is too thick, add more water. If it’s too thin, add more mustard powder.
5. Taste and Adjust Seasoning: Taste your mustard and adjust the seasoning as needed. You can add salt, pepper, garlic powder, onion powder, turmeric (for color), or any other spices you like.
6. Store in the Refrigerator: Store your homemade mustard in an airtight container in the refrigerator. It will keep for several weeks.
Recipe Ideas and Flavor Variations
The possibilities are endless when it comes to making your own mustard! Here are a few ideas to get you started:
* Honey Mustard: Add honey to your mustard paste for a sweet and tangy flavor.
* Dijon Mustard: Use brown mustard seeds and white wine vinegar for a classic Dijon flavor.
* Spicy Mustard: Add chili powder, cayenne pepper, or hot sauce to your mustard paste for a fiery kick.
* Garlic Mustard: Add minced garlic or garlic powder to your mustard paste for a savory flavor.
* Herb Mustard: Add fresh or dried herbs like thyme, rosemary, or dill to your mustard paste for a fragrant flavor.
Troubleshooting
Even with the best intentions, things don’t always go according to plan. Here are a few common problems you might encounter and how to fix them:
* Seeds Not Germinating: Make sure your soil is moist and that the seeds are getting enough sunlight. You may also need to scarify the seeds (gently scratch the surface) to help them germinate.
* Plants Turning Yellow: This could be a sign of overwatering or nutrient deficiency. Make sure your soil is well-draining and consider fertilizing your plants.
* Pests Infestation: Inspect your plants regularly and take action if you see any signs of pests. Insecticidal soap or neem oil can be effective treatments.
* Mustard Too Bitter: This can happen if you use too much mustard powder or if you don’t let the mixture sit long enough. Try adding a little honey or sugar to balance the bitterness.
* Mustard Too Mild: Use brown or black mustard seeds for a more pungent flavor. You can also add a pinch of cayenne pepper or hot sauce.
Enjoy
Conclusion
So, there you have it! Growing your own mustard isn’t just a fun gardening project; it’s a gateway to a world of flavor and culinary creativity. From the vibrant greens to the potent seeds, every part of the mustard plant offers something unique to elevate your dishes. Why settle for store-bought when you can cultivate your own supply of fresh, flavorful mustard, tailored precisely to your taste?
This DIY trick is a must-try for several compelling reasons. First and foremost, it puts you in complete control of the ingredients. You know exactly what’s going into your mustard, free from artificial additives, preservatives, and excessive sodium often found in commercial varieties. This is especially important for those with dietary restrictions or a preference for natural, wholesome foods. Secondly, growing your own mustard is incredibly cost-effective. A small packet of seeds yields a surprisingly large harvest, providing you with a continuous supply of mustard greens and seeds for months to come. Think of all the money you’ll save on those little jars of gourmet mustard!
But perhaps the most compelling reason to embark on this mustard-growing adventure is the sheer versatility it unlocks in your kitchen. Imagine the possibilities! You can experiment with different varieties of mustard seeds, each offering a distinct flavor profile. Yellow mustard seeds provide a mild, classic flavor, while brown mustard seeds deliver a spicier, more pungent kick. Black mustard seeds are the most intense, adding a fiery heat to your creations.
Beyond the seeds, don’t forget about the mustard greens! These peppery leaves are delicious in salads, stir-fries, and soups. They can even be used as a flavorful addition to sandwiches and wraps. For a milder flavor, harvest the greens when they are young and tender. For a more intense mustardy bite, wait until they mature.
Ready to take your mustard game to the next level? Consider these variations:
* **Honey Mustard:** Infuse your homemade mustard with a touch of sweetness by adding a tablespoon or two of honey to the grinding process.
* **Spicy Mustard:** Kick up the heat by incorporating a pinch of cayenne pepper or a few finely chopped chili peppers.
* **Garlic Mustard:** Add a clove or two of minced garlic for a savory, aromatic twist.
* **Herb Mustard:** Experiment with different herbs like dill, tarragon, or rosemary to create unique flavor combinations.
* **Beer Mustard:** Substitute some of the water or vinegar with your favorite beer for a malty, complex flavor.
Growing your own mustard is a rewarding experience that connects you to the food you eat and empowers you to create truly unique and flavorful dishes. It’s a simple, sustainable, and delicious way to elevate your culinary creations. So, grab a packet of seeds, get your hands dirty, and prepare to be amazed by the incredible flavor of homegrown mustard.
We encourage you to try this DIY trick and share your experience with us! Let us know what varieties you grow, what flavor combinations you create, and what dishes you use your homemade mustard in. Share your photos and recipes on social media using #HomegrownMustard and inspire others to join the mustard-growing movement! We can’t wait to see what you create!
Frequently Asked Questions (FAQ)
What kind of mustard seeds should I grow?
The best type of mustard seeds to grow depends on your personal preference. Yellow mustard seeds are the mildest and most common, perfect for classic yellow mustard. Brown mustard seeds offer a spicier, more pungent flavor, ideal for Dijon-style mustard. Black mustard seeds are the hottest and most intense, best used sparingly. You can even grow a mix of different types for a more complex flavor profile. Consider your climate as well, as some varieties may be better suited to certain growing conditions. Experiment and see which ones you like best!
How long does it take to grow mustard from seed?
Mustard is a fast-growing plant. Mustard greens can be harvested in as little as 3-4 weeks after planting. For mustard seeds, you’ll need to wait until the plants flower and the seed pods mature, which typically takes around 80-90 days. The seed pods will turn brown and dry when they are ready to harvest.
What are the best growing conditions for mustard?
Mustard prefers full sun but can tolerate partial shade. It thrives in well-drained soil that is rich in organic matter. The ideal soil pH is between 6.0 and 7.5. Mustard is a cool-season crop, so it’s best to plant it in early spring or late summer/early fall. Avoid planting during the hottest months of the year, as high temperatures can cause the plants to bolt (go to seed prematurely).
How do I harvest mustard greens?
You can harvest mustard greens at any stage of growth, depending on your preference. For tender, mild-flavored greens, harvest them when they are young and small. For a more intense mustardy bite, wait until they mature. Simply cut the leaves off at the base of the plant, leaving the central stem intact so it can continue to produce more leaves.
How do I harvest mustard seeds?
Once the seed pods have turned brown and dry, cut the entire plant at the base and hang it upside down in a paper bag in a cool, dry place. As the pods dry further, they will shatter and release the seeds into the bag. Once all the seeds have been collected, remove any remaining plant debris and store the seeds in an airtight container in a cool, dark place.
How do I make mustard from the seeds I’ve harvested?
To make mustard from your homegrown seeds, you’ll need to grind them into a powder. You can use a spice grinder, a coffee grinder (dedicated to spices), or a mortar and pestle. Once you have your mustard powder, combine it with water, vinegar, and any other desired seasonings (salt, honey, herbs, etc.). Let the mixture sit for at least 15 minutes to allow the flavors to meld. Adjust the consistency by adding more water or vinegar as needed. Store your homemade mustard in an airtight container in the refrigerator.
Can I grow mustard indoors?
Yes, you can grow mustard indoors, especially for the greens. Choose a sunny location or use grow lights. Use a well-draining potting mix and keep the soil consistently moist. You may not get as large a harvest as you would outdoors, but you can still enjoy fresh mustard greens year-round.
Are there any pests or diseases that affect mustard plants?
Mustard plants are generally quite hardy, but they can be susceptible to certain pests and diseases. Common pests include aphids, flea beetles, and cabbage worms. Diseases include downy mildew and white rust. To prevent problems, practice good garden hygiene, such as removing weeds and debris, and rotate your crops regularly. If you encounter pests or diseases, treat them promptly with organic pest control methods or fungicides.
Can I eat the flowers of the mustard plant?
Yes, the flowers of the mustard plant are edible and have a mild mustardy flavor. They can be used as a garnish in salads or added to stir-fries.
Is growing my own mustard worth the effort?
Absolutely! Growing your own mustard is a rewarding experience that allows you to control the ingredients, save money, and create unique and flavorful dishes. It’s a simple and sustainable way to add a touch of homegrown goodness to your kitchen. Plus, it’s a fun and educational project for the whole family. Give it a try and see for yourself!
Leave a Comment