

Growing Blueberries from Seed might sound like a daunting task reserved for seasoned horticulturalists, but trust me, with a little patience and these DIY tricks, you can cultivate your own blueberry patch from the tiniest of beginnings! Forget those expensive nursery plants – we’re diving into the rewarding world of starting from scratch.
Blueberries, native to North America, have been cherished for centuries, not just for their delicious flavor but also for their incredible health benefits. Indigenous peoples have long recognized the power of these little blue gems, using them for food, medicine, and even dyes. Now, you can connect with that history by nurturing your own blueberry plants from seed.
Why bother with the DIY route? Well, for starters, it’s incredibly cost-effective! Buying mature blueberry bushes can be a significant investment. But more importantly, growing blueberries from seed allows you to select specific varieties and experience the unique satisfaction of watching life unfold from the very beginning. Plus, you’ll learn so much about the plant’s life cycle along the way. This DIY trick is perfect for anyone looking to save money, expand their gardening knowledge, and enjoy the freshest, most rewarding blueberries imaginable. Let’s get started!
Growing Blueberries from Seed: A Comprehensive DIY Guide
Okay, so you want to grow blueberries from seed? Awesome! It’s a bit of a journey, definitely not as quick as buying a mature plant, but incredibly rewarding. I’ve done it, and trust me, the satisfaction of eating blueberries you grew from tiny seeds is unmatched. This guide will walk you through every step, from seed extraction to transplanting. Get ready to get your hands dirty!
Phase 1: Seed Extraction and Preparation
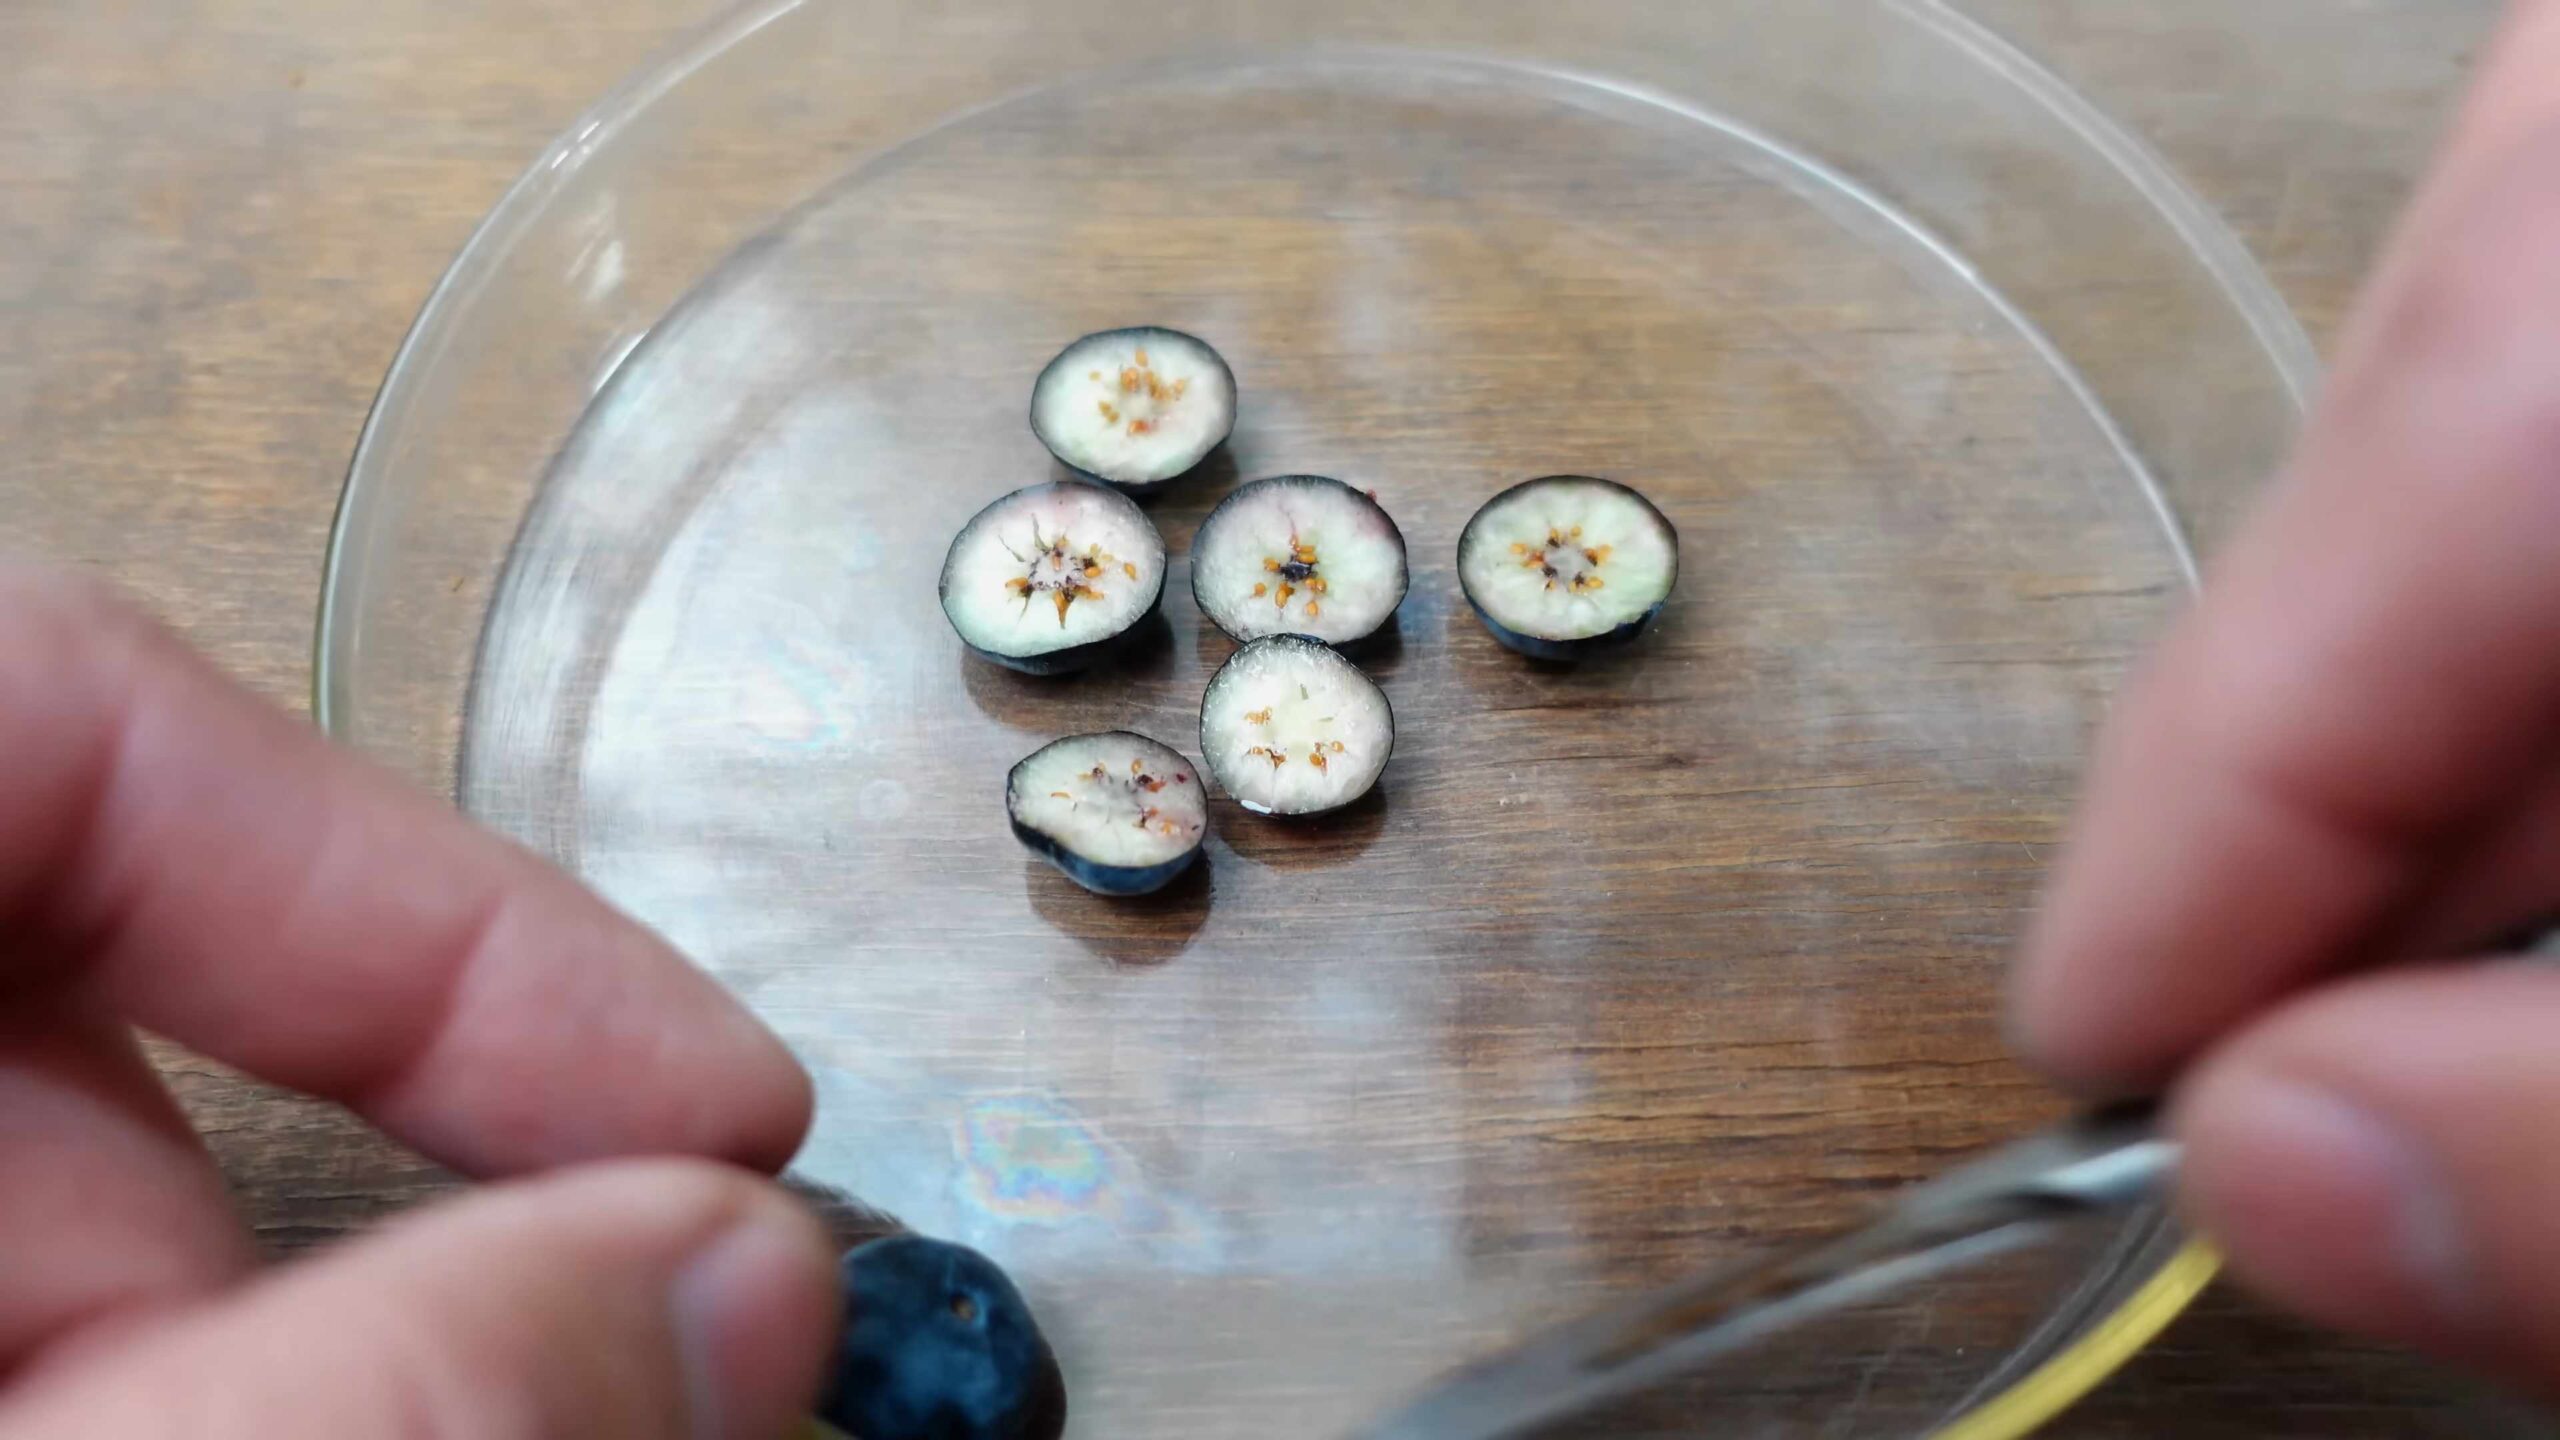
This is where the magic begins! Getting those tiny seeds out of the berries is a delicate process, but don’t worry, I’ll show you how.
What You’ll Need:
* Ripe blueberries (organic is best to avoid treated seeds)
* A blender or food processor (optional, but makes things easier)
* A fine-mesh sieve or cheesecloth
* A bowl or container
* Distilled water
* Paper towels
* A well-ventilated area
Step-by-Step Instructions:
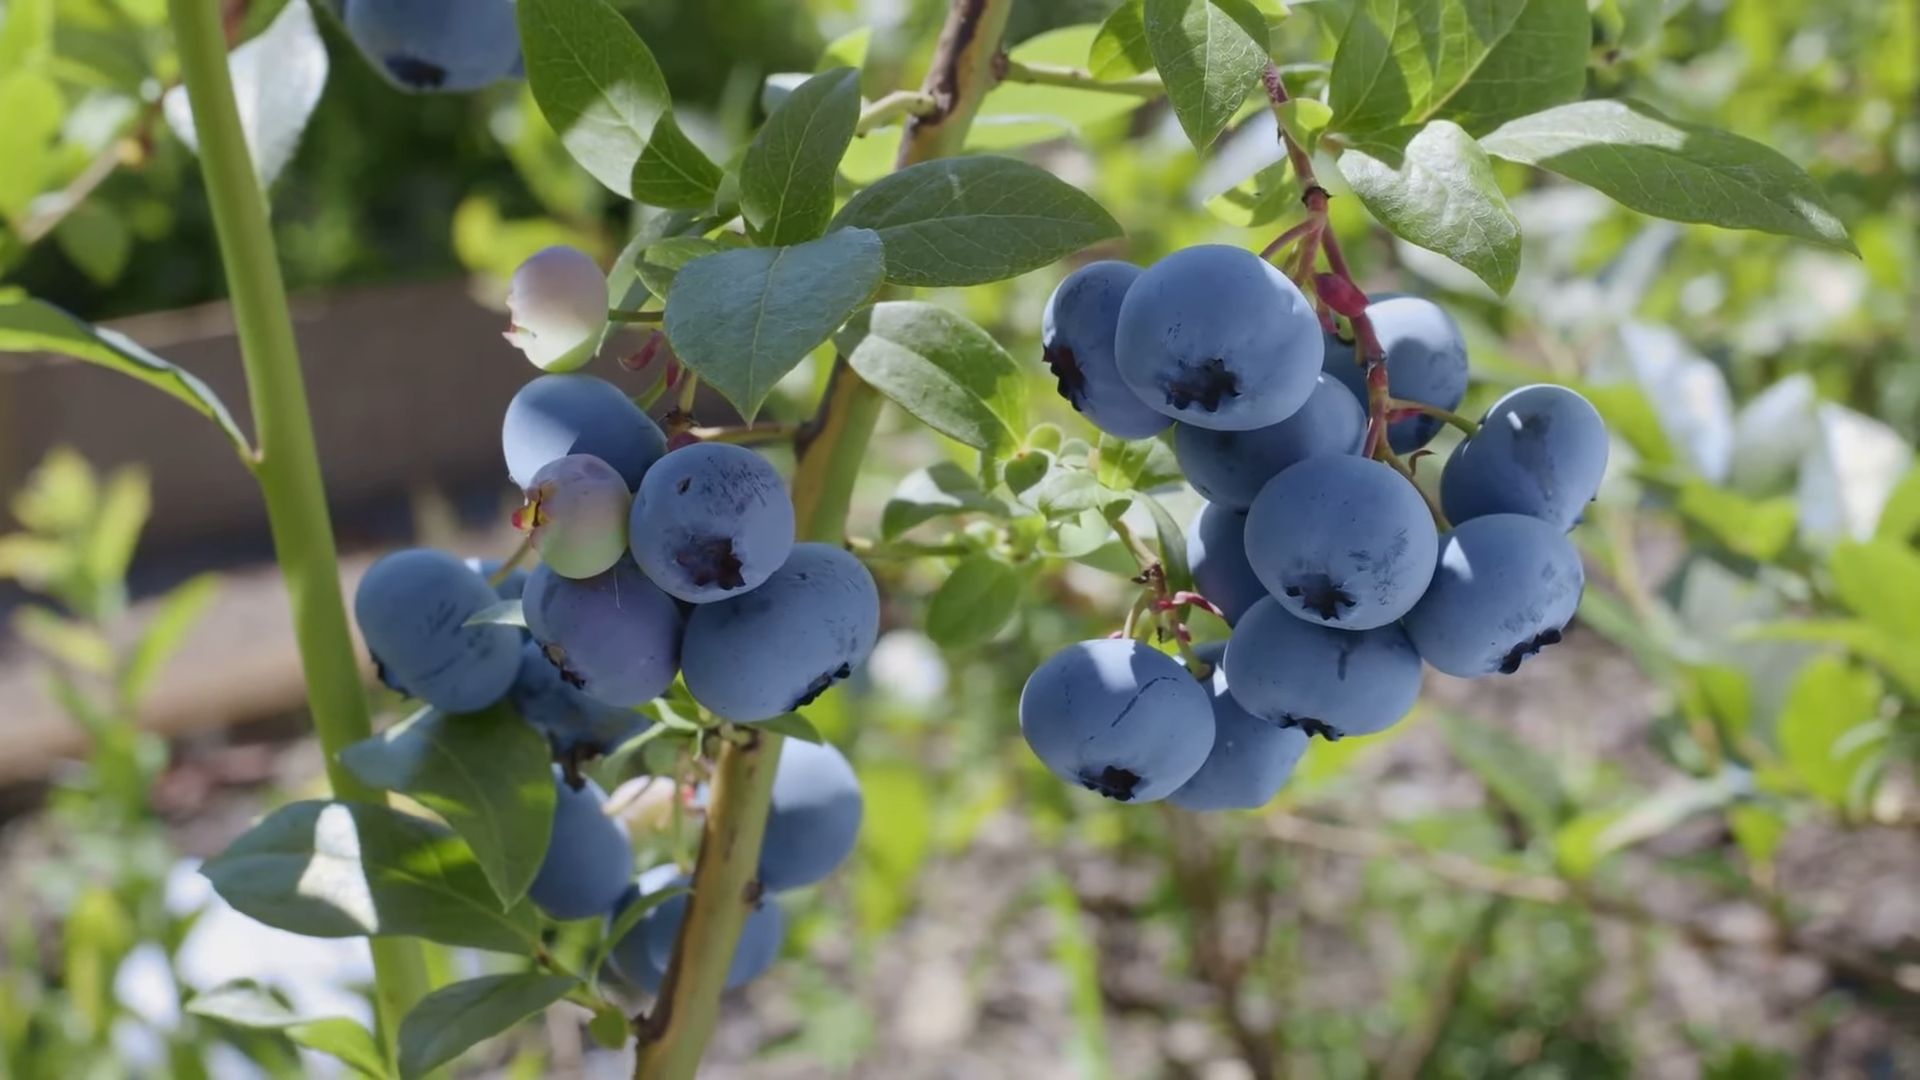
1. Choose Your Berries: Select the plumpest, ripest blueberries you can find. Organic is preferable because you want to avoid any seeds that might have been treated with chemicals. The healthier the berries, the better the chance of viable seeds.
2. Blend (Optional): If you’re using a blender or food processor, add the blueberries and a small amount of distilled water. Pulse a few times until the berries are broken down into a pulp. Be careful not to over-blend; you don’t want to destroy the seeds! If you don’t have a blender, you can simply mash the berries by hand in a bowl.
3. Separate the Seeds: Pour the blueberry pulp into your fine-mesh sieve or cheesecloth-lined bowl. Rinse the pulp thoroughly with distilled water, gently rubbing and squeezing to separate the seeds from the pulp. This might take a few minutes, but be patient. You want to remove as much of the pulp as possible.
4. Clean the Seeds: Continue rinsing the seeds until the water runs clear. This is crucial to prevent mold growth later on. Any remaining pulp can harbor fungi that will kill your tiny seedlings.
5. Dry the Seeds: Spread the cleaned seeds thinly on a paper towel in a well-ventilated area. Make sure the seeds are not clumped together. Allow them to air dry completely, which can take several days. Turning them occasionally will help them dry evenly. Completely dry seeds are essential for proper stratification.
6. Store the Seeds (Optional): If you’re not planning to stratify immediately, store the dried seeds in an airtight container in the refrigerator. This will help preserve their viability.
Phase 2: Cold Stratification
Blueberry seeds need a period of cold stratification to break their dormancy. This mimics the natural winter conditions they would experience in the wild.
What You’ll Need:
* Dried blueberry seeds
* A small airtight container or zip-lock bag
* Moistened peat moss or vermiculite
* Refrigerator
Step-by-Step Instructions:
1. Prepare the Stratification Medium: Moisten the peat moss or vermiculite with distilled water. It should be damp but not soggy. You want it to hold its shape when squeezed, but not drip water.
2. Mix Seeds and Medium: Place the dried blueberry seeds in the airtight container or zip-lock bag. Add the moistened peat moss or vermiculite and gently mix to ensure the seeds are evenly distributed.
3. Refrigerate: Seal the container or bag and place it in the refrigerator. The ideal temperature is between 33°F and 41°F (0.5°C and 5°C).
4. Stratification Period: The seeds need to be stratified for at least 90 days, but 120 days is even better. I usually aim for 120 days to maximize germination rates.
5. Check Moisture Levels: Periodically check the moisture level of the peat moss or vermiculite. If it starts to dry out, lightly mist it with distilled water.
Phase 3: Sowing the Seeds
After stratification, it’s time to sow the seeds! This is where you’ll start to see those tiny sprouts emerge.
What You’ll Need:
* Stratified blueberry seeds
* Seed starting trays or small pots
* Acidic seed starting mix (specifically formulated for blueberries or azaleas)
* Spray bottle
* Humidity dome or plastic wrap
* Warm, bright location (grow lights are ideal)
Step-by-Step Instructions:
1. Prepare the Seed Starting Mix: Fill your seed starting trays or small pots with the acidic seed starting mix. Gently tamp down the soil to create a firm surface.
2. Sow the Seeds: Sprinkle the stratified blueberry seeds evenly over the surface of the soil. They are very small, so don’t bury them too deeply. A light dusting of soil is sufficient.
3. Water Gently: Use a spray bottle to gently mist the soil surface. Avoid overwatering, as this can lead to damping-off, a fungal disease that can kill seedlings.
4. Create a Humid Environment: Cover the seed starting trays or pots with a humidity dome or plastic wrap to create a humid environment. This will help the seeds germinate.
5. Provide Warmth and Light: Place the trays or pots in a warm, bright location. Grow lights are ideal, as they provide consistent and even light. If using natural light, choose a south-facing window.
6. Monitor Germination: Germination can take several weeks, so be patient. Keep the soil consistently moist but not soggy. Remove the humidity dome or plastic wrap for a few hours each day to allow for air circulation and prevent mold growth.
Phase 4: Seedling Care
Once your seedlings emerge, they’ll need careful attention to thrive.
What You’ll Need:
* Blueberry seedlings
* Acidic seed starting mix
* Small pots (larger than the seed starting trays)
* Grow lights or bright, indirect sunlight
* Acidic fertilizer (specifically formulated for blueberries)
* Spray bottle or watering can
Step-by-Step Instructions:
1. Thin the Seedlings: Once the seedlings have developed a few true leaves, thin them out, leaving only the strongest seedlings in each cell or pot. This will give them more room to grow.
2. Transplant the Seedlings: When the seedlings are large enough to handle (usually a few inches tall), transplant them into individual small pots filled with acidic seed starting mix. Be very gentle when handling the delicate roots.
3. Provide Adequate Light: Continue to provide the seedlings with plenty of light, either from grow lights or bright, indirect sunlight.
4. Water Regularly: Water the seedlings regularly, keeping the soil consistently moist but not soggy. Use distilled water or rainwater if possible, as tap water can be too alkaline.
5. Fertilize Sparingly: Begin fertilizing the seedlings with a diluted acidic fertilizer every few weeks. Follow the instructions on the fertilizer label carefully. Over-fertilizing can damage the seedlings.
6. Monitor for Pests and Diseases: Keep an eye out for pests and diseases. If you notice any problems, address them promptly.
Phase 5: Hardening Off and Transplanting Outdoors
Before transplanting your blueberry seedlings outdoors, you’ll need to harden them off to acclimate them to the outdoor environment.
What You’ll Need:
* Blueberry seedlings
* Outdoor location with acidic soil
* Acidic soil amendments (peat moss, sulfur)
* Mulch (pine needles, wood chips)
* Watering can
Step-by-Step Instructions:
1. Begin Hardening Off: Gradually acclimate the seedlings to outdoor conditions by placing them outside for a few hours each day, starting with a shady location. Gradually increase the amount of time they spend outdoors and the amount of sunlight they receive.
2. Prepare the Planting Site: Choose a location with acidic soil and good drainage. Blueberries thrive in soil with a pH between 4.5 and 5.5. Amend the soil with peat moss and sulfur to lower the pH if necessary.
3. Transplant Outdoors: Once the seedlings have been hardened off, transplant them into the prepared planting site. Space the plants according to the mature size of the blueberry variety you are growing.
4. Water Thoroughly: Water the newly transplanted seedlings thoroughly.
5. Mulch: Apply a layer of mulch around the base of the plants to help retain moisture, suppress weeds, and regulate soil temperature. Pine needles and wood chips are excellent choices for blueberries.
6. Ongoing Care: Continue to water the plants regularly, especially during dry periods. Fertilize them with an acidic fertilizer in the spring. Prune them annually to promote healthy growth and fruit production.
Growing blueberries from seed takes time
Conclusion
Embarking on the journey of growing blueberries from seed might seem daunting, but the rewards – a thriving blueberry bush grown with your own hands, bursting with delicious, homegrown fruit – are well worth the effort. This DIY trick isn’t just about saving money; it’s about connecting with nature, understanding the life cycle of a plant, and experiencing the profound satisfaction of nurturing something from its very beginning. It’s a testament to patience and dedication, and the sweet, tangy taste of those first blueberries will be all the sweeter knowing you cultivated them from tiny seeds.
This method offers a unique level of control over your blueberry cultivation. You can select specific blueberry varieties known for their disease resistance, flavor profiles, or adaptability to your local climate. This allows you to tailor your blueberry patch to your exact preferences and environmental conditions, something you can’t always guarantee when purchasing established plants.
Beyond the basic method outlined, there are numerous variations you can explore. Experiment with different soil mixtures to find what works best in your area. Try using rainwater or distilled water for optimal seed germination. Consider starting your seeds indoors during the colder months to give them a head start. You can even try grafting your seedling onto a more established rootstock for faster fruit production, although this requires more advanced gardening skills.
Remember, success in growing blueberries from seed hinges on patience and consistent care. Don’t be discouraged if your first attempt doesn’t yield immediate results. Observe your seedlings closely, adjust your watering and lighting as needed, and learn from any challenges you encounter. Each attempt will bring you closer to mastering the art of blueberry propagation.
So, are you ready to take on the challenge and experience the joy of growing your own blueberries from seed? We encourage you to give this DIY trick a try. It’s a rewarding and educational experience that will connect you with nature and provide you with a bountiful harvest for years to come. Don’t forget to document your journey and share your experiences with us! We’d love to hear about your successes, challenges, and any tips you discover along the way. Share your photos and stories in the comments below, and let’s build a community of blueberry-growing enthusiasts! Let’s all learn together how to master the art of **growing blueberries from seed**.
Frequently Asked Questions (FAQ)
1. What are the best blueberry varieties to grow from seed?
While you can technically grow any blueberry variety from seed, some are more reliable and produce better results. Look for varieties known for their strong germination rates and adaptability to your climate. Some popular choices include:
* **Highbush Blueberries (Vaccinium corymbosum):** These are the most common type of blueberry and are well-suited for cooler climates. Popular highbush varieties include ‘Bluecrop,’ ‘Duke,’ and ‘Elliott.’
* **Southern Highbush Blueberries:** These are hybrids of highbush and rabbiteye blueberries and are better suited for warmer climates.
* **Rabbiteye Blueberries (Vaccinium virgatum):** These are very heat-tolerant and are a good choice for the Southern United States. Popular rabbiteye varieties include ‘Tifblue,’ ‘Brightwell,’ and ‘Powderblue.’
* **Lowbush Blueberries (Vaccinium angustifolium):** These are native to North America and are very cold-hardy. They produce smaller berries but are very flavorful.
Research which varieties are best suited for your specific region and growing conditions before selecting your seeds.
2. How long does it take to grow blueberries from seed to fruit production?
Growing blueberries from seed is a long-term commitment. It typically takes 3-5 years for a blueberry plant grown from seed to produce a significant crop of fruit. This is because the plant needs time to develop a strong root system and mature enough to flower and fruit. Be patient and provide consistent care, and you will eventually be rewarded with a bountiful harvest.
3. What type of soil is best for growing blueberries from seed?
Blueberries require acidic soil with a pH between 4.5 and 5.5. They also need well-draining soil that is rich in organic matter. You can amend your soil with peat moss, composted pine bark, or sulfur to lower the pH and improve drainage. A good starting mix for seedlings is a combination of peat moss, perlite, and vermiculite. You can also purchase commercially available blueberry potting mix.
4. How often should I water my blueberry seedlings?
Blueberry seedlings need consistent moisture, but they don’t like to be waterlogged. Water them regularly, especially during dry periods, but allow the soil to dry out slightly between waterings. Check the soil moisture by sticking your finger into the soil. If the top inch feels dry, it’s time to water. Avoid overwatering, as this can lead to root rot.
5. What kind of light do blueberry seedlings need?
Blueberry seedlings need plenty of sunlight to thrive. Aim for at least 6-8 hours of direct sunlight per day. If you are starting your seeds indoors, use grow lights to provide adequate light. Position the grow lights close to the seedlings and adjust the height as they grow.
6. How do I fertilize my blueberry seedlings?
Blueberry seedlings need regular fertilization to provide them with the nutrients they need to grow. Use a fertilizer specifically formulated for acid-loving plants, such as azaleas or rhododendrons. Follow the instructions on the fertilizer label carefully. Avoid over-fertilizing, as this can damage the seedlings.
7. How do I protect my blueberry seedlings from pests and diseases?
Blueberry seedlings are susceptible to various pests and diseases. Monitor your seedlings regularly for signs of problems. Common pests include aphids, spider mites, and blueberry maggots. Common diseases include powdery mildew, leaf spot, and root rot. Use organic pest control methods, such as insecticidal soap or neem oil, to control pests. Ensure good air circulation and avoid overwatering to prevent diseases.
8. Can I grow blueberries in containers?
Yes, blueberries can be successfully grown in containers. Choose a large container with good drainage holes. Use a potting mix specifically formulated for acid-loving plants. Water and fertilize regularly, and protect the container from extreme temperatures. Container-grown blueberries may need to be repotted every few years as they grow.
9. What is the best time of year to plant blueberry seeds?
The best time to plant blueberry seeds is in the fall or early winter. This allows the seeds to undergo stratification, a period of cold dormancy that is necessary for germination. You can also stratify the seeds artificially by placing them in the refrigerator for several weeks before planting.
10. Where can I find blueberry seeds?
You can purchase blueberry seeds from reputable seed companies or online retailers. You can also collect seeds from ripe blueberries, but be aware that the resulting plants may not be true to type. If you collect your own seeds, be sure to clean them thoroughly and stratify them before planting. Remember that **growing blueberries from seed** requires patience and dedication, but the rewards are well worth the effort.

Leave a Comment