

Growing cabbage at home might seem daunting, conjuring images of sprawling farms rather than cozy backyards. But trust me, you don’t need acres of land to enjoy the satisfaction of harvesting your own crisp, delicious cabbage! For centuries, cabbage has been a staple in diets across the globe, from the hearty stews of Eastern Europe to the vibrant slaws of Asia. Its resilience and nutritional value have made it a beloved crop for generations.
Have you ever dreamt of serving a salad made entirely from ingredients you nurtured yourself? Or perhaps you’re tired of the bland, mass-produced vegetables at the grocery store? That’s where this DIY guide comes in! We’re about to unlock the secrets to successfully growing cabbage at home, even if you’re a complete beginner.
This isn’t just about saving money (though that’s a definite perk!). It’s about connecting with nature, understanding where your food comes from, and enjoying the unparalleled flavor of freshly harvested cabbage. Plus, we’ll share some clever DIY tricks and hacks to overcome common challenges, ensuring a bountiful harvest. So, grab your gardening gloves, and let’s get started on this exciting journey!
Growing Cabbage at Home: A Beginner’s Guide
Hey there, fellow garden enthusiasts! Ever dreamt of harvesting your own crisp, delicious cabbage right from your backyard? Well, dream no more! Growing cabbage at home is totally achievable, even if you’re a complete newbie. I’m going to walk you through everything you need to know, from choosing the right variety to battling those pesky cabbage worms. Let’s get our hands dirty!
Choosing Your Cabbage Variety
First things first, let’s talk cabbage types. There’s a whole world beyond the standard green cabbage you see in the grocery store! Consider these factors when making your choice:
* Growing Season: Cabbages are generally categorized as early, mid-season, or late-season varieties. Early varieties mature quickly (around 60-70 days), making them ideal for shorter growing seasons. Mid-season varieties take a bit longer (70-85 days), and late-season varieties need the most time (85+ days). Choose a variety that fits your climate and the length of your growing season.
* Head Size and Shape: Cabbage heads come in various sizes and shapes, from small, round heads to large, flattened ones. Think about how much cabbage you typically use and choose a size that suits your needs.
* Color: While green cabbage is the most common, you can also find red, purple, and even savoy (crinkled leaf) varieties. These add a pop of color to your garden and offer slightly different flavors.
* Disease Resistance: Some varieties are more resistant to common cabbage diseases like clubroot or black rot. If you’ve had problems with these diseases in the past, opt for a resistant variety.
Some popular and reliable cabbage varieties include:
* Early Jersey Wakefield: An early variety with small, pointed heads. Great for small gardens.
* Golden Acre: Another early variety with round, compact heads.
* Copenhagen Market: A mid-season variety with medium-sized, round heads.
* Red Acre: A beautiful red cabbage with a slightly peppery flavor.
* Savoy Ace: A savoy cabbage with crinkled leaves and a mild flavor.
Preparing Your Garden Bed
Cabbage needs a sunny spot and well-drained soil to thrive. Here’s how to get your garden bed ready:
* Sunlight: Cabbage needs at least 6 hours of direct sunlight per day. Choose a location in your garden that gets plenty of sun.
* Soil: Cabbage prefers fertile, well-drained soil with a pH between 6.0 and 7.0. If your soil is heavy clay or sandy, amend it with compost or other organic matter to improve drainage and fertility.
* Fertilizer: Cabbage is a heavy feeder, so it needs plenty of nutrients. Before planting, work a balanced fertilizer (like 10-10-10) into the soil according to the package directions. You can also use compost or well-rotted manure as a natural fertilizer.
* Weed Control: Remove any weeds from the planting area. Weeds compete with cabbage for nutrients and water, so it’s important to keep them under control.
Starting Cabbage Seeds Indoors (Optional)
Starting cabbage seeds indoors gives you a head start on the growing season, especially if you live in a colder climate. Here’s how:
* Timing: Start seeds 6-8 weeks before the last expected frost.
* Containers: Use seed trays or small pots filled with seed-starting mix.
* Sowing: Sow seeds about 1/4 inch deep and gently water.
* Light: Place the seed trays under grow lights or in a sunny window.
* Temperature: Keep the soil warm (around 70-75°F) until the seeds germinate.
* Watering: Keep the soil consistently moist, but not soggy.
* Hardening Off: Before transplanting seedlings outdoors, gradually acclimate them to outdoor conditions by exposing them to increasing amounts of sunlight and wind over a period of 1-2 weeks. This process is called “hardening off.”
Transplanting Cabbage Seedlings Outdoors
Once your seedlings are hardened off and the danger of frost has passed, it’s time to transplant them into your garden bed.
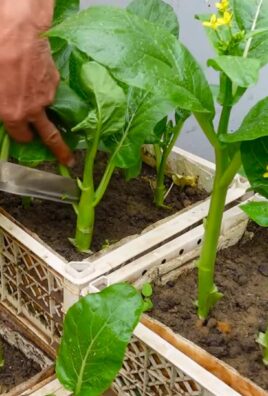
1. Prepare the Planting Holes: Dig holes that are slightly larger than the root balls of your seedlings. Space the holes 12-18 inches apart, depending on the variety. Smaller varieties can be planted closer together.
2. Remove Seedlings Carefully: Gently remove the seedlings from their containers, being careful not to damage the roots.
3. Plant the Seedlings: Place the seedlings in the holes and backfill with soil. Make sure the top of the root ball is level with the soil surface.
4. Water Thoroughly: Water the seedlings thoroughly after planting.
5. Mulch: Apply a layer of mulch around the plants to help retain moisture, suppress weeds, and regulate soil temperature. Straw, wood chips, or shredded leaves are good choices for mulch.
Direct Sowing Cabbage Seeds (Alternative)
If you live in a warmer climate with a longer growing season, you can direct sow cabbage seeds directly into your garden bed.
1. Prepare the Soil: Follow the same soil preparation steps as for transplanting seedlings.
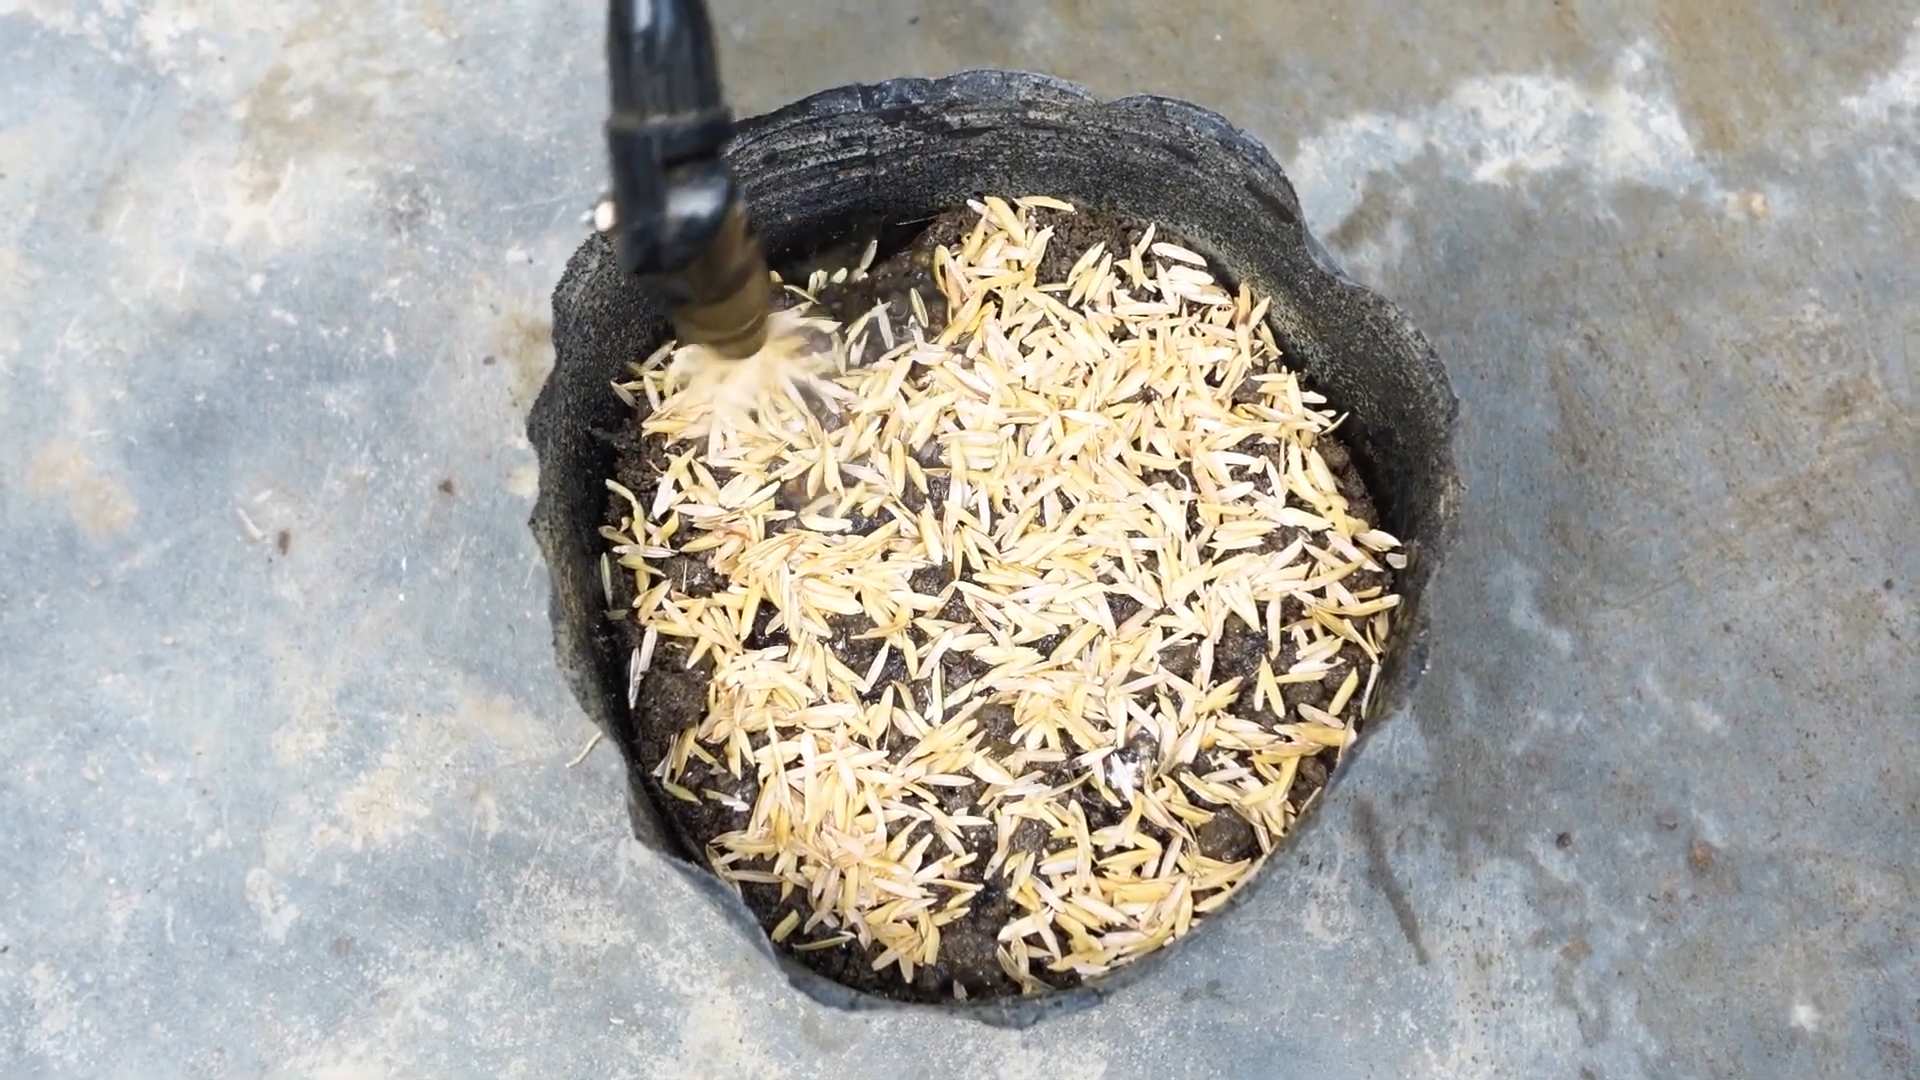
2. Sow the Seeds: Sow seeds about 1/2 inch deep and 2-3 inches apart.
3. Water Gently: Water the seeds gently to avoid washing them away.
4. Thin Seedlings: Once the seedlings emerge, thin them to 12-18 inches apart, depending on the variety.
Caring for Your Cabbage Plants
Now that your cabbage plants are in the ground, it’s time to provide them with the care they need to thrive.
* Watering: Cabbage needs consistent moisture, especially during head formation. Water deeply and regularly, especially during dry spells. Aim for about 1 inch of water per week.
* Fertilizing: Side-dress your cabbage plants with a nitrogen-rich fertilizer every 3-4 weeks. This will help promote leafy growth and head development.
* Weed Control: Keep the area around your cabbage plants free of weeds. Hand-pull weeds or use a hoe to cultivate the soil.
* Pest Control: Cabbage is susceptible to several pests, including cabbage worms, aphids, and flea beetles. I’ll cover pest control in more detail in the next section.
Dealing with Cabbage Pests
Cabbage pests can be a real headache, but with a little vigilance and the right strategies, you can keep them under control.
* Cabbage Worms: These are the larvae of cabbage white butterflies and moths. They can quickly devour cabbage leaves.
* Prevention: Cover your cabbage plants with row covers to prevent butterflies and moths from laying eggs.
* Handpicking: Regularly inspect your plants and handpick any cabbage worms you find.
* Bacillus thuringiensis (Bt): This is a natural bacterium that is toxic to cabbage worms. Spray your plants with Bt according to the package directions.
* Diatomaceous Earth (DE): This is a natural powder made from fossilized diatoms. It can be sprinkled around your plants to kill cabbage worms.
* Aphids: These small, sap-sucking insects can weaken cabbage plants.
* Water Spray: Blast aphids off your plants with a strong stream of water from a hose.
* Insecticidal Soap: Spray your plants with insecticidal soap according to the package directions.
* Ladybugs: Ladybugs are natural predators of aphids. Encourage ladybugs to visit your garden by planting flowers that attract them.
* Flea Beetles: These small, jumping beetles can create small holes in cabbage leaves.
* Row Covers: Cover your cabbage plants with row covers to prevent flea beetles from reaching them.
* Diatomaceous Earth (DE): Sprinkle DE around your plants to kill flea beetles.
* Insecticidal Soap: Spray your plants with insecticidal soap according to the package directions.
Harvesting Your Cabbage
The moment you’ve been waiting for! Harvesting your own homegrown cabbage is incredibly rewarding.
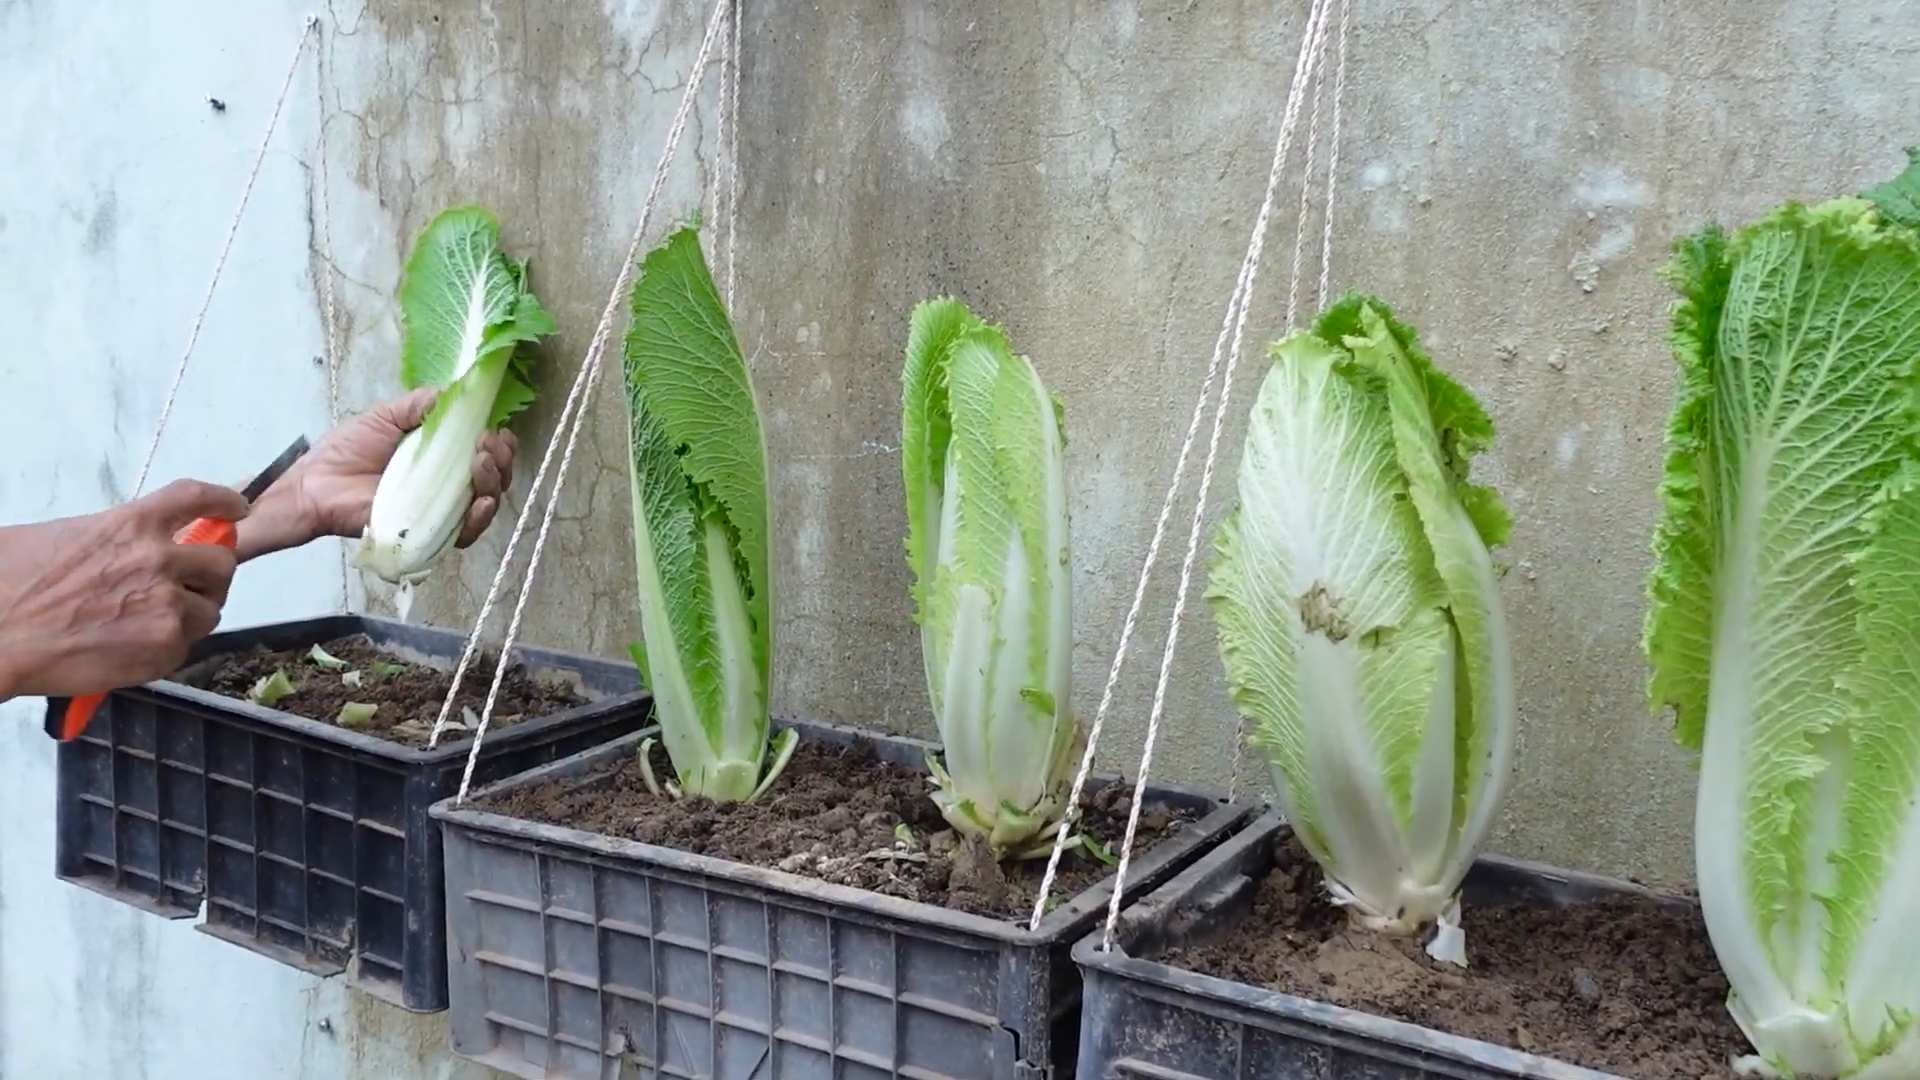
1. Check for Firmness: Cabbage is ready to harvest when the head is firm and solid to the touch.
2. Cut the Head: Use a sharp knife to cut the head from the stem, leaving a few outer leaves attached.
3. Harvest Time: Harvest in the morning when the plant is cool.
4. Storage: Store cabbage in the refrigerator for up to 2 weeks.
Troubleshooting Common Cabbage Problems
Even with the best care, you might encounter some problems while growing cabbage. Here are a few
Conclusion
So, there you have it! Growing cabbage at home, while it might seem daunting at first, is an incredibly rewarding experience that puts fresh, flavorful, and nutritious food right at your fingertips. We’ve walked through the essential steps, from selecting the right variety for your climate to warding off common pests and diseases. But why should you take the plunge and dedicate a little space in your garden to this leafy green?
The answer is simple: the taste and quality of homegrown cabbage are simply unmatched. Store-bought cabbage, while convenient, often lacks the vibrant flavor and crisp texture of a freshly harvested head. Plus, when you grow your own, you have complete control over what goes into your food, ensuring it’s free from harmful pesticides and chemicals. You’re also reducing your carbon footprint by cutting down on transportation and packaging.
Beyond the superior taste and health benefits, growing cabbage at home is a fantastic way to connect with nature and learn about the food you eat. It’s a therapeutic activity that can reduce stress and provide a sense of accomplishment as you watch your plants thrive. And let’s not forget the satisfaction of serving a meal made with ingredients you’ve nurtured yourself!
But the beauty of growing cabbage doesn’t stop there. There’s plenty of room for experimentation and personalization. Consider these variations to spice things up:
* Try different varieties: From the classic green cabbage to the vibrant red and savoy varieties, each offers a unique flavor and texture profile. Experiment with different types to find your favorites.
* Succession planting: Plant new cabbage seedlings every few weeks to ensure a continuous harvest throughout the growing season. This is especially useful if you enjoy cabbage frequently.
* Companion planting: Plant cabbage alongside beneficial herbs and flowers like dill, rosemary, and marigolds to deter pests and attract pollinators.
* Ferment your harvest: Turn your homegrown cabbage into delicious and healthy sauerkraut or kimchi. It’s a great way to preserve your harvest and enjoy the probiotic benefits of fermented foods.
Growing cabbage at home is more than just a gardening project; it’s an investment in your health, your well-being, and your connection to the natural world. It’s a chance to experience the joy of growing your own food and savor the unmatched flavor of homegrown produce.
So, what are you waiting for? Grab some seeds or seedlings, prepare your garden bed, and get ready to embark on a rewarding journey of growing cabbage at home. We’re confident that you’ll be amazed by the results.
We encourage you to try these tips and tricks and share your experiences with us! Let us know what varieties you’re growing, what challenges you’ve faced, and what successes you’ve celebrated. Share your photos and stories in the comments below. We can all learn from each other and create a thriving community of home gardeners. Happy growing!
Frequently Asked Questions (FAQ)
1. What is the best time of year to start growing cabbage at home?
The best time to start growing cabbage depends on your climate and the specific variety you’re planting. Generally, cabbage is a cool-season crop, meaning it thrives in temperatures between 60°F and 70°F (15°C and 21°C). For spring harvests, start seeds indoors 6-8 weeks before the last expected frost. For fall harvests, start seeds outdoors in mid-summer. Check your local frost dates and the specific recommendations for your chosen cabbage variety for the most accurate timing.
2. What kind of soil is best for growing cabbage at home?
Cabbage prefers well-drained, fertile soil that is rich in organic matter. The ideal soil pH is between 6.0 and 7.0. Before planting, amend your soil with compost or well-rotted manure to improve drainage and fertility. If your soil is heavy clay, consider adding sand or other amendments to improve drainage. A soil test can help you determine the pH and nutrient levels of your soil and guide you on what amendments are needed.
3. How much sunlight does cabbage need?
Cabbage needs at least 6 hours of direct sunlight per day to thrive. Choose a planting location that receives full sun for most of the day. If you live in a particularly hot climate, some afternoon shade can be beneficial to prevent the leaves from scorching.
4. How often should I water my cabbage plants?
Cabbage needs consistent moisture to grow properly. Water deeply and regularly, especially during dry periods. Aim to keep the soil consistently moist but not waterlogged. A good rule of thumb is to water when the top inch of soil feels dry to the touch. Mulching around your cabbage plants can help retain moisture and suppress weeds.
5. What are some common pests and diseases that affect cabbage?
Cabbage is susceptible to several pests and diseases, including cabbage worms, aphids, flea beetles, clubroot, and black rot. Regularly inspect your plants for signs of infestation or disease. Use organic pest control methods such as handpicking pests, using insecticidal soap, or applying Bacillus thuringiensis (Bt) for cabbage worms. To prevent diseases, practice crop rotation, ensure good drainage, and avoid overhead watering.
6. How do I know when my cabbage is ready to harvest?
Cabbage is ready to harvest when the head is firm and feels solid to the touch. The size of the head will vary depending on the variety, but generally, it should be close to the size specified on the seed packet. To harvest, use a sharp knife to cut the head from the stem, leaving a few outer leaves intact.
7. Can I grow cabbage in containers?
Yes, you can grow cabbage in containers, but you’ll need to choose a large container (at least 12 inches in diameter) to accommodate the plant’s root system. Use a high-quality potting mix and ensure the container has good drainage. Water regularly and fertilize every few weeks with a balanced fertilizer.
8. What are some good companion plants for cabbage?
Companion planting can help deter pests, attract pollinators, and improve the overall health of your cabbage plants. Some good companion plants for cabbage include:
* Dill: Attracts beneficial insects that prey on cabbage worms.
* Rosemary: Deters cabbage moths.
* Marigolds: Repel nematodes and other soil pests.
* Nasturtiums: Attract aphids away from cabbage plants.
* Garlic and onions: Repel various pests.
9. How can I prevent my cabbage from splitting?
Cabbage heads can sometimes split if they receive too much water after a period of drought. To prevent splitting, water your cabbage plants consistently and evenly, especially during dry spells. You can also harvest the cabbage as soon as it’s mature to prevent it from becoming overripe and splitting.
10. Can I save seeds from my homegrown cabbage?
Saving seeds from cabbage can be challenging because cabbage is a biennial plant, meaning it takes two years to produce seeds. You’ll need to overwinter the cabbage plant and allow it to flower and produce seeds in the second year. However, cabbage is also cross-pollinated, so the seeds you save may not be true to type. If you’re interested in seed saving, it’s best to start with open-pollinated varieties and isolate them from other brassicas to prevent cross-pollination.
Leave a Comment