

Growing Coral Cactus might sound like an exotic underwater adventure, but trust me, it’s a surprisingly simple and rewarding journey you can embark on right in your own home! Have you ever looked at those quirky, brain-like succulents and thought, “Wow, I wish I could grow one of those”? Well, you absolutely can! For centuries, succulents have been cherished for their resilience and unique beauty, gracing homes and gardens across diverse cultures. Their low-maintenance nature makes them perfect for busy individuals and beginner gardeners alike.
But why should you specifically learn about growing Coral Cactus? Because these fascinating plants add a touch of whimsy and architectural interest to any space. They’re conversation starters, natural air purifiers, and incredibly satisfying to propagate. Plus, let’s be honest, who doesn’t love a plant that looks like it belongs in a Dr. Seuss book? In this article, I’m going to share my favorite DIY tricks and hacks to help you successfully cultivate these captivating succulents, even if you don’t have a green thumb. Get ready to unlock the secrets to a thriving Coral Cactus and bring a little bit of desert magic into your home!
Growing Coral Cactus: A DIY Guide to Propagating and Caring for Euphorbia Neriifolia Cristata
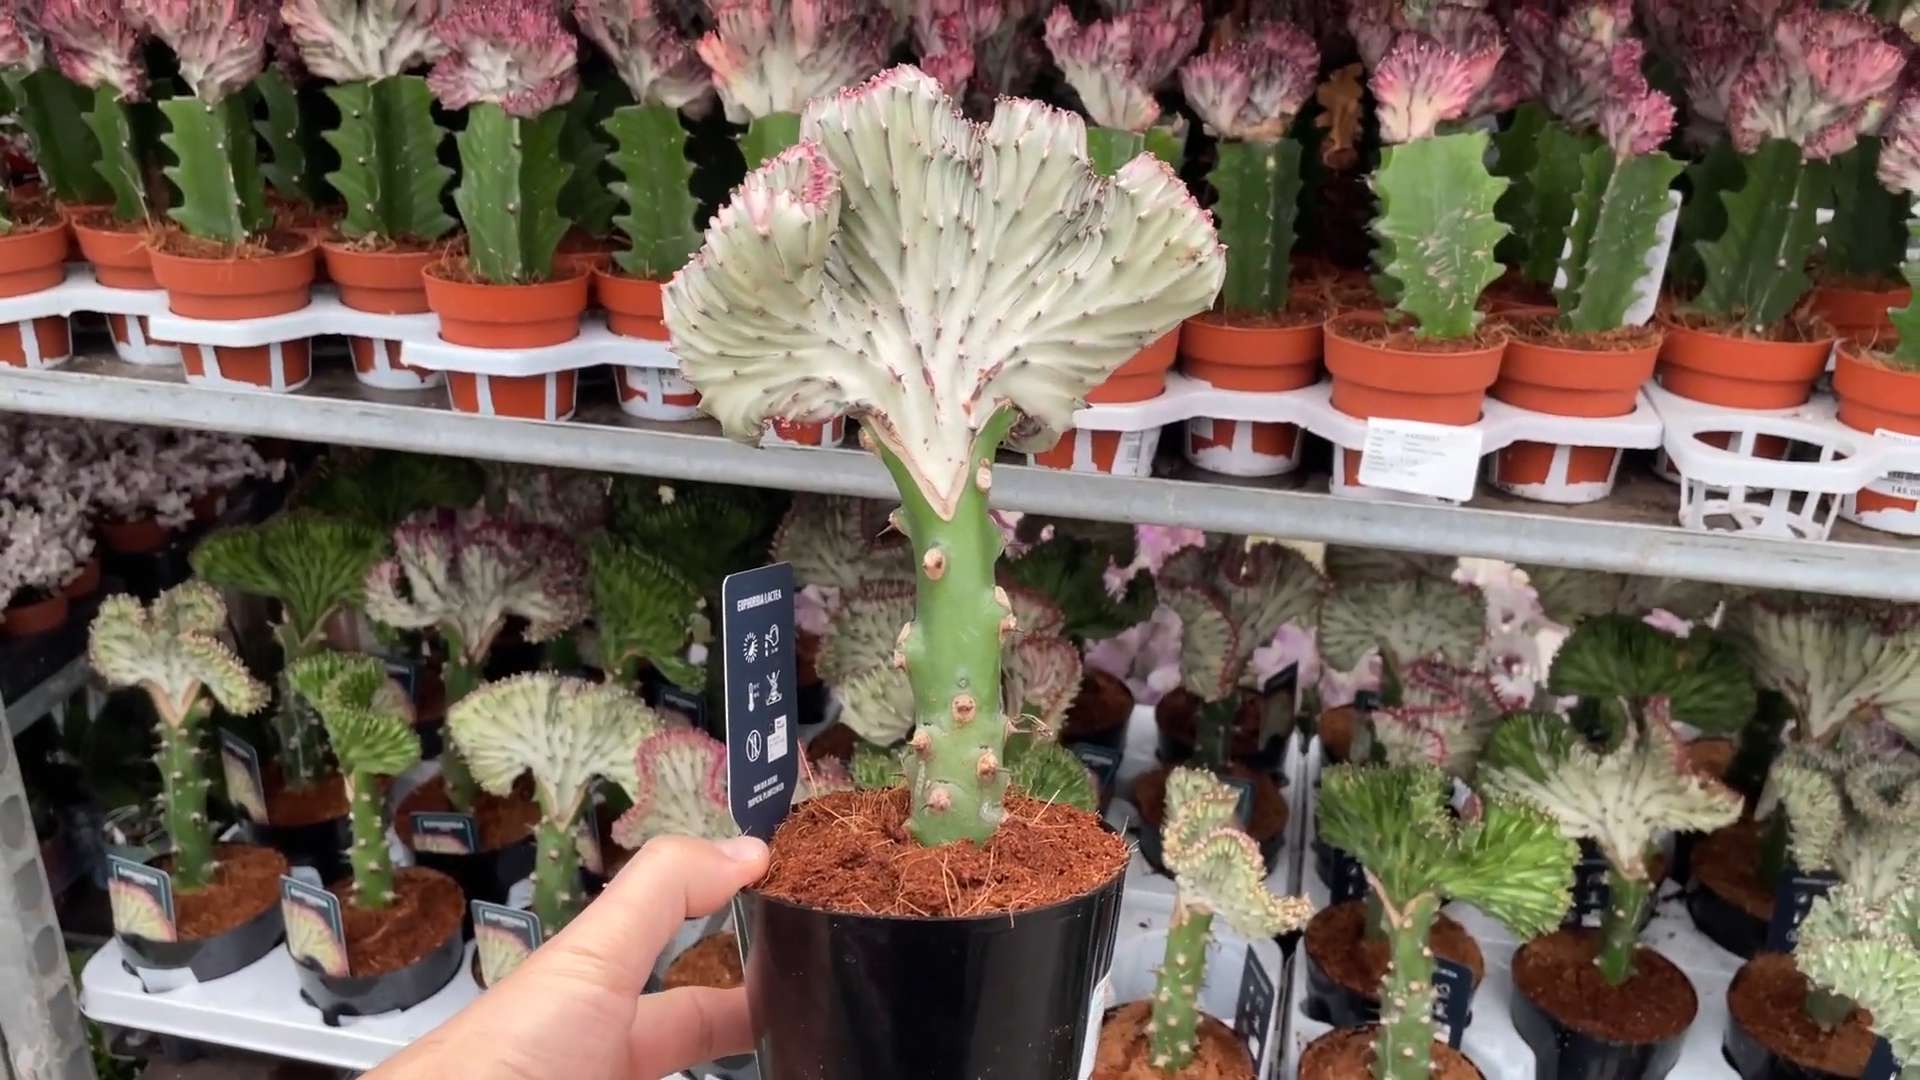
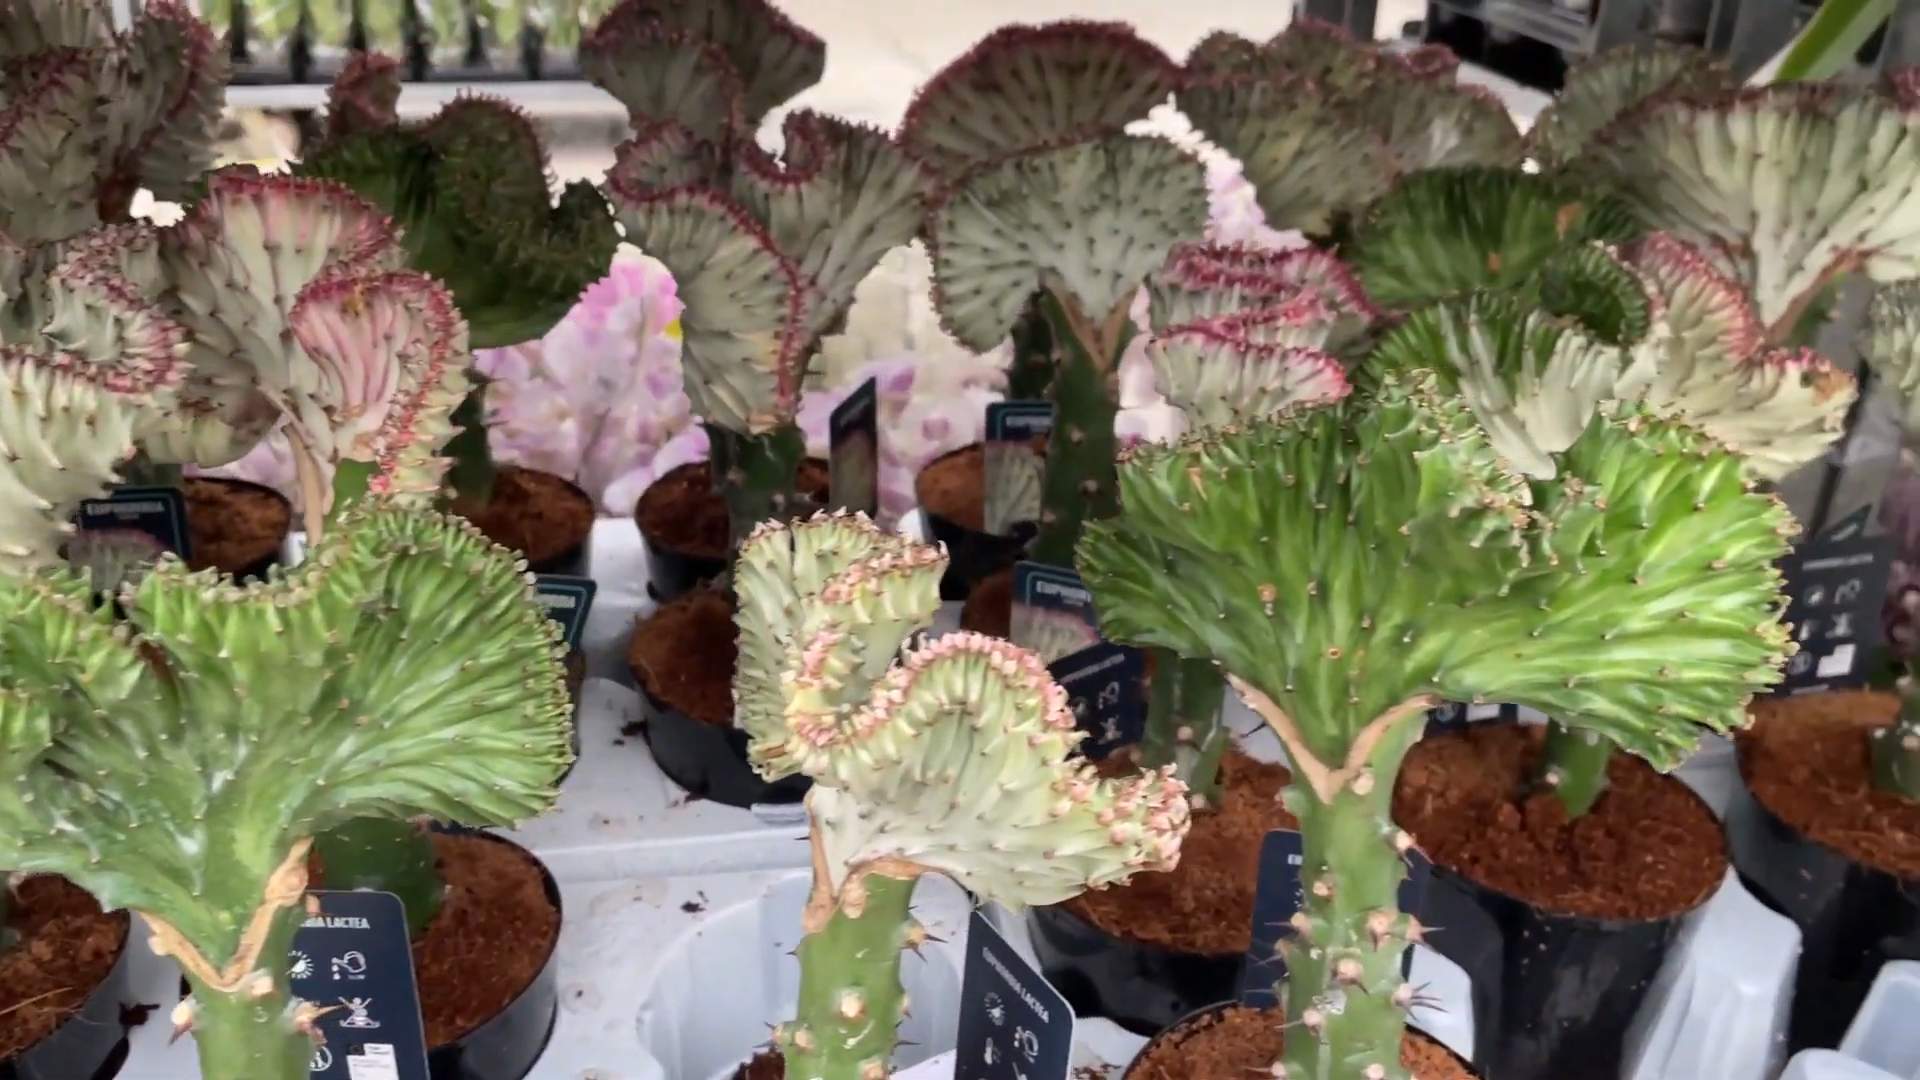
So, you’re captivated by the bizarre beauty of the Coral Cactus (Euphorbia neriifolia cristata), also known as the crested euphorbia? I don’t blame you! These fascinating plants, resembling underwater coral reefs, add a unique sculptural element to any indoor garden. While they might seem intimidating, propagating and caring for them is surprisingly straightforward. Let me walk you through everything you need to know to successfully grow your own Coral Cactus.
Understanding the Coral Cactus
Before we dive into the DIY, let’s understand what we’re dealing with. The Coral Cactus isn’t actually a cactus! It’s a grafted plant, typically a Euphorbia neriifolia (the base, providing the roots) topped with a Euphorbia lactea cristata (the crested, coral-like top). This grafting is crucial because the crested form doesn’t have chlorophyll and can’t survive on its own.
Key things to remember:
* Grafting is essential: The two parts need each other to survive.
* Not a true cactus: It’s a Euphorbia, so care differs slightly.
* Sap is toxic: Wear gloves when handling to avoid skin irritation.
* Well-draining soil is crucial: Prevents root rot.
* Bright, indirect light is ideal: Avoid direct sunlight, which can scorch it.
Propagating Coral Cactus: A Step-by-Step Guide
Unfortunately, you can’t propagate the crested part of the Coral Cactus on its own. Since it lacks chlorophyll, it needs to be grafted onto a suitable base. However, you *can* propagate the base plant, Euphorbia neriifolia, through cuttings. This is how you can create more rootstock for future grafting projects (or just enjoy the base plant on its own!).
Here’s how to propagate Euphorbia neriifolia from cuttings:
Materials You’ll Need:
* A healthy Euphorbia neriifolia plant (the base of your Coral Cactus is perfect!)
* Sharp, sterilized knife or pruning shears
* Gloves (essential to protect your skin from the sap)
* Rooting hormone powder (optional, but it helps)
* Well-draining potting mix (cactus mix is ideal)
* Small pots or containers with drainage holes
* Watering can or spray bottle
Step-by-Step Instructions:
1. Prepare Your Workspace: Lay down some newspaper or a drop cloth to protect your work surface. Gather all your materials and put on your gloves. Remember, the sap is an irritant!
2. Take a Cutting: Using your sterilized knife or pruning shears, take a cutting from the Euphorbia neriifolia plant. Aim for a cutting that’s about 4-6 inches long. Make sure the cut is clean and at a slight angle. I usually try to get a cutting with a few leaves, but it’s not essential.
3. Let the Cutting Callus: This is a crucial step! Euphorbia sap needs to dry and form a callus over the cut end to prevent rot. Place the cutting in a dry, well-ventilated area for about 1-2 weeks. You’ll notice a hardened layer forming over the cut. This is the callus.
4. Apply Rooting Hormone (Optional): Dip the calloused end of the cutting into rooting hormone powder. This will encourage root development. Tap off any excess powder. I find this step really speeds things up, but it’s not absolutely necessary.
5. Prepare the Potting Mix: Fill your small pot or container with well-draining potting mix. Cactus mix is perfect, or you can create your own by mixing regular potting soil with perlite and sand. The key is to ensure good drainage.
6. Plant the Cutting: Make a small hole in the potting mix and gently insert the calloused end of the cutting. Bury it deep enough so that it stands upright on its own.
7. Water Sparingly: Water the potting mix lightly, just enough to moisten it. Avoid overwatering, as this can lead to rot.
8. Provide Bright, Indirect Light: Place the pot in a location that receives bright, indirect light. Avoid direct sunlight, which can scorch the cutting.
9. Wait Patiently: It can take several weeks or even a couple of months for the cutting to develop roots. During this time, keep the potting mix slightly moist but not soggy. You can check for root development by gently tugging on the cutting. If it resists, it has likely rooted.
10. Transplant (If Needed): Once the cutting has developed a strong root system, you can transplant it into a larger pot if desired.
Caring for Your Coral Cactus: A Comprehensive Guide
Now that you know how to propagate the base plant, let’s talk about caring for your existing Coral Cactus. Proper care is essential for keeping your plant healthy and vibrant.
Light:
Coral Cactus thrives in bright, indirect light. Direct sunlight can scorch the crested top, causing discoloration and damage. An east-facing window is ideal, or a spot near a south- or west-facing window with a sheer curtain to filter the light. If you notice the crested top turning pale or yellow, it may be getting too much light. If it’s stretching and becoming leggy, it needs more light.
Watering:
Watering is crucial, but it’s also where many people go wrong. Coral Cactus is susceptible to root rot, so it’s essential to let the soil dry out completely between waterings. During the growing season (spring and summer), water thoroughly when the top inch of soil is dry. In the dormant season (fall and winter), reduce watering significantly. I usually water mine about once a month during the winter. Always use well-draining soil and ensure the pot has drainage holes.
Signs of overwatering:
* Soft, mushy stems
* Yellowing or browning leaves
* Root rot (you’ll smell a foul odor)
Signs of underwatering:
* Shriveled stems
* Drooping leaves
Soil:
As I’ve mentioned before, well-draining soil is essential. A cactus mix is ideal, or you can create your own by mixing regular potting soil with perlite and sand. This will ensure that excess water drains away quickly, preventing root rot.
Temperature:
Coral Cactus prefers temperatures between 65°F and 80°F (18°C and 27°C). Avoid exposing it to temperatures below 50°F (10°C), as this can damage the plant.
Humidity:
Coral Cactus is relatively tolerant of low humidity levels, which makes it a great houseplant for most homes. However, if you live in a very dry climate, you can increase the humidity around the plant by placing it on a pebble tray filled with water or using a humidifier.
Fertilizing:
Feed your Coral Cactus with a balanced liquid fertilizer diluted to half strength during the growing season (spring and summer). Fertilize every 2-4 weeks. Avoid fertilizing during the dormant season (fall and winter).
Pruning:
Pruning is generally not necessary for Coral Cactus, but you can remove any dead or damaged growth. Always use sterilized pruning shears or a sharp knife to prevent the spread of disease.
Pests and Diseases:
Coral Cactus is relatively resistant to pests and diseases, but it can be susceptible to mealybugs and scale. Inspect your plant regularly for signs of infestation. If you find any pests, treat them with insecticidal soap or neem oil. Root rot is the most common disease, and it’s usually caused by overwatering.
Grafting Issues:
Sometimes, the graft union can weaken over time. If you notice the crested top starting to separate from the base, you may need to re-graft it. This is a more advanced technique, but there are plenty of resources online to guide you through the process.
Troubleshooting Common Problems
Even with the best care, you might encounter some problems with your Coral Cactus. Here are some common issues and how to address them:
* Yellowing or Browning Crested Top: This can be caused by too much direct sunlight, overwatering, or underwatering. Adjust the light exposure and watering schedule accordingly.
* Soft, Mushy Stems: This is a sign of root rot. Stop watering immediately and allow the soil to dry out completely. If the rot is severe, you may need to repot the plant with fresh, well-draining soil.
* Leggy Growth: This indicates that the plant is not getting enough light. Move it to a brighter location.
* Pests: Inspect your plant regularly for pests and treat them promptly with insecticidal soap or neem oil.
Final Thoughts
Growing Coral Cactus is a rewarding experience. With a little knowledge and care, you can enjoy these unique and fascinating plants for years to come. Remember
Conclusion
So, there you have it! Growing your own Coral Cactus from cuttings is not just a cost-effective way to expand your succulent collection; it’s a deeply rewarding experience that connects you with the natural world. This DIY propagation method unlocks a world of possibilities, allowing you to cultivate multiple vibrant and unique specimens from a single parent plant. Forget expensive nursery trips – with a little patience and these simple steps, you can transform your home into a thriving desert oasis.
The beauty of this method lies in its adaptability. Feel free to experiment with different types of well-draining soil mixes to find what works best for your climate and growing conditions. Consider using terracotta pots, which promote better airflow and drainage, further minimizing the risk of root rot. You can also explore different rooting hormones to potentially speed up the propagation process, although it’s often unnecessary.
Beyond the basic method, consider these variations to add a personal touch to your Coral Cactus propagation:
* Grafting Experiments: For the adventurous gardener, try grafting your Coral Cactus onto a different succulent base. This can create fascinating and unique plant combinations.
* Container Gardening Creativity: Get creative with your container choices! Use repurposed items like teacups, old boots, or even hollowed-out logs to create eye-catching displays.
* Miniature Landscapes: Combine your propagated Coral Cacti with other small succulents and cacti to create miniature desert landscapes in shallow dishes or terrariums.
The key takeaway is that propagating your own Coral Cactus is an accessible and enjoyable project for gardeners of all skill levels. It’s a fantastic way to learn more about plant biology, develop your green thumb, and create a personalized collection of these fascinating succulents.
Don’t be intimidated by the process. Even if your first attempt isn’t perfectly successful, remember that gardening is a journey of learning and experimentation. Each attempt will bring you closer to mastering the art of Coral Cactus propagation.
We wholeheartedly encourage you to give this DIY trick a try. The satisfaction of watching your tiny cutting develop into a thriving plant is truly unparalleled. Plus, you’ll have plenty of new plants to share with friends and family, spreading the joy of succulent gardening.
Once you’ve embarked on your Coral Cactus propagation adventure, we’d love to hear about your experience! Share your photos, tips, and any challenges you encountered in the comments below. Let’s build a community of Coral Cactus enthusiasts and learn from each other’s successes and failures. Happy growing!
Frequently Asked Questions (FAQ)
What exactly is a Coral Cactus, and why would I want to propagate it?
A Coral Cactus (Euphorbia neriifolia cristata) isn’t actually a cactus at all! It’s a crested form of the Euphorbia neriifolia succulent. The “coral” appearance comes from the fan-like, convoluted growth at the top of the plant. People propagate them because they are relatively easy to grow, visually striking, and a great way to expand your succulent collection without spending a lot of money. Propagating allows you to create genetically identical copies of your favorite plant, ensuring you maintain its unique characteristics. Plus, it’s a fun and rewarding project!
What’s the best time of year to propagate a Coral Cactus?
The ideal time to propagate a Coral Cactus is during the spring or early summer. This is when the plant is actively growing, and the cuttings will root more readily. The warmer temperatures and longer daylight hours provide optimal conditions for root development. However, you can attempt propagation at other times of the year, but the success rate might be lower. Avoid propagating during the dormant winter months.
What kind of soil should I use for rooting Coral Cactus cuttings?
Well-draining soil is crucial for successful Coral Cactus propagation. A mix specifically formulated for cacti and succulents is ideal. You can also create your own mix by combining equal parts of potting soil, coarse sand, and perlite. This combination provides good drainage and aeration, preventing root rot, which is a common problem with succulents. Avoid using regular garden soil, as it tends to retain too much moisture.
How long does it take for Coral Cactus cuttings to root?
Rooting time can vary depending on environmental factors such as temperature, humidity, and light. Generally, it takes anywhere from 2 to 6 weeks for Coral Cactus cuttings to develop roots. Be patient and avoid disturbing the cuttings too frequently. You can gently tug on the cutting after a few weeks to check for resistance, which indicates root development.
How often should I water the cuttings while they are rooting?
Water sparingly! Overwatering is a common mistake that can lead to root rot. Allow the soil to dry out completely between waterings. When you do water, do so thoroughly, ensuring that the water drains freely from the bottom of the pot. During the rooting process, the cuttings don’t need a lot of water, as they don’t yet have roots to absorb it efficiently.
What kind of light do Coral Cactus cuttings need?
Provide bright, indirect light for your Coral Cactus cuttings. Avoid direct sunlight, especially during the hottest part of the day, as it can scorch the cuttings. A location near an east- or west-facing window is usually ideal. If you don’t have access to natural light, you can use a grow light to supplement the light.
Do I need to use rooting hormone when propagating Coral Cactus?
While not strictly necessary, using a rooting hormone can help to speed up the rooting process and increase the success rate. Rooting hormones contain auxins, which are plant hormones that stimulate root development. If you choose to use a rooting hormone, apply it to the cut end of the cutting before planting it in the soil. Follow the instructions on the rooting hormone packaging.
What if my Coral Cactus cutting starts to rot?
If you notice signs of rot, such as soft, mushy spots or discoloration, it’s important to act quickly. Remove the cutting from the soil and carefully cut away any rotted portions with a clean, sharp knife. Allow the cut end to callous over for a few days before replanting it in fresh, well-draining soil. Be extra careful not to overwater.
Can I propagate a Coral Cactus from a leaf?
Unfortunately, Coral Cacti are not typically propagated from leaves. The most successful method is through stem cuttings. Leaves may root, but they are unlikely to produce a full plant with the crested “coral” formation.
My Coral Cactus cutting has rooted. When can I transplant it into a larger pot?
Once your Coral Cactus cutting has developed a healthy root system, you can transplant it into a larger pot. Choose a pot that is only slightly larger than the current pot. Use the same well-draining soil mix that you used for rooting the cutting. Water thoroughly after transplanting and then allow the soil to dry out completely before watering again.
How do I care for my newly propagated Coral Cactus?
Care for your newly propagated Coral Cactus as you would any other mature Coral Cactus. Provide bright, indirect light, well-draining soil, and water sparingly. Fertilize occasionally during the growing season with a balanced fertilizer diluted to half strength. Protect your plant from frost and extreme temperatures. With proper care, your newly propagated Coral Cactus will thrive and bring you years of enjoyment.


Leave a Comment