

Growing corn in containers might sound like a farm-sized dream squeezed into a tiny pot, but trust me, it’s totally achievable! Forget acres of land; with a few clever tricks and a dash of DIY spirit, you can enjoy the sweet taste of homegrown corn right on your balcony, patio, or even a sunny windowsill.
For centuries, corn has been a staple crop, deeply woven into the cultures of indigenous peoples across the Americas. From ancient rituals to everyday meals, corn has nourished and sustained communities. While traditionally grown in vast fields, the beauty of modern gardening is its adaptability. We can now bring this iconic crop into our own small spaces.
Why bother with growing corn in containers? Well, for starters, it’s incredibly rewarding! Imagine the satisfaction of harvesting your own sweet corn, knowing exactly where it came from and how it was grown. Plus, it’s a fantastic way to maximize limited space, especially if you’re an urban dweller with a green thumb. More importantly, it allows you to control the growing environment, protecting your precious corn from pests and diseases that might plague larger gardens. I’m excited to share some simple yet effective DIY tricks that will help you succeed in growing your own container corn. Let’s get started!
Growing Corn in Containers: A Beginner’s Guide
Hey there, fellow gardening enthusiasts! Ever dreamed of having fresh, sweet corn right outside your door, even if you don’t have a sprawling backyard? Well, I’m here to tell you it’s totally possible! Growing corn in containers is a fun and rewarding project, and I’m going to walk you through every step of the process. Let’s get started!
Choosing the Right Corn Variety
Not all corn varieties are created equal, especially when it comes to container gardening. You’ll want to choose a variety that’s bred for smaller spaces and shorter growing seasons. Here are a few of my favorites:
* ‘On Deck’: This is a super sweet variety that’s specifically bred for container growing. It matures quickly and produces delicious, smaller ears.
* ‘Golden Bantam’: A classic heirloom variety that’s known for its sweet flavor and relatively compact size.
* ‘Trinity’: A newer variety that’s disease-resistant and produces good yields in containers.
* ‘Sweet Painted Mountain’: While technically a flour corn, it can be eaten fresh when young and is beautiful to look at. It’s also more tolerant of cooler temperatures.
Remember to check the seed packet for specific information on plant height and spacing. This will help you determine how many plants you can comfortably fit in your container.
Gathering Your Supplies
Before you start planting, you’ll need to gather all your supplies. Here’s a checklist to make sure you have everything you need:
* Large Container: This is crucial! Corn plants need plenty of space for their roots to grow. I recommend a container that’s at least 24 inches in diameter and 24 inches deep. The bigger, the better!
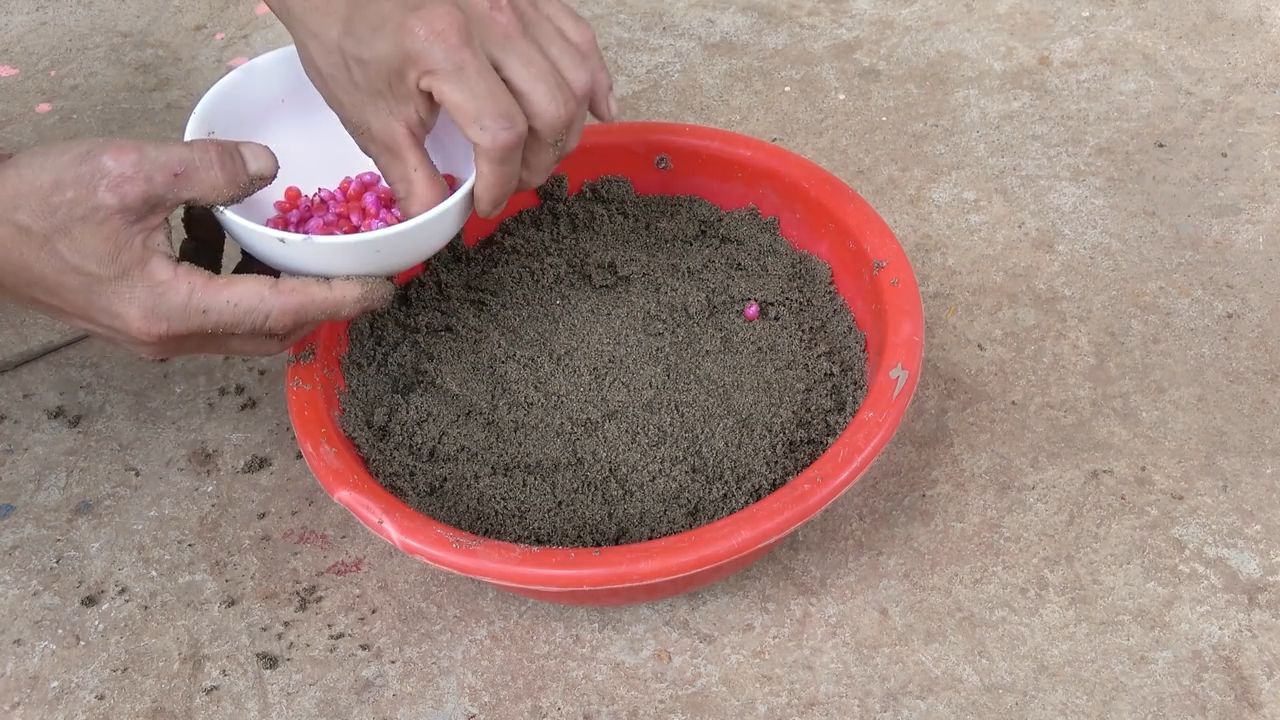
* Potting Mix: Don’t use garden soil! It’s too heavy and doesn’t drain well. Use a high-quality potting mix that’s lightweight and well-draining.
* Corn Seeds: Choose your favorite variety from the list above.
* Slow-Release Fertilizer: Corn is a heavy feeder, so you’ll need to provide it with plenty of nutrients. A slow-release fertilizer will gradually release nutrients over time.
* Watering Can or Hose: You’ll need to water your corn regularly, especially during hot weather.
* Mulch: Mulch helps to retain moisture in the soil and suppress weeds. I like to use straw or wood chips.
* Optional: Stakes or Trellis: Depending on the variety you choose, you may need to provide support for your corn plants.
Planting Your Corn
Now for the fun part! Planting your corn is easy, but there are a few things to keep in mind to ensure success.
1. Prepare the Container: Fill your container with potting mix, leaving a few inches of space at the top.
2. Add Fertilizer: Mix in the slow-release fertilizer according to the package directions.
3. Plant the Seeds: Sow the corn seeds about 1 inch deep and 4-6 inches apart. Plant in a grid pattern rather than a single row to aid pollination.
4. Water Thoroughly: Water the soil gently until it’s evenly moist.
5. Mulch: Add a layer of mulch around the base of the plants to help retain moisture and suppress weeds.
Caring for Your Corn
Once your corn is planted, it’s important to provide it with the care it needs to thrive.
1. Watering: Corn needs consistent moisture, especially during hot weather. Water deeply whenever the top inch of soil feels dry to the touch. Avoid overwatering, which can lead to root rot.
2. Fertilizing: Corn is a heavy feeder, so you’ll need to fertilize it regularly. In addition to the slow-release fertilizer you added at planting, you can also supplement with a liquid fertilizer every few weeks. Follow the package directions for application rates.
3. Sunlight: Corn needs at least 6-8 hours of sunlight per day. Place your container in a sunny location where it will receive plenty of light.
4. Pollination: Corn is wind-pollinated, so you’ll need to help it along if you’re growing it in a container. When the tassels (the male flowers at the top of the plant) start to shed pollen, gently shake the plants to help distribute the pollen to the silks (the female flowers on the ears of corn). You can also hand-pollinate by collecting pollen from the tassels and brushing it onto the silks. This is especially important if you’re only growing a few plants.
5. Pest Control: Keep an eye out for pests such as corn earworms and aphids. You can control these pests with insecticidal soap or neem oil.
6. Support: As your corn plants grow taller, they may need support to prevent them from falling over. You can use stakes or a trellis to provide support.
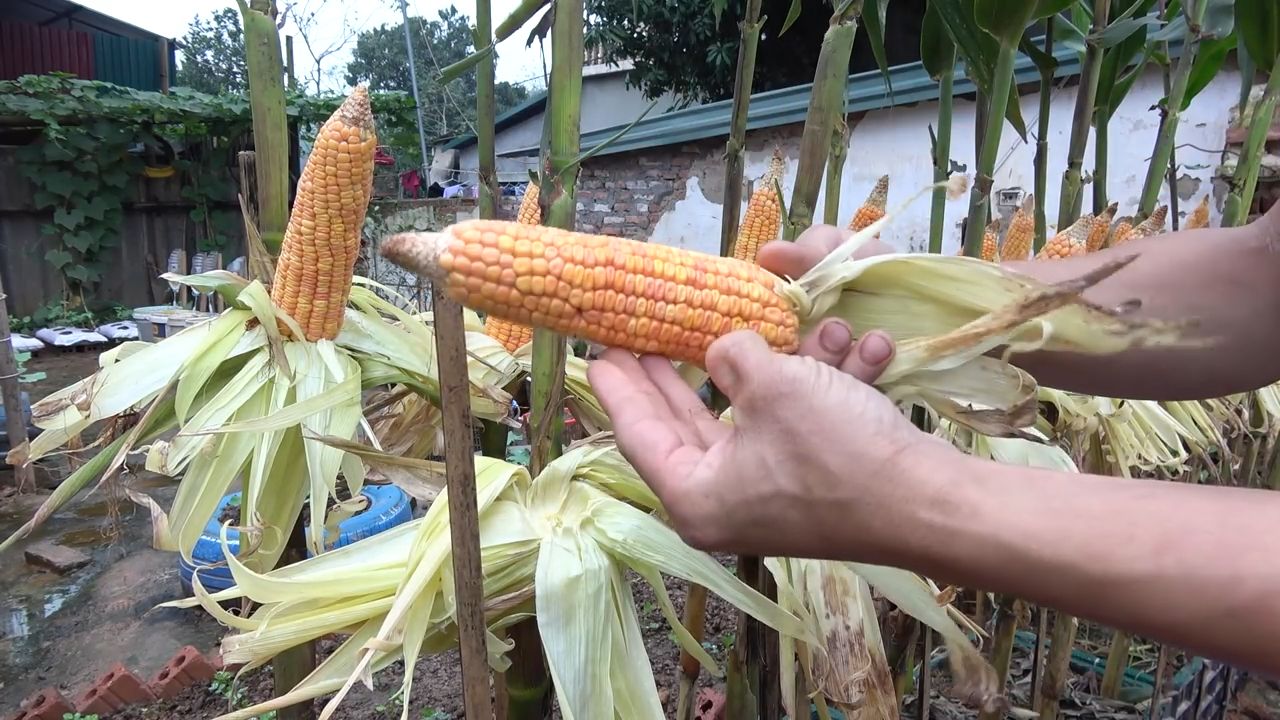
Harvesting Your Corn
Harvesting your corn at the right time is crucial for getting the best flavor. Here’s how to tell when your corn is ready to harvest:
1. Check the Silks: The silks should be brown and dry.
2. Feel the Ears: The ears should feel plump and full.
3. Pierce a Kernel: Gently peel back the husk and pierce a kernel with your fingernail. If the liquid that comes out is milky, the corn is ready to harvest. If it’s clear, the corn needs more time to mature.
4. Harvest: To harvest, grasp the ear firmly and twist it downward. The ear should snap off easily.
Troubleshooting Common Problems
Even with the best care, you may encounter some problems when growing corn in containers. Here are a few common issues and how to address them:
* Poor Pollination: If your corn ears are small and have missing kernels, it’s likely due to poor pollination. Make sure to hand-pollinate your plants if necessary.
* Stunted Growth: Stunted growth can be caused by a variety of factors, including lack of nutrients, insufficient sunlight, or overwatering. Make sure your plants are getting enough sunlight, water, and fertilizer.
* Pest Infestations: Keep an eye out for pests and treat them promptly with insecticidal soap or neem oil.
* Root Rot: Root rot is caused by overwatering. Make sure your container has good drainage and avoid overwatering your plants.
Tips for Success
Here are a few extra tips to help you succeed at growing corn in containers:
* Choose the Right Container: As I mentioned earlier, the size of your container is crucial. Make sure to choose a container that’s at least 24 inches in diameter and 24 inches deep.
* Use High-Quality Potting Mix: Don’t skimp on the potting mix! Use a high-quality potting mix that’s lightweight and well-draining.
* Water Regularly: Corn needs consistent moisture, especially during hot weather. Water deeply whenever the top inch of soil feels dry to the touch.
* Fertilize Regularly: Corn is a heavy feeder, so you’ll need to fertilize it regularly.
* Provide Support: As your corn plants grow taller, they may need support to prevent them from falling over.
* Hand-Pollinate: If you’re only growing a few plants, hand-pollination is essential for ensuring good ear development.
* Harvest at the Right Time: Harvesting your corn at the right time is crucial for getting the best flavor.
Enjoy Your Homegrown Corn!
Growing corn in containers is a rewarding experience that allows you to enjoy fresh, sweet corn even if you don’t have a large garden. With a little bit of care and attention, you can successfully grow corn in containers and impress your friends and family with your homegrown harvest. So, grab your seeds, get your hands dirty, and get ready to enjoy the taste of summer! Happy gardening!
Conclusion
So, there you have it! Growing corn in containers might seem like a daunting task at first, but with the right preparation and a little bit of patience, you can absolutely enjoy the sweet taste of homegrown corn, even without a sprawling garden. This DIY trick is a must-try for several compelling reasons.
First and foremost, it democratizes access to fresh, homegrown produce. Apartment dwellers, balcony gardeners, and anyone with limited space can now experience the joy of nurturing a corn plant from seed to harvest. Imagine stepping onto your patio and picking a perfectly ripe ear of corn, still warm from the sun – a far cry from the supermarket variety.
Secondly, growing corn in containers offers a unique educational opportunity. It’s a fantastic way to teach children (and adults!) about the life cycle of plants, the importance of pollination, and the rewards of sustainable gardening. Witnessing the transformation from a tiny seed to a towering stalk laden with ears is truly remarkable.
Thirdly, it allows for greater control over the growing environment. You can carefully monitor the soil quality, water levels, and sunlight exposure, ensuring that your corn plants receive optimal care. This can lead to healthier, more productive plants compared to those grown in less controlled conditions.
But the benefits don’t stop there. Growing your own corn reduces your carbon footprint by eliminating the need for transportation and packaging associated with commercially grown produce. Plus, you can avoid the use of harmful pesticides and herbicides, ensuring that your corn is safe and healthy for your family.
Ready to take your container corn growing to the next level? Consider these variations:
* Experiment with different corn varieties: While sweet corn is a popular choice, try growing ornamental corn for its colorful kernels or popcorn corn for a fun and delicious snack.
* Companion planting: Maximize your container space by planting companion plants like beans or squash alongside your corn. These plants can help improve soil fertility, deter pests, and provide shade.
* Succession planting: Plant corn seeds in staggered intervals to ensure a continuous harvest throughout the growing season.
* Vertical gardening: If space is truly limited, explore vertical gardening techniques to maximize your corn-growing potential.
Ultimately, growing corn in containers is a rewarding and fulfilling experience that connects you to nature and provides you with fresh, delicious food. Don’t be intimidated by the perceived challenges – embrace the opportunity to learn, experiment, and enjoy the fruits (or rather, the ears!) of your labor.
We wholeheartedly encourage you to try this DIY trick and share your experiences with us. Let us know what varieties you grew, what challenges you faced, and what successes you celebrated. Your insights can help other aspiring container corn growers and contribute to a thriving community of urban gardeners. So, grab some seeds, prepare your containers, and get ready to embark on a corn-growing adventure! We can’t wait to hear your stories and see your beautiful container corn gardens. Happy growing!
Frequently Asked Questions (FAQ)
What size container is best for growing corn?
The ideal container size for growing corn is at least 12 inches in diameter and 12 inches deep, but larger is generally better. A 20-gallon container or larger will provide ample space for the roots to develop and support the tall stalks. Remember that corn plants need stability, and a larger, heavier container will be less likely to tip over in windy conditions. Consider using a durable material like plastic, resin, or even a repurposed container like a large trash can (with drainage holes, of course!). The key is to ensure adequate drainage to prevent root rot.
How many corn plants can I grow in one container?
It’s generally recommended to plant only 2-3 corn plants per container, especially if you’re using a smaller container (around 20 gallons). Corn plants need space to grow and develop, and overcrowding can lead to stunted growth, reduced yields, and increased susceptibility to pests and diseases. If you’re using a very large container (30 gallons or more), you might be able to squeeze in a few more plants, but be sure to monitor their growth closely and provide adequate support if needed. Remember that corn is wind-pollinated, so planting multiple plants together increases the chances of successful pollination.
What type of soil is best for growing corn in containers?
Corn thrives in well-draining, fertile soil that is rich in organic matter. A good potting mix for container corn should consist of a blend of compost, peat moss (or coconut coir), and perlite or vermiculite. Compost provides essential nutrients and improves soil structure, while peat moss or coconut coir helps retain moisture. Perlite or vermiculite improves drainage and aeration. Avoid using garden soil in containers, as it can become compacted and poorly drained. You can also amend your potting mix with slow-release fertilizer to provide a steady supply of nutrients throughout the growing season.
How often should I water my container corn?
Corn plants are heavy drinkers, especially during hot weather. Water your container corn deeply and regularly, ensuring that the soil remains consistently moist but not waterlogged. Check the soil moisture level daily by sticking your finger into the soil – if the top inch feels dry, it’s time to water. The frequency of watering will depend on factors such as the weather, the size of the container, and the type of potting mix you’re using. In general, you may need to water your container corn every day or every other day during the peak growing season. Be sure to water at the base of the plant to avoid wetting the foliage, which can increase the risk of fungal diseases.
How much sunlight does container corn need?
Corn plants need at least 6-8 hours of direct sunlight per day to thrive. Choose a location for your container corn that receives plenty of sunlight throughout the day. If you live in a particularly hot climate, you may need to provide some afternoon shade to prevent the plants from overheating. If you’re growing corn indoors, you’ll need to supplement with artificial lighting, such as grow lights. Rotate your container corn regularly to ensure that all sides of the plant receive adequate sunlight.
How do I pollinate my container corn?
Corn is wind-pollinated, meaning that the pollen from the tassels (the male flowers at the top of the plant) needs to reach the silks (the female flowers on the ears) for fertilization to occur. In a container setting, you may need to assist with pollination to ensure a good harvest. You can do this by gently shaking the corn stalks to release pollen from the tassels. You can also collect pollen from the tassels using a small brush and then apply it to the silks. Repeat this process every day for several days to ensure that all the silks are pollinated.
What are some common pests and diseases that affect container corn?
Common pests that can affect container corn include aphids, corn earworms, and spider mites. Aphids can be controlled with insecticidal soap or neem oil. Corn earworms can be handpicked or treated with Bacillus thuringiensis (Bt). Spider mites can be controlled with horticultural oil or miticides. Common diseases that can affect container corn include fungal diseases such as rust and leaf spot. These diseases can be prevented by providing good air circulation, avoiding overhead watering, and applying fungicides if necessary.
When is the best time to harvest my container corn?
The best time to harvest your container corn is when the silks have turned brown and dry, and the kernels are plump and milky. You can test the ripeness of the kernels by piercing one with your fingernail – if a milky liquid squirts out, the corn is ready to harvest. To harvest, simply grasp the ear firmly and twist it downward until it snaps off the stalk. Enjoy your freshly harvested corn grilled, boiled, or roasted!
Leave a Comment