

Growing Gooseberries might seem like a challenge reserved for seasoned gardeners, but trust me, with a few clever tricks and DIY hacks, you can enjoy these tart and delicious berries straight from your own backyard! For centuries, gooseberries have been a beloved fruit in European gardens, prized for their unique flavor and versatility in jams, pies, and even savory dishes.
But why should you bother growing gooseberries? Well, store-bought gooseberries can be hard to find and often lack the vibrant flavor of homegrown ones. Plus, there’s something incredibly satisfying about nurturing a plant from a tiny seedling to a bountiful producer. This article is packed with easy-to-follow DIY tips and tricks that will demystify the process of growing gooseberries, even if you’re a complete beginner.
I’m going to share my favorite secrets for choosing the right variety, preparing the perfect soil, and protecting your precious berries from pests and diseases. Get ready to transform your garden into a gooseberry paradise – you’ll be amazed at how easy and rewarding it can be!
Growing Gooseberries: A DIY Guide to Bountiful Berries!
Alright, berry lovers! I’m so excited to share my secrets to growing juicy, delicious gooseberries right in your own backyard. Gooseberries often get overlooked, but trust me, they’re incredibly rewarding to grow. They’re packed with flavor, relatively easy to care for, and offer a unique tartness that’s perfect for jams, pies, and even just snacking on fresh. Let’s dive in!
Choosing the Right Gooseberry Variety
Before we even think about planting, we need to pick the perfect gooseberry variety for your climate and taste. There are two main types: European and American.
* **European Gooseberries (Ribes uva-crispa):** These tend to have larger, more flavorful berries, but they’re also more susceptible to mildew. If you live in a humid area, you might want to consider a mildew-resistant variety.
* **American Gooseberries (Ribes hirtellum):** These are generally more disease-resistant and easier to grow, but the berries are often smaller.
Here are a few popular varieties I recommend:
* **’Hinnonmaki Red’:** A European variety known for its excellent flavor and good mildew resistance. The berries are a beautiful red color.
* **’Invicta’:** Another European variety, very productive and relatively resistant to mildew. The berries are large and green.
* **’Poorman’:** An American variety, very hardy and disease-resistant. The berries are red and have a good, tart flavor.
* **’Pixwell’:** Another American variety, known for being easy to grow and having good disease resistance. The berries are pinkish-red.
Tip: Check with your local nursery to see which varieties thrive in your area. They’ll have the best advice based on your specific climate and soil conditions.
Preparing the Planting Site
Gooseberries need a sunny spot with well-drained soil. They can tolerate some shade, especially in hotter climates, but they’ll produce the most fruit in full sun (at least 6 hours a day).
* **Soil Testing:** Before planting, it’s a good idea to test your soil’s pH. Gooseberries prefer a slightly acidic soil, with a pH between 6.0 and 6.5. You can buy a soil testing kit at most garden centers.
* **Soil Amendment:** If your soil is heavy clay or sandy, you’ll need to amend it with organic matter. Compost, well-rotted manure, or peat moss are all great options. Dig in plenty of organic matter to improve drainage and fertility.
* **Weed Removal:** Clear the planting area of all weeds and grass. Gooseberries don’t compete well with weeds, so it’s important to start with a clean slate.
Planting Your Gooseberry Bush
Now for the fun part – planting! I usually plant my gooseberries in the early spring or late fall, when the plants are dormant.
1. **Dig the Hole:** Dig a hole that’s twice as wide as the root ball and just as deep.
2. **Amend the Soil (Again!):** Mix some compost or well-rotted manure into the soil you removed from the hole. This will give your gooseberry bush a good start.
3. **Position the Plant:** Gently remove the gooseberry bush from its container and loosen the roots. Place the plant in the hole, making sure the top of the root ball is level with the ground.
4. **Backfill the Hole:** Fill the hole with the amended soil, gently tamping it down around the roots.
5. **Water Thoroughly:** Water the newly planted gooseberry bush thoroughly. This will help settle the soil and get the roots established.
6. **Mulch:** Apply a layer of mulch around the base of the plant. Mulch helps retain moisture, suppress weeds, and regulate soil temperature. I like to use wood chips, straw, or shredded bark.
Important Note: Space your gooseberry bushes about 4-5 feet apart. This will give them plenty of room to grow and allow for good air circulation, which helps prevent disease.
Caring for Your Gooseberry Bush
Once your gooseberry bush is planted, it’s important to provide it with proper care to ensure a healthy and productive plant.
Watering
Gooseberries need consistent moisture, especially during dry periods. Water deeply and regularly, especially when the berries are developing. Aim for about 1 inch of water per week.
Tip: Use a soaker hose or drip irrigation to water your gooseberry bushes. This will help prevent fungal diseases by keeping the foliage dry.
Fertilizing
Gooseberries benefit from regular fertilization. In the spring, apply a balanced fertilizer, such as 10-10-10, according to the package directions. You can also use organic fertilizers, such as compost or fish emulsion.
Caution: Avoid over-fertilizing, as this can lead to excessive vegetative growth and reduced fruit production.
Pruning
Pruning is essential for maintaining a healthy and productive gooseberry bush. Prune in late winter or early spring, before the buds start to swell.
* **Remove Dead, Damaged, or Diseased Wood:** Start by removing any dead, damaged, or diseased branches.
* **Thin Out the Center:** Thin out the center of the bush to improve air circulation and light penetration.
* **Remove Low-Growing Branches:** Remove any branches that are growing close to the ground. These branches are more susceptible to disease.
* **Maintain a Balance:** Aim to have a mix of young and old wood. Gooseberries produce the most fruit on 2-3 year old wood.
Pruning Guide for Young Plants (1-3 years old):
* **Year 1:** After planting, cut back all the shoots to about 6 inches above the ground. This will encourage the plant to develop a strong root system.
* **Year 2:** Select 4-5 strong shoots to form the main framework of the bush. Remove any weak or crossing shoots.
* **Year 3:** Continue to select strong shoots and remove any weak or crossing shoots. Prune back the selected shoots by about one-third.
Pruning Guide for Mature Plants (4+ years old):
* Remove about one-third of the oldest wood each year. This will encourage new growth and maintain a good balance of young and old wood.
* Shorten the side shoots to 4-6 buds.
* Remove any suckers that are growing from the base of the plant.
Pest and Disease Control
Gooseberries can be susceptible to a few pests and diseases. Here are some common problems and how to deal with them:
* **Gooseberry Sawfly:** These larvae can defoliate your gooseberry bush in a matter of days. Check your plants regularly for signs of infestation. Handpick the larvae or spray with insecticidal soap.
* **Powdery Mildew:** This fungal disease can cause a white, powdery coating on the leaves and berries. Choose mildew-resistant varieties and provide good air circulation. You can also spray with a fungicide if necessary.
* **Currant Borer:** This pest tunnels into the stems of gooseberry bushes, causing them to wilt and die. Prune out any infested stems and destroy them.
* **Aphids:** These small insects can suck the sap from the leaves, causing them to curl and distort. Spray with insecticidal soap or neem oil.
Organic Pest Control: I always prefer to use organic pest control methods whenever possible. Insecticidal soap, neem oil, and horticultural oil are all effective and safe for use on gooseberries.
Supporting the Branches
As your gooseberry bush matures and the berries get heavier, the branches may start to droop. You can support the branches with stakes or a trellis. This will help prevent the branches from breaking and make it easier to harvest the berries.
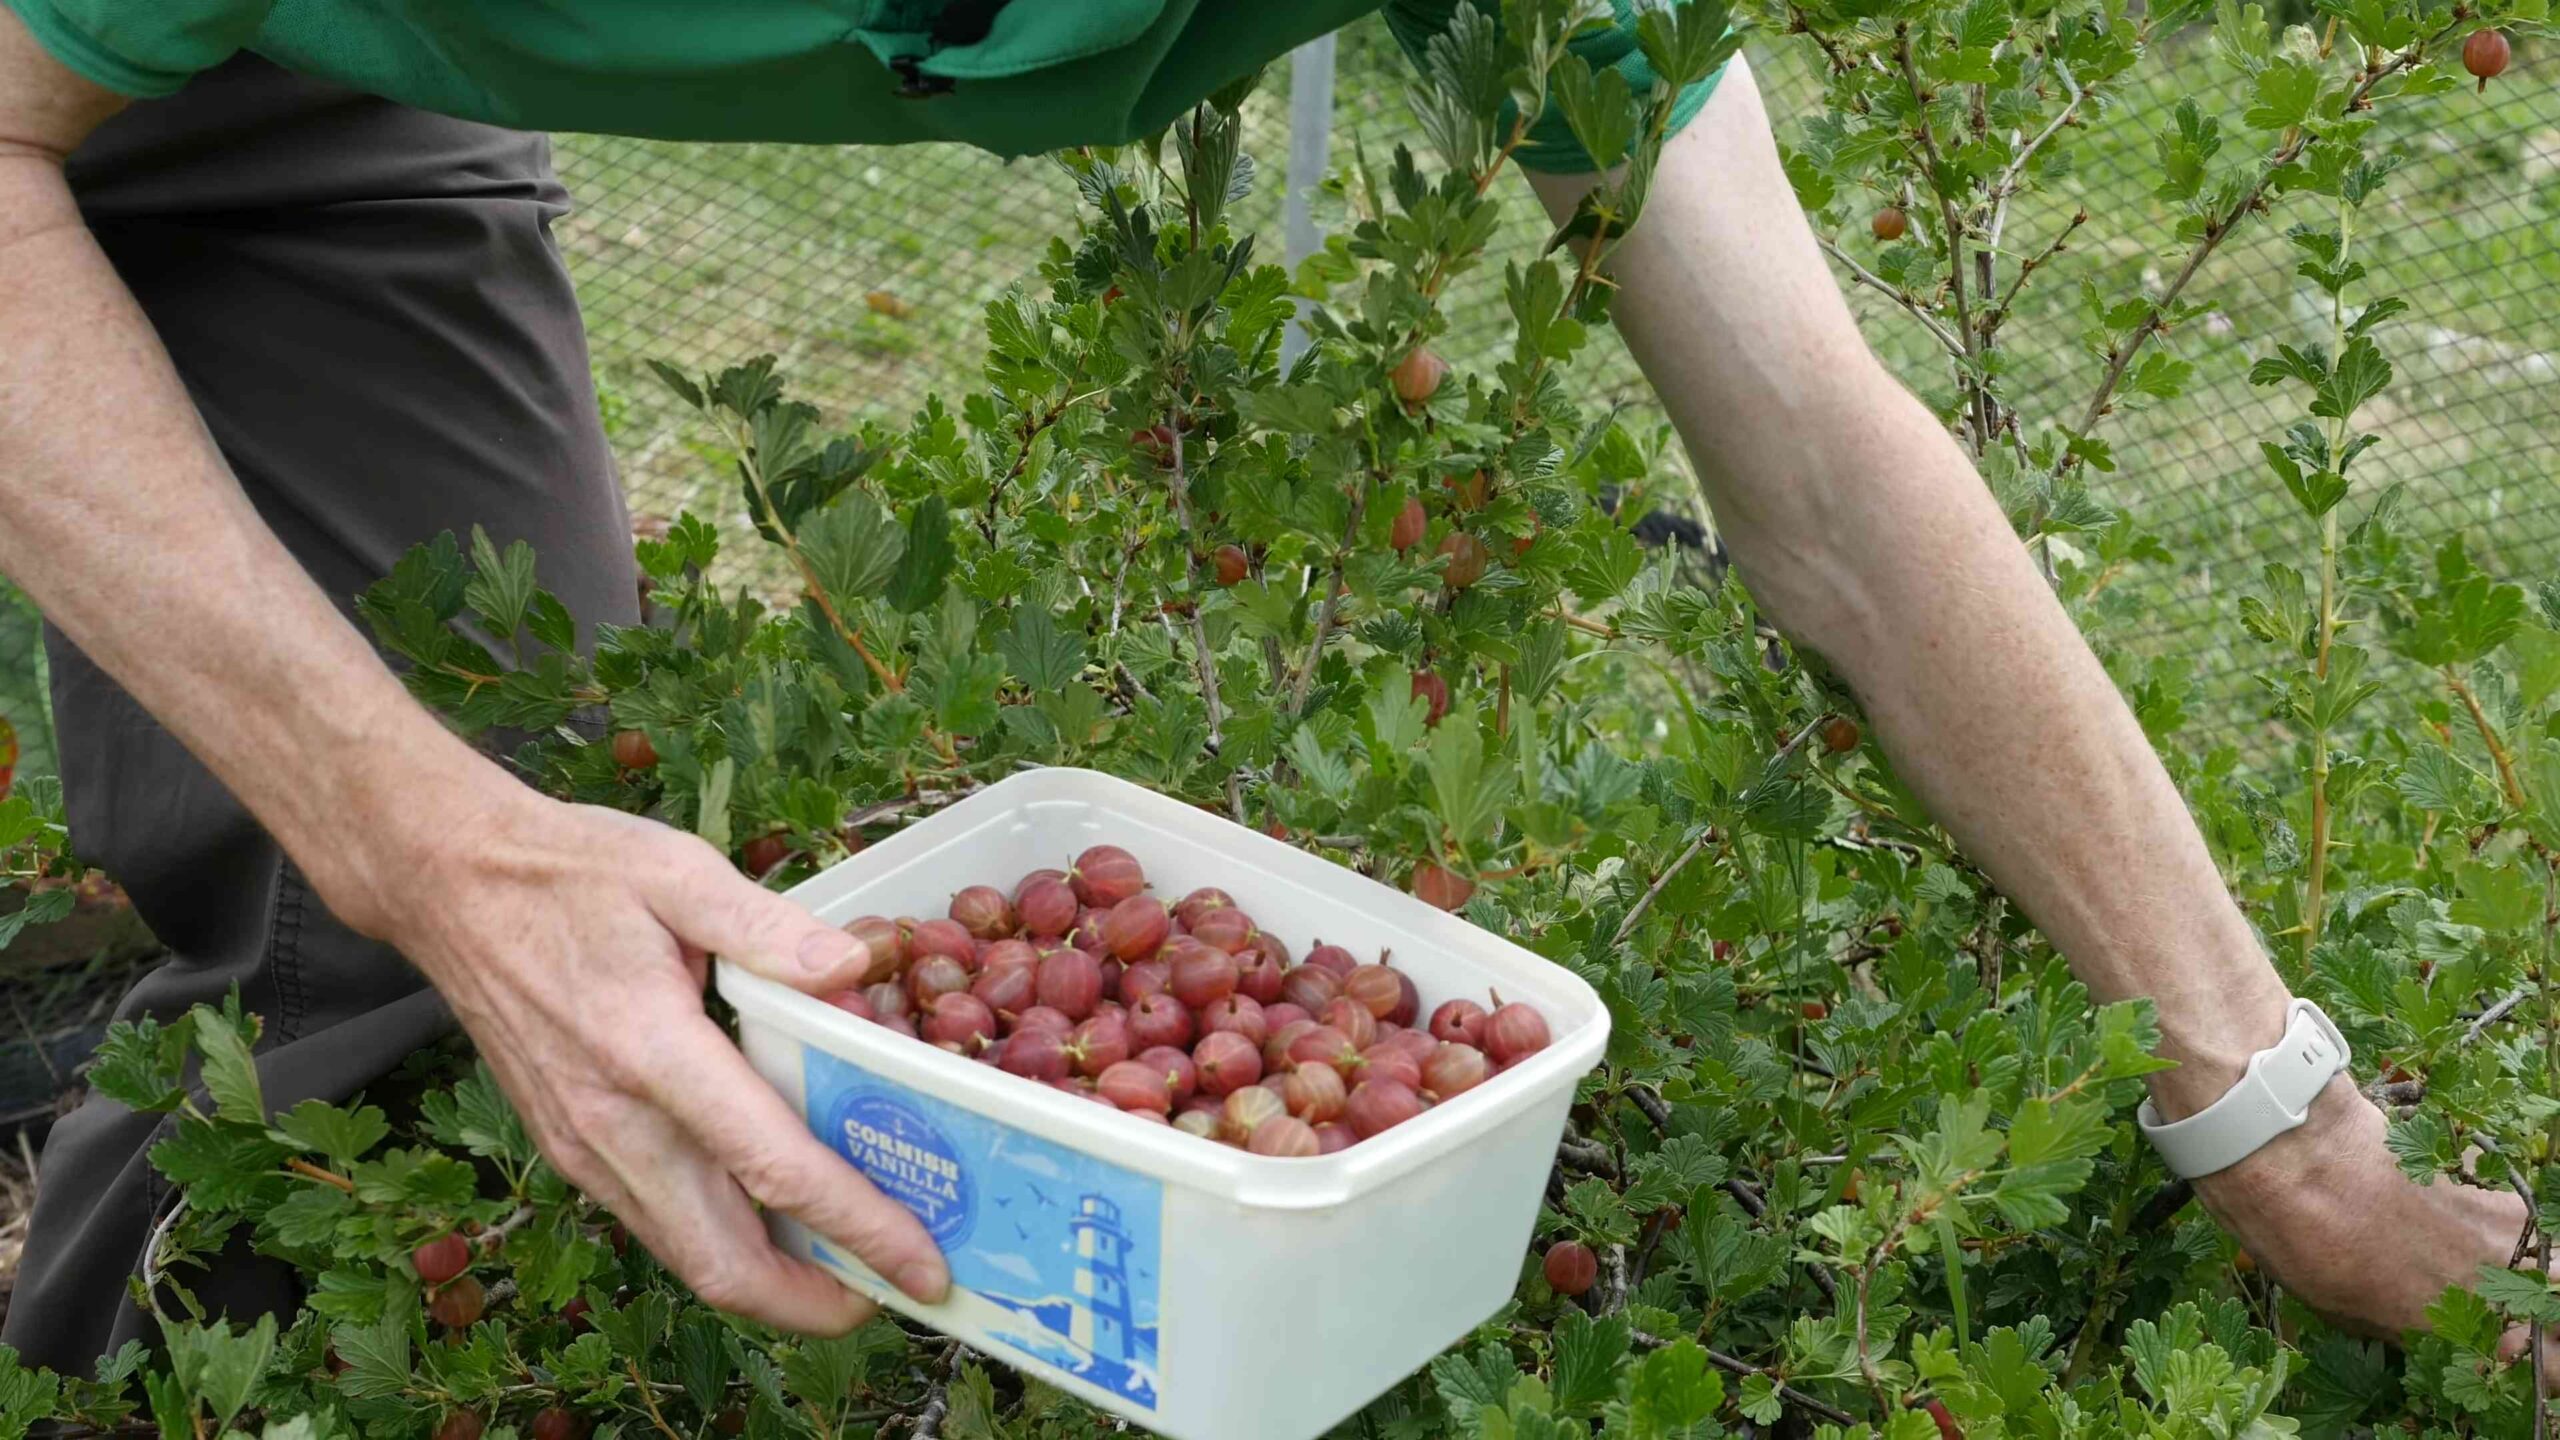
Harvesting Your Gooseberries
The moment we’ve all been waiting for – harvesting! Gooseberries are typically ready to harvest in mid-summer, about 60-70 days after flowering.
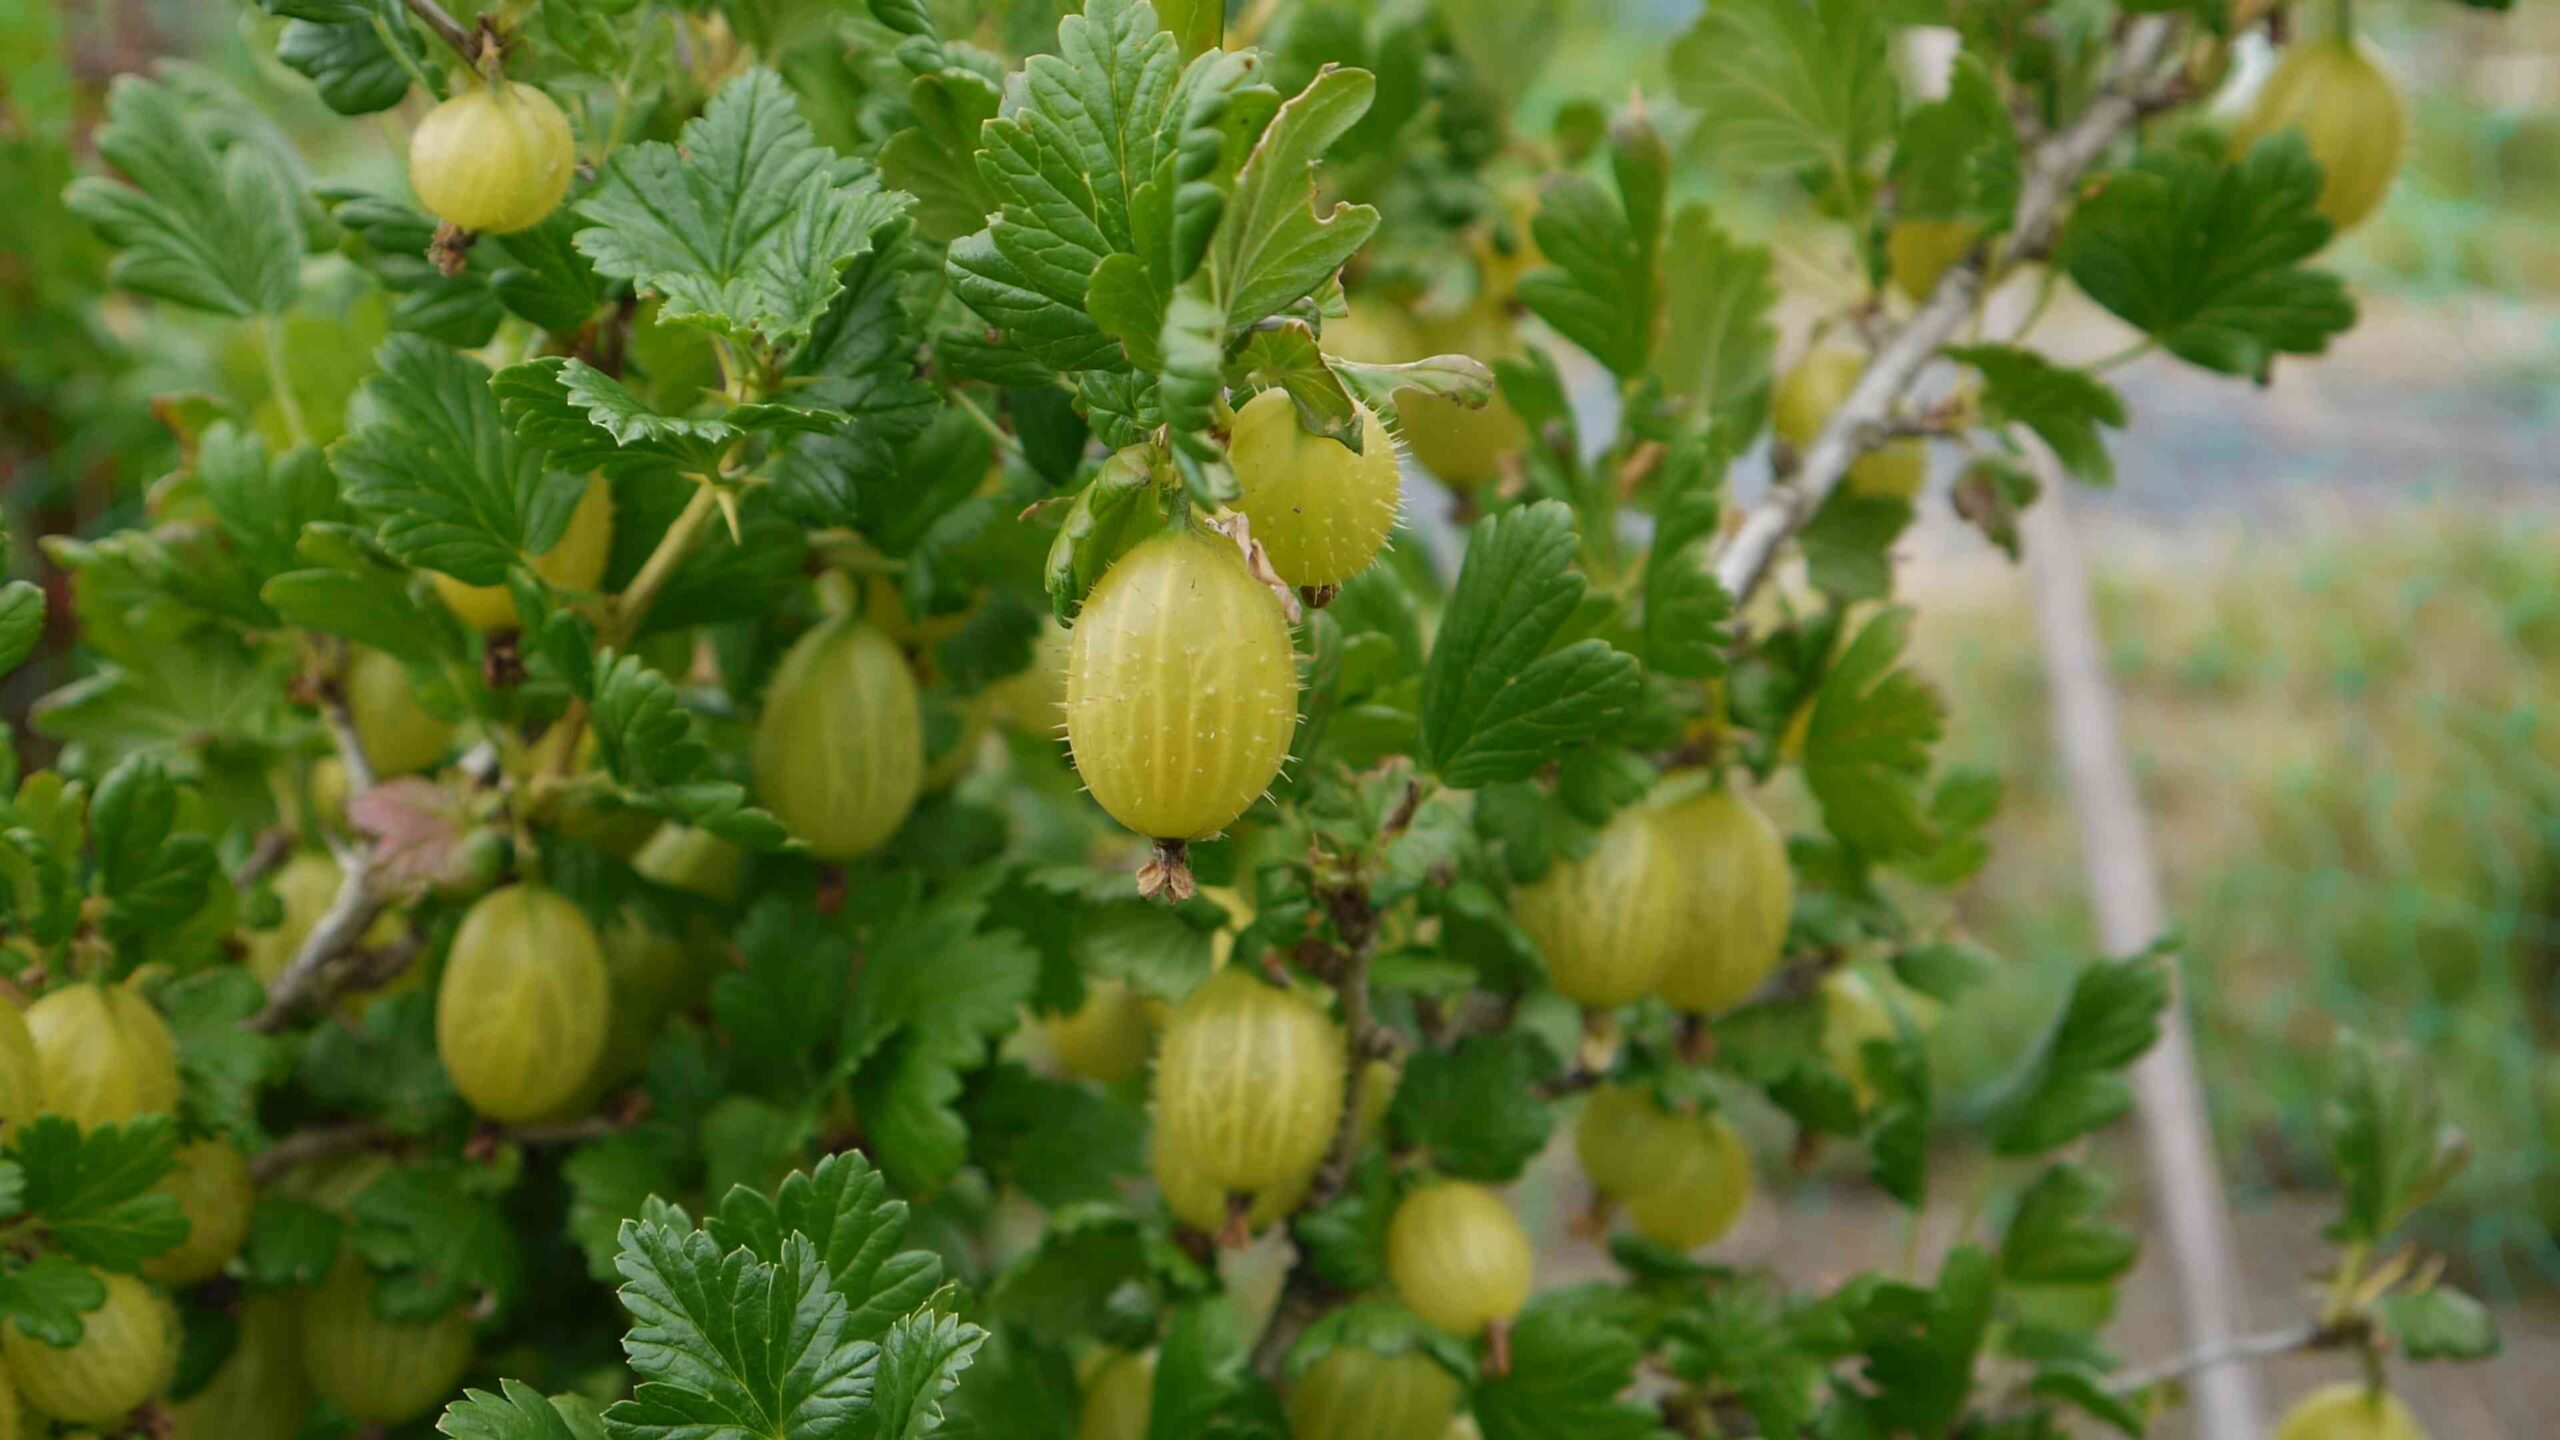
* **Ripeness:** The berries will change color as they ripen. The exact color will depend on the variety, but they’ll typically turn red, pink, green, or yellow. The berries should also be slightly soft to the touch.
* **Harvesting Technique:** Gently pluck the berries from the bush. Be careful not to damage the branches.
* **Early Harvest for Cooking:** For jams and jellies, you can harvest the berries when they’re still slightly underripe. They’ll have a higher pectin content, which will help the jam set.
* **Late Harvest for Eating Fresh:** For eating fresh, wait until the berries are fully ripe. They’ll be sweeter and more flavorful.
Storage: Gooseberries can be stored in the refrigerator for up to a week. You can also freeze them for longer storage. Simply wash and dry the berries, then spread them out on a baking sheet and freeze them. Once they’re frozen, transfer them to a freezer bag or container.
Enjoying
Conclusion
So, there you have it! Growing gooseberries at home, while it might seem a little daunting at first, is incredibly rewarding and, with this simple DIY trick, surprisingly achievable. We’ve walked you through a method that not only simplifies the process but also significantly increases your chances of a bountiful harvest. Think of it: plump, juicy gooseberries, bursting with flavor, ready to be transformed into delectable jams, pies, or simply enjoyed fresh from your own garden.
This isn’t just about saving money (although that’s a definite perk!). It’s about connecting with nature, understanding the life cycle of your food, and experiencing the satisfaction of nurturing something from a small cutting to a thriving, fruit-bearing bush. It’s about knowing exactly what’s going into your food, free from any unwanted chemicals or additives.
But the best part? This DIY trick for growing gooseberries is incredibly versatile. Feel free to experiment! Try different types of rooting hormones to see which works best for your specific climate and gooseberry variety. Consider using different types of growing mediums, like a mix of perlite and vermiculite, to optimize drainage and aeration. You could even try this method with other types of berry bushes, like currants or jostaberries, to expand your homegrown fruit collection.
Don’t be afraid to get creative with your setup. If you don’t have a greenhouse, a simple cold frame or even a sheltered spot on your patio can work wonders. The key is to provide consistent moisture, warmth, and protection from harsh weather conditions.
We truly believe that anyone can successfully grow gooseberries with this method. It’s all about patience, observation, and a little bit of love. So, grab your gardening gloves, gather your supplies, and get ready to embark on this exciting journey.
We’re confident that you’ll be amazed by the results. And we can’t wait to hear about your experiences! Share your photos, tips, and stories in the comments below. Let’s build a community of gooseberry growers and learn from each other. What varieties are you trying? What challenges have you faced? What successes have you celebrated? Your insights could be invaluable to other aspiring gardeners.
Remember, the key to successful gardening is continuous learning and adaptation. Don’t be discouraged if you encounter setbacks along the way. Every mistake is an opportunity to learn and improve. And with a little bit of effort, you’ll be enjoying homegrown gooseberries in no time. Happy gardening!
Frequently Asked Questions (FAQ)
What exactly *is* the DIY trick you’re referring to?
The DIY trick we’ve been emphasizing throughout this article refers to a specific method of propagating gooseberries from cuttings. This typically involves taking semi-hardwood cuttings in late summer or early autumn, treating them with rooting hormone, and then planting them in a well-draining growing medium. The key is to maintain consistent moisture and warmth to encourage root development. While the specific steps may vary slightly depending on the source, the underlying principle remains the same: using cuttings to create new gooseberry plants, rather than relying solely on purchasing established bushes. This method is cost-effective and allows you to propagate specific varieties that you particularly enjoy.
What are the best gooseberry varieties to grow using this DIY method?
While this method works for most gooseberry varieties, some tend to root more easily than others. Generally, European gooseberry varieties (Ribes uva-crispa) are known for their larger fruit size and sweeter flavor, but they can be more susceptible to mildew. American gooseberry varieties (Ribes hirtellum) are typically more disease-resistant but may have smaller, tarter fruit. Hybrid varieties, which combine the best traits of both, are also a good option. Some popular and reliable varieties to try include ‘Hinnonmaki Red,’ ‘Invicta,’ ‘Pixwell,’ and ‘Poorman.’ Research the specific characteristics of each variety to choose the ones that best suit your taste preferences and growing conditions.
How long does it take for the cuttings to root and produce fruit?
Rooting time can vary depending on factors such as the variety, the quality of the cuttings, and the environmental conditions. Generally, you can expect to see root development within 4-8 weeks. Once the cuttings have rooted, they can be transplanted into larger pots or directly into the garden. It typically takes 2-3 years for a gooseberry bush grown from a cutting to start producing fruit. Be patient and provide proper care, and you’ll be rewarded with a bountiful harvest in due time.
What kind of soil is best for growing gooseberries?
Gooseberries thrive in well-draining soil that is rich in organic matter. A slightly acidic to neutral pH (around 6.0-6.5) is ideal. Before planting, amend the soil with compost or well-rotted manure to improve drainage and fertility. Avoid heavy clay soils, as they can become waterlogged and lead to root rot. If you have clay soil, consider planting your gooseberries in raised beds or containers to improve drainage.
How much sunlight do gooseberries need?
Gooseberries need at least 6 hours of sunlight per day to produce a good crop of fruit. However, in hot climates, they may benefit from some afternoon shade to prevent the berries from scorching. Choose a location that receives morning sun and afternoon shade, or provide some artificial shade during the hottest part of the day.
What are some common problems that affect gooseberries, and how can I prevent them?
Some common problems that affect gooseberries include powdery mildew, gooseberry sawfly, and aphids. Powdery mildew is a fungal disease that can cause a white, powdery coating on the leaves and fruit. To prevent powdery mildew, choose disease-resistant varieties, provide good air circulation, and avoid overhead watering. Gooseberry sawfly larvae can defoliate the bushes. Inspect your plants regularly and handpick the larvae or use an insecticidal soap. Aphids are small, sap-sucking insects that can weaken the plants. Control aphids with insecticidal soap or by introducing beneficial insects like ladybugs.
How often should I water my gooseberry bushes?
Water your gooseberry bushes regularly, especially during dry periods. Aim to keep the soil consistently moist but not waterlogged. Water deeply and less frequently, rather than shallowly and more often. Mulching around the base of the plants can help to retain moisture and suppress weeds.
Do I need to prune my gooseberry bushes?
Yes, pruning is essential for maintaining the health and productivity of your gooseberry bushes. Prune in late winter or early spring, before the buds break. Remove any dead, damaged, or crossing branches. Also, thin out the center of the bush to improve air circulation and sunlight penetration. Aim to have a mix of young and old wood, as the best fruit is produced on 2-3 year old branches.
Can I grow gooseberries in containers?
Yes, gooseberries can be successfully grown in containers, especially if you have limited space. Choose a large container (at least 15-20 gallons) with good drainage. Use a high-quality potting mix and fertilize regularly. Container-grown gooseberries may need more frequent watering than those grown in the ground.
What kind of fertilizer should I use for gooseberries?
Fertilize your gooseberry bushes in early spring with a balanced fertilizer, such as 10-10-10. You can also amend the soil with compost or well-rotted manure. Avoid over-fertilizing, as this can lead to excessive vegetative growth and reduced fruit production.
How do I know when my gooseberries are ripe?
Gooseberries are typically ready to harvest in mid-summer. The exact timing will depend on the variety and the growing conditions. The berries will change color from green to red, pink, or yellow, depending on the variety. They should also be slightly soft to the touch. Taste a few berries to check for sweetness. If they are still tart, wait a few more days before harvesting.
Can I freeze gooseberries?
Yes, gooseberries freeze very well. Simply wash and dry the berries, then spread them out on a baking sheet and freeze for a few hours. Once frozen, transfer them to a freezer bag or container. Frozen gooseberries can be stored for up to a year.
Are gooseberries good for you?
Yes! Gooseberries are packed with vitamins, minerals, and antioxidants. They are a good source of vitamin C, vitamin A, and fiber. They also contain antioxidants that can help protect against cell damage. Adding gooseberries to your diet can contribute to overall health and well-being.

Leave a Comment