

Growing Kale at Home can feel like a daunting task, conjuring images of sprawling farms and expert gardeners. But what if I told you that vibrant, nutrient-packed kale is surprisingly easy to cultivate right in your own backyard, balcony, or even windowsill? Forget the grocery store – fresh, homegrown kale is within your reach!
For centuries, kale has been a staple in diets around the world, from the hearty stews of medieval Europe to the vibrant green smoothies of today. Its resilience and nutritional power have made it a beloved crop, and now, you can tap into that rich history by growing your own. But why should you bother with the effort? Well, beyond the satisfaction of nurturing something from seed to harvest, growing your own kale guarantees freshness and allows you to control exactly what goes into your food – no pesticides, no hidden additives, just pure, leafy goodness.
This DIY guide is packed with simple tricks and hacks to make growing kale at home a breeze, even if you’re a complete beginner. We’ll cover everything from choosing the right variety to troubleshooting common problems, ensuring you’ll be enjoying delicious kale salads and smoothies in no time. So, grab your gardening gloves, and let’s get started on this rewarding journey together!
Growing Kale at Home: A Beginner’s Guide to Leafy Greens
Hey there, fellow gardening enthusiasts! I’m so excited to share my experience with growing kale at home. It’s surprisingly easy, incredibly rewarding, and gives you access to fresh, nutritious greens right in your backyard (or even on your balcony!). Kale is a powerhouse of vitamins and minerals, and nothing beats the taste of homegrown. So, let’s dive in!
Choosing Your Kale Variety
Before we get our hands dirty, let’s talk kale varieties. There are tons to choose from, each with its own unique flavor and texture. Here are a few of my favorites:
* Curly Kale: This is the classic kale, with its frilly, vibrant green leaves. It’s slightly bitter but holds up well in cooking.
* Lacinato Kale (Dinosaur Kale): Also known as Tuscan kale or cavolo nero, this variety has long, dark green, almost black leaves with a slightly bumpy texture. It’s milder and sweeter than curly kale.
* Red Russian Kale: This kale has flat, fringed leaves with purple stems. It’s tender and has a slightly sweet and nutty flavor.
* Redbor Kale: A beautiful ornamental kale with deeply ruffled, purple leaves. It’s slightly tougher than other varieties but adds a pop of color to your garden.
I recommend starting with a variety that appeals to you most. Don’t be afraid to experiment!
Getting Started: Seeds vs. Seedlings
You have two main options for starting your kale journey: seeds or seedlings.
* Seeds: Starting from seed is more economical and gives you a wider variety to choose from. However, it requires a bit more patience and attention.
* Seedlings: Buying seedlings from a local nursery is a quicker and easier option, especially for beginners. You’ll get a head start on the growing season.
I’ve done both, and honestly, both work great! If you’re new to gardening, seedlings might be the way to go initially.
Planting Kale: A Step-by-Step Guide
Okay, let’s get down to the nitty-gritty of planting!
1. Timing is Key
Kale is a cool-season crop, which means it thrives in cooler temperatures.
* For a spring harvest: Start seeds indoors 6-8 weeks before the last expected frost. Transplant seedlings outdoors 2-3 weeks before the last frost.
* For a fall/winter harvest: Sow seeds directly into the garden in mid-summer (July/August). This will give your kale plenty of time to mature before the first frost.
I usually aim for a fall harvest because the cooler temperatures actually make the kale sweeter!
2. Preparing the Soil
Kale needs well-drained, fertile soil with a pH between 6.0 and 7.5.
* Amend the soil: Before planting, amend your soil with plenty of compost or well-rotted manure. This will provide essential nutrients and improve drainage. I like to add a generous amount – about 2-3 inches worked into the top 6-8 inches of soil.
* Choose a sunny spot: Kale needs at least 6 hours of sunlight per day. Choose a location in your garden that gets plenty of sun.
3. Planting Seeds (If Starting from Seed)
* Sow seeds indoors: Fill seed trays or small pots with seed-starting mix. Sow seeds about 1/4 inch deep and gently water.
* Keep the soil moist: Keep the soil consistently moist but not soggy. Use a spray bottle to mist the soil regularly.
* Provide light: Place the seed trays under grow lights or in a sunny window.
* Harden off seedlings: Before transplanting seedlings outdoors, you’ll need to harden them off. This means gradually exposing them to outdoor conditions over a period of 7-10 days. Start by placing them outside for a few hours each day, gradually increasing the amount of time they spend outdoors.
4. Planting Seedlings (Whether Grown from Seed or Purchased)
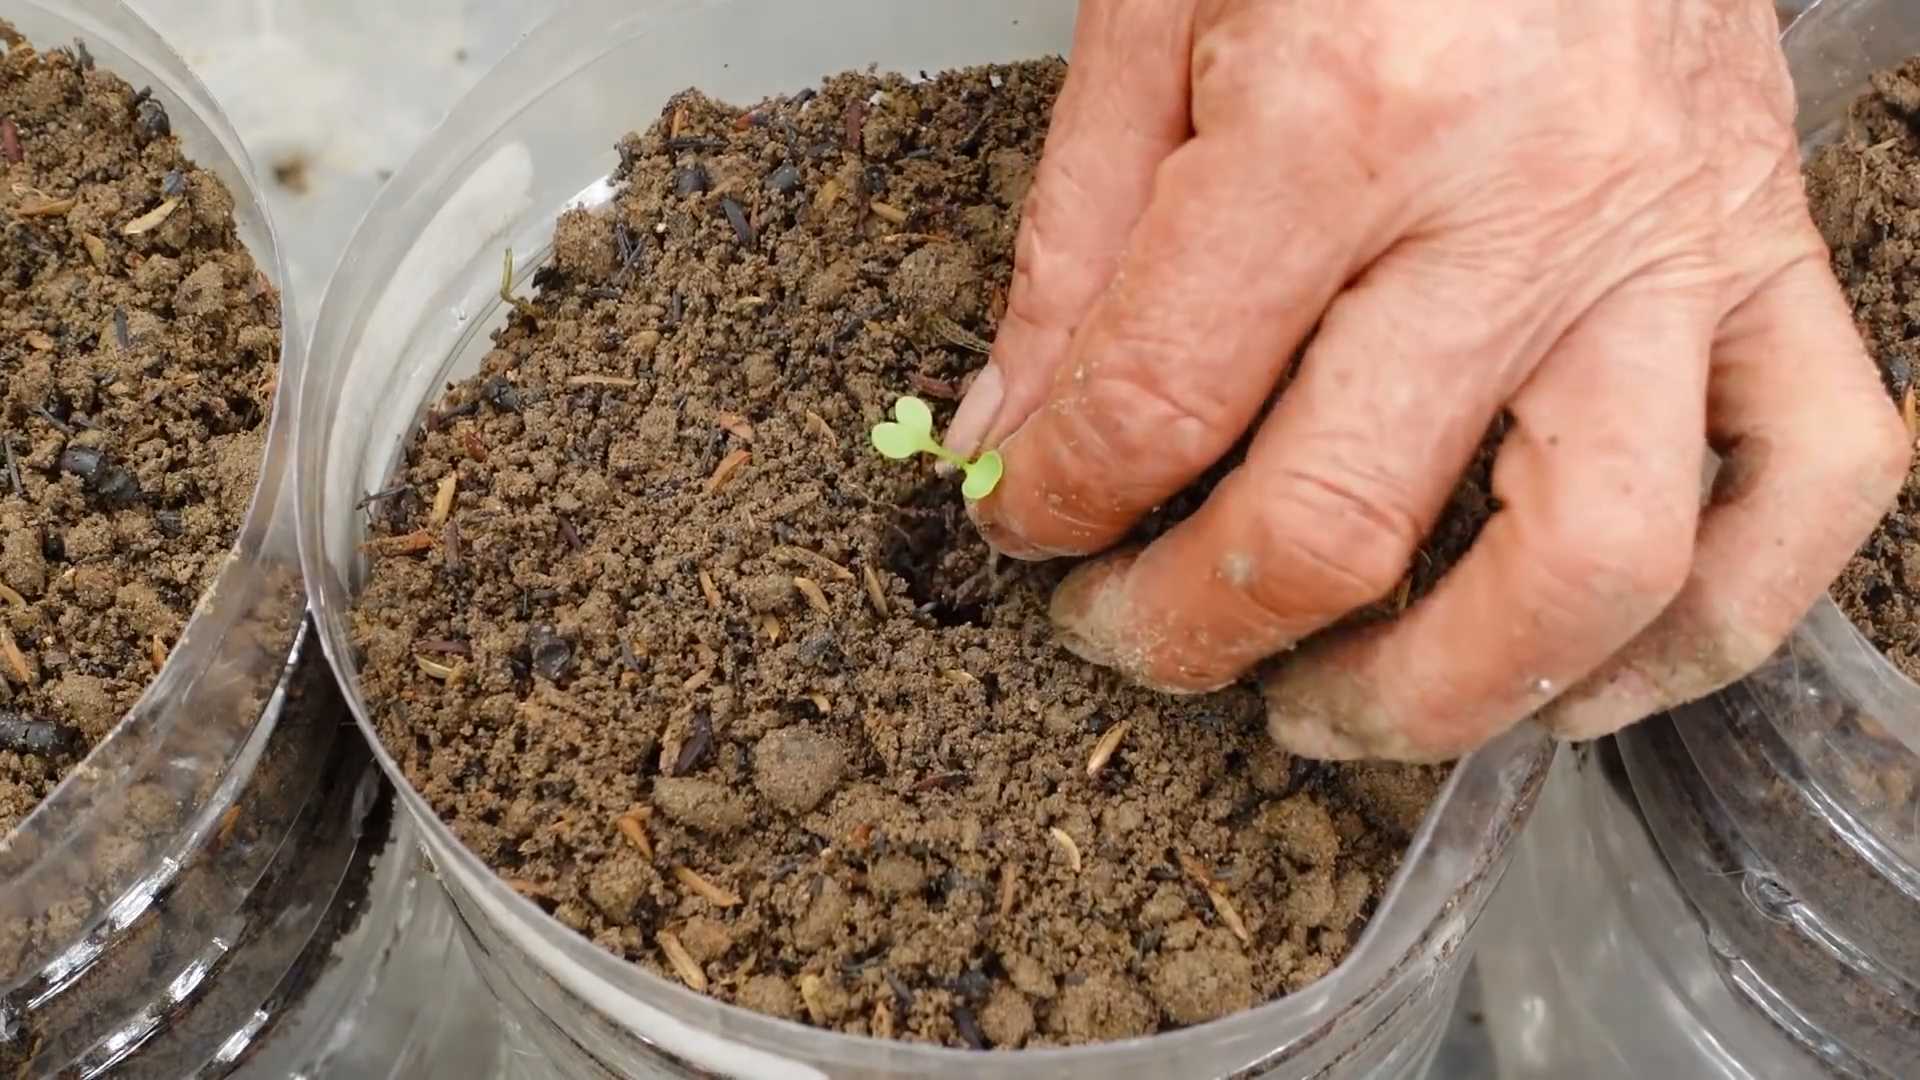
* Dig holes: Dig holes that are slightly larger than the root ball of your seedlings. Space the holes about 12-18 inches apart.
* Gently remove seedlings: Carefully remove the seedlings from their containers, being careful not to damage the roots.
* Place seedlings in holes: Place the seedlings in the holes and gently backfill with soil.
* Water thoroughly: Water the seedlings thoroughly after planting.
5. Watering and Fertilizing
* Water regularly: Kale needs consistent moisture, especially during hot weather. Water deeply whenever the top inch of soil feels dry.
* Fertilize: Fertilize your kale every 4-6 weeks with a balanced organic fertilizer. I like to use fish emulsion or compost tea.
6. Pest Control
Kale can be susceptible to a few pests, including aphids, cabbage worms, and flea beetles.
* Inspect regularly: Check your kale plants regularly for signs of pests.
* Handpick pests: If you find any pests, handpick them off the plants and dispose of them.
* Use organic pest control methods: For larger infestations, you can use organic pest control methods such as insecticidal soap or neem oil. I’ve found that covering my kale with row covers early in the season helps prevent many pest problems.
Harvesting Your Kale
Now for the best part – harvesting!
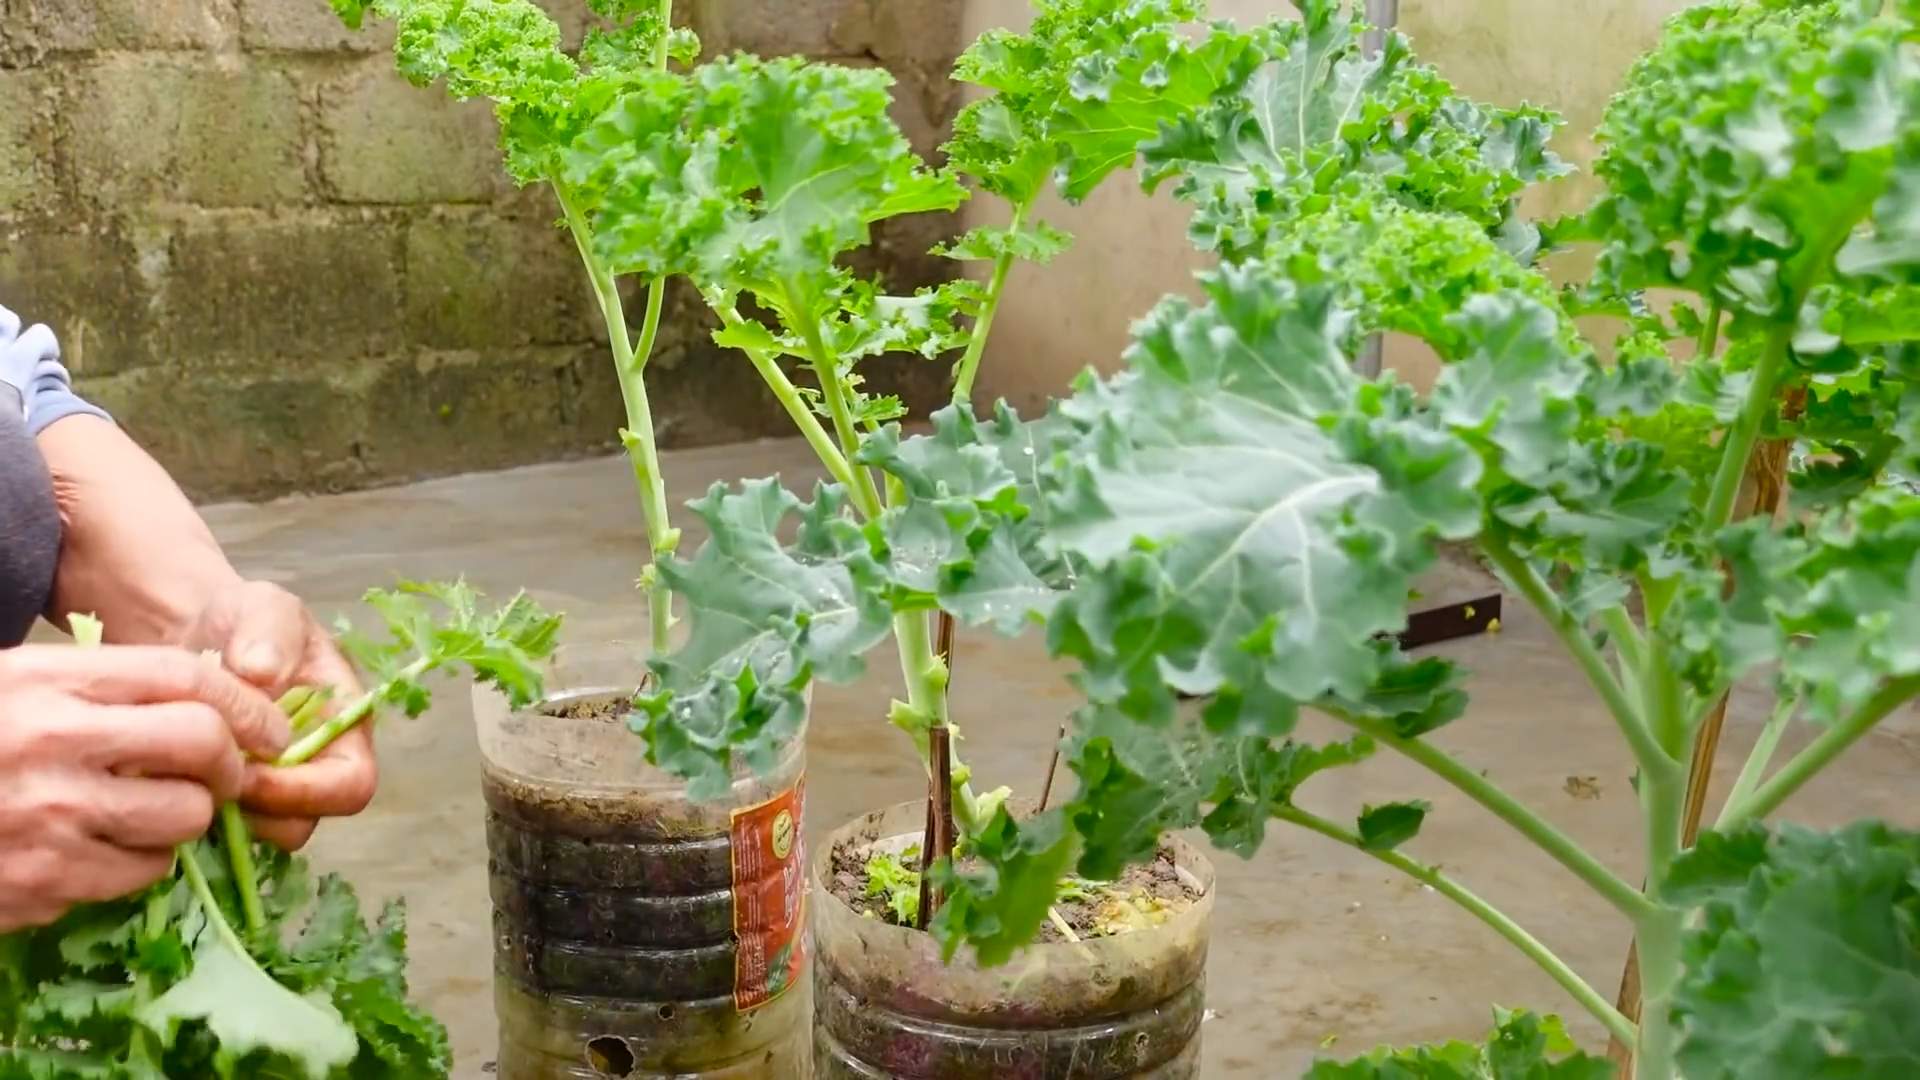
* Harvest outer leaves: Start harvesting kale when the leaves are about 6-8 inches long. Harvest the outer leaves first, leaving the inner leaves to continue growing.
* Cut or snap leaves: You can either cut the leaves off with a knife or snap them off with your fingers.
* Harvest regularly: Harvesting regularly will encourage the plant to produce more leaves.
* Enjoy your harvest: Wash your kale thoroughly before eating. You can use it in salads, smoothies, soups, stews, or sauté it as a side dish.
I love making kale chips! Just toss the leaves with olive oil and salt, then bake them in the oven until crispy.
Troubleshooting
Even with the best care, you might encounter a few problems along the way. Here are some common issues and how to address them:
* Yellowing leaves: This could be a sign of nutrient deficiency. Try fertilizing your kale with a balanced organic fertilizer.
* Holes in leaves: This is likely caused by pests. Inspect your plants regularly and use organic pest control methods as needed.
* Bolting: Bolting occurs when kale goes to seed prematurely, usually due to hot weather. To prevent bolting, plant kale in the early spring or late summer. If your kale does bolt, you can still eat the leaves, but they may be more bitter.
Extending the Harvest
Want to keep enjoying fresh kale even as the weather gets colder? Here are a few tips:
* Cold frames: Use cold frames to protect your kale from frost and extend the growing season.
* Row covers: Cover your kale with row covers to provide extra insulation.
* Mulch: Mulch around your kale plants to help retain moisture and protect the roots from freezing temperatures.
Saving Seeds (For the Advanced Gardener)
If you’re feeling adventurous, you can even save your own kale seeds! This is a great way to preserve your favorite varieties and save money.
* Allow plants to bolt: Let a few of your kale plants bolt and go to seed.
* Harvest seeds: Once the seed pods are dry and brown, harvest them and extract the seeds.
* Store seeds: Store the seeds in a cool, dry place.
Growing kale at home is a truly rewarding experience. It’s a great way to get fresh, healthy greens and connect with nature. So, grab your gardening gloves and get started! You’ll be amazed at how easy it is to grow your own delicious kale. Happy gardening!
Conclusion
So, there you have it! Growing kale at home isn’t just a trendy gardening fad; it’s a genuinely rewarding experience that puts fresh, nutritious greens right at your fingertips. We’ve walked through the simple steps, from selecting the right kale variety to harvesting your bountiful crop. But why is this DIY trick a must-try?
Firstly, consider the unparalleled freshness. Store-bought kale, even organic varieties, can’t compete with the vibrant flavor and crisp texture of kale harvested moments before you eat it. The difference is truly remarkable. Secondly, you’re in control of what goes into your kale. No pesticides, no herbicides, just pure, natural goodness. This is especially important if you’re health-conscious or have dietary restrictions. Thirdly, growing your own kale is incredibly cost-effective. A single packet of seeds can yield a continuous supply of kale for months, saving you money on grocery bills.
Beyond the basics, there’s a world of variations to explore. Experiment with different kale varieties like Lacinato (dinosaur kale), Red Russian, or Curly kale to discover your favorites. Try companion planting with herbs like rosemary or thyme to deter pests and enhance flavor. You can even grow kale in containers on your balcony or patio if you don’t have a traditional garden. Consider succession planting – sowing new seeds every few weeks – to ensure a continuous harvest throughout the growing season. For a spicier kick, try adding a few chili pepper plants nearby; some gardeners swear it improves the kale’s flavor!
Growing kale at home is more than just a gardening project; it’s an investment in your health, your wallet, and your connection to nature. It’s a chance to learn new skills, enjoy the satisfaction of growing your own food, and savor the delicious taste of homegrown kale.
We’ve covered the essentials, but the real magic happens when you get your hands dirty. Don’t be afraid to experiment, make mistakes, and learn from your experiences. Every garden is unique, and what works for one person may not work for another. The key is to be patient, observant, and persistent.
So, what are you waiting for? Grab some seeds, find a sunny spot, and start growing your own kale today! We’re confident that you’ll be amazed by the results. And once you’ve harvested your first crop, we’d love to hear about your experience. Share your tips, tricks, and photos in the comments below. Let’s build a community of kale-growing enthusiasts and inspire others to discover the joys of homegrown goodness. We encourage you to share your journey and any unique methods you discover for maximizing your kale yield. Did you find a particular fertilizer worked wonders? Or perhaps a specific pest control method proved exceptionally effective? Your insights could be invaluable to other aspiring kale growers.
Remember, the best way to learn is by doing. So, get out there, get growing, and get ready to enjoy the delicious taste of homegrown kale!
Frequently Asked Questions (FAQ)
What is the best time of year to start growing kale?
The ideal time to start growing kale depends on your climate. In general, kale is a cool-season crop, meaning it thrives in temperatures between 60°F and 70°F (15°C and 21°C). For spring harvests, start seeds indoors 6-8 weeks before the last expected frost. You can also direct sow seeds outdoors 2-4 weeks before the last frost. For fall and winter harvests, sow seeds outdoors in late summer or early fall. In warmer climates, you can grow kale throughout the winter. Pay attention to your local weather patterns and adjust your planting schedule accordingly.
How much sunlight does kale need?
Kale needs at least 6 hours of sunlight per day to thrive. Choose a location in your garden that receives full sun for most of the day. If you live in a particularly hot climate, some afternoon shade can be beneficial to prevent the leaves from scorching. If you’re growing kale indoors, use grow lights to supplement natural sunlight. Rotate your kale plants regularly to ensure even light exposure.
What kind of soil is best for growing kale?
Kale prefers well-drained soil that is rich in organic matter. Amend your soil with compost or aged manure before planting to improve its fertility and drainage. The ideal soil pH for kale is between 6.0 and 7.5. You can test your soil pH using a soil testing kit and adjust it as needed with lime or sulfur. Avoid planting kale in heavy clay soil, as this can lead to root rot. If you have clay soil, consider growing kale in raised beds or containers.
How often should I water my kale plants?
Water your kale plants regularly, especially during dry periods. Aim to keep the soil consistently moist but not waterlogged. Water deeply at the base of the plants, avoiding wetting the leaves, which can promote fungal diseases. Mulching around your kale plants can help retain moisture in the soil and suppress weeds. Check the soil moisture regularly by sticking your finger into the soil. If the top inch feels dry, it’s time to water.
What are some common pests and diseases that affect kale?
Kale can be susceptible to various pests and diseases, including aphids, cabbage worms, flea beetles, and fungal diseases like powdery mildew. Inspect your kale plants regularly for signs of pests or diseases. Handpick pests off the plants or use insecticidal soap or neem oil to control infestations. Prevent fungal diseases by providing good air circulation, avoiding overhead watering, and removing infected leaves promptly. Companion planting with herbs like rosemary or thyme can also help deter pests.
How do I harvest kale?
You can start harvesting kale leaves when they are about 4-6 inches long. Harvest the outer leaves first, leaving the inner leaves to continue growing. Use a sharp knife or scissors to cut the leaves close to the stem. Avoid tearing the leaves, as this can damage the plant. You can harvest kale leaves continuously throughout the growing season. The flavor of kale often improves after a frost.
Can I grow kale in containers?
Yes, kale can be grown successfully in containers. Choose a container that is at least 12 inches deep and wide to provide enough room for the roots to grow. Use a well-draining potting mix and water regularly. Place the container in a sunny location that receives at least 6 hours of sunlight per day. Fertilize your kale plants regularly with a balanced fertilizer.
How do I store harvested kale?
Store harvested kale in the refrigerator in a plastic bag or container. Kale will stay fresh for up to a week in the refrigerator. Wash the kale just before using it. You can also freeze kale for longer storage. Blanch the kale in boiling water for 2-3 minutes, then plunge it into ice water to stop the cooking process. Drain the kale well and freeze it in freezer bags or containers.
Is kale a good source of nutrients?
Yes, kale is an excellent source of nutrients. It is rich in vitamins A, C, and K, as well as minerals like calcium, iron, and potassium. Kale is also a good source of fiber and antioxidants. Eating kale can help boost your immune system, protect against chronic diseases, and improve your overall health.
What are some creative ways to use homegrown kale?
Homegrown kale is incredibly versatile! You can use it in salads, smoothies, soups, stews, stir-fries, and more. Try massaging kale with olive oil and lemon juice to make it more tender for salads. Add kale to your favorite smoothie recipe for a nutritional boost. Sauté kale with garlic and olive oil for a simple and delicious side dish. You can even bake kale chips for a healthy snack. The possibilities are endless!

Leave a Comment