

Growing Peppers Backyard Garden can be incredibly rewarding, adding vibrant colors and spicy flavors to your home-cooked meals. Have you ever dreamed of strolling into your backyard and plucking a perfectly ripe bell pepper or a fiery jalapeño, knowing you nurtured it from seed to table? I know I have! For centuries, peppers have held a significant place in cultures around the world, from the ancient civilizations of South America, where they were first cultivated, to becoming a staple ingredient in cuisines across the globe.
But let’s be honest, sometimes the idea of growing peppers backyard garden feels a bit daunting. Maybe you’ve tried before and ended up with stunted plants or a disappointing harvest. That’s where these DIY tricks and hacks come in! I’m here to share some simple, yet effective, techniques that will transform your pepper-growing experience. Whether you’re a seasoned gardener or just starting out, these tips will help you overcome common challenges, maximize your yield, and enjoy a bountiful harvest of delicious peppers. Get ready to unlock the secrets to a thriving pepper patch right in your own backyard!
Growing Peppers: From Seed to Salsa Right in Your Backyard!
Hey there, fellow garden enthusiasts! I’m so excited to share my tried-and-true method for growing peppers – and I’m not just talking about a few bell peppers. We’re diving into the world of spicy jalapenos, sweet banana peppers, and maybe even a few habaneros if you’re feeling brave! This guide will walk you through every step, from starting seeds indoors to harvesting a bumper crop. Let’s get our hands dirty!
Choosing Your Pepper Varieties
Before we even think about soil, let’s talk peppers! The sheer variety can be overwhelming, but here’s a quick rundown to help you choose:
* Bell Peppers: Classic, sweet, and come in a rainbow of colors. Great for stuffing, salads, and roasting.
* Jalapenos: A mild to medium heat level, perfect for salsas, pickling, and adding a kick to your dishes.
* Serranos: Hotter than jalapenos, these are great for those who like a bit more fire.
* Banana Peppers: Sweet and mild, ideal for pickling, sandwiches, and adding a subtle flavor to salads.
* Habaneros: Proceed with caution! These are seriously hot and should be used sparingly.
* Poblano: Mild and flavorful, often used in Mexican cuisine for dishes like chiles rellenos.
* Cayenne: Thin, red peppers known for their intense heat, perfect for drying and making chili powder.
Consider your climate and the length of your growing season when choosing varieties. Some peppers take longer to mature than others. Also, think about what you plan to do with your peppers. Do you want to make salsa? Pickle them? Or just add them to your everyday cooking?
Starting Seeds Indoors (8-10 Weeks Before Last Frost)
This is where the magic begins! Starting your pepper seeds indoors gives them a head start, especially in cooler climates.
What You’ll Need:
* Pepper seeds (of course!)
* Seed starting trays or small pots
* Seed starting mix (a light, sterile mix is crucial)
* A heat mat (optional, but highly recommended)
* Grow lights (essential for strong seedlings)
* Spray bottle with water
* A humidity dome or plastic wrap
Step-by-Step Instructions:
1. Prepare Your Seed Starting Trays: Fill your seed starting trays or pots with seed starting mix. Gently tap the trays to settle the mix.
2. Sow the Seeds: Make a small indentation (about ¼ inch deep) in the center of each cell or pot. Place 2-3 seeds in each indentation. This increases your chances of germination.
3. Cover the Seeds: Gently cover the seeds with more seed starting mix. Lightly pat down the surface.
4. Water Thoroughly: Use a spray bottle to thoroughly moisten the soil. Avoid overwatering, which can lead to damping off (a fungal disease that kills seedlings).
5. Provide Heat: Place the seed starting trays on a heat mat. Peppers need warm soil (around 80-85°F) to germinate.
6. Maintain Humidity: Cover the trays with a humidity dome or plastic wrap to create a humid environment. This helps the seeds germinate.
7. Monitor Germination: Check the trays daily for germination. Once the seedlings emerge (usually within 7-14 days), remove the humidity dome or plastic wrap.
8. Provide Light: Place the seedlings under grow lights. Position the lights a few inches above the seedlings and keep them on for 14-16 hours per day. Adjust the height of the lights as the seedlings grow.
9. Water Regularly: Keep the soil consistently moist, but not soggy. Water when the top inch of soil feels dry.
10. Thin Seedlings: Once the seedlings have their first true leaves (the second set of leaves), thin them out by snipping off the weaker seedlings at the soil line. Leave only one strong seedling per cell or pot.
11. Fertilize: Start fertilizing the seedlings with a diluted liquid fertilizer (half strength) every 1-2 weeks.
Hardening Off Your Seedlings
Before transplanting your pepper seedlings outdoors, you need to “harden them off.” This process gradually acclimates them to the outdoor environment, preventing shock.
What You’ll Need:
* Your pepper seedlings
* A sheltered outdoor location (e.g., a porch or patio)
Step-by-Step Instructions:
1. Day 1-2: Place the seedlings outdoors in a sheltered location for 1-2 hours per day. Protect them from direct sunlight and strong winds.
2. Day 3-4: Gradually increase the amount of time the seedlings spend outdoors to 3-4 hours per day.
3. Day 5-6: Expose the seedlings to more sunlight and wind. Increase the outdoor time to 5-6 hours per day.
4. Day 7: Leave the seedlings outdoors overnight, provided the temperature is above 50°F.
Transplanting Your Pepper Seedlings Outdoors
Now for the exciting part – planting your peppers in the garden!
What You’ll Need:
* Your hardened-off pepper seedlings
* Gardening gloves
* Trowel or shovel
* Well-draining soil amended with compost or aged manure
* Fertilizer (slow-release or liquid)
* Mulch (straw, wood chips, or shredded leaves)
* Stakes or cages (optional, but recommended for taller varieties)
Step-by-Step Instructions:
1. Choose a Sunny Location: Peppers need at least 6-8 hours of sunlight per day.
2. Prepare the Soil: Dig holes that are slightly larger than the root balls of your seedlings. Space the holes 18-24 inches apart, depending on the variety. Amend the soil with compost or aged manure to improve drainage and fertility.
3. Plant the Seedlings: Gently remove the seedlings from their pots or trays. Loosen the root ball slightly. Place the seedlings in the holes and backfill with soil.
4. Water Thoroughly: Water the seedlings thoroughly after planting.
5. Fertilize: Apply a slow-release fertilizer or a diluted liquid fertilizer according to the package instructions.
6. Mulch: Apply a layer of mulch around the base of the plants to help retain moisture, suppress weeds, and regulate soil temperature.
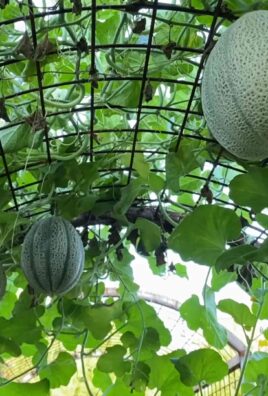
7. Stake or Cage: If you’re growing taller varieties, provide support with stakes or cages to prevent the plants from falling over.
Caring for Your Pepper Plants
Consistent care is key to a bountiful harvest.
Watering:
* Water deeply and regularly, especially during hot, dry weather.
* Avoid overhead watering, which can promote fungal diseases.
* Water at the base of the plants to keep the foliage dry.
Fertilizing:
* Fertilize every 2-3 weeks with a balanced liquid fertilizer or a fertilizer specifically formulated for peppers.
* Avoid over-fertilizing, which can lead to excessive foliage growth and fewer peppers.
Pruning:
* Pruning isn’t strictly necessary, but it can improve air circulation and encourage fruit production.
* Remove any yellowing or diseased leaves.
* Pinch off any suckers (small shoots that grow from the base of the plant) to encourage more energy to be directed towards fruit production.
Pest and Disease Control:
* Inspect your plants regularly for pests and diseases.
* Common pepper pests include aphids, flea beetles, and spider mites.
* Control pests with insecticidal soap, neem oil, or by handpicking them off the plants.
* Common pepper diseases include blossom end rot, fungal leaf spot, and viral diseases.
* Prevent diseases by providing good air circulation, avoiding overhead watering, and using disease-resistant varieties.
* Remove any infected leaves or plants to prevent the spread of disease.
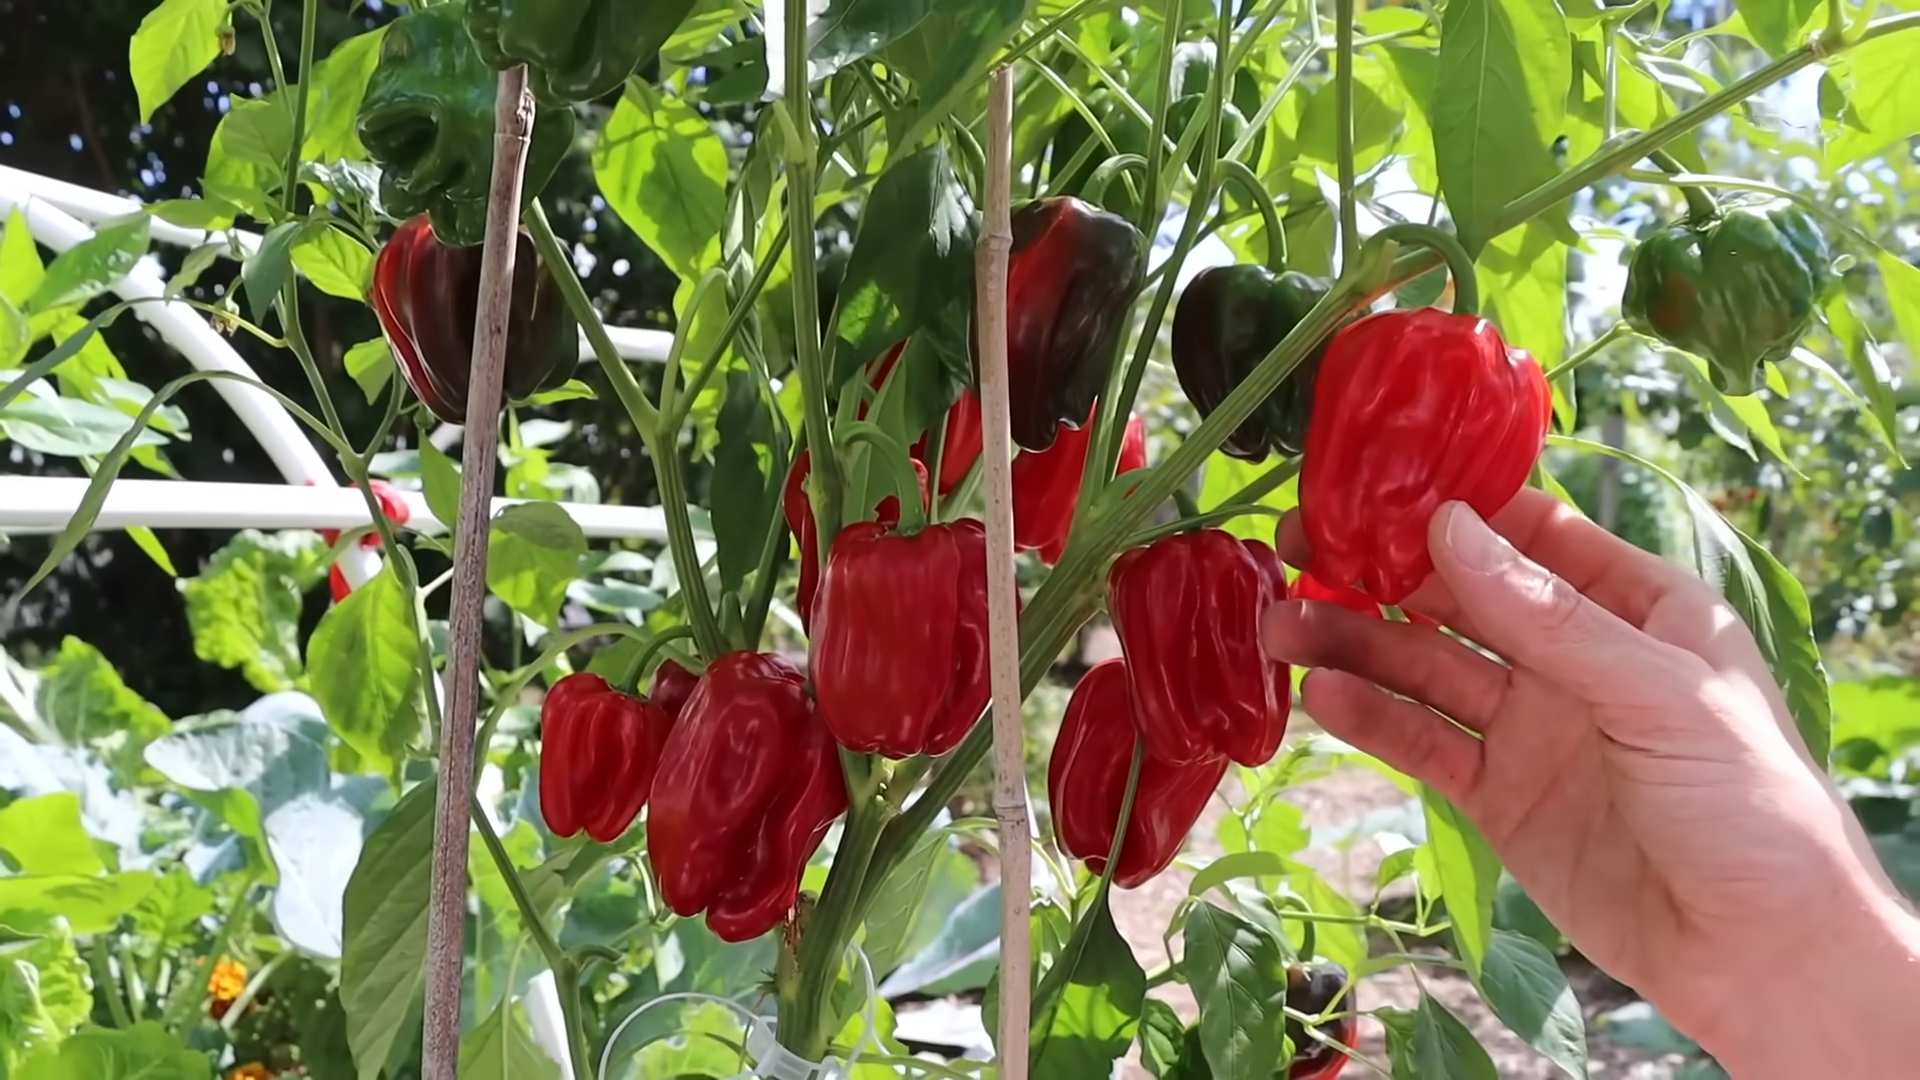
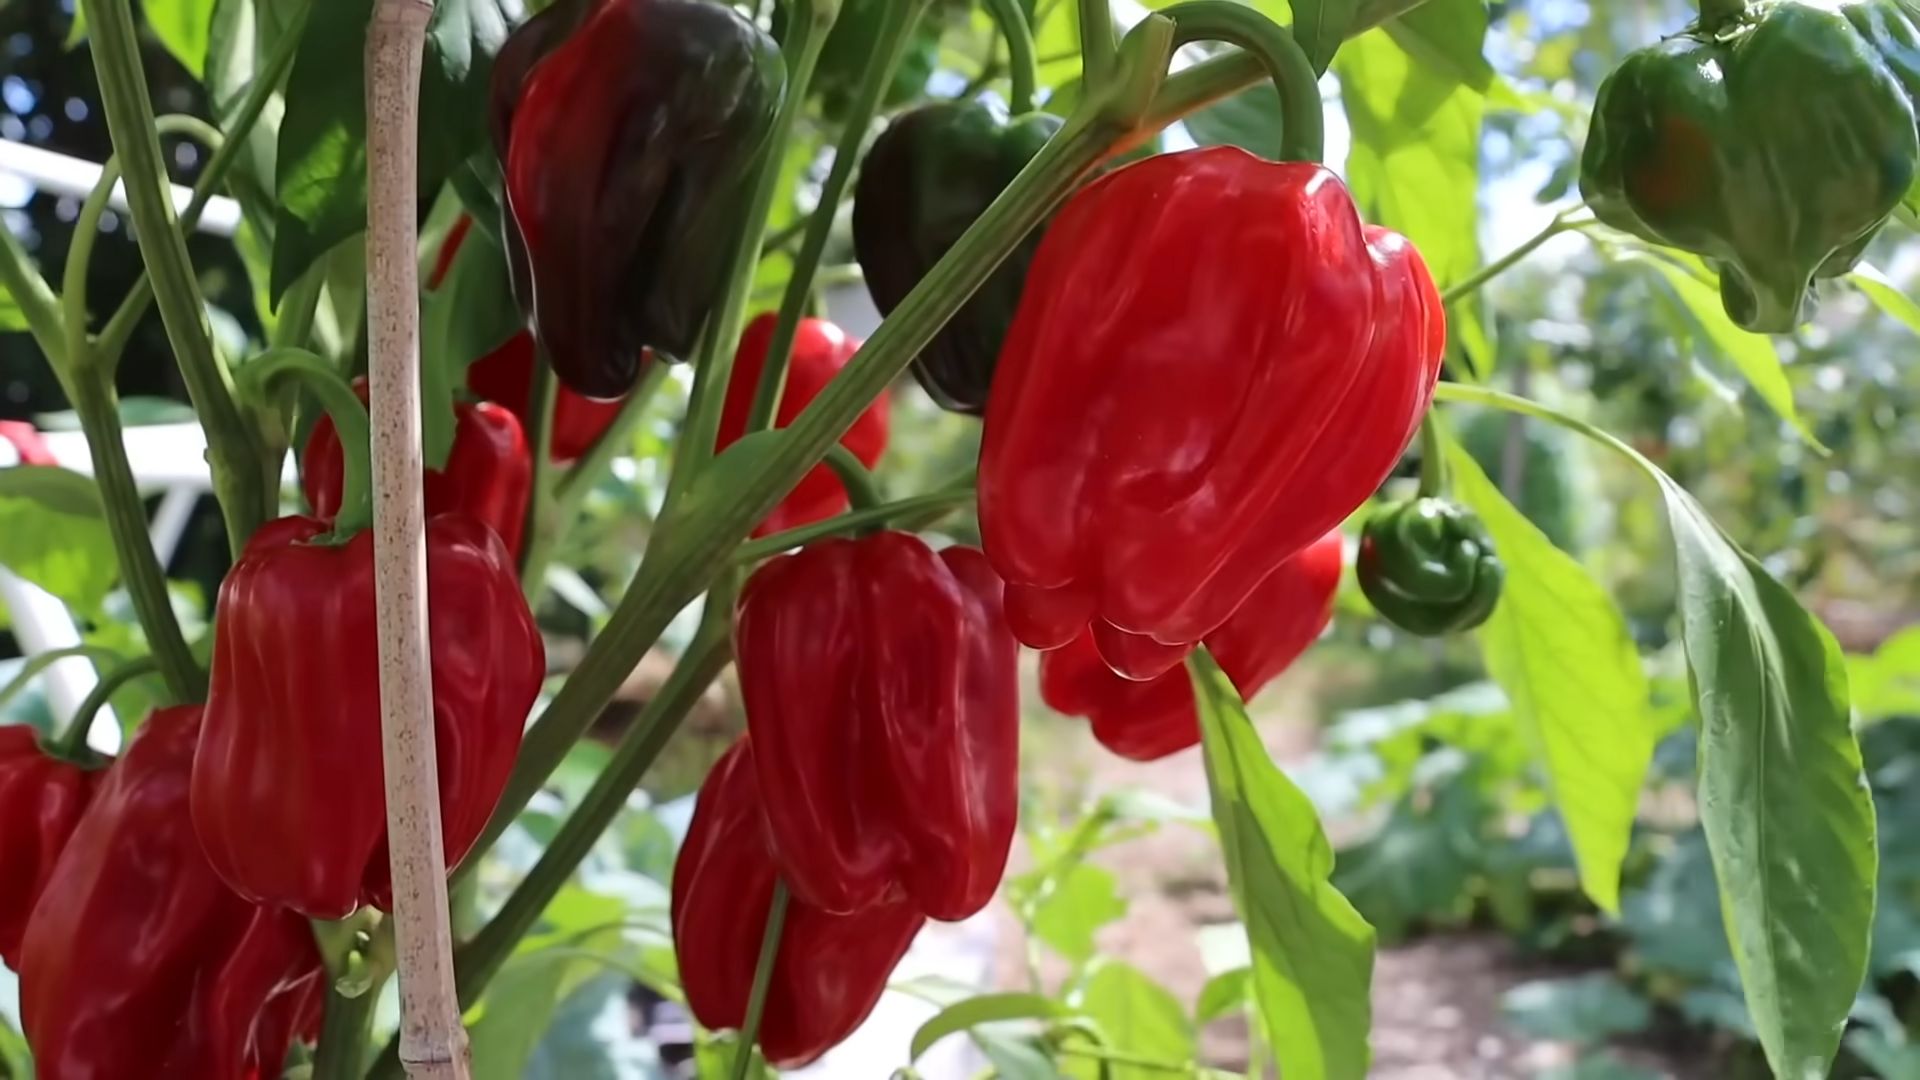
Harvesting Your Peppers
The moment we’ve all been waiting for!
* Harvest peppers when they reach their mature size and color.
* Use pruning shears or a sharp knife to cut the peppers from the plant.
* Leave a small piece of stem attached to the pepper.
* The timing of harvest depends on the variety and your personal preference.
* Bell peppers are typically harvested when they are fully colored and firm.
* Jalapenos can be harvested when they are green or red.
* Habaneros are typically harvested when they are orange or red.
A Note on Hot Peppers: When handling hot peppers, wear gloves to protect your skin from the capsaicin (the compound that makes peppers hot). Avoid touching your eyes or face after handling hot peppers.
Troubleshooting Common
Conclusion
So, there you have it! Mastering the art of growing peppers in your backyard garden is not only achievable but also incredibly rewarding. We’ve explored the essential steps, from selecting the right pepper varieties to nurturing them through their growth cycle. But the real magic lies in our DIY trick: creating a simple, yet effective, pepper-boosting fertilizer using readily available kitchen scraps. This isn’t just about saving money; it’s about understanding what your plants need and providing it in a sustainable, organic way.
Why is this DIY trick a must-try? Because it addresses the specific nutritional needs of pepper plants, particularly during their fruiting stage. Peppers are heavy feeders, demanding plenty of phosphorus and potassium to produce those vibrant, flavorful fruits we all crave. Commercial fertilizers can be expensive and sometimes contain harsh chemicals. Our homemade solution, rich in these essential nutrients, is gentle on your plants, beneficial for the soil, and kind to your wallet. Plus, it reduces food waste – a win-win for everyone!
Consider these variations to personalize your pepper-growing journey. For hotter peppers like habaneros or scotch bonnets, you might want to add a small amount of Epsom salts to your fertilizer mix. Epsom salts provide magnesium, which can further enhance pepper production and prevent blossom end rot. If you’re growing sweet peppers, focus on maintaining consistent watering and providing ample sunlight to encourage sweetness. Experiment with different companion plants like basil or marigolds to deter pests and attract beneficial insects.
Don’t be afraid to tweak the recipe based on your specific soil conditions and the needs of your pepper plants. Observe your plants closely – are the leaves yellowing? Are the peppers small and underdeveloped? These are signs that your plants might need a nutrient boost. Adjust the frequency and concentration of your DIY fertilizer accordingly.
We are confident that incorporating this DIY fertilizer trick into your pepper-growing routine will lead to a bountiful harvest of delicious, homegrown peppers. Imagine the satisfaction of using peppers you nurtured from seed to table, knowing that you provided them with the best possible care using natural, sustainable methods.
Now, it’s your turn! We wholeheartedly encourage you to try this DIY trick in your own backyard garden. Start small, experiment, and most importantly, have fun! Growing peppers should be an enjoyable and rewarding experience.
We’d love to hear about your results! Share your experiences, tips, and photos in the comments section below. Let’s create a community of pepper-growing enthusiasts, sharing our knowledge and helping each other achieve pepper-growing success. What pepper varieties are you growing? What challenges have you faced, and how have you overcome them? Your insights could be invaluable to other gardeners. Let’s get growing!
Frequently Asked Questions (FAQ)
What exactly makes this DIY fertilizer so good for growing peppers?
This DIY fertilizer is excellent for growing peppers because it’s packed with the nutrients that peppers crave, especially phosphorus and potassium. Phosphorus is crucial for root development and flower production, while potassium is essential for fruit development and overall plant health. The ingredients we use, like banana peels and eggshells, are naturally rich in these nutrients. Unlike some commercial fertilizers, our homemade solution is slow-releasing, meaning the nutrients are gradually released into the soil, providing a sustained source of nourishment for your pepper plants. This prevents nutrient burn and promotes healthy, balanced growth. Furthermore, it improves soil structure and encourages beneficial microbial activity, creating a thriving environment for your peppers.
How often should I apply this DIY fertilizer to my pepper plants?
The frequency of application depends on several factors, including the age of your plants, the type of soil you have, and the weather conditions. As a general guideline, you can apply this DIY fertilizer every two to three weeks during the growing season, particularly when the plants start to flower and set fruit. If you notice signs of nutrient deficiency, such as yellowing leaves or stunted growth, you can increase the frequency to once a week. However, be careful not to over-fertilize, as this can lead to nutrient imbalances and other problems. Always dilute the fertilizer properly before applying it to your plants. Observe your plants closely and adjust the frequency accordingly.
Can I use this DIY fertilizer for other plants in my garden?
Yes, this DIY fertilizer can be beneficial for other plants in your garden, especially those that are heavy feeders like tomatoes, cucumbers, and squash. However, it’s important to consider the specific nutrient needs of each plant. Some plants may require different ratios of nutrients. For example, leafy greens like lettuce and spinach may benefit from a fertilizer that is higher in nitrogen. Before applying this DIY fertilizer to other plants, research their specific nutrient requirements and adjust the recipe accordingly. You can also test the soil pH to ensure it’s suitable for the plants you’re growing.
What if I don’t have all the ingredients listed in the recipe? Can I substitute them?
Yes, you can definitely substitute some of the ingredients in the recipe, depending on what you have available. For example, if you don’t have banana peels, you can use coffee grounds instead. Coffee grounds are rich in nitrogen, which is also beneficial for pepper plants. If you don’t have eggshells, you can use bone meal, which is a good source of phosphorus. However, keep in mind that the nutrient content of different ingredients may vary, so you may need to adjust the quantities accordingly. Experiment and see what works best for your plants.
My pepper plants are growing slowly and not producing many peppers. Is this DIY fertilizer enough to fix the problem?
While this DIY fertilizer can certainly help improve the growth and productivity of your pepper plants, it may not be a complete solution if there are other underlying issues. Slow growth and poor pepper production can be caused by a variety of factors, including insufficient sunlight, improper watering, pests, diseases, and poor soil quality. Make sure your pepper plants are getting at least six to eight hours of direct sunlight per day. Water them regularly, but avoid overwatering. Check for signs of pests or diseases and take appropriate action. Amend your soil with compost or other organic matter to improve its fertility and drainage. If you’ve addressed all of these factors and your pepper plants are still struggling, you may need to consider using a commercial fertilizer in addition to the DIY solution.
How do I store the leftover DIY fertilizer?
You can store leftover DIY fertilizer in a sealed container in a cool, dark place for up to a week. After a week, the fertilizer may start to ferment and develop an unpleasant odor. It’s best to use the fertilizer as soon as possible to ensure that it retains its nutrient content. If you have a large amount of leftover fertilizer, you can also compost it. Composting the fertilizer will help to break down the organic matter and release the nutrients into the soil.
Can I use this fertilizer on peppers grown in containers?
Absolutely! This DIY fertilizer is perfectly suitable for peppers grown in containers. In fact, container-grown peppers often benefit even more from regular fertilization because the nutrients in the potting mix can become depleted more quickly than in garden soil. Just be sure to dilute the fertilizer properly to avoid over-fertilizing, as container plants are more susceptible to nutrient burn. Pay close attention to the moisture levels in the containers, as they tend to dry out faster than garden soil.
What are some common mistakes to avoid when growing peppers?
Some common mistakes to avoid when growing peppers include overwatering, underwatering, planting too early in the season, not providing enough sunlight, and failing to protect plants from pests and diseases. Overwatering can lead to root rot, while underwatering can cause stunted growth and blossom end rot. Planting too early in the season can expose your plants to frost damage. Peppers need at least six to eight hours of direct sunlight per day to thrive. Regularly inspect your plants for signs of pests or diseases and take appropriate action to prevent them from spreading. By avoiding these common mistakes, you can increase your chances of success in growing peppers.
Leave a Comment