

Growing Tomatoes from Seed can feel like unlocking a secret garden, and trust me, it’s a secret worth knowing! Have you ever dreamt of biting into a sun-warmed, juicy tomato, bursting with flavor that no store-bought variety can match? That dream can become a reality, and it all starts with a tiny seed and a little bit of know-how. For centuries, cultivating tomatoes has been a cherished tradition, dating back to the Aztecs and Incas who first domesticated this vibrant fruit. From humble beginnings in South America, the tomato has conquered kitchens worldwide, becoming a staple in countless cuisines.
But why bother starting from seed when you can just buy seedlings? Well, for starters, you gain access to a much wider variety of tomatoes, including heirloom and unique cultivars that aren’t typically available at your local garden center. Plus, there’s an immense satisfaction in nurturing a plant from its earliest stages, watching it grow and thrive under your care. And let’s be honest, it’s a fantastic way to save money! This DIY guide is packed with simple, effective tricks and hacks that will empower you to successfully start growing tomatoes from seed, even if you’re a complete beginner. I’m here to guide you through every step, from choosing the right seeds to transplanting your seedlings, ensuring you have a bountiful harvest of delicious, homegrown tomatoes. Let’s get started!
Growing Tomatoes from Seed: A Beginner’s Guide
Okay, tomato lovers, let’s get our hands dirty! Growing tomatoes from seed is seriously rewarding. There’s nothing quite like biting into a juicy, homegrown tomato that you nurtured from a tiny seed. It might seem daunting, but trust me, it’s totally doable, even if you’re a complete newbie. I’m going to walk you through every step, from choosing the right seeds to transplanting your little seedlings. Let’s get started!
Choosing Your Tomato Varieties
Before we even think about soil, let’s talk tomatoes! The sheer variety can be overwhelming, but don’t worry, I’ll simplify it. Consider these factors:
* Your climate: Some varieties thrive in hot, humid summers, while others prefer cooler conditions. Check your local climate zone and choose accordingly.
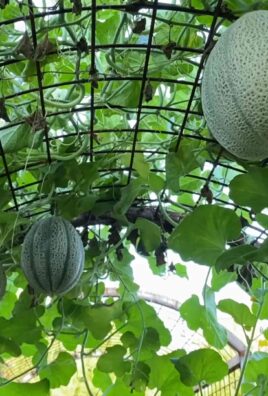
* Available space: Determinate tomatoes grow to a certain size and then stop, making them great for containers or smaller gardens. Indeterminate tomatoes keep growing and producing fruit all season long, so they need more space and support.
* Intended use: Are you dreaming of slicing tomatoes for sandwiches, sauce tomatoes for pasta, or cherry tomatoes for snacking? Different varieties are better suited for different purposes.
* Disease resistance: Look for varieties that are resistant to common tomato diseases in your area. This will save you a lot of headaches later on.
Some popular and reliable choices for beginners include:
* ‘Early Girl’: A classic early-maturing variety, perfect for cooler climates.
* ‘Roma’: A determinate variety ideal for making sauces and pastes.
* ‘Beefsteak’: Large, juicy tomatoes perfect for slicing.
* ‘Cherry Tomatoes’ (like ‘Sungold’ or ‘Sweet 100’): Prolific producers of sweet, bite-sized tomatoes.
Once you’ve chosen your varieties, it’s time to gather your supplies!
Gathering Your Supplies
Here’s what you’ll need to get your tomato-growing operation up and running:
* Tomato seeds: Obviously! Purchase from a reputable source to ensure good germination rates.
* Seed starting trays or containers: You can use plastic seed starting trays, peat pots, or even recycled yogurt cups (just make sure to poke drainage holes!).
* Seed starting mix: This is a lightweight, sterile mix specifically designed for starting seeds. Don’t use garden soil, as it can be too heavy and may contain diseases.
* Watering can or spray bottle: For gentle watering.
* Heat mat (optional): Tomato seeds germinate best in warm soil (around 75-85°F). A heat mat can help maintain this temperature.
* Grow lights (optional): If you don’t have a sunny windowsill, grow lights will provide the necessary light for your seedlings.
* Labels and a permanent marker: To keep track of your different varieties.
* Small pots (for transplanting): You’ll need these when your seedlings outgrow their starting containers.
* Potting mix: A richer mix than seed starting mix, for transplanting into larger pots.
Sowing Your Tomato Seeds
Alright, let’s get those seeds in the ground (or rather, in the seed starting mix!).
1. Moisten the seed starting mix: Add water to the mix until it’s evenly moist but not soggy. You want it to clump together slightly when you squeeze it.
2. Fill your seed starting trays or containers: Gently fill each cell or container with the moistened seed starting mix, leaving about half an inch of space at the top.
3. Sow the seeds: Place 2-3 seeds in the center of each cell or container. This increases the chances of at least one seed germinating.
4. Cover the seeds: Lightly cover the seeds with about ¼ inch of seed starting mix.
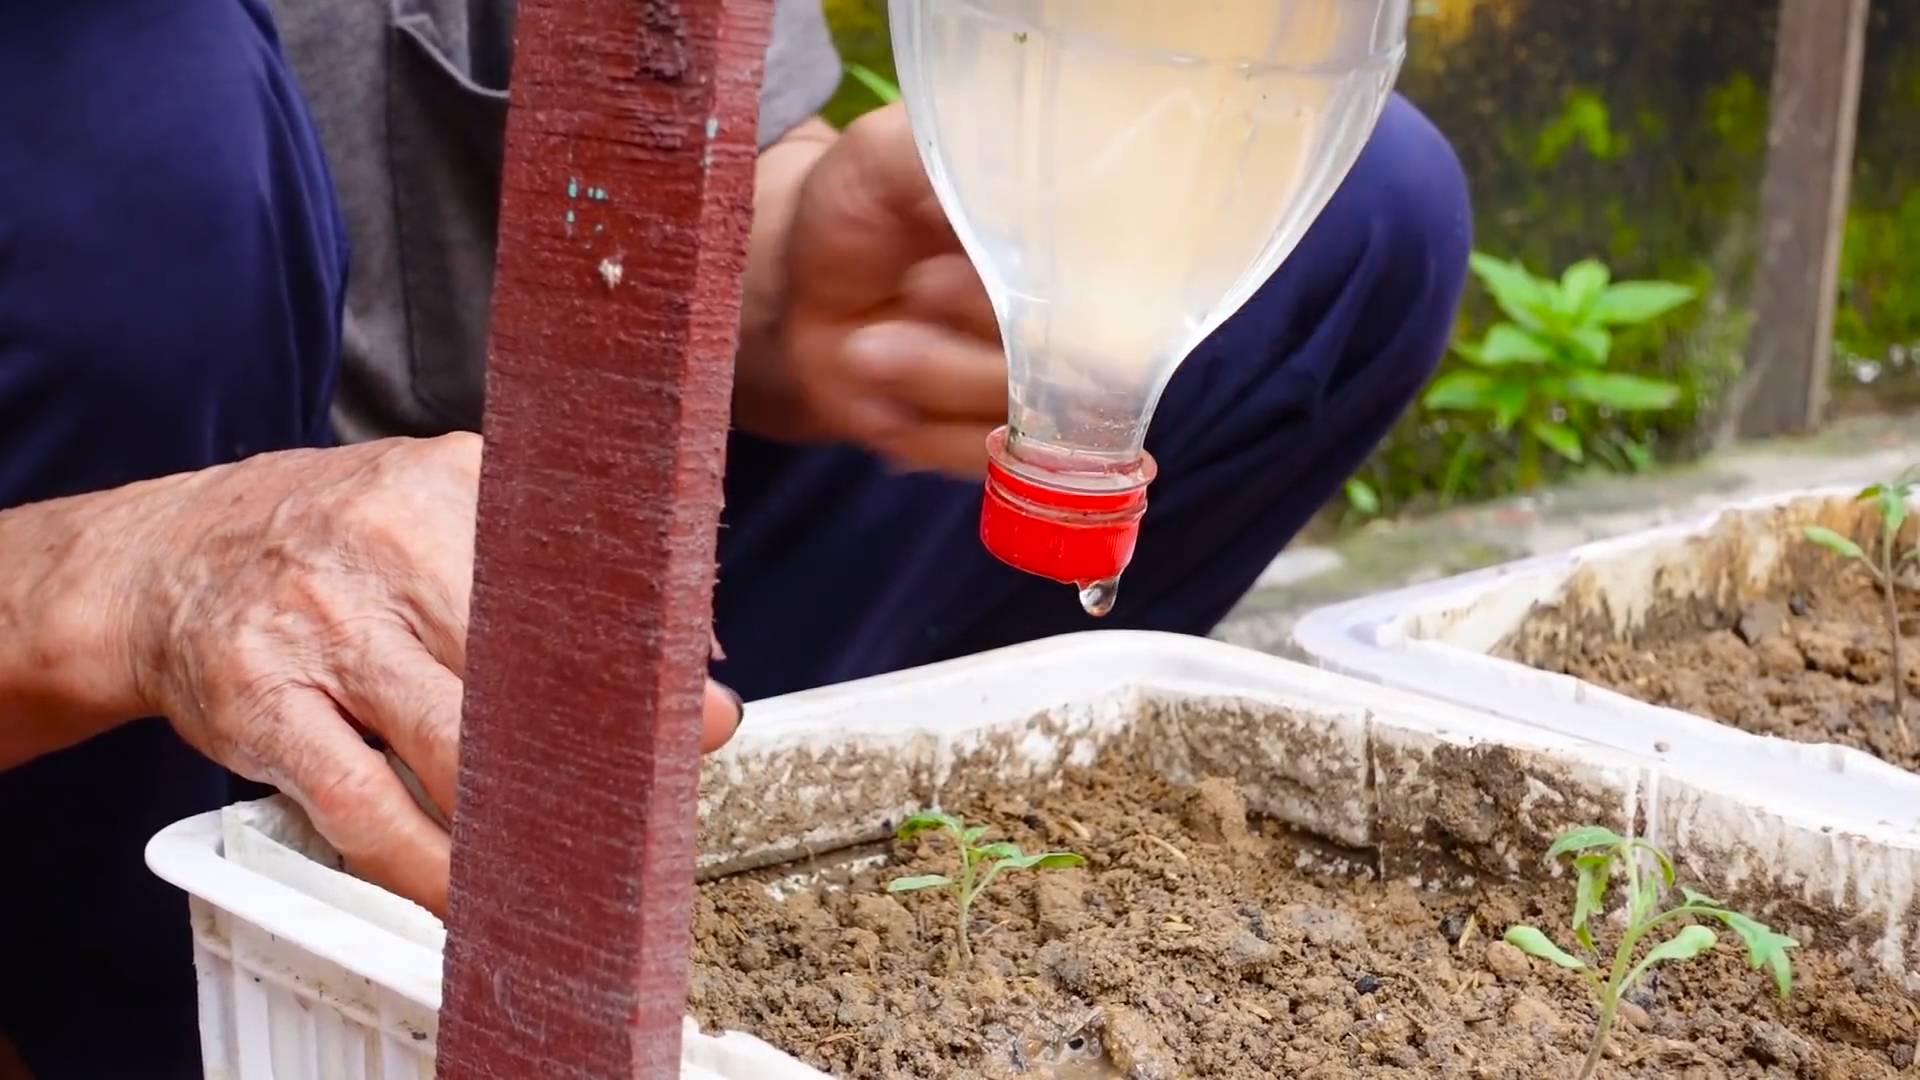
5. Water gently: Use a watering can or spray bottle to gently water the surface of the mix. Avoid overwatering, which can cause the seeds to rot.
6. Label your trays or containers: Use your labels and permanent marker to clearly identify each variety.
7. Provide warmth: Place your seed starting trays on a heat mat (if using) and cover them with a clear plastic dome or plastic wrap to create a humid environment.
8. Place in a warm location: Put the trays in a warm location, ideally around 75-85°F. A sunny windowsill can work, but grow lights are more reliable.
Caring for Your Seedlings
Now comes the waiting game! But don’t just sit back and relax. You need to keep an eye on your seedlings and provide them with the right care.
1. Monitor moisture levels: Check the seed starting mix daily and water gently when the surface feels dry. Avoid overwatering.
2. Provide light: If you’re using grow lights, keep them on for 14-16 hours per day. If you’re using a windowsill, rotate the trays regularly to ensure even light exposure.
3. Remove the humidity dome: Once the seeds start to germinate (usually within 5-10 days), remove the humidity dome or plastic wrap.
4. Thin the seedlings: Once the seedlings have their first true leaves (the second set of leaves that appear after the initial seed leaves), thin them out by snipping off the weaker seedlings at the soil line with scissors. Leave only the strongest seedling in each cell or container.
5. Fertilize lightly: Once the seedlings have their second set of true leaves, start fertilizing them with a diluted liquid fertilizer (follow the instructions on the fertilizer package). Fertilize every 1-2 weeks.
Transplanting Your Seedlings
Your seedlings are growing up! Once they’re a few inches tall and have a few sets of true leaves, it’s time to transplant them into larger pots.
1. Prepare your pots: Fill your small pots with potting mix.
2. Gently remove the seedlings: Carefully remove the seedlings from their seed starting trays or containers. Use a small spoon or fork to gently loosen the soil around the roots.
3. Transplant the seedlings: Make a hole in the center of each pot and gently place the seedling in the hole. Make sure the top of the root ball is level with the soil surface.
4. Water thoroughly: Water the transplanted seedlings thoroughly.
5. Provide light and warmth: Place the transplanted seedlings in a sunny location or under grow lights.
Hardening Off Your Seedlings
Before you can plant your tomato seedlings in the garden, you need to “harden them off.” This process gradually acclimates them to outdoor conditions, preventing shock.
1. Start slowly: Begin by placing your seedlings outdoors in a sheltered location (like a porch or patio) for just a few hours each day.
2. Gradually increase exposure: Over the course of a week or two, gradually increase the amount of time your seedlings spend outdoors, and expose them to more sunlight and wind.
3. Monitor the weather: Avoid exposing your seedlings to frost or extreme temperatures.
4. Water regularly: Water your seedlings regularly during the hardening off process.
Planting Your Seedlings in the Garden
Finally, the moment we’ve been waiting for! Once your seedlings are hardened off and the weather is warm enough (soil temperature above 60°F), it’s time to plant them in the garden.
1. Choose a sunny location: Tomatoes need at least 6-8 hours of sunlight per day.
2. Prepare the soil: Amend the soil with compost or other organic matter to improve drainage and fertility.
3. Dig a hole: Dig a hole that’s slightly larger than the root ball of your seedling.
4. Plant the seedling: Gently remove the seedling from its pot and place it in the hole. You can plant tomato seedlings deeper than other plants; in fact, burying the stem up to the first set of leaves will encourage more root growth.
5. Backfill the hole: Backfill the hole with soil and gently firm it around the base of the plant.
6. Water thoroughly: Water the newly planted seedling thoroughly.
7. Add support: If you’re growing indeterminate tomato varieties, provide support with stakes, cages, or trellises.
8. Mulch: Add a layer of mulch around the base of the plant to help retain moisture and suppress weeds.
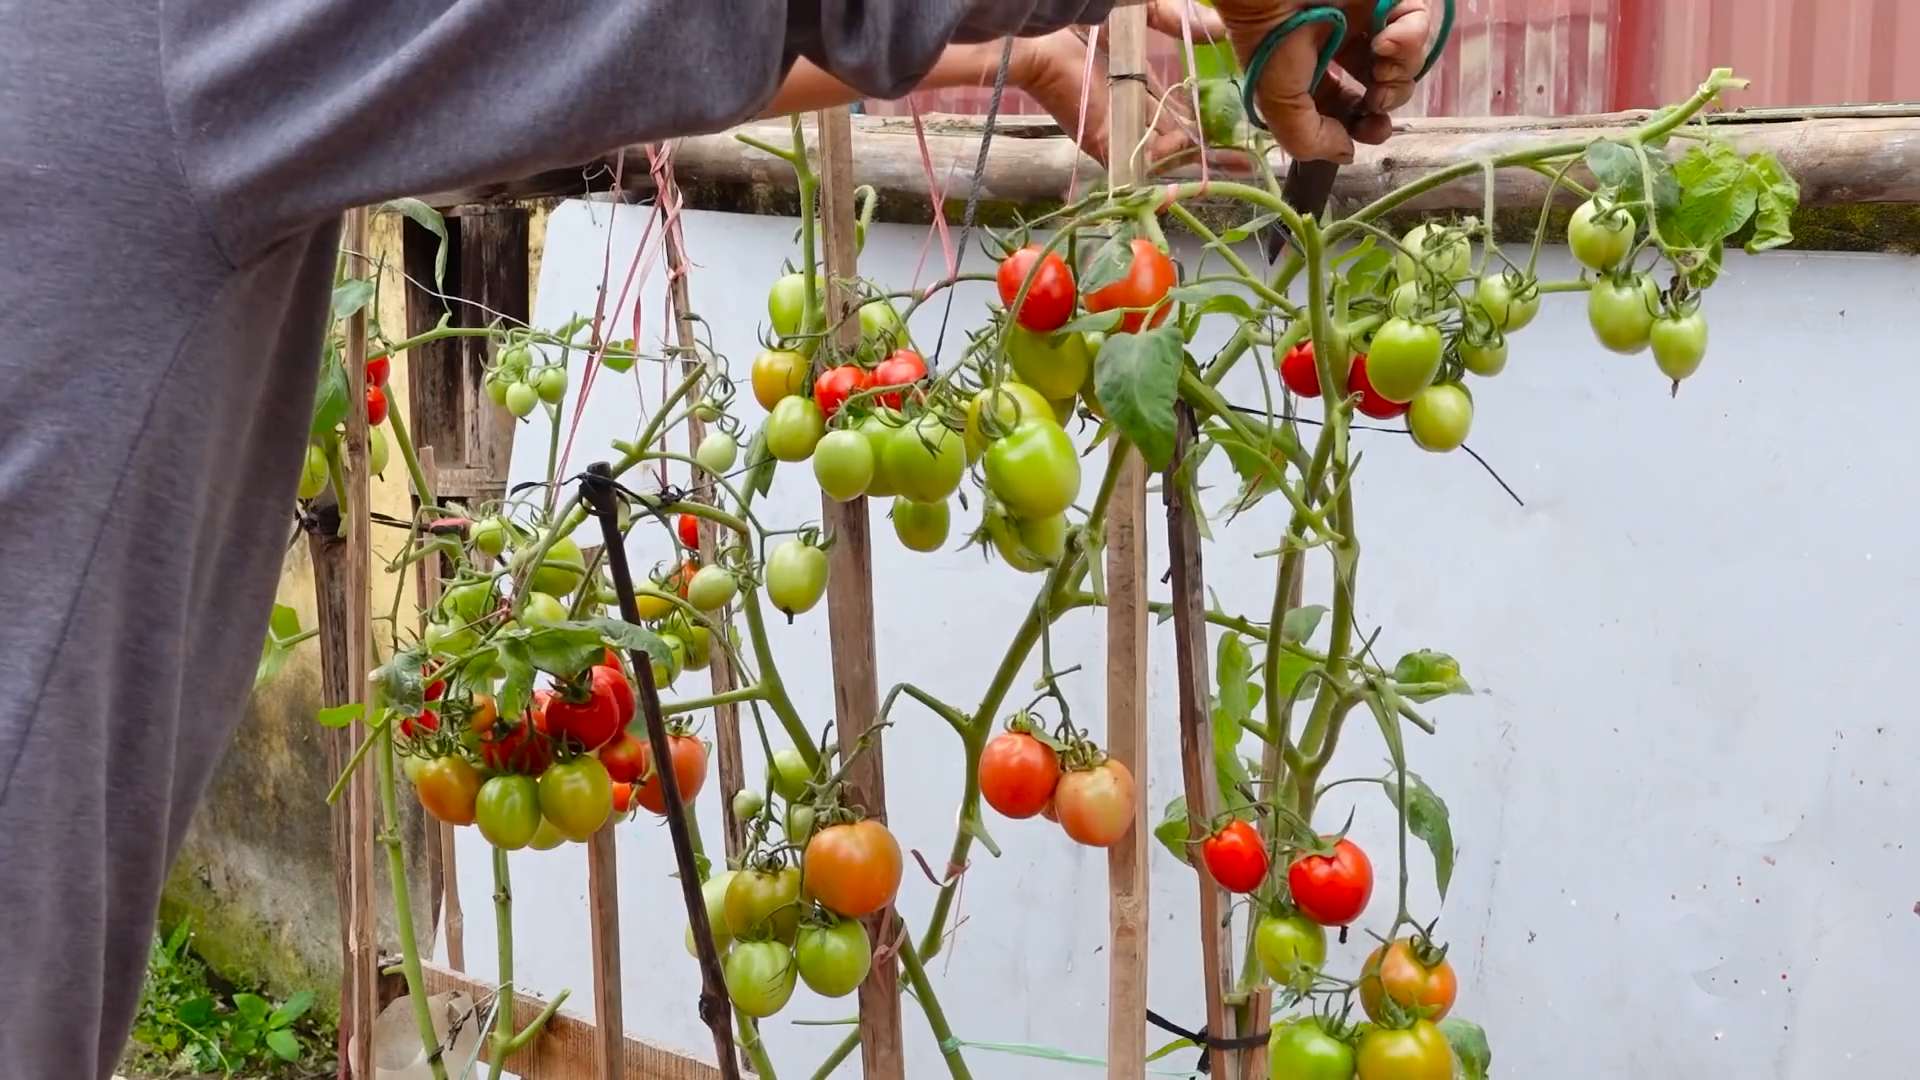
Caring for Your Tomato Plants
Your tomato plants are in the ground, but your work isn’t done yet! Here’s how to keep them healthy and productive:
* Water regularly: Water deeply and consistently, especially during dry spells. Aim for about 1-2 inches of water per week.
* Fertilize regularly: Fertilize your tomato plants every 2-3 weeks with a balanced fertilizer.
Conclusion
So, there you have it! Growing tomatoes from seed isn’t just a cost-effective way to fill your garden with delicious, homegrown produce; it’s a deeply rewarding experience. From the initial sprout emerging from the soil to the first juicy, sun-ripened tomato gracing your plate, every step of the process connects you to the natural world in a profound way. It allows you to cultivate varieties you might never find at your local nursery, giving you complete control over the quality and taste of your harvest.
Why is this DIY trick a must-try? Because it empowers you to become a true gardener, independent of commercial seedling providers. You’re no longer limited by their selection or their growing practices. You get to choose the exact tomato varieties that tantalize your taste buds, whether it’s a classic beefsteak, a sweet cherry tomato, or an heirloom variety bursting with unique flavor. Plus, you’ll save money in the long run, especially if you plan on growing a significant number of tomato plants.
But the benefits extend beyond economics and variety. Starting your own tomato seeds allows you to control the growing environment from the very beginning. You can use organic soil, avoid harmful pesticides, and ensure your seedlings receive the optimal amount of light and water. This translates to healthier, more robust plants that are better equipped to withstand pests and diseases once they’re transplanted into your garden.
Feeling adventurous? Consider experimenting with different seed-starting methods. Try using peat pots, coconut coir pellets, or even recycled egg cartons. Each method has its own advantages, and finding the one that works best for you is part of the fun. You can also explore different soil mixes to see how they affect seedling growth. Some gardeners swear by adding a small amount of compost to their seed-starting mix, while others prefer a sterile, soilless medium.
Another exciting variation is to try succession planting. Start a new batch of tomato seeds every few weeks to extend your harvest season. This way, you’ll have a continuous supply of fresh tomatoes throughout the summer and into the fall. You can also experiment with different tomato varieties that mature at different times, ensuring a diverse and abundant harvest.
Don’t be intimidated if you’re a beginner. Growing tomatoes from seed is a relatively simple process, and even if you encounter a few challenges along the way, you’ll learn valuable lessons that will make you a better gardener. The key is to be patient, observant, and willing to experiment.
We wholeheartedly encourage you to give this DIY trick a try. Embrace the journey, learn from your mistakes, and savor the satisfaction of harvesting your own homegrown tomatoes. And most importantly, share your experience with us! We’d love to hear about your successes, your challenges, and your favorite tomato varieties. Post photos of your seedlings, share your tips and tricks, and let’s create a community of passionate tomato growers. Let us know what kind of tomato growing success you have!
Frequently Asked Questions (FAQ)
Q: How long does it take for tomato seeds to germinate?
A: Tomato seeds typically germinate within 5 to 10 days, but this can vary depending on the temperature and moisture levels. The ideal soil temperature for germination is between 70°F and 80°F (21°C and 27°C). Keeping the soil consistently moist, but not waterlogged, is also crucial. Using a heat mat can help speed up the germination process, especially in cooler climates. If your seeds haven’t germinated after 14 days, it’s likely that they’re either too old or the conditions aren’t optimal.
Q: What kind of soil should I use for starting tomato seeds?
A: A light, well-draining seed-starting mix is ideal. Avoid using garden soil, as it can be too heavy and may contain pathogens that can harm your seedlings. You can purchase a pre-made seed-starting mix from your local garden center, or you can make your own by combining equal parts peat moss (or coconut coir), vermiculite, and perlite. Some gardeners also add a small amount of compost to their seed-starting mix to provide extra nutrients. Ensure the mix is thoroughly moistened before sowing your seeds.
Q: How much light do tomato seedlings need?
A: Tomato seedlings need plenty of light to grow strong and healthy. Ideally, they should receive at least 14 to 16 hours of light per day. If you’re starting your seeds indoors, you’ll likely need to supplement natural light with grow lights. Fluorescent shop lights or LED grow lights are both good options. Position the lights a few inches above the seedlings and adjust them as the plants grow. Without adequate light, your seedlings will become leggy and weak.
Q: When should I transplant my tomato seedlings into larger pots?
A: You should transplant your tomato seedlings into larger pots when they have developed their first set of true leaves (the leaves that appear after the initial seed leaves, or cotyledons). This is typically about 2 to 3 weeks after germination. Gently remove the seedlings from their original containers and transplant them into individual pots that are at least 3 to 4 inches in diameter. Use a good quality potting mix for transplanting.
Q: When can I transplant my tomato seedlings into the garden?
A: You can transplant your tomato seedlings into the garden once the danger of frost has passed and the soil has warmed up to at least 60°F (16°C). This is typically in late spring or early summer, depending on your climate. Before transplanting, harden off your seedlings by gradually exposing them to outdoor conditions for a week or two. Start by placing them in a sheltered location for a few hours each day, gradually increasing the amount of time they spend outdoors. This will help them acclimate to the sun, wind, and temperature changes.
Q: How often should I water my tomato seedlings?
A: Water your tomato seedlings regularly, keeping the soil consistently moist but not waterlogged. Check the soil moisture level daily and water when the top inch of soil feels dry to the touch. Avoid overwatering, as this can lead to root rot. Use a gentle watering can or spray bottle to avoid disturbing the seedlings.
Q: What are some common problems when growing tomatoes from seed?
A: Some common problems include damping off (a fungal disease that causes seedlings to collapse), leggy seedlings (caused by insufficient light), and nutrient deficiencies (caused by poor soil). To prevent damping off, use a sterile seed-starting mix and avoid overwatering. To prevent leggy seedlings, provide adequate light. To prevent nutrient deficiencies, use a good quality seed-starting mix and fertilize your seedlings with a diluted liquid fertilizer once they have developed their first set of true leaves.
Q: Can I save seeds from my homegrown tomatoes?
A: Yes, you can save seeds from your homegrown tomatoes, but it’s important to note that not all tomato varieties will breed true from seed. Hybrid varieties (labeled as “F1” or “hybrid”) will not produce offspring that are identical to the parent plant. Heirloom varieties, on the other hand, are more likely to breed true. To save tomato seeds, scoop out the seeds and pulp from a ripe tomato and place them in a jar with a little water. Let the mixture ferment for a few days, stirring occasionally. This will help remove the gelatinous coating around the seeds. Once the fermentation process is complete, rinse the seeds thoroughly and spread them out on a paper towel to dry. Store the dried seeds in an airtight container in a cool, dark place.
Leave a Comment