

Growing Water Spinach Terrace: Ever dreamed of stepping outside your door and harvesting fresh, vibrant greens for your dinner, all grown in a beautiful, space-saving terrace garden? I know I have! For centuries, water spinach, also known as Ong Choy, has been a staple in Asian cuisine, prized for its delicious flavor and impressive nutritional benefits. From stir-fries to soups, this leafy green adds a delightful crunch and a boost of vitamins to any meal.
But what if you don’t have a sprawling backyard? That’s where the magic of terrace gardening comes in! This DIY guide will show you how to create your own thriving water spinach oasis, even if you only have a small balcony or patio. Forget expensive grocery store produce – with a few simple tricks and readily available materials, you can enjoy a continuous supply of fresh, organic water spinach right at your fingertips.
In today’s fast-paced world, knowing how to growing water spinach terrace is more important than ever. It’s a fantastic way to connect with nature, reduce your carbon footprint, and ensure you always have access to healthy, delicious food. Plus, it’s incredibly rewarding to watch your plants flourish and know that you nurtured them from seed to table. So, grab your gardening gloves, and let’s get started on this exciting DIY adventure!
DIY Water Spinach Terrace: A Floating Feast!
Hey there, fellow garden enthusiasts! I’m so excited to share this project with you – building your own floating water spinach terrace! It’s a fantastic way to grow this delicious and nutritious leafy green, especially if you’re short on space or have a pond or water feature you want to utilize. Plus, it’s surprisingly easy and rewarding. Let’s dive in!
What You’ll Need: The Supply List
Before we get started, let’s gather all the necessary materials. This will save you time and frustration later on.
* **A Large Plastic Container:** Think a sturdy storage tote, a plastic bin, or even a repurposed kiddie pool. The size will depend on how much water spinach you want to grow. I recommend something at least 2 feet by 3 feet for a decent harvest. Make sure it’s food-grade plastic if you’re using a recycled container.
* **Styrofoam Sheets or Noodles:** This is what will provide the buoyancy for your terrace. You can use large sheets of styrofoam insulation (the pink or blue kind from hardware stores) or a bunch of styrofoam pool noodles. The amount you need will depend on the size of your container and the weight of the soil and plants. Err on the side of more rather than less!
* **Landscape Fabric or Burlap:** This will act as a liner to hold the soil in place and prevent it from leaking into the water.
* **Potting Soil:** Choose a good quality potting mix that’s rich in organic matter. Avoid using garden soil, as it can be too heavy and compact.
* **Water Spinach Seeds or Cuttings:** You can find water spinach seeds online or at some Asian grocery stores. Alternatively, you can propagate water spinach from cuttings.
* **Zip Ties or Strong Twine:** For securing the styrofoam to the container.
* **Utility Knife or Scissors:** For cutting the styrofoam and landscape fabric.
* **Measuring Tape:** To ensure accurate cuts.
* **Gloves:** To protect your hands.
* **Optional: Fertilizer:** A slow-release fertilizer or liquid fertilizer can help boost growth.
* **Optional: Netting:** To protect your water spinach from pests.
Building the Floating Frame: Step-by-Step
This is where we create the structure that will keep our water spinach afloat.
1. **Measure Your Container:** Use your measuring tape to determine the inside dimensions of your plastic container. This will help you cut the styrofoam to the correct size.
2. **Cut the Styrofoam:** Using your utility knife or scissors, cut the styrofoam sheets or noodles to fit snugly inside the container. You want to create a solid layer of styrofoam that covers the entire bottom of the container. If you’re using styrofoam noodles, arrange them side-by-side until you have a complete layer.
3. **Secure the Styrofoam (Important!):** This is crucial for stability. Use zip ties or strong twine to secure the styrofoam to the container. If you’re using styrofoam sheets, you can drill small holes through the styrofoam and the container and then thread the zip ties through. If you’re using styrofoam noodles, you can wrap the twine around them and tie it to the container. Make sure the styrofoam is firmly attached and won’t come loose. I like to use a lot of zip ties for extra security.
4. **Test the Buoyancy:** Before moving on, test the buoyancy of your floating frame. Place it in a tub of water or your pond and see if it floats evenly. If it’s tilting or sinking, add more styrofoam until it floats properly. This step is important to avoid problems later.
Creating the Soil Bed: Preparing for Planting
Now, let’s create the perfect environment for our water spinach to thrive.
1. **Line the Container:** Cut the landscape fabric or burlap to fit inside the container, leaving some extra fabric hanging over the edges. This will allow you to secure it later. The fabric should completely cover the styrofoam and the sides of the container.
2. **Secure the Liner:** Fold the excess fabric over the edges of the container and secure it with zip ties or strong twine. This will prevent the soil from leaking into the water. Make sure the liner is taut and doesn’t have any holes.
3. **Add the Potting Soil:** Fill the lined container with potting soil, leaving about 2-3 inches of space at the top. Gently pat down the soil to create a firm surface. Don’t over-compact it, as water spinach prefers well-draining soil.
4. **Water the Soil:** Thoroughly water the soil until it’s evenly moist. This will help settle the soil and prepare it for planting.
Planting Your Water Spinach: From Seed to Sprout
Time to get those seeds or cuttings in the ground (or rather, the soil)!
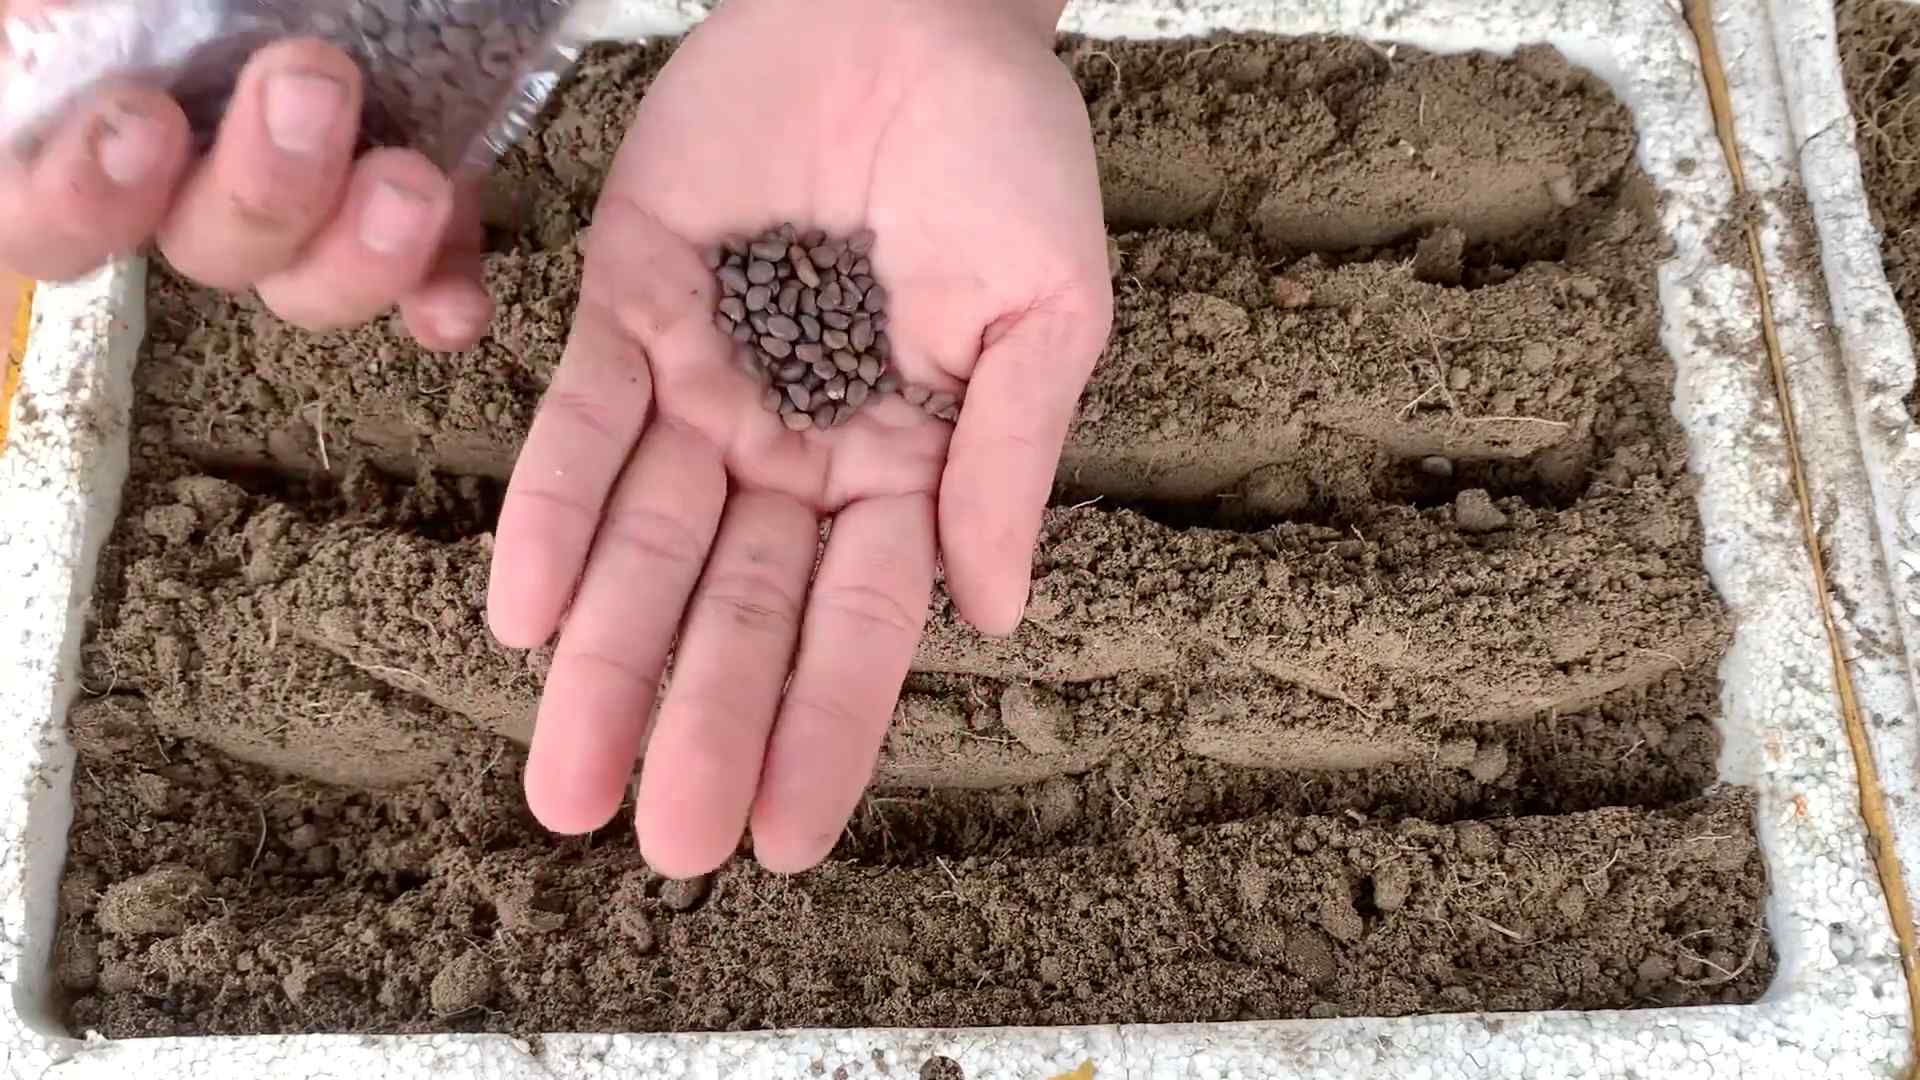
1. **Planting from Seeds:** If you’re using seeds, sow them directly into the soil, spacing them about 2-3 inches apart. Cover the seeds with a thin layer of soil and gently water them. Keep the soil consistently moist until the seeds germinate, which usually takes about 7-14 days.
2. **Planting from Cuttings:** If you’re using cuttings, take cuttings that are about 6-8 inches long. Remove the lower leaves and stick the cuttings directly into the soil, spacing them about 2-3 inches apart. Water the cuttings thoroughly and keep the soil consistently moist. The cuttings should root within a week or two.
3. **Watering:** Water spinach loves water, so keep the soil consistently moist. You can even flood the terrace slightly, as water spinach can tolerate standing water.
4. **Fertilizing (Optional):** If you want to boost growth, you can add a slow-release fertilizer to the soil or use a liquid fertilizer every few weeks. Follow the instructions on the fertilizer packaging.
Maintaining Your Water Spinach Terrace: Keeping it Thriving
A little care goes a long way in ensuring a bountiful harvest.
1. **Sunlight:** Water spinach needs at least 6 hours of sunlight per day. Place your floating terrace in a sunny location.
2. **Water Quality:** If you’re using a pond or water feature, make sure the water is clean and free of pollutants. Water spinach can absorb toxins from the water, so it’s important to use clean water.
3. **Pest Control (Optional):** Water spinach can be susceptible to pests like aphids and caterpillars. If you notice any pests, you can spray the plants with an organic insecticide or cover the terrace with netting.
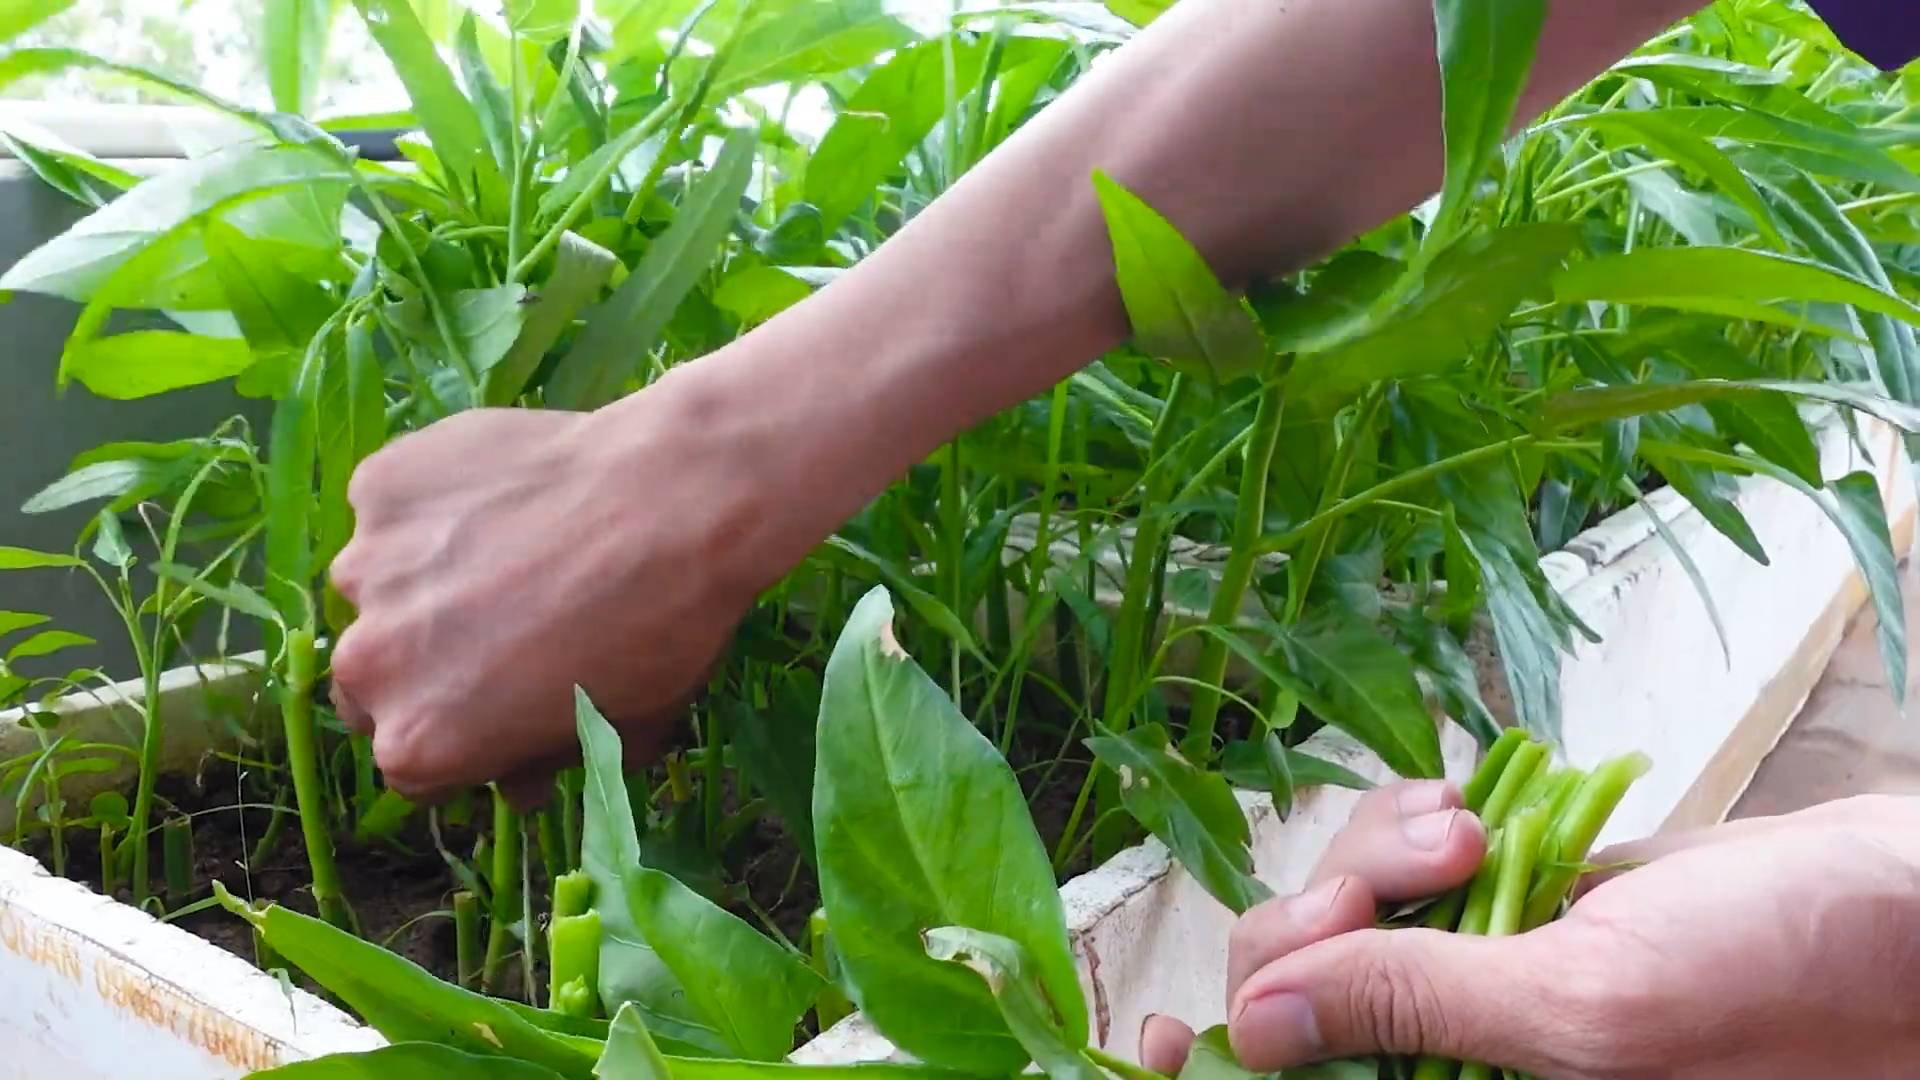
4. **Harvesting:** You can start harvesting your water spinach about 4-6 weeks after planting. Simply cut the stems about 4-6 inches from the base. The plants will continue to grow and produce new shoots.
5. **Regular Pruning:** Regular pruning encourages bushier growth and prevents the plants from becoming leggy.
6. **Monitor Water Level:** Keep an eye on the water level in your pond or container. If the water level drops too low, the water spinach may dry out. Add water as needed to keep the soil consistently moist.
Troubleshooting: Addressing Common Issues
Even with the best planning, sometimes things don’t go exactly as expected. Here are some common issues and how to address them:
* **Yellowing Leaves:** This could be a sign of nutrient deficiency. Try adding a fertilizer that’s rich in nitrogen.
* **Slow Growth:** This could be due to lack of sunlight or water. Make sure your terrace is in a sunny location and that the soil is consistently moist.
* **Pest Infestation:** As mentioned earlier, water spinach can be susceptible to pests. Inspect your plants regularly and take action if you notice any pests.
* **Algae Growth:** If you’re using a pond or water feature, algae growth can be a problem. You can control algae growth by adding aquatic plants that compete with algae for nutrients or by using an algae control product.
Enjoying Your Harvest: From Terrace to Table
The best part of this project is, of course, enjoying the fruits (or rather, the vegetables!) of your labor. Water spinach is a versatile vegetable that can be used in a variety of dishes.
* **Stir-fries:** Water spinach is a popular ingredient in stir-fries. Simply stir-fry it with garlic, ginger, and your favorite sauce.
* **Soups:** Water spinach can be added to soups for extra flavor and nutrients.
* **Salads:** Young, tender water spinach leaves can be used in salads.
* **Steamed:** Water spinach can be steamed and served as a side dish.
Remember to wash your water spinach thoroughly before eating it.
And there you have it! Your very own floating water spinach terrace. I hope you enjoy this project as much as I do. Happy gardening!
Conclusion
So, there you have it! Transforming a simple terrace into a thriving water spinach garden is not only achievable but also incredibly rewarding. We’ve walked you through the steps, highlighting the ease and accessibility of this DIY project. But why should you actually dedicate your time and effort to growing your own water spinach? The answer is multifaceted.
Firstly, the freshness and quality are unparalleled. Store-bought water spinach, while convenient, often pales in comparison to the vibrant, crisp texture and intense flavor of homegrown varieties. You control the growing environment, ensuring that your vegetables are free from harmful pesticides and herbicides. This translates to healthier, more nutritious meals for you and your family.
Secondly, the cost savings are significant. Once your initial setup is complete, the ongoing expenses are minimal. You’ll be harvesting fresh water spinach regularly, reducing your grocery bills and minimizing food waste. Think of all the delicious stir-fries, soups, and salads you can create without constantly running to the store.
Thirdly, and perhaps most importantly, this project is incredibly fulfilling. There’s a unique satisfaction that comes from nurturing a plant from seed to harvest. Watching your water spinach flourish on your terrace is a testament to your efforts and a constant reminder of the beauty and abundance of nature. It’s a therapeutic activity that connects you to the earth and provides a sense of accomplishment.
But don’t stop there! Feel free to experiment with different growing mediums. While we’ve focused on a soil-based system, you can also explore hydroponic methods for even faster growth. Consider adding companion plants like basil or mint to deter pests and enhance the flavor of your water spinach. You can also try different varieties of water spinach to find your favorite. Some varieties are leafier, while others have thicker stems.
Ready to take the plunge and create your own water spinach oasis? We encourage you to give this DIY trick a try. It’s easier than you think, and the rewards are well worth the effort. Don’t be afraid to get your hands dirty and embrace the learning process. Every gardener, regardless of experience level, started somewhere.
And most importantly, we want to hear about your experiences! Share your photos, tips, and challenges in the comments section below. Let’s build a community of water spinach enthusiasts and learn from each other. Did you encounter any unexpected hurdles? Did you discover a particularly effective growing technique? Your insights could be invaluable to other readers.
Growing your own water spinach is more than just a way to save money or eat healthier. It’s a journey of discovery, a connection to nature, and a source of endless satisfaction. So, grab your tools, gather your supplies, and get ready to transform your terrace into a thriving water spinach garden. Happy growing!
Frequently Asked Questions (FAQ)
What exactly is water spinach, and what does it taste like?
Water spinach (Ipomoea aquatica), also known as ong choy, morning glory, or kangkong, is a semi-aquatic leafy green vegetable popular in Southeast Asian cuisine. It has long, hollow stems and arrow-shaped leaves. The taste is mild and slightly sweet, with a subtle earthy undertone. When cooked, it has a tender, slightly crunchy texture. It’s often compared to spinach but with a more delicate flavor.
How much sunlight does water spinach need?
Water spinach thrives in full sun, requiring at least 6-8 hours of direct sunlight per day. If you live in a particularly hot climate, providing some afternoon shade can prevent the leaves from scorching. Insufficient sunlight will result in leggy growth and reduced yields. Observe your plants closely and adjust their position as needed to ensure they receive adequate sunlight.
What kind of soil is best for growing water spinach?
While water spinach can tolerate a variety of soil types, it prefers rich, well-draining soil with a slightly acidic to neutral pH (around 6.0 to 7.0). Amend your soil with compost or other organic matter to improve its fertility and drainage. If you’re using containers, choose a high-quality potting mix specifically formulated for vegetables. Avoid heavy clay soils, as they can become waterlogged and inhibit root growth.
How often should I water my water spinach?
As the name suggests, water spinach loves water! Keep the soil consistently moist, but not waterlogged. Water deeply whenever the top inch of soil feels dry to the touch. In hot weather, you may need to water daily, or even twice a day. Consider using a self-watering container or setting up a simple irrigation system to ensure consistent moisture levels.
How long does it take for water spinach to grow?
Water spinach is a fast-growing vegetable. You can typically start harvesting leaves within 4-6 weeks of planting seeds or cuttings. Continue harvesting regularly to encourage new growth. With proper care, you can enjoy a continuous harvest throughout the growing season.
How do I harvest water spinach?
Harvest water spinach by cutting the stems about 6-8 inches from the base of the plant. This will encourage new shoots to grow from the cut stems. You can harvest individual leaves as needed, or harvest larger portions of the plant at once. It’s best to harvest in the morning, when the leaves are at their freshest.
What are some common pests and diseases that affect water spinach?
Water spinach is generally resistant to pests and diseases, but it can be susceptible to aphids, spider mites, and fungal diseases like powdery mildew. Inspect your plants regularly for signs of infestation or disease. Treat any problems promptly with organic pest control methods, such as insecticidal soap or neem oil. Ensure good air circulation around your plants to prevent fungal diseases.
Can I grow water spinach indoors?
Yes, you can grow water spinach indoors, but you’ll need to provide adequate light and humidity. Place your plants near a sunny window or use grow lights to supplement natural light. Maintain a humid environment by misting the plants regularly or using a humidifier. Indoor-grown water spinach may not grow as quickly or produce as much as outdoor-grown plants, but it’s still a viable option for those with limited space or unfavorable climates.
Is water spinach safe to eat?
Yes, water spinach is generally safe to eat when grown in clean water and soil. However, it’s important to avoid growing water spinach in polluted water sources, as it can accumulate heavy metals and other contaminants. Always wash your water spinach thoroughly before eating to remove any dirt or debris. If you’re unsure about the safety of your water source, it’s best to purchase water spinach from a reputable source.
Can I grow water spinach from cuttings?
Yes, growing water spinach from cuttings is a very effective and easy method. Simply take cuttings from healthy stems, about 6-8 inches long. Remove the lower leaves and place the cuttings in a glass of water. Roots will typically develop within a few days. Once the roots are about an inch long, you can transplant the cuttings into soil or a hydroponic system. This method allows you to quickly propagate new plants from existing ones.


Leave a Comment