

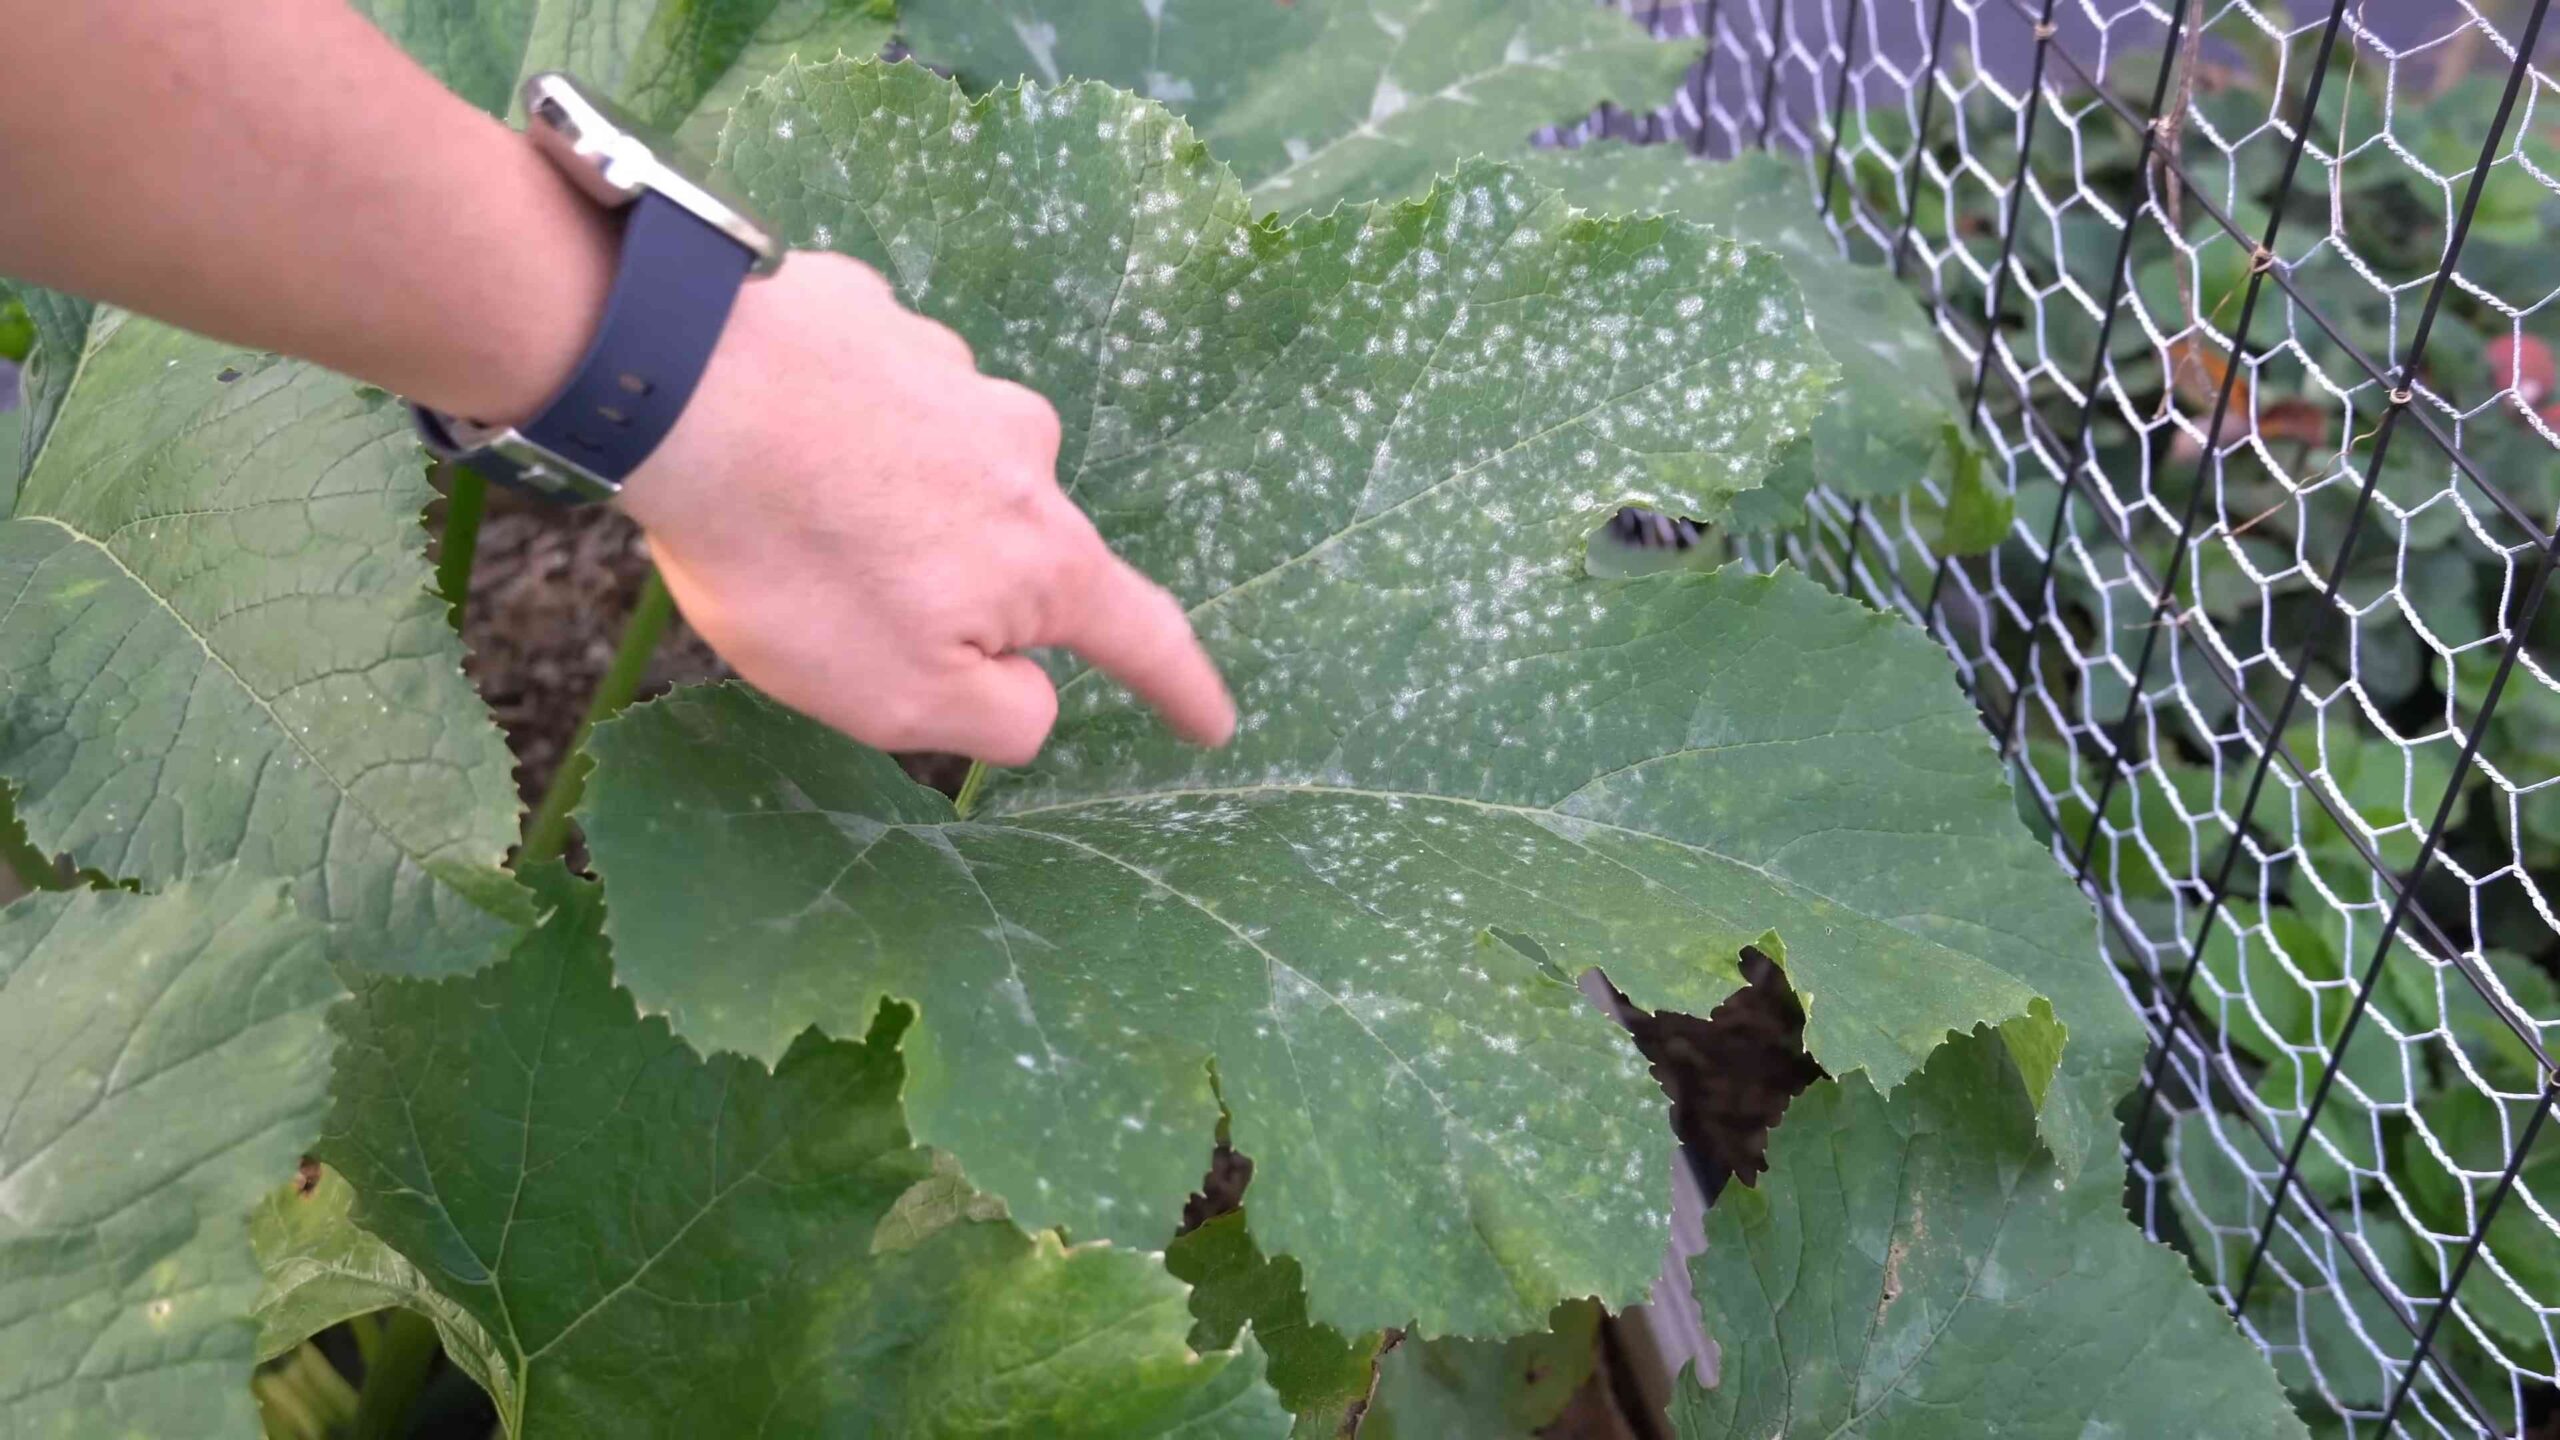
Hydrogen Peroxide Powdery Mildew: Sounds like a science experiment gone wrong, right? But trust me, it’s your secret weapon against one of the most frustrating garden invaders! I know, I know, you’ve probably tried everything to combat that unsightly white fuzz clinging to your precious plants. From expensive fungicides to questionable home remedies, the battle against powdery mildew can feel endless.
Powdery mildew has been a gardener’s nemesis for centuries. Evidence suggests that even ancient Roman farmers struggled with this fungal foe, impacting their crops and livelihoods. Today, it remains a widespread problem, affecting everything from roses to vegetables. But don’t despair! This DIY trick offers a simple, affordable, and effective solution using something you likely already have in your medicine cabinet: hydrogen peroxide.
Why is this DIY hack so crucial? Because nobody wants to see their hard work and dedication ruined by a stubborn fungal infection. Powdery mildew not only looks awful, but it can also weaken your plants, reduce yields, and even lead to their demise. This article will guide you through a step-by-step process, showing you exactly how to use hydrogen peroxide powdery mildew treatment to reclaim your garden and enjoy healthy, thriving plants. Let’s get started and say goodbye to powdery mildew for good!
DIY Powdery Mildew Treatment: Hydrogen Peroxide Power!
Hey everyone! Powdery mildew can be a real bummer for any gardener, turning your beautiful plants into ghostly, white messes. But don’t despair! I’ve got a simple, effective, and budget-friendly DIY solution using something you probably already have in your medicine cabinet: hydrogen peroxide. This method has worked wonders for me, and I’m excited to share it with you.
What You’ll Need
Before we dive in, let’s gather our supplies. This is a pretty straightforward project, so the list is short and sweet:
* 3% Hydrogen Peroxide (the kind you get at the drugstore)
* Spray Bottle (a clean one, please!)
* Water (tap water is fine)
* Optional: A drop or two of mild dish soap (this helps the solution stick to the leaves)
* Optional: Gardening gloves (to protect your hands)
* Optional: Eye protection (just in case!)
Understanding the Science (A Little Bit!)
Hydrogen peroxide (H2O2) is basically water with an extra oxygen molecule. This extra oxygen molecule is what makes it so effective against powdery mildew. Powdery mildew is a fungus, and fungi don’t like oxygen-rich environments. When you spray your plants with a hydrogen peroxide solution, the extra oxygen helps to kill the fungal spores and prevent them from spreading. It’s also relatively safe for your plants when used correctly.
Mixing the Solution: Getting the Ratios Right
The key to success with hydrogen peroxide is getting the dilution right. Too strong, and you risk damaging your plants. Too weak, and it won’t be effective. I’ve found that a 1:10 ratio of hydrogen peroxide to water works best.
1. Measure Your Water: Start by measuring out 10 parts water into your spray bottle. For example, if your spray bottle holds 1 liter, you’ll need 900 ml of water.
2. Add the Hydrogen Peroxide: Now, carefully add 1 part hydrogen peroxide to the water. Using the same example, you’d add 100 ml of 3% hydrogen peroxide.
3. Optional Soap Boost: If you’re using dish soap, add just a drop or two. Too much soap can also harm your plants. The soap acts as a surfactant, helping the solution spread evenly and stick to the leaves.
4. Mix Well: Gently shake the spray bottle to thoroughly mix the solution. Avoid vigorous shaking, as this can create excessive bubbles.
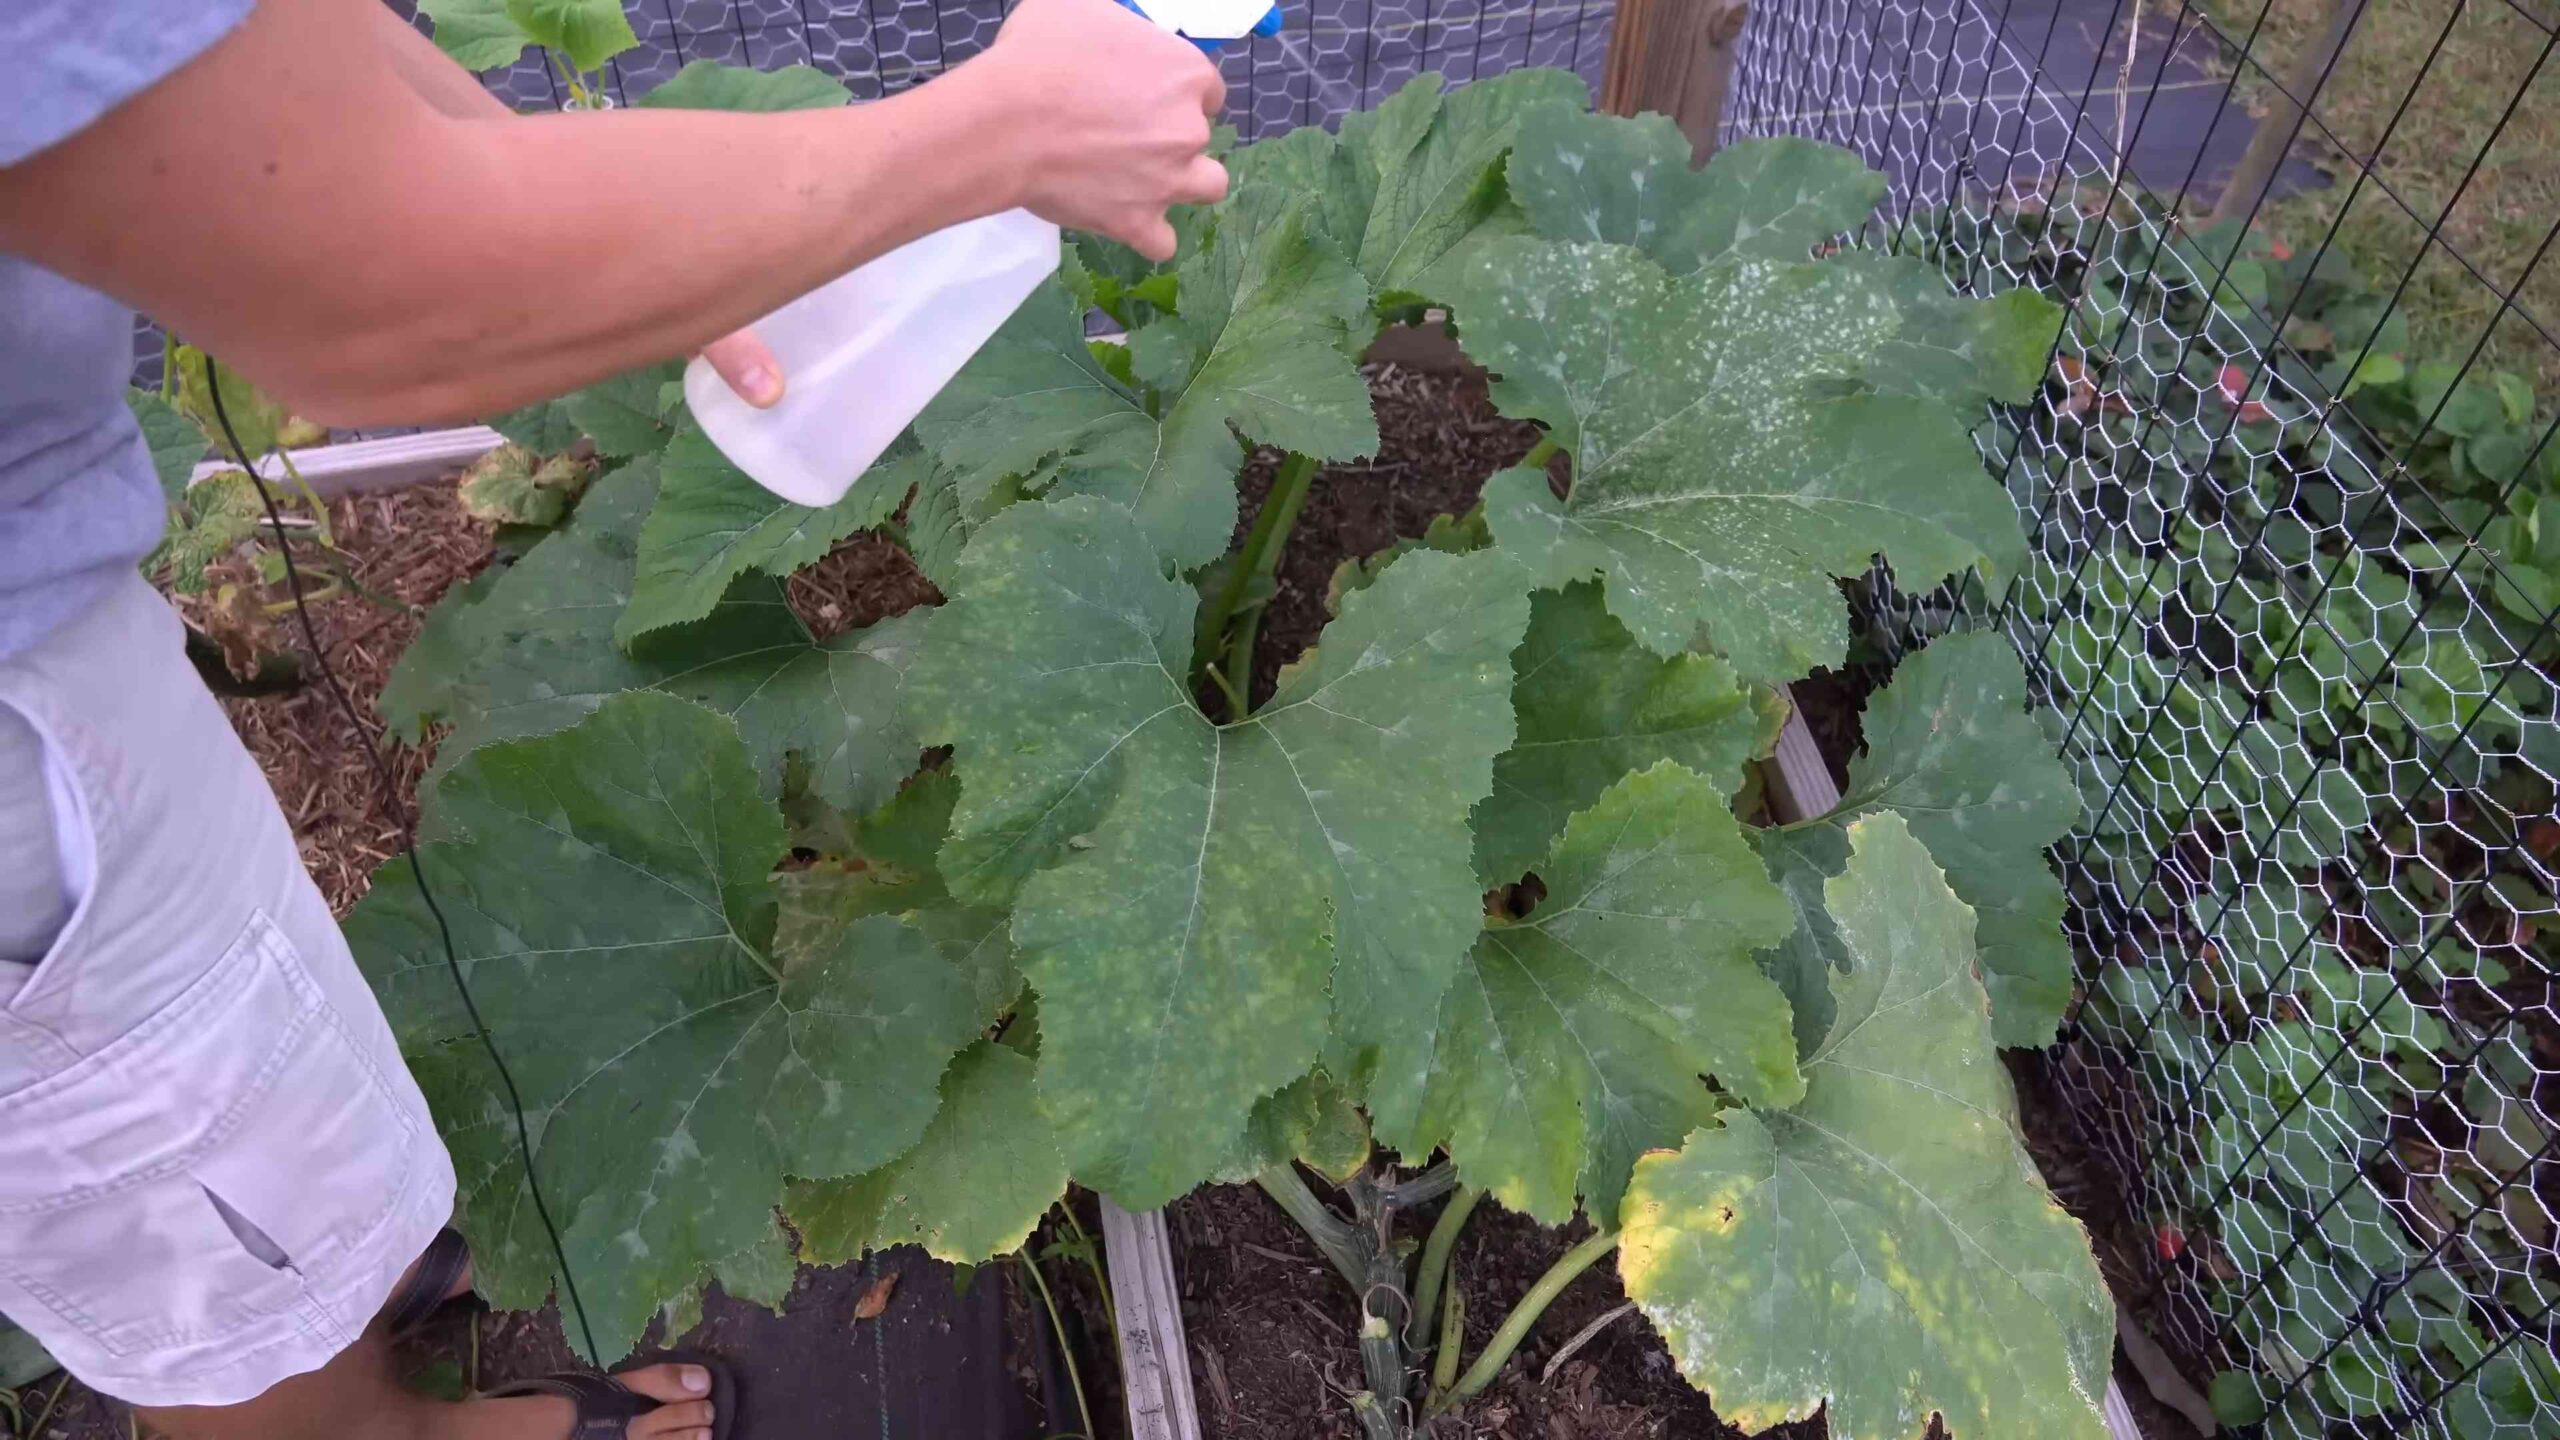
Applying the Solution: A Step-by-Step Guide
Now for the fun part: treating your plants! Here’s how I do it:
1. Test on a Small Area: Before you go spraying your entire plant, it’s always a good idea to test the solution on a small, inconspicuous area. This will help you make sure your plant isn’t sensitive to the hydrogen peroxide. Wait 24 hours and check for any signs of damage, like leaf burn or discoloration. If everything looks good, proceed to the next step.
2. Spray Thoroughly: Once you’ve confirmed that your plant tolerates the solution, spray all affected areas thoroughly. Pay close attention to the tops and undersides of the leaves, as well as the stems. Powdery mildew loves to hide in those nooks and crannies!
3. Don’t Overdo It: While it’s important to spray thoroughly, avoid oversaturating the plant. You don’t want the solution to drip excessively. A light, even coating is all you need.
4. Timing is Key: The best time to apply the solution is in the early morning or late evening, when the sun isn’t too strong. This will help prevent the leaves from burning. Avoid spraying during the hottest part of the day.
5. Repeat as Needed: Depending on the severity of the powdery mildew, you may need to repeat the treatment every few days. I usually reapply every 3-5 days until the mildew is gone. Keep a close eye on your plants and adjust the frequency as needed.
Preventative Measures: Stopping Powdery Mildew Before It Starts
While hydrogen peroxide is a great treatment, prevention is always better than cure. Here are some things I do to keep powdery mildew at bay:
* Good Air Circulation: Powdery mildew thrives in humid, stagnant conditions. Make sure your plants have good air circulation by spacing them properly and pruning them as needed.
* Water Properly: Avoid overhead watering, as this can create a humid environment that encourages fungal growth. Water at the base of the plant, and try to do it in the morning so the leaves have time to dry before nightfall.
* Sunlight: Powdery mildew prefers shady conditions. Make sure your plants are getting enough sunlight.
* Healthy Soil: Healthy plants are more resistant to disease. Make sure your plants are growing in well-draining soil that’s rich in organic matter.
* Neem Oil: Neem oil is a natural fungicide that can help prevent powdery mildew. I spray my plants with neem oil every few weeks as a preventative measure.
* Milk Spray: Another DIY preventative measure is a milk spray. Mix one part milk with nine parts water and spray your plants every 1-2 weeks. The proteins in the milk are thought to have antifungal properties.
Troubleshooting: What to Do If Things Go Wrong
Even with the best intentions, things don’t always go as planned. Here are some common problems you might encounter and how to fix them:
* Leaf Burn: If you notice leaf burn after applying the hydrogen peroxide solution, it means the concentration was too strong. Reduce the amount of hydrogen peroxide in your next batch.
* No Improvement: If you’re not seeing any improvement after a few treatments, it could be that the powdery mildew is resistant to hydrogen peroxide. Try a different treatment, such as neem oil or a commercial fungicide.
* Plant Sensitivity: Some plants are more sensitive to hydrogen peroxide than others. If you notice any signs of stress after applying the solution, stop using it immediately and try a different treatment.
Important Considerations
* Always use 3% hydrogen peroxide. Higher concentrations can be harmful to your plants.
* Don’t mix hydrogen peroxide with other chemicals. This can create dangerous reactions.
* Store hydrogen peroxide in a cool, dark place. Light and heat can degrade it.
* Be patient. It may take several treatments to get rid of powdery mildew completely.
* Monitor your plants regularly. Early detection is key to preventing powdery mildew from spreading.
A Note on Different Plants
While this method is generally safe, it’s always a good idea to be cautious, especially with delicate plants. Some plants, like certain types of ferns and orchids, may be more sensitive to hydrogen peroxide. Always test on a small area first, and if you’re unsure, consult a gardening expert.
Why I Love This Method
I’ve tried many different treatments for powdery mildew over the years, and this hydrogen peroxide method is by far my favorite. It’s effective, affordable, and relatively safe for my plants and the environment. Plus, it’s something I can easily whip up with ingredients I already have on hand.
Beyond Powdery Mildew: Other Uses for Hydrogen Peroxide in the Garden
Did you know that hydrogen peroxide has other uses in the garden besides treating powdery mildew? Here are a few of my favorites:
* Seed Germination: Soaking seeds in a diluted hydrogen peroxide solution (1 teaspoon per cup of water) before planting can help improve germination rates. The hydrogen peroxide softens the seed coat and helps to kill any pathogens that may be present.
* Root Rot Treatment: Hydrogen peroxide can also be used to treat root rot, a common problem in overwatered plants. Remove the affected plant from its pot, trim away any rotten roots, and soak the remaining roots in a diluted hydrogen peroxide solution (1 tablespoon per cup of water) for a few minutes. Then, replant the plant in fresh, well-draining soil.
* Soil Aeration: Adding hydrogen peroxide to your watering can can help aerate the soil and improve drainage. This is especially helpful for plants that are growing in heavy clay soil. Use a diluted solution of 1 tablespoon of 3% hydrogen peroxide per gallon of water.
* Cleaning Garden Tools: Hydrogen peroxide is a great disinfectant for cleaning garden tools. Simply spray your tools with a 3% hydrogen peroxide solution and let them air dry. This will help prevent the spread of diseases from one plant to another.
Final Thoughts
Powdery mildew can be a frustrating problem, but it doesn’t have to ruin your garden. With a little bit of hydrogen peroxide and some preventative measures, you can keep your plants healthy and thriving. I hope this guide has been helpful! Happy gardening!
Conclusion
So, there you have it! This simple, cost-effective, and readily available solution using hydrogen peroxide for powdery mildew is a game-changer for any gardener battling this frustrating fungal disease. We’ve walked you through the process, explained the science behind it, and hopefully, dispelled any lingering doubts you might have had.
Why is this DIY trick a must-try? Because it offers a powerful alternative to harsh chemical fungicides. It’s gentle on your plants (when used correctly, of course!), environmentally friendly, and incredibly easy to prepare and apply. Think about it: no more expensive trips to the garden center, no more worrying about harmful residues on your fruits and vegetables, and no more unsightly white patches ruining the beauty of your garden.
But the benefits don’t stop there. This method is incredibly versatile. While we’ve focused on powdery mildew, hydrogen peroxide can also be effective against other fungal diseases, such as black spot and rust. You can even use it as a preventative measure, spraying your plants regularly to keep fungal spores at bay.
Looking for variations? Consider adding a tablespoon of baking soda to your hydrogen peroxide solution. Baking soda helps to increase the pH of the solution, making it even more effective against powdery mildew. Another option is to add a few drops of mild dish soap to help the solution adhere to the leaves. Just be sure to use a soap that doesn’t contain any harsh chemicals or fragrances that could harm your plants. You can also experiment with different concentrations of hydrogen peroxide, starting with a lower concentration and gradually increasing it until you find what works best for your plants. Remember to always test the solution on a small area of the plant first to ensure that it doesn’t cause any damage.
We understand that trying something new can be a little daunting, but we’re confident that you’ll be amazed by the results. Imagine your roses blooming beautifully, your squash thriving, and your garden looking healthier than ever before, all thanks to this simple DIY solution.
Don’t let powdery mildew get the best of your plants. Take control of your garden’s health and give this hydrogen peroxide treatment a try. We’re eager to hear about your experiences! Share your before-and-after photos, tips, and tricks in the comments below. Let’s create a community of gardeners who are empowered to fight powdery mildew naturally and effectively. Your success story could inspire others to ditch the chemicals and embrace a healthier, more sustainable approach to gardening. So, grab your hydrogen peroxide, mix up a batch, and get ready to say goodbye to powdery mildew for good! We can’t wait to hear about your success using hydrogen peroxide for powdery mildew!
Frequently Asked Questions (FAQ)
What concentration of hydrogen peroxide should I use?
The recommended concentration is typically 3% hydrogen peroxide, which is the standard strength you can find at most drugstores or supermarkets. Avoid using higher concentrations without diluting them properly, as they can damage your plants. For a foliar spray, mix 1 tablespoon (15 ml) of 3% hydrogen peroxide per cup (240 ml) of water. For severe infestations, you can try increasing the concentration slightly, but always test on a small area first.
Can I use hydrogen peroxide on all types of plants?
While hydrogen peroxide is generally safe for most plants, it’s always a good idea to test it on a small, inconspicuous area first, especially if you’re dealing with delicate or sensitive plants. Observe the treated area for a few days to see if there are any signs of damage, such as leaf burn or discoloration. If you notice any adverse effects, discontinue use or dilute the solution further. Plants like ferns and some succulents can be more sensitive.
How often should I apply the hydrogen peroxide solution?
For active powdery mildew infestations, you can apply the solution every 3-5 days until the symptoms subside. For preventative measures, you can spray your plants every 1-2 weeks. Avoid spraying during the hottest part of the day, as this can increase the risk of leaf burn. Early morning or late evening is the best time to apply the solution.
Is hydrogen peroxide safe for beneficial insects and pollinators?
When used correctly, hydrogen peroxide is generally considered safe for beneficial insects and pollinators. However, it’s always a good idea to avoid spraying directly on insects, as it can be harmful to them. Focus on spraying the affected areas of the plant, and avoid spraying flowers that are actively being visited by pollinators.
Can I use hydrogen peroxide in conjunction with other treatments?
Yes, you can use hydrogen peroxide in conjunction with other treatments, such as neem oil or horticultural oil. However, it’s important to avoid mixing hydrogen peroxide with certain chemicals, such as copper-based fungicides, as this can create a harmful reaction. Always read the labels of all products carefully and follow the instructions. It’s best to apply different treatments on separate days to minimize the risk of any adverse interactions.
How long does it take for hydrogen peroxide to kill powdery mildew?
The effectiveness of hydrogen peroxide can vary depending on the severity of the infestation and the environmental conditions. In most cases, you should start to see results within a few days of application. The powdery mildew will start to dry out and turn brown. However, it may take several applications to completely eradicate the disease. Be patient and persistent, and continue to monitor your plants for any signs of recurrence.
What are the signs of over-application of hydrogen peroxide?
Signs of over-application include leaf burn (brown or scorched spots on the leaves), yellowing of the leaves, and stunted growth. If you notice any of these symptoms, discontinue use immediately and flush the affected area with water. In the future, dilute the solution further or reduce the frequency of application.
Does hydrogen peroxide affect the soil?
Hydrogen peroxide can actually benefit the soil by increasing oxygen levels and promoting beneficial microbial activity. When hydrogen peroxide decomposes, it breaks down into water and oxygen, which can help to improve soil drainage and aeration. However, it’s important to avoid over-saturating the soil with hydrogen peroxide, as this can harm beneficial soil organisms.
Can I use expired hydrogen peroxide?
While expired hydrogen peroxide may still be effective, it may not be as potent as fresh hydrogen peroxide. Over time, hydrogen peroxide can break down into water, reducing its concentration. If you’re using expired hydrogen peroxide, you may need to increase the concentration slightly to achieve the desired results. However, it’s always best to use fresh hydrogen peroxide whenever possible.
Where can I buy hydrogen peroxide?
You can easily purchase 3% hydrogen peroxide at most drugstores, supermarkets, and online retailers. It’s typically sold in brown bottles to protect it from light, which can cause it to decompose. Be sure to store hydrogen peroxide in a cool, dark place to prolong its shelf life.
Is there a specific time of day that is best to apply the solution?
Yes, it is best to apply the hydrogen peroxide solution either early in the morning or late in the evening. Avoid applying it during the hottest part of the day, as the heat can cause the solution to evaporate too quickly and potentially burn the leaves. Applying it in the morning allows the leaves to dry before nightfall, reducing the risk of fungal growth. Applying it in the evening allows the solution to work overnight without being exposed to direct sunlight.
What if the powdery mildew comes back after treatment?
Powdery mildew can be persistent, so it’s important to continue monitoring your plants even after the initial treatment. If the powdery mildew returns, repeat the hydrogen peroxide treatment as needed. You may also need to address any underlying issues that are contributing to the problem, such as poor air circulation, high humidity, or nutrient deficiencies. Pruning your plants to improve air circulation, providing adequate sunlight, and fertilizing them properly can help to prevent future outbreaks.


Leave a Comment