

Kitchen Window Rosemary: Imagine stepping into your kitchen, not just to cook, but to snip fresh, fragrant rosemary right from your windowsill. Sounds idyllic, right? Well, it’s more achievable than you think! For centuries, herbs like rosemary have been cherished, not only for their culinary uses but also for their medicinal and symbolic significance. From ancient Greece, where students wore rosemary garlands to enhance memory, to medieval times when it symbolized remembrance, this herb has a rich and fascinating history.
But beyond its historical charm, growing kitchen window rosemary offers a practical solution for modern living. How often have you needed just a sprig of rosemary for a recipe, only to find the store-bought bunch wilting away in your fridge? Or maybe you’re simply looking to add a touch of green to your indoor space. That’s where this DIY guide comes in! I’m going to share some simple, effective tricks and hacks to help you cultivate thriving rosemary right in your kitchen. No green thumb required! We’ll cover everything from choosing the right pot and soil to providing the perfect amount of sunlight and water. Get ready to enjoy the fresh, aromatic flavor of homegrown rosemary at your fingertips, all year round!

Grow Your Own Rosemary Right in Your Kitchen Window!
Hey there, fellow plant enthusiasts! I’m so excited to share this super simple and rewarding DIY project with you: growing rosemary right in your kitchen window! Imagine having fresh, fragrant rosemary always at your fingertips for cooking, teas, or even just to enjoy its lovely scent. It’s easier than you think, and I’m going to walk you through every step.
Why Rosemary?
Rosemary is a fantastic herb to grow indoors. It’s relatively low-maintenance, smells amazing, and adds a delicious flavor to so many dishes. Plus, it’s known for its potential health benefits, like improving memory and boosting the immune system. What’s not to love?
What You’ll Need
Before we dive in, let’s gather our supplies. Here’s what you’ll need to create your indoor rosemary haven:
* **Rosemary Plant or Cuttings:** You can either buy a small rosemary plant from a local nursery or propagate your own from cuttings. I’ll cover both methods.
* **Pot with Drainage:** Choose a pot that’s at least 6 inches in diameter and has drainage holes. Good drainage is crucial for rosemary.
* **Well-Draining Potting Mix:** Rosemary thrives in well-draining soil. A mix specifically formulated for herbs or cacti/succulents works great. Avoid heavy garden soil.
* **Watering Can or Spray Bottle:** For gentle watering.
* **Sunny Kitchen Window:** Rosemary needs at least 6 hours of sunlight per day. A south-facing window is ideal.
* **Optional: Grow Light:** If you don’t have a sunny window, a grow light can supplement the sunlight.
* **Optional: Rooting Hormone (for cuttings):** This helps cuttings develop roots faster.
* **Optional: Pruning Shears or Scissors:** For trimming and harvesting.
Getting Started: Two Ways to Rosemary
You have two main options for starting your indoor rosemary garden: buying a small plant or propagating from cuttings. Let’s explore both:
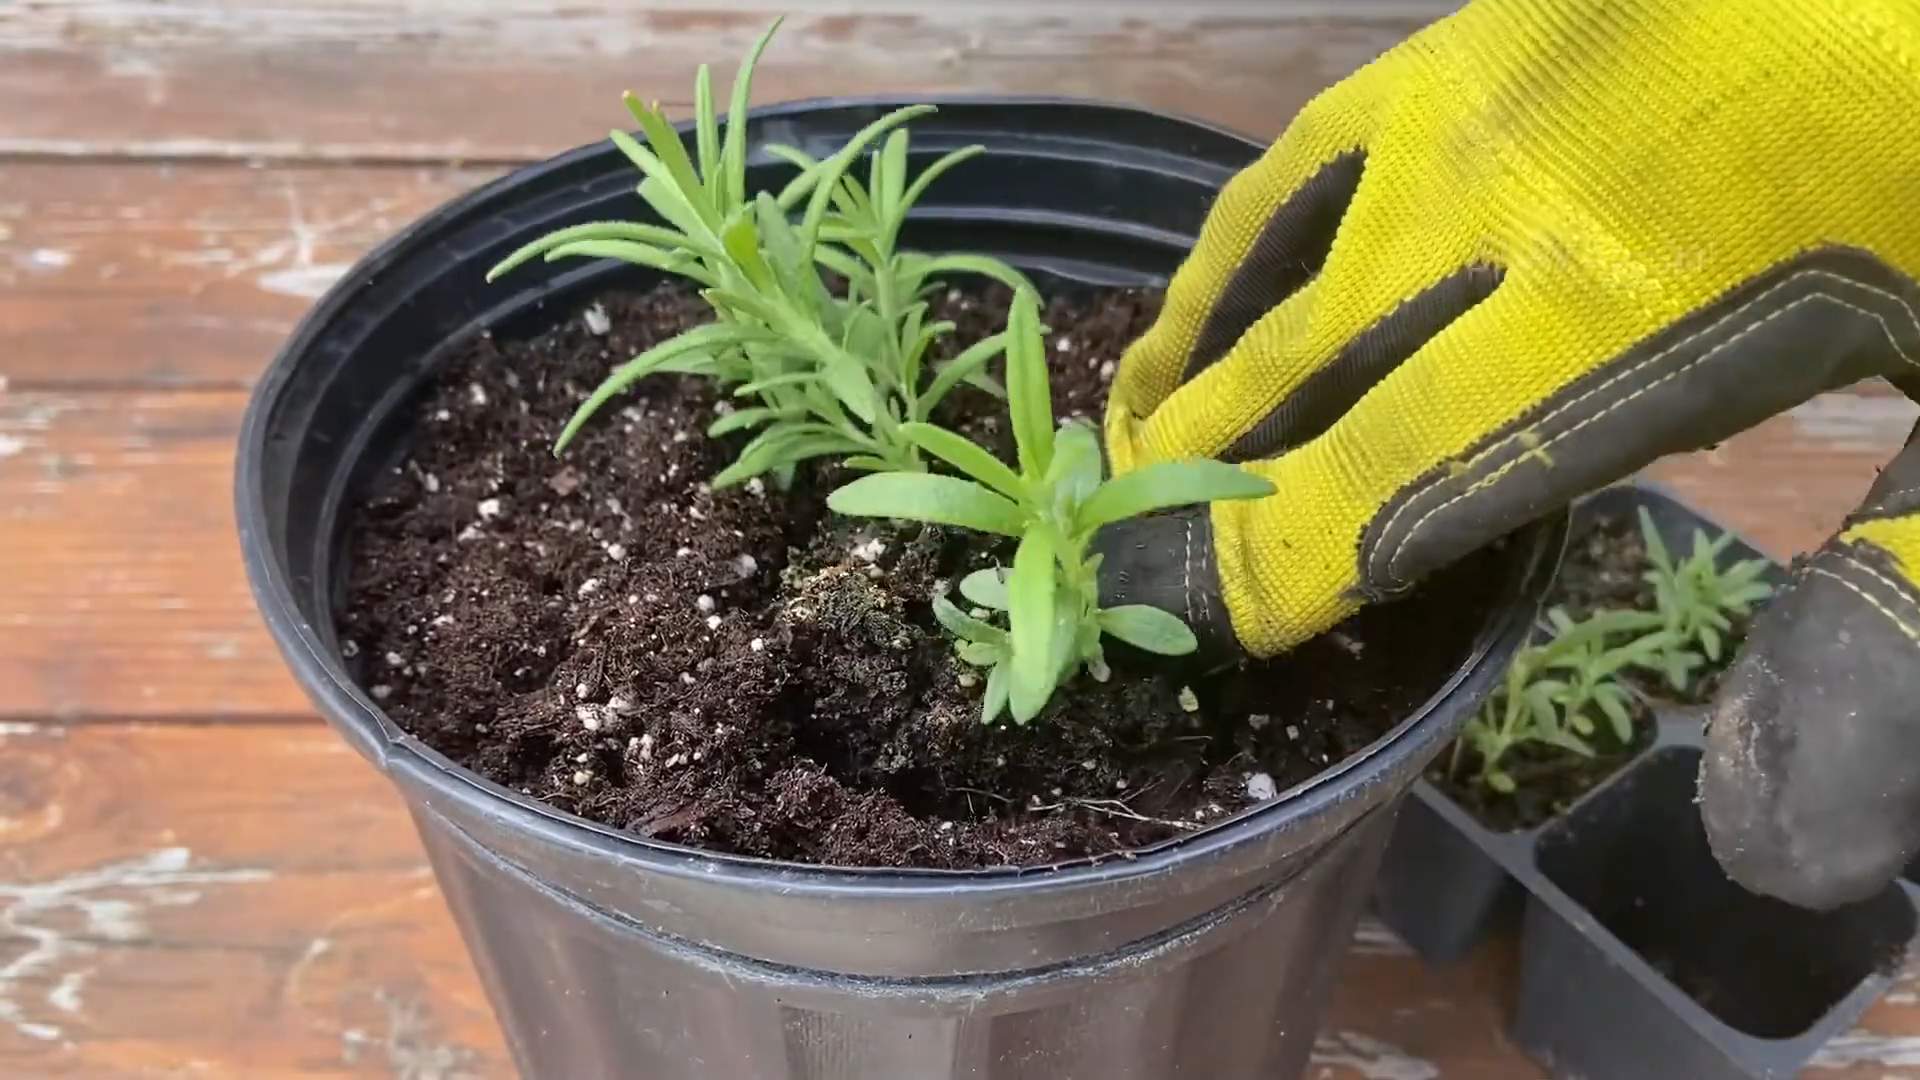
Option 1: Planting a Rosemary Plant
This is the quickest and easiest way to get started.
1. **Choose Your Plant:** Head to your local nursery and select a healthy-looking rosemary plant. Look for vibrant green foliage and avoid plants that look wilted or have signs of pests.
2. **Prepare Your Pot:** Fill your pot with the well-draining potting mix, leaving about an inch of space at the top.
3. **Remove the Plant from its Container:** Gently squeeze the sides of the nursery pot to loosen the plant. Carefully remove the plant, being mindful not to damage the roots.
4. **Loosen the Root Ball:** Gently tease apart the roots with your fingers. This encourages them to spread out and establish themselves in the new pot.
5. **Plant the Rosemary:** Place the rosemary plant in the center of the pot, ensuring that the top of the root ball is level with the soil surface.
6. **Fill with Soil:** Fill in the remaining space around the plant with potting mix, gently pressing down to secure it.
7. **Water Thoroughly:** Water the plant thoroughly until water drains out of the drainage holes. This helps settle the soil and hydrate the roots.
8. **Place in a Sunny Window:** Put your newly planted rosemary in a sunny kitchen window where it will receive at least 6 hours of sunlight per day.
Option 2: Propagating Rosemary from Cuttings
This method takes a bit longer, but it’s a great way to multiply your rosemary plants and save money.
1. **Take Cuttings:** Using clean pruning shears or scissors, take cuttings from a healthy rosemary plant. The cuttings should be about 4-6 inches long. Choose stems that are new growth and haven’t flowered.
2. **Remove Lower Leaves:** Remove the leaves from the bottom inch or two of each cutting. This is where the roots will develop.
3. **Apply Rooting Hormone (Optional):** Dip the cut ends of the cuttings in rooting hormone powder or liquid. This will encourage root growth.
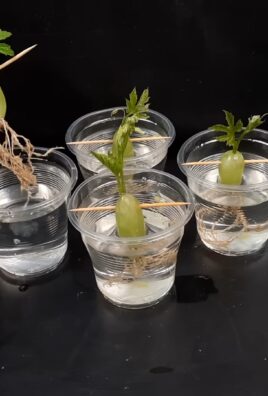
4. **Plant the Cuttings:** There are two ways to root rosemary cuttings:
* **Water Propagation:** Place the cuttings in a glass or jar filled with water, ensuring that the leaves are above the water line. Change the water every few days. Roots should start to appear in a few weeks.
* **Soil Propagation:** Dip the cut end of the cutting in rooting hormone (optional) and plant the cuttings in a small pot filled with moist potting mix. Cover the pot with a plastic bag or humidity dome to create a humid environment. Keep the soil moist but not soggy.
5. **Wait for Roots to Develop:** Whether you’re using water or soil propagation, it will take several weeks for roots to develop. You’ll know the cuttings have rooted when you see new growth.
6. **Transplant to a Pot:** Once the cuttings have developed a good root system (at least an inch or two long), transplant them into a pot filled with well-draining potting mix, following steps 2-8 from the “Planting a Rosemary Plant” section.
Caring for Your Indoor Rosemary
Now that your rosemary is planted, it’s time to learn how to care for it. Here are some key tips:
* **Sunlight:** Rosemary needs at least 6 hours of sunlight per day. If you don’t have a sunny window, supplement with a grow light.
* **Watering:** Water your rosemary when the top inch of soil feels dry to the touch. Avoid overwatering, as this can lead to root rot. Rosemary prefers to be slightly dry rather than constantly wet. Ensure the pot has good drainage.
* **Humidity:** Rosemary prefers relatively low humidity. Avoid placing it in a bathroom or other humid area. If your home is very dry, you can mist the plant occasionally.
* **Fertilizing:** Feed your rosemary plant with a balanced liquid fertilizer every 2-4 weeks during the growing season (spring and summer). Dilute the fertilizer to half strength to avoid burning the roots.
* **Pruning:** Prune your rosemary plant regularly to encourage bushier growth and prevent it from becoming leggy. You can prune it anytime, but it’s best to do it in the spring or summer. Use clean pruning shears or scissors to trim the stems. Don’t remove more than one-third of the plant at a time.
* **Pest Control:** Keep an eye out for pests like aphids, spider mites, and whiteflies. If you notice any pests, treat them with insecticidal soap or neem oil.
* **Repotting:** Repot your rosemary plant every year or two, or when it outgrows its pot. Choose a pot that’s slightly larger than the current one.
Troubleshooting
Even with the best care, you might encounter some problems with your indoor rosemary plant. Here are some common issues and how to fix them:
* **Yellowing Leaves:** This can be caused by overwatering, underwatering, or nutrient deficiencies. Check the soil moisture and adjust your watering accordingly. If the soil is dry, water thoroughly. If the soil is soggy, allow it to dry out before watering again. You can also try fertilizing the plant with a balanced liquid fertilizer.
* **Brown Leaves:** This can be caused by dry air, sunburn, or root rot. Increase the humidity around the plant by misting it occasionally. If the plant is getting too much direct sunlight, move it to a slightly shadier location. If you suspect root rot, repot the plant in fresh, well-draining potting mix.
* **Leggy Growth:** This is caused by insufficient sunlight. Move the plant to a sunnier location or supplement with a grow light. Prune the plant to encourage bushier growth.
* **Pests:** As mentioned earlier, keep an eye out for pests and treat them with insecticidal soap or neem oil.
Harvesting Your Rosemary
One of the best parts of growing your own rosemary is being able to harvest it whenever you need it!
1. **When to Harvest:** You can harvest rosemary at any time, but the flavor is most intense in the morning.
2. **How to Harvest:** Use clean pruning shears or scissors to cut off stems as needed. Cut the stems just above a leaf node (the point where leaves grow from the stem). This will encourage new growth.
3. **Storing Rosemary:** You can use fresh rosemary immediately, or you can dry it for later use. To dry rosemary, tie the stems together and hang them upside down in a cool, dry place. Once the leaves are dry, you can crumble them and store them in an airtight container.
Enjoying Your Homegrown Rosemary
Now that you have a thriving rosemary plant in your kitchen window, it’s time to enjoy the fruits (or rather, herbs!) of your labor. Here are some ideas:
* **Cooking:** Rosemary is a versatile herb that can be used in a variety of dishes, including roasted meats, vegetables, soups, and sauces.
* **Teas:** Steep fresh or dried rosemary in hot water to make a fragrant and flavorful tea.
* **
Conclusion
So, there you have it! Transforming your kitchen window into a thriving rosemary haven is not only achievable, but also incredibly rewarding. We’ve walked through the simple steps, highlighting the benefits of having fresh, fragrant rosemary right at your fingertips. Forget those sad, dried-out jars from the supermarket – imagine the vibrant flavor you’ll be adding to your dishes with homegrown rosemary.
This isn’t just about convenience; it’s about connecting with your food, understanding where it comes from, and enjoying the simple pleasure of nurturing something beautiful and useful. Plus, let’s be honest, a lush, green rosemary plant adds a touch of rustic charm to any kitchen.
Why is this DIY trick a must-try? Because it’s easy, cost-effective, and delivers a continuous supply of fresh rosemary. It elevates your cooking, brightens your kitchen, and provides a therapeutic connection to nature. What more could you ask for?
Looking to personalize your kitchen window rosemary garden? Consider these variations:
* Experiment with different rosemary varieties: From the upright ‘Blue Spires’ to the trailing ‘Prostratus,’ each variety offers a unique flavor profile and growth habit.
* Companion planting: Rosemary thrives alongside other herbs like thyme and sage. Create a mini herb garden in your window box for a diverse culinary experience.
* Decorative pots: Choose pots that complement your kitchen decor. Terracotta pots offer a classic look, while colorful ceramic pots add a pop of personality.
* Vertical gardening: If you’re short on windowsill space, consider a vertical planter to maximize your rosemary growing potential.
Don’t be intimidated if you’ve never grown herbs before. Rosemary is relatively low-maintenance, and with a little sunlight and water, you’ll be amazed at how quickly it thrives. The key is to provide well-draining soil, adequate sunlight (at least six hours a day), and avoid overwatering.
We are confident that you will enjoy the benefits of having fresh rosemary at your fingertips. So, grab a pot, some soil, and a rosemary seedling, and get started today! We can’t wait to hear about your experiences. Share your photos and tips in the comments below – let’s create a community of kitchen window rosemary growers! Let us know what recipes you are using your fresh rosemary in.
Frequently Asked Questions (FAQ)
What is the best type of rosemary to grow indoors?
While most rosemary varieties can be grown indoors, some are better suited than others. Dwarf varieties like ‘Blue Boy’ or ‘Roman Beauty’ are excellent choices because they stay relatively compact and are less likely to outgrow their pots. Upright varieties like ‘Tuscan Blue’ can also be grown indoors, but they may require more pruning to maintain a manageable size. Trailing varieties like ‘Prostratus’ are beautiful in hanging baskets or cascading over the edge of a pot. Ultimately, the best type of rosemary to grow indoors depends on your personal preference and the amount of space you have available.
How much sunlight does my kitchen window rosemary need?
Rosemary thrives in bright sunlight, so aim for at least six hours of direct sunlight per day. A south-facing window is ideal, but an east- or west-facing window can also work if it provides sufficient light. If your kitchen window doesn’t receive enough natural light, you may need to supplement with a grow light. Position the grow light a few inches above the plant and leave it on for 12-14 hours per day.
How often should I water my kitchen window rosemary?
Rosemary prefers well-draining soil and doesn’t like to be overwatered. Water your rosemary plant when the top inch of soil feels dry to the touch. When you water, water thoroughly until water drains out of the bottom of the pot. Be sure to empty the saucer underneath the pot to prevent the plant from sitting in water, which can lead to root rot. During the winter months, when the plant is not actively growing, you may need to water less frequently.
What kind of soil should I use for my kitchen window rosemary?
Use a well-draining potting mix specifically formulated for herbs or vegetables. Avoid using garden soil, as it can be too heavy and may not drain properly. You can also amend your potting mix with perlite or vermiculite to improve drainage.
How do I prune my kitchen window rosemary?
Pruning is essential for maintaining the shape and health of your rosemary plant. Prune your rosemary regularly to encourage bushier growth and prevent it from becoming leggy. Use sharp, clean pruning shears to trim the tips of the stems, just above a leaf node. You can also remove any dead or yellowing leaves. Avoid pruning more than one-third of the plant at a time. The best time to prune rosemary is in the spring or summer, after it has finished flowering.
How do I harvest rosemary from my kitchen window plant?
Harvest rosemary sprigs as needed for cooking. Simply snip off the desired amount of rosemary with sharp scissors or pruning shears. The flavor of rosemary is most intense in the morning, so harvest early in the day for the best flavor. You can use fresh rosemary immediately or dry it for later use.
How do I dry rosemary from my kitchen window plant?
To dry rosemary, tie the sprigs together with twine and hang them upside down in a cool, dry, and well-ventilated place. You can also dry rosemary in a dehydrator or oven. To dry rosemary in the oven, spread the sprigs on a baking sheet and bake at a low temperature (around 170°F) for several hours, or until the leaves are brittle. Once the rosemary is dry, store it in an airtight container in a cool, dark place.
My kitchen window rosemary is turning yellow. What should I do?
Yellowing leaves can be a sign of several problems, including overwatering, underwatering, nutrient deficiency, or pest infestation. Check the soil moisture to determine if you are watering too much or too little. If the soil is consistently wet, reduce your watering frequency. If the soil is dry, water more often. You can also fertilize your rosemary plant with a balanced liquid fertilizer to provide it with the nutrients it needs. Inspect the plant for pests, such as spider mites or aphids, and treat accordingly.
My kitchen window rosemary is not growing. What should I do?
If your rosemary plant is not growing, it may not be getting enough sunlight, water, or nutrients. Ensure that the plant is receiving at least six hours of direct sunlight per day. Check the soil moisture and water as needed. Fertilize the plant with a balanced liquid fertilizer. You may also need to repot the plant into a larger container if it has outgrown its current pot.
Can I propagate rosemary from cuttings?
Yes, you can easily propagate rosemary from cuttings. Take a 4-6 inch cutting from a healthy rosemary plant. Remove the leaves from the bottom inch of the cutting. Dip the cut end in rooting hormone and plant it in a pot filled with well-draining potting mix. Water the cutting and cover it with a plastic bag to create a humid environment. Place the pot in a warm, bright location, but out of direct sunlight. Roots should develop in a few weeks. Once the cutting has rooted, remove the plastic bag and transplant it into a larger pot.


Leave a Comment