

Living Room Cleaning Tips: Let’s face it, our living rooms often bear the brunt of daily life. From movie nights with spilled popcorn to impromptu playdates leaving toys scattered everywhere, it’s a space that quickly accumulates clutter and grime. But what if I told you that achieving a sparkling clean living room doesn’t require hours of back-breaking work or a small fortune spent on fancy cleaning products?
Historically, maintaining a clean and welcoming living space has been a cornerstone of hospitality and well-being across cultures. Think of the meticulously swept hearths of ancient homes or the carefully arranged furniture in Victorian parlors. While our lifestyles have evolved, the desire for a tidy and inviting living room remains a constant.
That’s why I’m so excited to share these simple yet effective DIY cleaning tricks and hacks. We all deserve a sanctuary where we can relax, unwind, and feel proud of our surroundings. These living room cleaning tips will not only save you time and money but also empower you to create a healthier and happier home environment. Get ready to transform your living room from chaotic to calming with these easy-to-follow solutions!
Transform Your Living Room: A Deep Clean DIY Guide
Hey there! Ready to breathe new life into your living room? I know, cleaning isn’t always the most exciting task, but trust me, the feeling of a sparkling clean and organized space is totally worth it. This guide is designed to walk you through a deep clean of your living room, step-by-step, so you can achieve that fresh, inviting atmosphere you’ve been dreaming of. Let’s get started!
Phase 1: Preparation is Key
Before you even think about grabbing a duster, a little prep work will save you time and energy in the long run.
- Gather Your Supplies: Nothing’s worse than getting halfway through a task and realizing you’re missing something. Here’s a checklist:
- Microfiber cloths (lots of them!)
- All-purpose cleaner
- Glass cleaner
- Wood polish (if you have wood furniture)
- Upholstery cleaner (appropriate for your furniture type)
- Vacuum cleaner with attachments
- Dusting brush or duster
- Bucket
- Warm water
- Rubber gloves
- Trash bags
- Optional: Magic Eraser, baking soda, vinegar
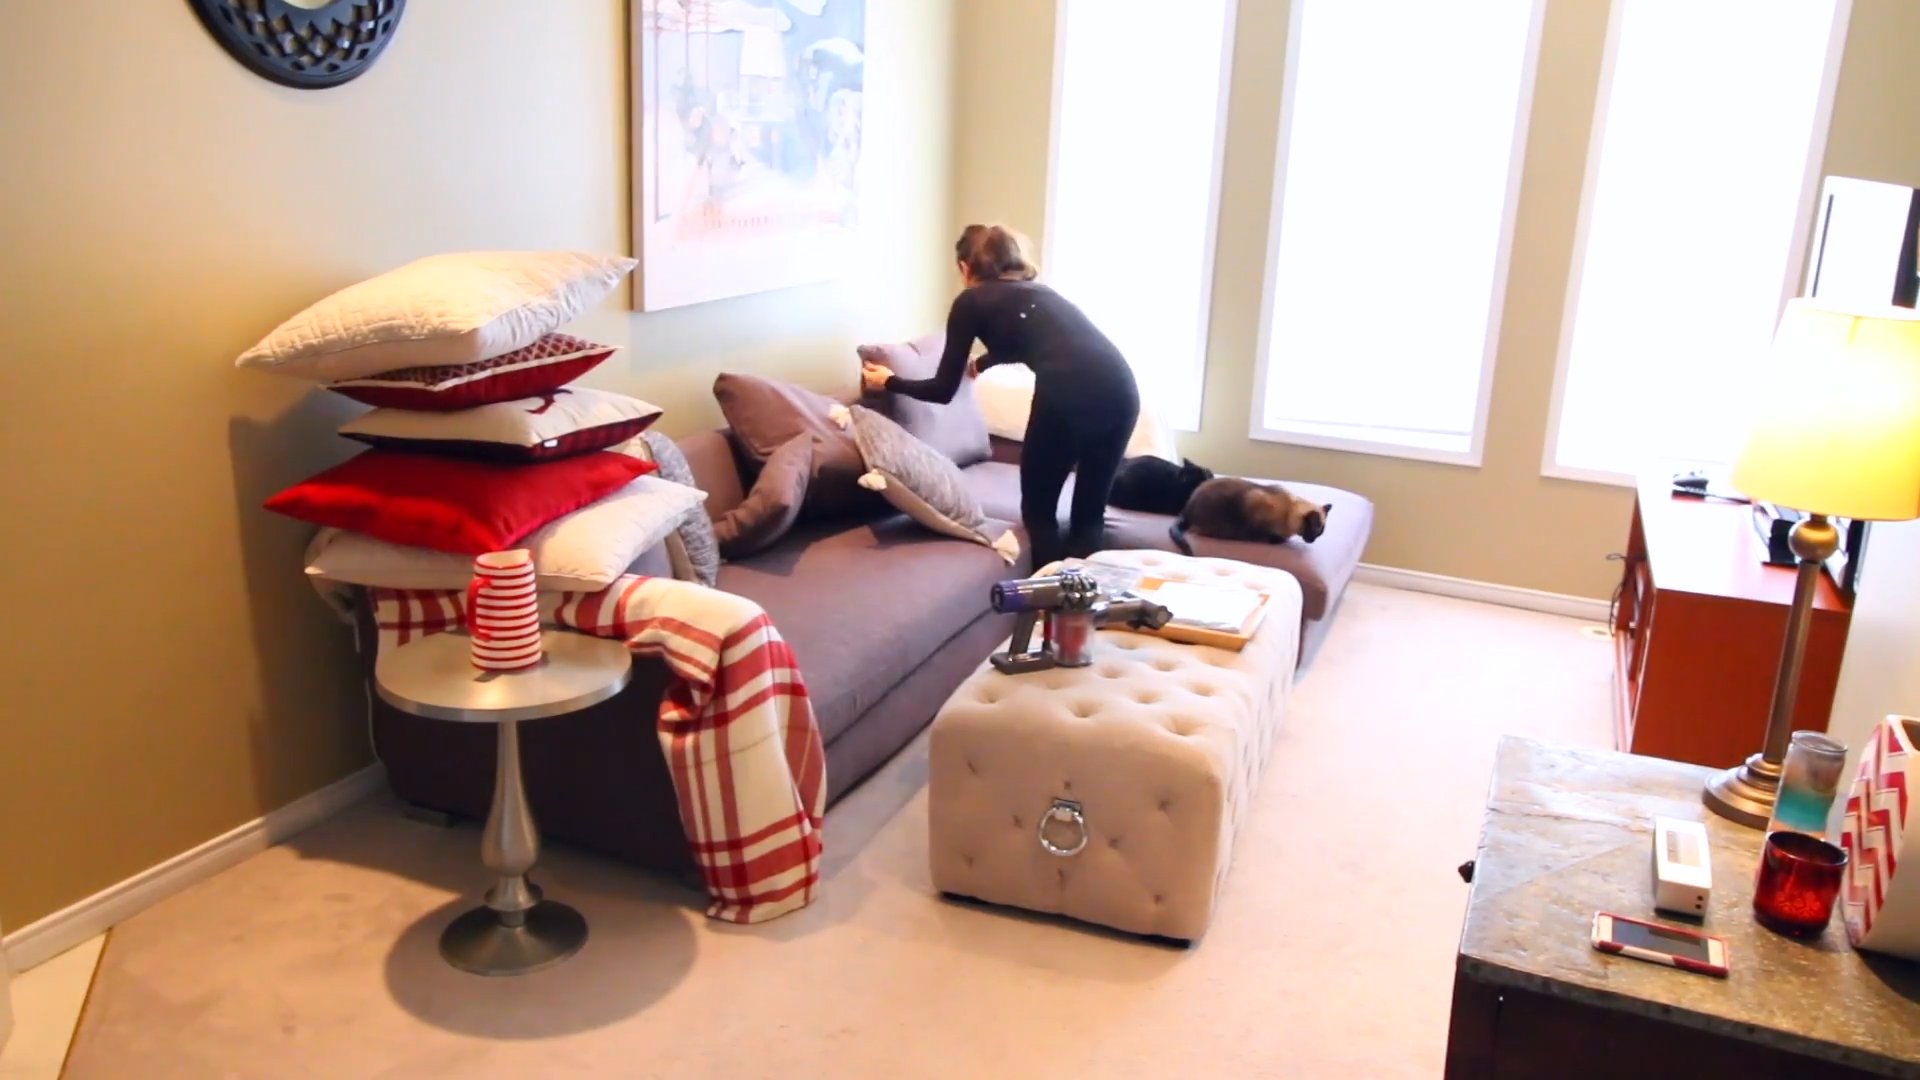
- Declutter First: This is crucial! Get rid of anything that doesn’t belong in the living room. Think magazines, toys, stray papers, etc. Place them where they actually belong. This will make the actual cleaning process much easier.
- Open Windows: Fresh air is your friend. Opening windows will help ventilate the room and get rid of any lingering odors.
- Protect Your Floors: If you’re using any cleaning solutions that could potentially damage your floors, lay down some old towels or drop cloths.
Phase 2: High to Low – The Cleaning Order
The golden rule of cleaning is to work from top to bottom. This prevents dust and debris from falling onto already cleaned surfaces.
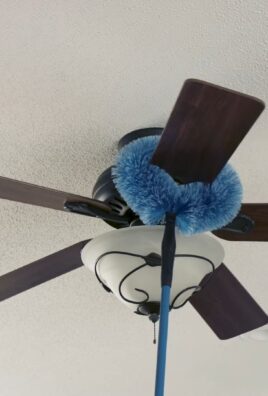
1. Dusting High Surfaces
This includes ceiling fans, light fixtures, and any high shelves or ledges.
- Ceiling Fans: Use a duster with a long handle or a step stool to reach the fan blades. Make sure to dust both sides of the blades. You can also use a pillowcase trick: carefully slide the pillowcase over each blade, trapping the dust inside.
- Light Fixtures: Turn off the light and let the bulb cool down. Use a dry duster to remove dust from the fixture. If the fixture is particularly dirty, you can use a damp cloth with a mild cleaning solution. Be careful not to get any water inside the fixture.
- Shelves and Ledges: Dust these surfaces thoroughly. Remove any items on the shelves and dust them individually before placing them back.
- Crown Molding and Trim: Don’t forget to dust along the top of your crown molding and trim. A long-handled duster works great for this.
2. Cleaning Walls and Baseboards
Walls can accumulate dust, fingerprints, and smudges over time.
- Dust the Walls: Use a microfiber cloth attached to a mop or broom handle to dust the walls. This will remove loose dust and dirt.
- Spot Clean: For any noticeable smudges or fingerprints, use a damp cloth with a mild all-purpose cleaner. Test the cleaner in an inconspicuous area first to make sure it doesn’t damage the paint.
- Washable Walls: If your walls are washable, you can use a sponge and a bucket of warm water with a mild all-purpose cleaner to wash them. Wring out the sponge well to avoid dripping.
- Baseboards: Use a damp cloth or a Magic Eraser to clean the baseboards. These tend to collect dust and scuff marks.
3. Window Cleaning
Clean windows can make a huge difference in the brightness and overall feel of your living room.
- Dust the Blinds or Curtains: Before cleaning the windows, dust the blinds or curtains. You can use a vacuum cleaner with a brush attachment or a duster.
- Prepare Your Cleaning Solution: You can use a commercial glass cleaner or make your own by mixing equal parts white vinegar and water in a spray bottle.
- Spray and Wipe: Spray the window with the cleaning solution and wipe it down with a clean microfiber cloth. Use a second dry microfiber cloth to buff the window and remove any streaks.
- Clean the Window Frames: Use a damp cloth to clean the window frames and sills.
4. Furniture Focus: Dusting and Polishing
Now it’s time to tackle the furniture.
- Dusting Furniture: Use a microfiber cloth or a dusting brush to dust all surfaces of your furniture, including tables, shelves, and entertainment centers.
- Wood Furniture Polishing: If you have wood furniture, use a wood polish to protect and shine the wood. Follow the instructions on the polish. Usually, you spray a small amount onto a cloth and then wipe the furniture in the direction of the grain.
- Leather Furniture Cleaning: For leather furniture, use a leather cleaner and conditioner. This will help keep the leather soft and supple.
- Fabric Furniture Cleaning: This will be covered in the next section.
Phase 3: Upholstery and Fabric Care
This is where things can get a little more involved, but don’t worry, I’ll guide you through it.
1. Vacuuming Upholstery
This is a crucial first step to remove loose dirt and debris.
- Use the Right Attachment: Use the upholstery attachment on your vacuum cleaner. This will help prevent damage to the fabric.
- Vacuum Thoroughly: Vacuum all surfaces of the furniture, including the cushions, back, arms, and any crevices. Pay special attention to areas where dirt tends to accumulate, such as between the cushions.
- Flip and Vacuum Cushions: Flip the cushions over and vacuum the other side.
2. Spot Cleaning Upholstery
Address any stains or spills as soon as possible to prevent them from setting.
- Identify the Stain: Different stains require different cleaning methods. Check the furniture’s care label for specific cleaning instructions.
- Test Your Cleaner: Before applying any cleaner to the entire stain, test it in an inconspicuous area to make sure it doesn’t damage the fabric.
- Apply the Cleaner: Apply the cleaner to the stain according to the instructions. Usually, you’ll need to blot the stain with a clean cloth. Avoid rubbing, as this can spread the stain.
- Rinse and Dry: Rinse the area with a damp cloth and then blot it dry with a clean towel.
3. Deep Cleaning Upholstery
For a more thorough clean, you can use an upholstery cleaner or a steam cleaner.
- Read the Instructions: Carefully read the instructions on the upholstery cleaner or steam cleaner.
- Test the Cleaner: Test the cleaner in an inconspicuous area first.
- Apply the Cleaner: Apply the cleaner to the upholstery according to the instructions.
- Extract the Cleaner: Use the upholstery cleaner or steam cleaner to extract the cleaner from the fabric.
- Allow to Dry: Allow the upholstery to dry completely before using the furniture. This may take several hours or even overnight.
4. Curtain and Rug Cleaning
Don’t forget these often-overlooked items!
- Curtains: Check the care label for cleaning instructions. Some curtains can be machine washed, while others may need to be dry cleaned. If you’re washing them, be sure to use a gentle cycle and a mild detergent.
- Rugs: Vacuum the rug thoroughly. For a deeper clean, you can use a rug cleaner or a steam cleaner. Test the cleaner in an inconspicuous area first. Follow the instructions on the cleaner.
Phase 4: Floor Care – The Grand Finale
The floor is the foundation of your living room, so giving it some TLC is essential.
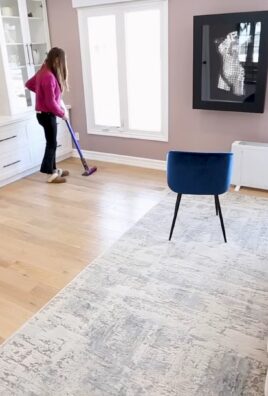
1. Vacuuming or Sweeping
Remove loose dirt and debris before you start mopping.
- Vacuum Thoroughly: Vacuum the entire floor, paying special attention to corners and edges.
- Sweep if Necessary: If you have hard floors, you can sweep them instead of vacuuming.
2. Mopping Hard Floors
Choose the right cleaning solution for your floor type.
- Prepare Your Cleaning Solution: Use a floor cleaner that is appropriate for your floor

Conclusion
So, there you have it! Transforming your living room into a sparkling sanctuary doesn’t require a small fortune or a team of professional cleaners. This DIY approach to living room cleaning is a game-changer, offering a cost-effective, eco-friendly, and surprisingly satisfying way to revitalize your space. We’ve covered everything from decluttering strategies to homemade cleaning solutions, ensuring that every corner of your living room receives the attention it deserves.
Why is this DIY trick a must-try? Because it empowers you to take control of your living environment. You’re not just cleaning; you’re creating a healthier, more inviting space for yourself, your family, and your guests. You’re reducing your reliance on harsh chemicals, saving money, and gaining a sense of accomplishment that comes from doing it yourself. Plus, it’s adaptable!
Consider these variations to personalize your cleaning routine:
* **Scent Sensations:** Infuse your homemade cleaning solutions with essential oils like lavender for relaxation, lemon for a fresh burst of energy, or eucalyptus for its antibacterial properties. A few drops can transform your cleaning session into an aromatherapy experience.
* **Fabric Focus:** For upholstery cleaning, always test your solution on an inconspicuous area first. For delicate fabrics, consider using a dry cleaning sponge or a specialized upholstery cleaner.
* **Tech Tidy:** Don’t forget your electronics! Use a microfiber cloth to gently wipe down your TV screen, remote controls, and other devices. Avoid spraying cleaning solutions directly onto electronics.
* Deep Cleaning Power-Up: For a truly deep clean, consider renting a carpet cleaner or upholstery cleaner. These machines can extract dirt and grime that regular vacuuming can’t reach.
* Decluttering Challenge: Turn decluttering into a fun game! Set a timer for 15 minutes and see how much you can declutter in that time. Reward yourself with a small treat when you’re done.The beauty of this DIY approach is its flexibility. Tailor the techniques and solutions to suit your specific needs and preferences. Whether you’re dealing with pet hair, stubborn stains, or simply want to maintain a clean and organized living room, these tips will provide you with the tools you need to succeed.
We wholeheartedly encourage you to give this DIY living room cleaning method a try. It’s not just about cleaning; it’s about creating a space that reflects your personality and promotes well-being. Once you experience the satisfaction of a sparkling clean living room achieved through your own efforts, you’ll never look back.
But don’t just take our word for it! We’re eager to hear about your experiences. Share your before-and-after photos, your favorite cleaning tips, and any variations you’ve discovered in the comments below. Let’s create a community of DIY cleaning enthusiasts and inspire each other to maintain beautiful and healthy living spaces. Your insights could be invaluable to others who are just starting their DIY cleaning journey. So, grab your cleaning supplies, put on some music, and get ready to transform your living room! We can’t wait to see your results!
Frequently Asked Questions (FAQs)
Q: How often should I deep clean my living room?
A: The frequency of deep cleaning depends on several factors, including the amount of traffic your living room receives, whether you have pets or children, and your personal preferences. As a general guideline, aim for a deep clean every 3-6 months. This includes tasks like cleaning carpets, upholstery, curtains, and windows. Regular maintenance cleaning, such as vacuuming, dusting, and wiping down surfaces, should be done weekly or bi-weekly to prevent dirt and grime from building up. If you have pets or children, you may need to deep clean more frequently.
Q: What’s the best way to remove pet hair from my living room furniture?
A: Pet hair can be a persistent problem, but there are several effective solutions. A rubber glove or a damp sponge can be used to wipe down furniture and attract pet hair. Vacuum cleaners with specialized pet hair attachments are also very helpful. For upholstery, consider using a lint roller or a pet hair removal brush. You can also try using a fabric softener sheet to wipe down furniture, which can help to loosen pet hair and reduce static cling. Regularly grooming your pets can also help to minimize shedding.
Q: How do I clean stains on my carpet or upholstery?
A: Act quickly! The sooner you address a stain, the easier it will be to remove. Blot the stain with a clean cloth, working from the outside in to prevent it from spreading. Avoid rubbing the stain, as this can damage the fibers. For specific types of stains, you can use a variety of cleaning solutions. For example, a mixture of vinegar and water can be effective for removing many common stains. Baking soda can be used to absorb odors and lift stains. Always test any cleaning solution on an inconspicuous area of the carpet or upholstery before applying it to the stain. If the stain persists, consider using a professional carpet or upholstery cleaner.
Q: What are some eco-friendly alternatives to commercial cleaning products?
A: There are many eco-friendly alternatives to commercial cleaning products that are just as effective and much safer for your health and the environment. Vinegar is a versatile cleaner that can be used to clean windows, floors, and countertops. Baking soda is a natural deodorizer and abrasive cleaner. Lemon juice is a natural disinfectant and can be used to remove stains and brighten surfaces. Essential oils can be added to homemade cleaning solutions for their antibacterial and antifungal properties, as well as their pleasant scents. You can also find a variety of eco-friendly cleaning products at most grocery stores and online retailers.
Q: How can I keep my living room clean and organized between deep cleanings?
A: Regular maintenance is key to keeping your living room clean and organized. Make it a habit to vacuum or sweep the floors at least once a week. Dust surfaces regularly to prevent dust from building up. Wipe down spills and messes immediately. Declutter regularly by putting away items that are out of place. Encourage family members to participate in keeping the living room clean and organized. Consider creating a designated storage area for toys, books, and other items. By establishing a regular cleaning routine, you can prevent your living room from becoming too cluttered or dirty.
Q: What’s the best way to clean my TV screen and other electronics?
A: Cleaning electronics requires a gentle approach to avoid damaging them. Always turn off the device and unplug it before cleaning. Use a soft, dry microfiber cloth to gently wipe down the screen and other surfaces. Avoid using paper towels or other abrasive materials, as these can scratch the screen. Never spray cleaning solutions directly onto the screen. Instead, dampen the microfiber cloth with a small amount of distilled water or a specialized screen cleaner. Gently wipe the screen in a circular motion, and then dry it with a clean, dry microfiber cloth. For keyboards and remote controls, you can use a cotton swab dipped in rubbing alcohol to clean between the keys and buttons.
Q: How do I get rid of unpleasant odors in my living room?
A: Unpleasant odors can be caused by a variety of factors, including pets, food spills, and mold. To eliminate odors, start by identifying the source. Clean any spills or messes immediately. Air out the room by opening windows and doors. Place bowls of baking soda around the room to absorb odors. You can also use an air purifier to remove odors and allergens from the air. For persistent odors, consider using a fabric refresher spray or a carpet deodorizer. Regularly cleaning your carpets and upholstery can also help to prevent odors from building up.
Leave a Comment