

Living Room Deep Cleaning Tips: Let’s face it, our living rooms are the heart of our homes. They’re where we unwind after a long day, entertain guests, and create lasting memories. But all that love and activity can leave our living spaces looking a little… well, lived-in! Are you tired of surface-level cleaning that just doesn’t cut it? Do you dream of a living room that sparkles and shines, a haven of tranquility and freshness? Then you’re in the right place!
Deep cleaning isn’t just about aesthetics; it’s about creating a healthier and more comfortable environment for you and your loved ones. Think about all the dust mites, allergens, and hidden grime lurking in your carpets, upholstery, and even behind your furniture. Yuck! Throughout history, cultures around the world have recognized the importance of a clean living space, associating it with physical and mental well-being. From ancient rituals to modern-day cleaning routines, the desire for a fresh and inviting home is universal.
That’s why I’ve put together this ultimate guide to living room deep cleaning tips and DIY hacks that will transform your space from drab to fab. I’m going to share my favorite tried-and-true methods, from tackling stubborn stains to organizing clutter, all with easy-to-follow instructions and budget-friendly solutions. Get ready to roll up your sleeves and discover the joy of a truly clean and revitalized living room. Trust me, you’ll be amazed at the difference it makes!
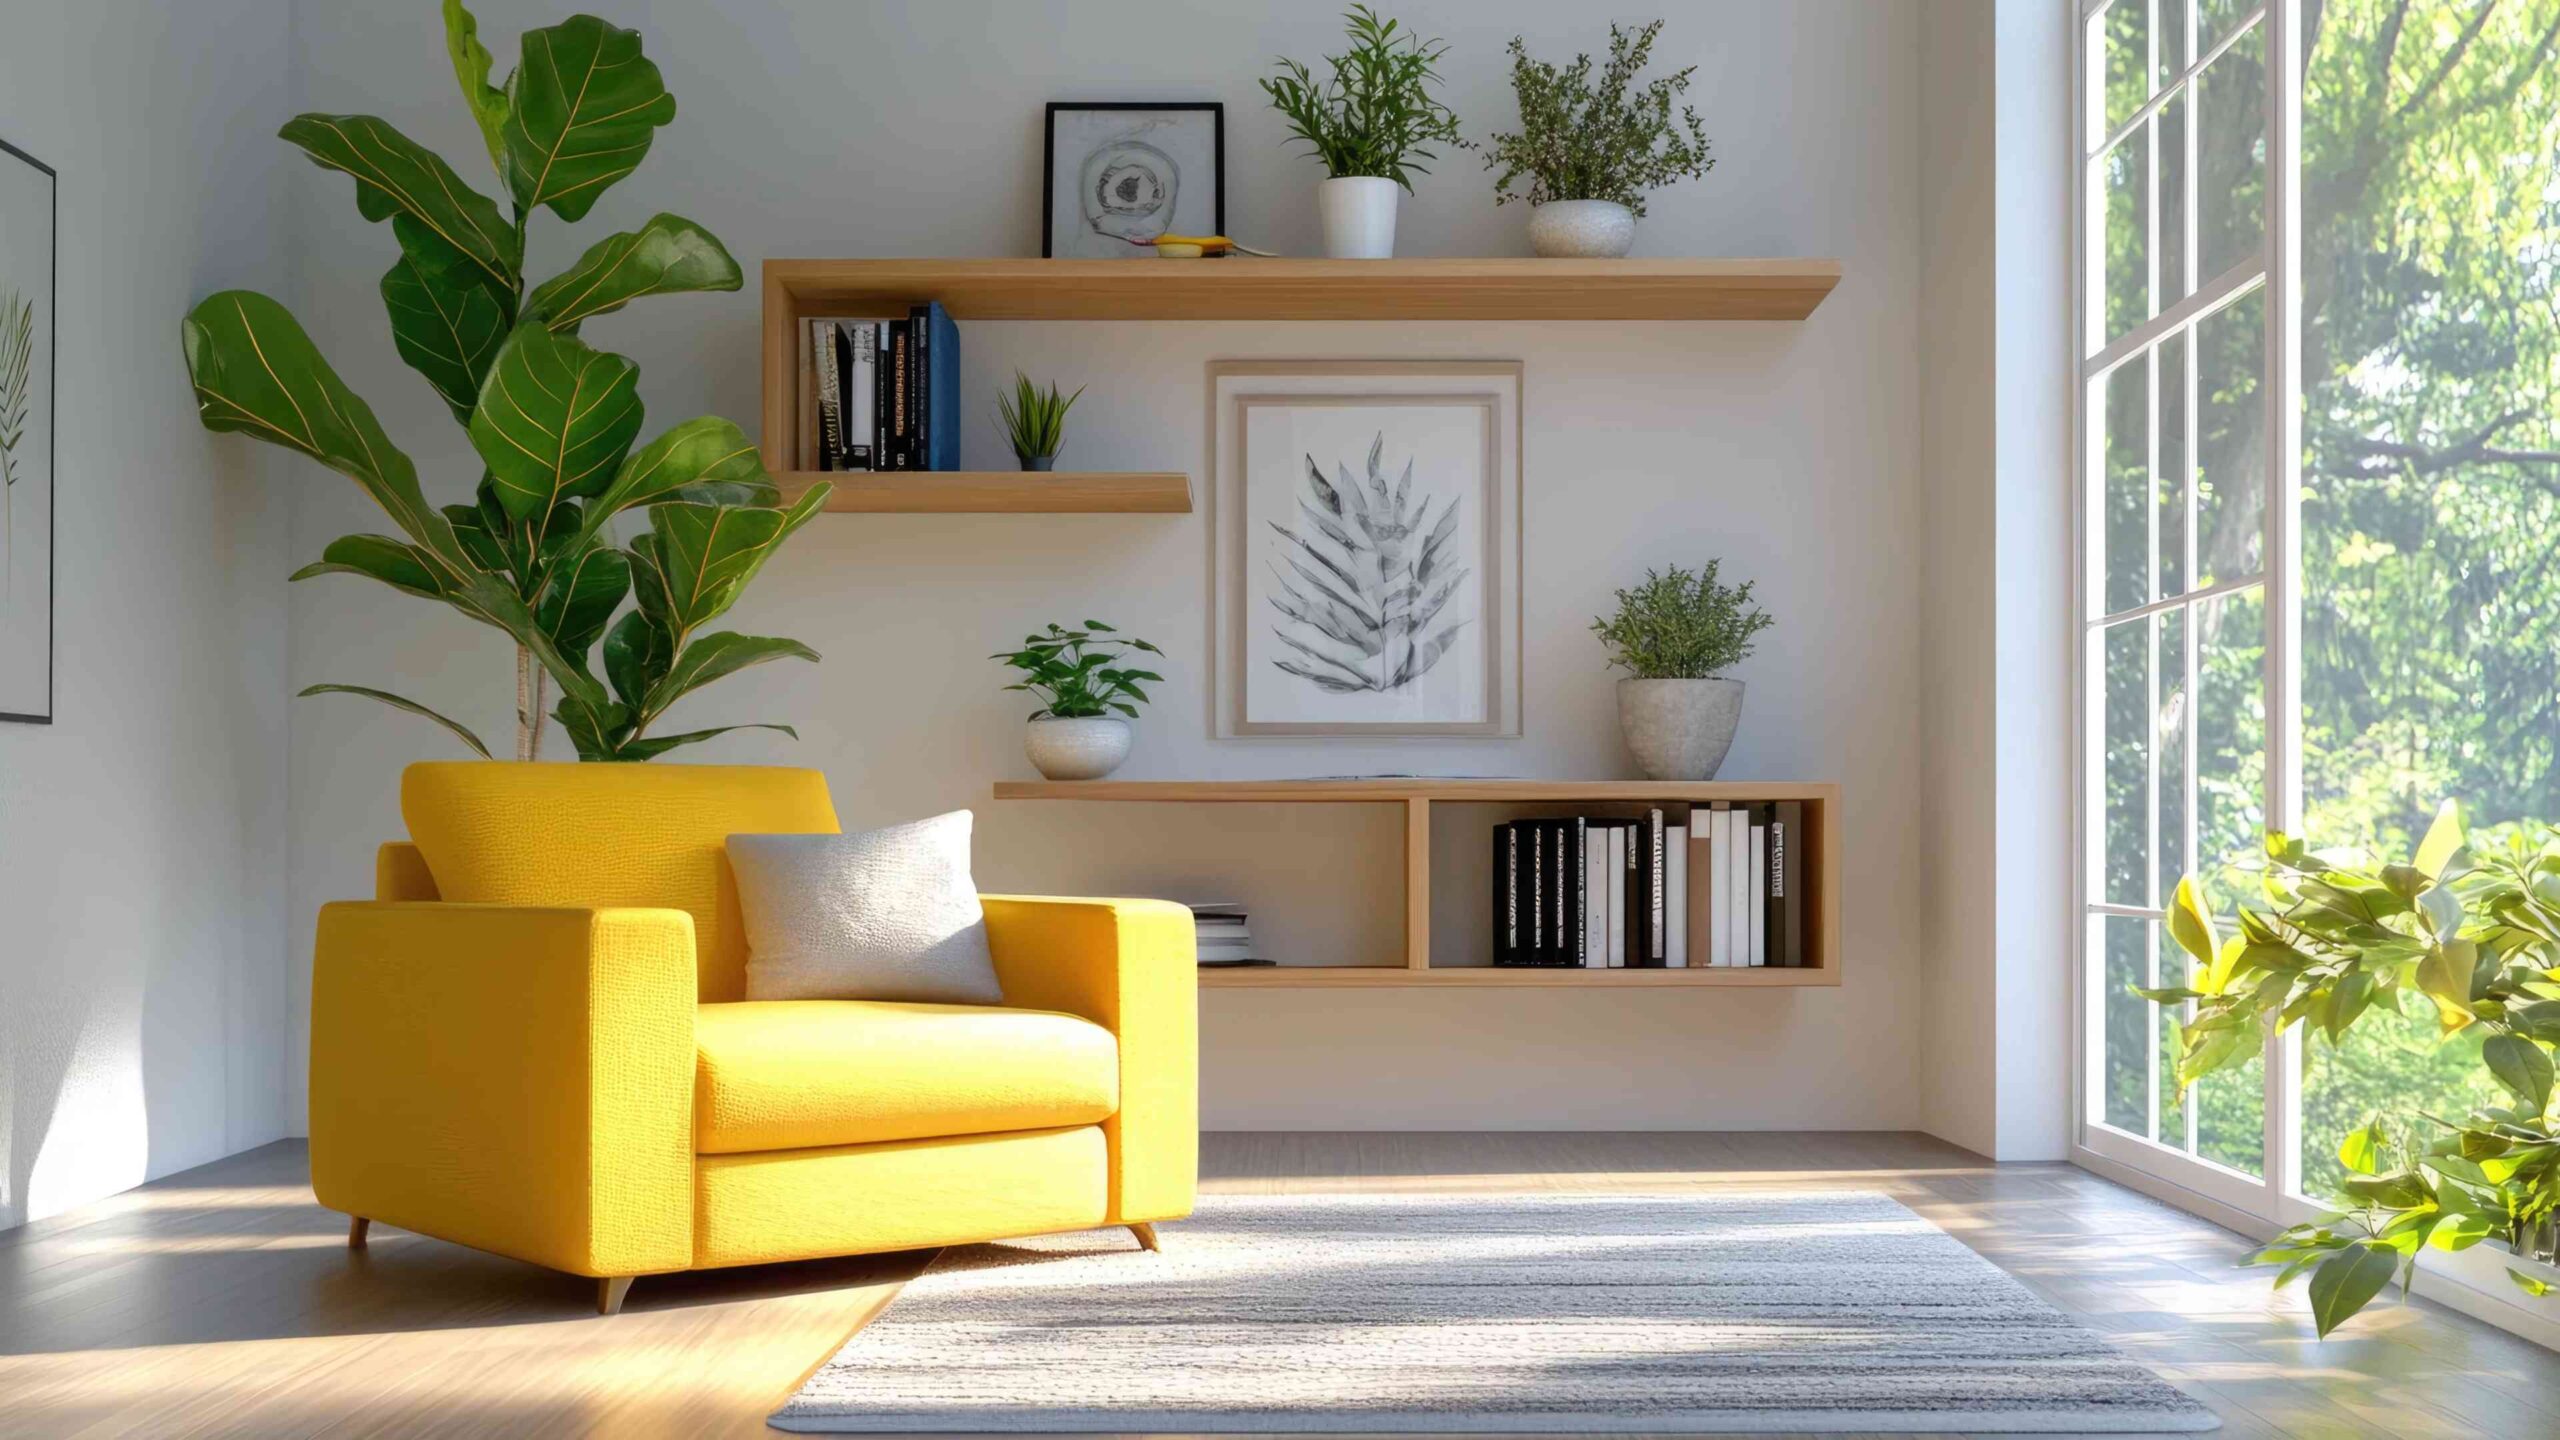
Living Room Deep Cleaning: From Chaos to Cozy!
Okay, friends, let’s face it: our living rooms often bear the brunt of daily life. Spilled snacks, forgotten toys, lingering dust bunnies – it all adds up! But don’t despair! I’m going to walk you through a deep clean that will transform your living room from a disaster zone to a haven of relaxation. Get ready to roll up your sleeves!
Phase 1: Preparation is Key!
Before we dive into the nitty-gritty, let’s get organized. Trust me, a little prep work saves a ton of time and frustration later.
* Gather Your Supplies: This is crucial! Nothing’s worse than realizing you’re out of glass cleaner halfway through. Here’s my go-to list:
* Microfiber cloths (lots of them!)
* All-purpose cleaner
* Glass cleaner
* Wood polish (if you have wood furniture)
* Upholstery cleaner (check the fabric code first!)
* Vacuum cleaner with attachments
* Baking soda
* White vinegar
* Rubber gloves
* Bucket
* Sponges
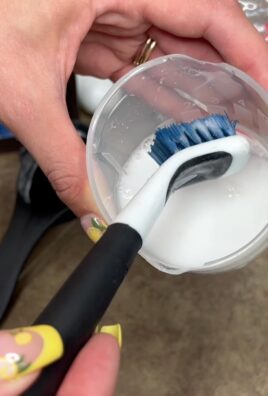
* Old toothbrush (for those hard-to-reach spots)
* Trash bags
* Laundry basket
* Declutter Like a Pro: Grab a trash bag and a laundry basket. Toss out any obvious trash (old newspapers, empty snack wrappers). Then, go through the room and collect anything that doesn’t belong there. Put books back on shelves, toys in their bins, and anything else that’s wandered into the living room where it shouldn’t be.
* Open the Windows: Fresh air is your friend! It helps dissipate cleaning fumes and makes the whole process more pleasant.
* Protect Your Floors: If you’re using any harsh chemicals, consider laying down a drop cloth or old towels to protect your flooring.
Phase 2: Tackling the Big Stuff
Now that we’re prepped, let’s tackle the larger items in the room.
1. Dusting High and Low: Start from the top and work your way down. This prevents dust from falling onto areas you’ve already cleaned.
* Use a duster with an extendable handle to reach ceiling fans, light fixtures, and crown molding.
* Don’t forget to dust picture frames, artwork, and mirrors.
* Pay attention to shelves, bookcases, and any other surfaces that collect dust.
2. Window Cleaning: Sparkling windows make a huge difference!
* Spray your windows with glass cleaner.
* Wipe them down with a clean microfiber cloth, using overlapping strokes.
* For stubborn streaks, try a solution of equal parts white vinegar and water.
* Clean window sills and frames with an all-purpose cleaner.
3. Curtain and Blind Cleaning: These often get overlooked, but they can harbor a lot of dust.
* Curtains: Check the care label. Most curtains can be machine washed on a delicate cycle. If they’re dry-clean only, take them to a professional.
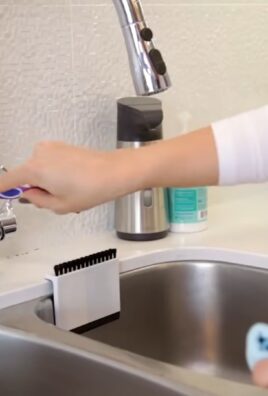
* Blinds: Close the blinds and dust them with a microfiber cloth or a blind duster. For a deeper clean, you can wipe them down with a damp cloth and a mild detergent.
4. Furniture Facelift: Let’s give your furniture some love!
* Vacuuming: Use the upholstery attachment on your vacuum cleaner to remove dust, crumbs, and pet hair from sofas, chairs, and ottomans. Pay special attention to crevices and seams.
* Upholstery Cleaning: This is where knowing your fabric code is essential!
* “W” (Water-based cleaner): You can use a water-based upholstery cleaner. Test it in an inconspicuous area first to make sure it doesn’t damage the fabric.
* “S” (Solvent-based cleaner): You’ll need to use a solvent-based upholstery cleaner. These are usually available at hardware stores or online. Again, test in a hidden area first.
* “WS” (Water- or solvent-based cleaner): You have more options! You can use either a water-based or a solvent-based cleaner.
* “X” (Professional cleaning only): Don’t attempt to clean this yourself! Take it to a professional upholstery cleaner.
* Wood Furniture: Dust wood furniture with a microfiber cloth. Then, apply a wood polish to protect the finish and give it a nice shine.
Phase 3: Floor Focus
Now that the furniture and surfaces are clean, it’s time to tackle the floors.
1. Carpet Cleaning: A deep clean can revive even the most tired carpets.
* Vacuum Thoroughly: Before you do anything else, vacuum the entire carpet to remove loose dirt and debris.
* Spot Cleaning: Treat any stains with a carpet stain remover. Follow the instructions on the product label.
* Deep Cleaning: You have a few options here:
* Carpet Cleaner Rental: You can rent a carpet cleaner from most hardware stores or grocery stores. Follow the instructions carefully.
* Professional Carpet Cleaning: If you have heavily soiled carpets or delicate fibers, it’s best to hire a professional carpet cleaner.
* DIY Carpet Cleaning Solution: For a natural option, mix equal parts white vinegar and water in a spray bottle. Spray the carpet lightly and blot with a clean cloth.
* Drying Time: Allow the carpet to dry completely before walking on it. Open windows and use fans to speed up the drying process.
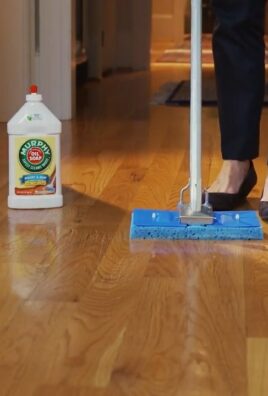
2. Hardwood Floor Cleaning: Proper cleaning is essential to protect your hardwood floors.
* Sweep or Vacuum: Remove loose dirt and debris with a broom or vacuum cleaner.
* Mop with a Wood Floor Cleaner: Use a cleaner specifically designed for hardwood floors. Avoid using excessive water, as it can damage the wood.
* Dry the Floor: Use a clean, dry mop or cloth to dry the floor immediately after mopping.
3. Tile Floor Cleaning: Tile is durable, but it still needs regular cleaning.
* Sweep or Vacuum: Remove loose dirt and debris.
* Mop with a Tile Cleaner: Use a cleaner specifically designed for tile floors.
* Grout Cleaning: Grout can be a breeding ground for dirt and mildew. To clean grout, mix baking soda with water to form a paste. Apply the paste to the grout lines and let it sit for a few minutes. Then, scrub with an old toothbrush and rinse with water.
Phase 4: The Finishing Touches
We’re almost there! These final touches will make all the difference.
1. Electronics Wipe Down: Dust and fingerprints accumulate quickly on TVs, remote controls, and other electronics.
* Use a microfiber cloth to gently wipe down the screens and surfaces.
* For stubborn smudges, you can use a screen cleaner specifically designed for electronics.
2. Accessory Arrangement: Now’s the time to put everything back in its place.
* Arrange throw pillows and blankets on the sofa.
* Style your coffee table with books, candles, and other decorative items.
* Make sure everything is neat and organized.
3. Air Freshening: A pleasant scent can make your living room feel even cleaner and more inviting.
* Use an air freshener spray or diffuser.
* Light a scented candle.
* Place a bowl of potpourri in the room.
4. Final Inspection: Take a step back and admire your work! Make sure you haven’t missed any spots.
Bonus Tips for Maintaining a Clean Living Room
* Vacuum Regularly: Vacuum your living room at least once a week to prevent dust and dirt from building up.
* Wipe Up Spills Immediately: Don’t let spills sit and stain your carpets or furniture.
* Declutter Daily: Take a few minutes each day to put things back in their place.
* Enlist Help: Get your family involved in the cleaning process.
* Consider a Robot Vacuum: These little helpers can keep your floors clean with minimal effort.
And there you have it! A sparkling clean living room that’s ready for relaxing, entertaining, and making memories. Enjoy the fruits of your labor! Remember, consistency is key. Regular cleaning will prevent your living room from becoming a disaster zone again. Happy cleaning!

Conclusion
So, there you have it! Transforming your living room into a haven of freshness and cleanliness doesn’t require expensive professional services or harsh chemicals. This DIY deep cleaning trick is a game-changer for anyone looking to revitalize their living space and breathe new life into their home. It’s cost-effective, environmentally friendly, and surprisingly simple to execute.
The beauty of this method lies in its adaptability. Feel free to experiment with different essential oil combinations to create a scent that perfectly matches your personal preference and the ambiance you desire. Lavender and chamomile offer a calming and relaxing atmosphere, while citrus scents like lemon and orange can invigorate and energize the room. You can also adjust the ratios of vinegar and water to suit the specific needs of your furniture and surfaces. For more delicate fabrics, a higher water-to-vinegar ratio is recommended.
Beyond the immediate visual and olfactory improvements, this deep cleaning trick offers long-term benefits. By regularly removing dust, allergens, and grime, you’re not only creating a healthier living environment for yourself and your family but also extending the lifespan of your furniture and décor. A clean living room is a happy living room, and a happy living room contributes to a happier home.
We understand that embarking on a deep cleaning project can seem daunting, but trust us, the results are well worth the effort. The satisfaction of stepping back and admiring a sparkling clean living room is unparalleled. Plus, knowing that you achieved this transformation using a simple, natural, and effective DIY method adds an extra layer of pride.
Don’t just take our word for it – give this living room deep cleaning trick a try! We’re confident that you’ll be amazed by the difference it makes. And once you’ve experienced the magic, we encourage you to share your results with us. Post pictures of your sparkling clean living room on social media, tag us, and let us know what variations you tried and how they worked for you. Your experiences can inspire others to embrace this simple yet powerful cleaning solution and create their own havens of cleanliness and comfort. We are eager to hear your success stories and learn from your unique approaches to this fantastic DIY project. Let’s create a community of clean living enthusiasts, one sparkling living room at a time!
Frequently Asked Questions (FAQs)
What exactly makes this DIY deep cleaning trick so effective?
This DIY deep cleaning trick combines the natural cleaning power of vinegar with the refreshing scent of essential oils. Vinegar is a fantastic disinfectant and degreaser, effectively removing dirt, grime, and mildew without the harsh chemicals found in many commercial cleaners. The essential oils not only add a pleasant fragrance but also offer additional antibacterial and antifungal properties. The combination creates a powerful yet gentle cleaning solution that is safe for most surfaces and fabrics in your living room.
Is vinegar safe to use on all types of furniture and surfaces?
While vinegar is generally safe, it’s always a good idea to test it on an inconspicuous area first, especially on delicate or antique furniture. Avoid using vinegar on marble, granite, or other natural stone surfaces, as it can etch and damage them. For leather furniture, use a very diluted solution and always follow up with a leather conditioner. For wood furniture, ensure the finish is sealed and avoid prolonged contact with the vinegar solution. When in doubt, consult the manufacturer’s instructions or a professional cleaner.
What essential oils are best to use for living room deep cleaning?
The best essential oils for living room deep cleaning depend on your personal preferences and desired effects. Some popular choices include:
* Lavender: Known for its calming and relaxing properties, perfect for creating a serene atmosphere.
* Lemon: A powerful degreaser and disinfectant with a bright, uplifting scent.
* Tea Tree: A potent antibacterial and antifungal oil, ideal for tackling mold and mildew.
* Eucalyptus: Helps to clear sinuses and freshen the air, especially beneficial during cold and flu season.
* Peppermint: Provides an invigorating and refreshing scent, great for boosting energy.
* Orange: Similar to lemon, offers a citrusy and energizing aroma.
Experiment with different combinations to find your favorite scent blend. Remember to use pure, high-quality essential oils for the best results.
How often should I deep clean my living room using this method?
The frequency of deep cleaning depends on your lifestyle and the amount of traffic your living room receives. As a general guideline, aim for a deep clean every 1-3 months. However, if you have pets, children, or frequently entertain guests, you may need to deep clean more often. Regular spot cleaning and maintenance, such as vacuuming and dusting, can help to extend the time between deep cleans.
Can I use this DIY cleaning solution on my carpets and rugs?
Yes, you can use a diluted vinegar solution on carpets and rugs, but it’s crucial to test it on a small, hidden area first to ensure it doesn’t cause any discoloration or damage. For carpets, you can mix equal parts vinegar and water in a spray bottle and lightly mist the affected area. Let it sit for a few minutes, then blot with a clean cloth. For rugs, you can use a similar method or add the solution to a carpet cleaning machine. Always allow the carpets and rugs to dry completely to prevent mold and mildew growth.
What if I don’t like the smell of vinegar?
The strong scent of vinegar can be off-putting to some people. However, the smell typically dissipates quickly after cleaning. You can also add more essential oils to the solution to mask the vinegar scent. Another option is to use distilled white vinegar, which has a milder odor than other types of vinegar. Ensure proper ventilation by opening windows and doors while cleaning.
How can I make this DIY cleaning trick even more eco-friendly?
To further reduce your environmental impact, consider using reusable spray bottles and cloths instead of disposable wipes. You can also purchase vinegar and essential oils in bulk to minimize packaging waste. Look for essential oils that are sustainably sourced and ethically produced. Composting any organic waste, such as food crumbs or plant debris, can also contribute to a greener cleaning routine.
What are some other areas in the living room that I should focus on during a deep clean?
In addition to furniture and surfaces, don’t forget to deep clean the following areas in your living room:
* Windows and mirrors: Clean with a vinegar and water solution for streak-free shine.
* Curtains and blinds: Dust or vacuum regularly, and wash or dry clean as needed.
* Light fixtures: Dust or wipe down to remove accumulated dust and grime.
* Electronics: Unplug and dust TVs, stereos, and other electronic devices.
* Baseboards and trim: Wipe down with a damp cloth to remove dust and dirt.
* Plants: Dust the leaves and check for pests.
By addressing all of these areas, you can ensure a truly deep and thorough clean of your living room.
What if I have stubborn stains that the vinegar solution can’t remove?
For stubborn stains, you may need to use a more targeted cleaning approach. For example, baking soda can be effective for removing stains from upholstery and carpets. You can also try using a commercial stain remover specifically designed for the type of stain you’re dealing with. Always test any cleaning product on a hidden area first to ensure it doesn’t damage the fabric or surface.
How do I store the leftover DIY cleaning solution?
Store any leftover DIY cleaning solution in a labeled spray bottle in a cool, dark place. The solution should be stable for several months. However, it’s always best to use it within a reasonable timeframe to ensure its effectiveness. If you notice any changes in color, odor, or consistency, discard the solution.
Leave a Comment