

Mushroom Growing Recycled Plastic: Imagine transforming your everyday plastic waste into a thriving source of delicious and nutritious mushrooms! Sounds like something out of a sci-fi movie, right? Well, it’s not! This DIY guide unlocks the secrets to cultivating your own fungi feast using, believe it or not, recycled plastic containers.
For centuries, mushroom cultivation has been revered in various cultures, from ancient China where they were considered delicacies with medicinal properties, to European traditions where foraging for wild mushrooms was a cherished pastime. Now, we’re taking that time-honored practice and giving it a modern, eco-friendly twist.
Why should you jump on the mushroom growing recycled plastic bandwagon? Because it’s a win-win! We’re all becoming increasingly aware of the plastic pollution crisis, and this project offers a tangible way to reduce our environmental footprint. Plus, let’s be honest, who wouldn’t love having a constant supply of fresh, organic mushrooms right at their fingertips? Forget those expensive grocery store prices and questionable origins. With this DIY project, you’ll know exactly where your food comes from and you’ll be contributing to a healthier planet in the process. So, grab those old plastic containers, and let’s get growing!
Growing Mushrooms in Recycled Plastic Containers: A DIY Guide
Hey there, fellow mushroom enthusiasts! I’m so excited to share this super cool and sustainable DIY project with you: growing delicious mushrooms in recycled plastic containers. Not only is it a fantastic way to reduce waste, but it’s also incredibly rewarding to cultivate your own food. Let’s dive in!
What You’ll Need
Before we get started, let’s gather all the necessary materials. This will make the whole process smoother and more enjoyable.
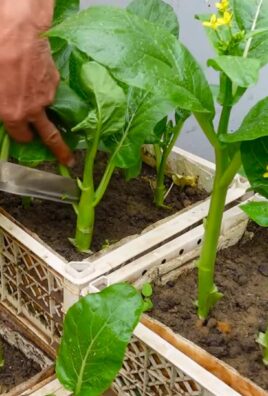
* Recycled Plastic Containers: Think yogurt tubs, takeout containers, ice cream buckets – anything food-grade and relatively clean. Avoid containers that have held harsh chemicals. The size will depend on how much you want to grow, but something between 1-5 gallons is a good starting point.
* Mushroom Spawn: This is essentially the “seed” for your mushrooms. You can purchase mushroom spawn online or from a local gardening supply store. Oyster mushrooms are a great choice for beginners because they’re relatively easy to grow and tolerate a wide range of conditions. Other options include shiitake, wine cap, or even button mushrooms, depending on your preference and the availability of spawn.
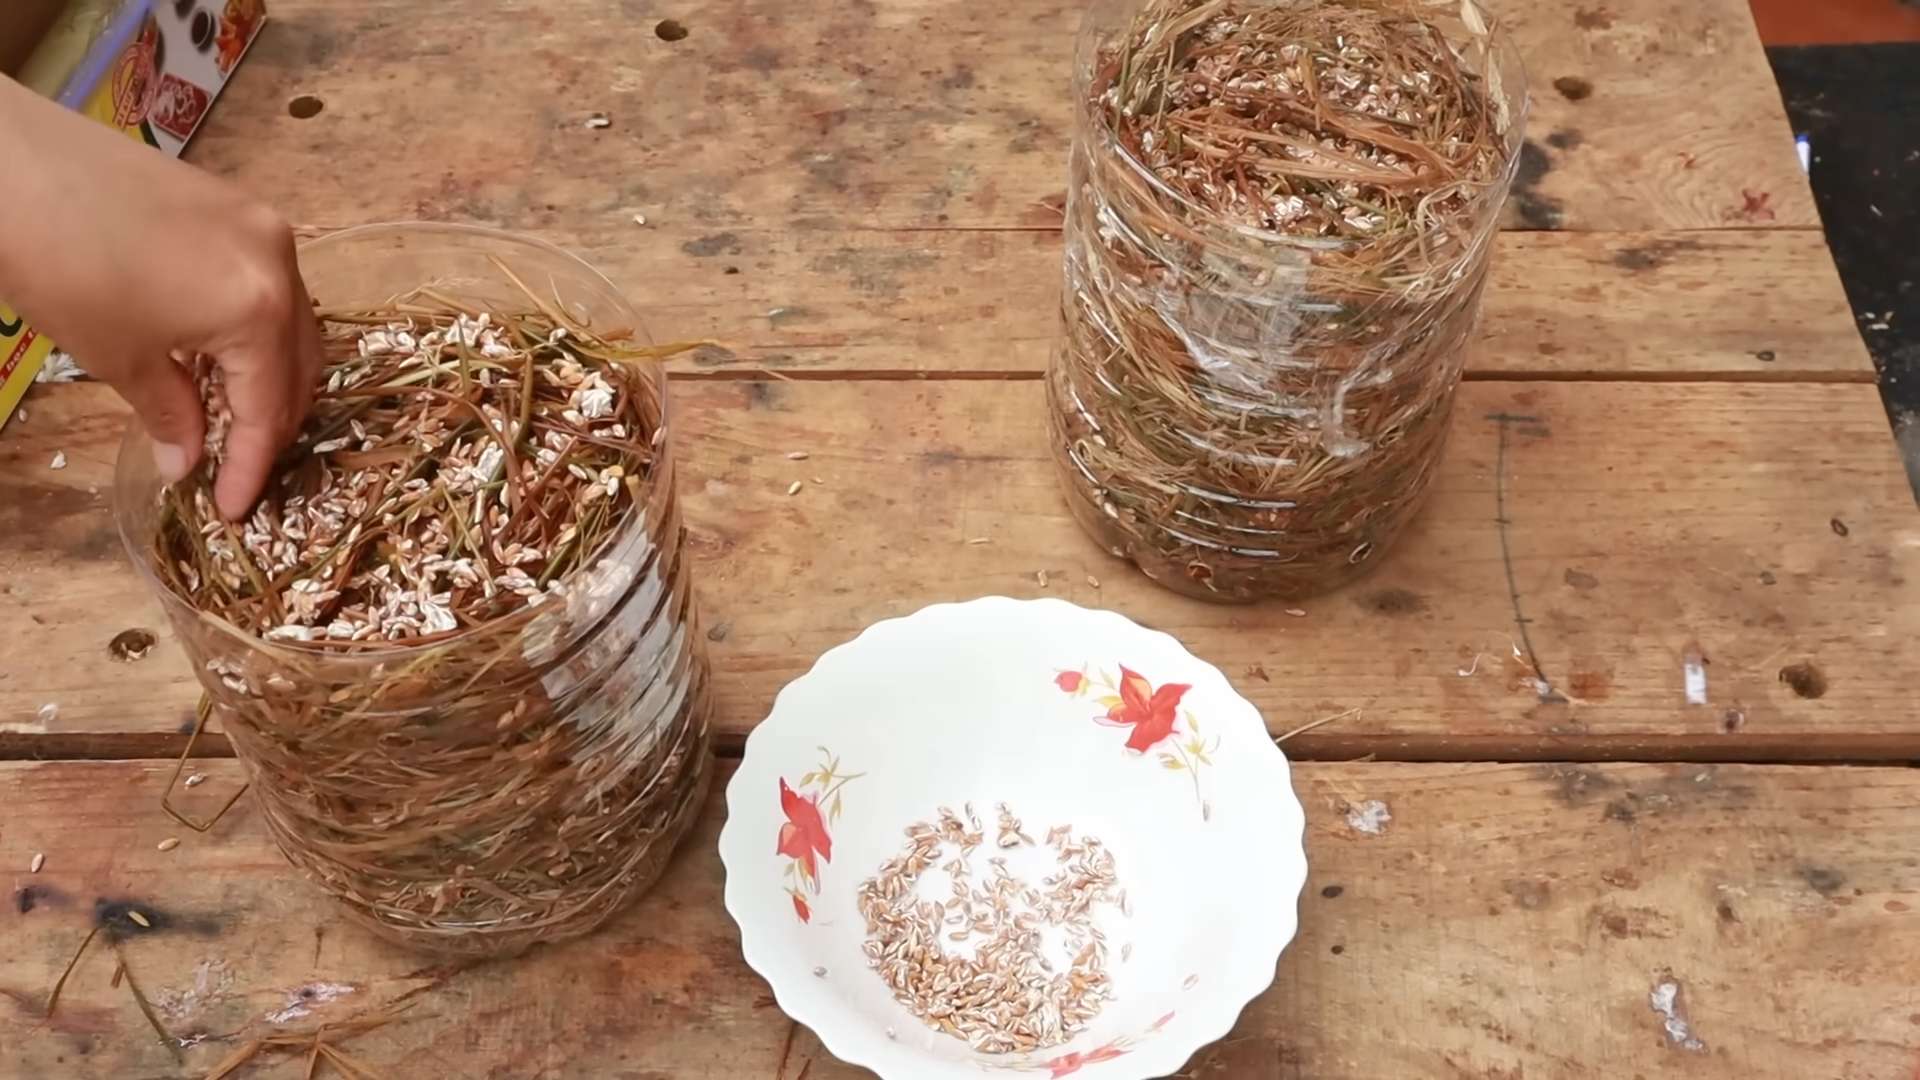
* Substrate: This is the material the mushrooms will grow on. For oyster mushrooms, straw is an excellent and readily available option. You can also use hardwood sawdust, coffee grounds (used, of course!), or a combination of these. Make sure your substrate is clean and free from contaminants.
* Large Pot or Tub: You’ll need this for pasteurizing your substrate. It should be large enough to hold all of your straw or sawdust.
* Heat Source: A stove or propane burner will work for pasteurizing the substrate.
* Thermometer: A reliable thermometer is crucial for monitoring the temperature of your substrate during pasteurization.
* Spray Bottle: For misting the mushrooms as they grow.
* Drill or Punch: To create ventilation holes in your plastic containers.
* Gloves: To keep everything clean and prevent contamination.
* Rubbing Alcohol: For sanitizing your tools and work area.
* Optional: Micropore Tape: To cover the ventilation holes and prevent contamination while still allowing air exchange.
Preparing the Substrate: Pasteurization is Key!
This is arguably the most important step. Pasteurization kills off competing organisms that could prevent your mushrooms from growing.
1. Chop the Straw (if using): If you’re using straw, chop it into smaller pieces (2-3 inches long) using scissors or a knife. This will make it easier for the mushroom mycelium to colonize.
2. Soak the Substrate: Place the chopped straw (or sawdust, coffee grounds, etc.) in your large pot or tub. Add enough water to completely submerge the substrate.
3. Heat the Water: Place the pot on your heat source and bring the water temperature to 160-180°F (71-82°C). This is the sweet spot for pasteurization.
4. Maintain the Temperature: Maintain this temperature for 60-90 minutes. Use your thermometer to monitor the temperature closely. Stir the substrate occasionally to ensure even heating.
5. Drain the Substrate: After pasteurization, carefully drain the hot water from the substrate. You can use a colander or a large strainer. Let the substrate cool down to room temperature. It should be moist but not dripping wet. Squeeze out any excess water.
Preparing the Plastic Containers
Now, let’s get those recycled containers ready for their new purpose!
1. Clean and Sanitize: Thoroughly clean the plastic containers with soap and water. Rinse them well and then sanitize them with rubbing alcohol. This will help prevent contamination.
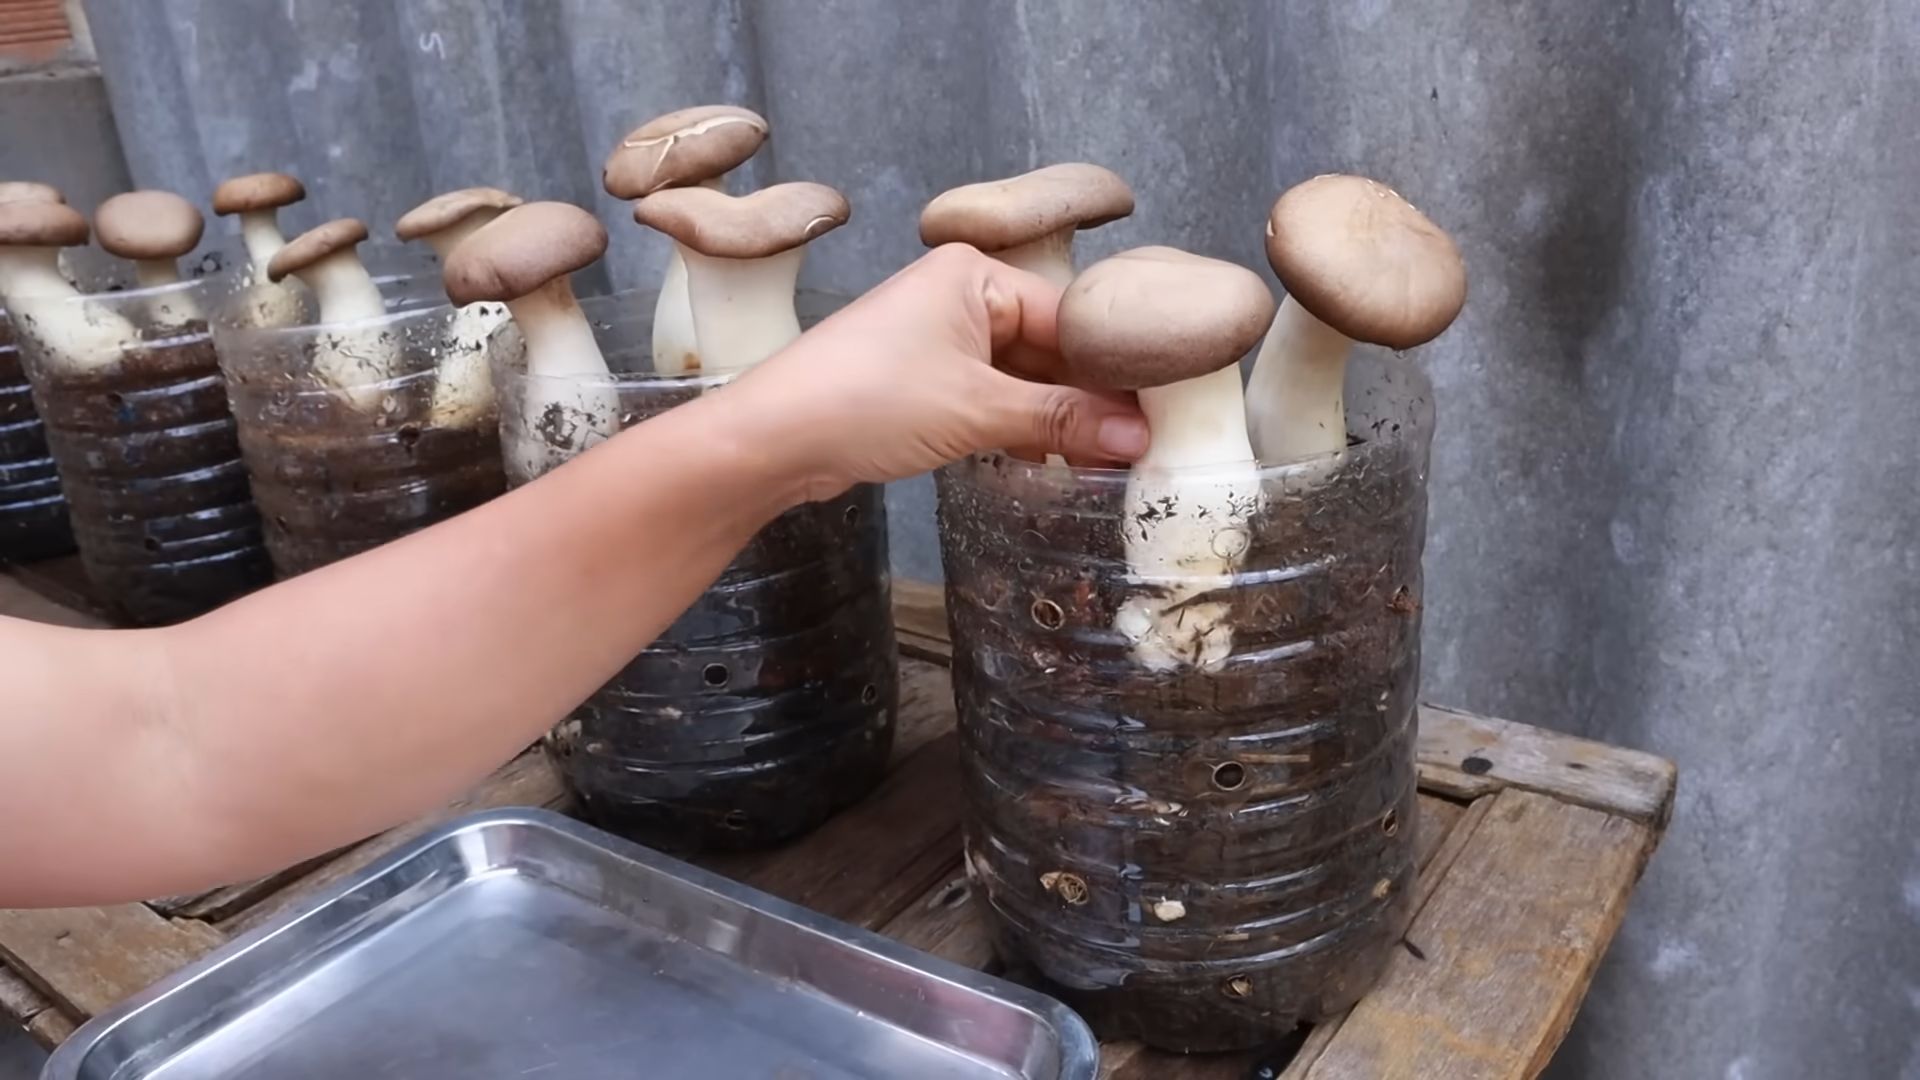
2. Drill Ventilation Holes: Drill or punch several small holes (about ¼ inch in diameter) around the sides of the container. These holes will provide ventilation for the growing mushrooms. Space them a few inches apart. I usually put about 6-8 holes on a 5-gallon bucket.
3. Optional: Cover the Holes: You can cover the ventilation holes with micropore tape to prevent contamination while still allowing air exchange. This is especially helpful if you’re growing in a less-than-sterile environment.
Inoculating the Substrate: Time to Introduce the Mushrooms!
This is where the magic happens!
1. Sanitize Your Hands: Wash your hands thoroughly with soap and water and wear gloves to prevent contamination.
2. Layer the Substrate and Spawn: In your prepared plastic container, create alternating layers of pasteurized substrate and mushroom spawn. Start with a layer of substrate at the bottom, then add a layer of spawn, followed by another layer of substrate, and so on. The top layer should be substrate. A good ratio is about 1 part spawn to 5-10 parts substrate.
3. Compact the Substrate: Gently compact the substrate in the container. This will help the mycelium colonize the substrate more effectively.
4. Label the Container: Label the container with the type of mushroom you’re growing and the date of inoculation. This will help you keep track of your progress.
Incubation: The Waiting Game
Now comes the patience part. The mycelium needs time to colonize the substrate.
1. Find a Suitable Location: Place the inoculated container in a dark, humid, and well-ventilated location. A basement, closet, or garage are all good options. The ideal temperature for most oyster mushrooms is between 60-75°F (15-24°C).
2. Maintain Humidity: Keep the humidity level high by misting the inside of the container with water regularly. You can also place a plastic bag loosely over the container to help retain moisture, but make sure to leave some space for air circulation.
3. Monitor Colonization: Check the container regularly for signs of mycelial growth. You should see white, fuzzy growth spreading throughout the substrate. This process can take anywhere from 2-4 weeks, depending on the type of mushroom and the environmental conditions.
Fruiting: The Reward!
Once the substrate is fully colonized, it’s time to trigger fruiting.
1. Increase Light Exposure: Move the container to a location with more light. Indirect sunlight is ideal.
2. Increase Ventilation: Make sure the container has adequate ventilation. You can remove the micropore tape from the ventilation holes, if you used it.
3. Maintain Humidity: Continue to mist the mushrooms regularly to maintain high humidity.
4. Observe Pinning: After a few days, you should start to see small mushroom “pins” forming on the surface of the substrate. These are the beginnings of your mushrooms!
5. Harvest the Mushrooms: Harvest the mushrooms when they are fully grown but before they start to drop spores. This is usually when the caps are still slightly curled under. To harvest, simply twist or cut the mushrooms off at the base.
Troubleshooting
Even with the best preparation, things don’t always go as planned. Here are a few common problems and how to address them:
* Contamination: If you see green, black, or other colored mold growing in your container, it’s likely contaminated. Unfortunately, there’s not much you can do at this point except discard the contaminated substrate. To prevent contamination, make sure to pasteurize your substrate properly and sanitize your tools and work area.
* Slow Colonization: If the mycelium is colonizing the substrate slowly, it could be due to low temperature, low humidity, or poor ventilation. Try adjusting these factors to see if it helps.
* No Fruiting: If the substrate is fully colonized but you’re not seeing any mushrooms, it could be due to lack of light, lack of ventilation, or low humidity. Try moving the container to a brighter location, increasing ventilation, and misting more frequently.
* Small Mushrooms: If the mushrooms are small and stunted, it could be due to lack of nutrients or insufficient humidity. Try adding a small amount of nutrient-rich material to the substrate, such as coffee grounds or compost. Also, make sure to maintain high humidity levels.
Tips for Success
Here are a few extra tips to help you succeed in your mushroom-growing adventure:
* Start Small: Don’t try to grow too many mushrooms at once. Start with a small container and gradually increase the size as you gain experience.
* Be Patient: Mushroom growing takes time and patience. Don’t get discouraged if you don’t see results immediately.
* Keep Records: Keep track of your progress by recording the date of inoculation, the type of mushroom you’re growing, and any observations you make. This will help you learn from your mistakes and improve your results in the future.
* Experiment: Don’t be afraid to experiment with different substrates, growing conditions, and mushroom varieties. The more you experiment, the more you’ll learn about mushroom
Conclusion
So, there you have it! Transforming recycled plastic into a thriving mushroom farm isn’t just a quirky DIY project; it’s a powerful step towards sustainable living and a delicious way to enjoy fresh, homegrown mushrooms. We’ve walked you through the process, highlighting the simplicity and accessibility of this method. Forget complicated setups and expensive equipment. This approach leverages readily available recycled plastic, turning waste into a valuable resource.
Why is this DIY mushroom growing trick a must-try? Because it’s environmentally responsible, cost-effective, and incredibly rewarding. You’re actively reducing plastic waste, contributing to a circular economy, and gaining access to a continuous supply of fresh, organic mushrooms. The satisfaction of harvesting your own food from something that was destined for the landfill is truly unparalleled.
But the beauty of this method lies in its adaptability. Feel free to experiment with different types of mushrooms. Oyster mushrooms are a fantastic starting point due to their resilience and rapid growth, but shiitake, lion’s mane, or even wine cap mushrooms can thrive in a recycled plastic environment with a bit of tweaking to the substrate and environmental conditions.
Consider variations in your plastic containers as well. While we’ve focused on larger containers, smaller tubs or even repurposed plastic bottles can be used for smaller-scale projects. Just adjust the substrate and mushroom spawn accordingly. You can also experiment with different substrate mixtures. While straw and coffee grounds are excellent choices, consider adding wood chips, sawdust, or even shredded cardboard for added nutrients and texture. Remember to always pasteurize or sterilize your substrate to eliminate competing organisms.
Don’t be afraid to get creative with your growing environment. While a dark, humid space is ideal, you can create a mini-greenhouse effect by placing your recycled plastic mushroom farm inside a larger, clear plastic bag. This will help retain moisture and warmth, especially in cooler climates.
Ultimately, the success of your DIY mushroom growing project depends on your willingness to experiment and learn. Observe your mushrooms closely, adjust your watering schedule as needed, and don’t be discouraged by initial setbacks. Every mistake is a learning opportunity.
We wholeheartedly encourage you to embark on this exciting journey of growing mushrooms in recycled plastic. It’s a fun, educational, and environmentally conscious activity that will reward you with delicious, homegrown mushrooms and a sense of accomplishment.
Once you’ve harvested your first flush, we’d love to hear about your experience! Share your photos, tips, and challenges in the comments below. Let’s build a community of DIY mushroom growers and inspire others to embrace sustainable practices. Let us know what kind of recycled plastic you used, what substrate worked best for you, and any unique modifications you made to the process. Your insights could be invaluable to other aspiring mushroom farmers. So, grab some recycled plastic, gather your supplies, and get growing! The world of DIY mushroom cultivation awaits.
Frequently Asked Questions (FAQ)
What types of plastic are safe to use for growing mushrooms?
Ideally, you should use food-grade plastic containers, such as those labeled with recycling codes 1 (PET or PETE), 2 (HDPE), or 5 (PP). These plastics are generally considered safe for contact with food and are less likely to leach harmful chemicals into your substrate. Avoid using plastics labeled with recycling codes 3 (PVC), 6 (PS), or 7 (Other), as these may contain potentially harmful chemicals. Always thoroughly clean and sanitize any recycled plastic container before using it for mushroom cultivation.
How do I prepare the substrate for growing mushrooms in recycled plastic?
The substrate is the food source for your mushrooms, so proper preparation is crucial. A common substrate mixture includes straw and coffee grounds. First, pasteurize the straw by soaking it in hot water (around 160-180°F) for at least an hour. This will kill off any competing organisms that could hinder mushroom growth. Allow the straw to cool and drain excess water. Mix the pasteurized straw with spent coffee grounds, ensuring the mixture is moist but not soggy. You can also add other ingredients like wood chips, sawdust, or shredded cardboard for added nutrients. Remember to always maintain proper hygiene throughout the substrate preparation process to prevent contamination.
How do I introduce the mushroom spawn to the substrate?
Once your substrate is prepared, it’s time to introduce the mushroom spawn. Break up the spawn into small pieces and evenly distribute it throughout the substrate. Aim for a spawn rate of around 5-10% of the substrate volume. Gently mix the spawn into the substrate, ensuring it’s well-distributed. After spawning, cover the substrate with a thin layer of clean, moist straw or vermiculite to help retain moisture and protect the spawn.
What are the ideal environmental conditions for growing mushrooms in recycled plastic?
Mushrooms thrive in dark, humid environments with good air circulation. Maintain a temperature between 60-75°F (15-24°C) for optimal growth. Humidity levels should be around 80-90%. You can achieve this by misting the substrate regularly with water or by placing the recycled plastic container inside a larger, clear plastic bag to create a mini-greenhouse effect. Ensure adequate air circulation by opening the bag or container periodically to prevent the buildup of carbon dioxide.
How long does it take for mushrooms to grow in recycled plastic?
The time it takes for mushrooms to grow depends on the type of mushroom, the quality of the spawn, and the environmental conditions. Oyster mushrooms typically fruit within 1-2 weeks after colonization, while other varieties may take longer. Look for small mushroom pins (baby mushrooms) forming on the surface of the substrate. Once the pins appear, they will rapidly grow into mature mushrooms within a few days.
How do I harvest mushrooms from recycled plastic?
Harvest your mushrooms when the caps are fully developed but before they start to release spores. Gently twist or cut the mushrooms off at the base of the stem. Avoid pulling the mushrooms, as this can damage the substrate and prevent future flushes. After harvesting, you can encourage further flushes by soaking the substrate in water for a few hours and then draining the excess water.
What if my mushroom growing project fails?
Don’t be discouraged if your first attempt at growing mushrooms in recycled plastic doesn’t go as planned. Mushroom cultivation can be challenging, and it often takes some experimentation to find what works best for you. Common reasons for failure include contamination, improper substrate preparation, and unfavorable environmental conditions. Analyze what might have gone wrong and try again with adjustments to your technique. Remember, every mistake is a learning opportunity.
Can I grow different types of mushrooms in recycled plastic?
Yes, you can grow a variety of mushrooms in recycled plastic, but some varieties are easier to cultivate than others. Oyster mushrooms are a great starting point due to their resilience and rapid growth. Shiitake, lion’s mane, and wine cap mushrooms can also be grown in recycled plastic with some adjustments to the substrate and environmental conditions. Research the specific requirements of the mushroom variety you want to grow and tailor your setup accordingly.
How can I prevent contamination in my mushroom growing project?
Contamination is a common problem in mushroom cultivation, but there are several steps you can take to minimize the risk. Always use clean and sanitized equipment, including your recycled plastic container, substrate preparation tools, and misting bottle. Pasteurize or sterilize your substrate to kill off any competing organisms. Maintain proper hygiene throughout the process, washing your hands thoroughly before handling the substrate or spawn. Ensure adequate air circulation to prevent the buildup of moisture, which can promote the growth of mold and bacteria.
What are the benefits of growing mushrooms in recycled plastic?
Growing mushrooms in recycled plastic offers numerous benefits, including environmental sustainability, cost-effectiveness, and access to fresh, organic food. By repurposing plastic waste, you’re reducing landfill waste and contributing to a circular economy. Growing your own mushrooms is significantly cheaper than buying them from the store, and you have complete control over the growing process, ensuring that your mushrooms are free from pesticides and other harmful chemicals. Plus, the satisfaction of harvesting your own food from something that was destined for the landfill is truly unparalleled.
Leave a Comment