

Overlooked spots to clean – we all have them! Those little nooks and crannies in our homes that seem to magically repel our cleaning efforts. Let’s be honest, we’ve all been there, right? You spend hours scrubbing and polishing, only to realize later that you completely missed the dust bunnies lurking behind the toilet or the grime clinging to the light switches.
Cleaning, as a chore, has been around for centuries. From ancient civilizations using natural remedies to keep their dwellings tidy to the modern-day obsession with spotless homes, the desire for cleanliness is deeply ingrained in our culture. But somewhere along the way, we’ve become so focused on the big picture that we’ve forgotten the importance of those smaller, often overlooked spots to clean.
But why is it so important to tackle these hidden areas? Well, for starters, neglecting these spots can lead to a build-up of dust, allergens, and even mold, which can negatively impact your health. Plus, a truly clean home is one where every corner sparkles, not just the ones that are immediately visible. I’m here to guide you through a simple, step-by-step guide to conquering those forgotten areas and achieving a level of cleanliness you never thought possible. Get ready to roll up your sleeves and discover the satisfaction of a truly spotless home!

DIY Deep Clean: Conquering Often-Overlooked Spots in Your Home
Okay, let’s be honest. We all have those spots in our homes that we conveniently “forget” to clean. You know, the ones that are out of sight, out of mind…until they’re not. Well, today, we’re tackling those overlooked areas head-on! I’m going to walk you through a deep clean of these often-neglected spots, leaving your home feeling fresher and cleaner than ever. Get ready to roll up your sleeves!
Gather Your Cleaning Arsenal
Before we dive in, let’s make sure we have everything we need. This will save you time and frustration later. Here’s a checklist of essentials:
* Microfiber cloths: These are your best friends for dusting and wiping surfaces.
* All-purpose cleaner: Choose your favorite, or make your own with vinegar and water.
* Baking soda: A natural deodorizer and mild abrasive.
* White vinegar: A powerful cleaner and disinfectant.
* Dish soap: For greasy messes and general cleaning.
* Old toothbrush: Perfect for scrubbing tight spaces.
* Cotton swabs: For detailed cleaning in small crevices.
* Vacuum cleaner with attachments: Essential for reaching high and low areas.
* Duster with an extendable handle: For cobwebs and high shelves.
* Rubber gloves: Protect your hands from harsh chemicals.
* Spray bottles: For mixing cleaning solutions.
* Screwdriver (various sizes): You might need this to remove vent covers or other fixtures.
* Bucket: For carrying cleaning supplies and rinsing cloths.
* Ladder or step stool: For reaching high places safely.
Phase 1: Kitchen Deep Dive
The kitchen is a breeding ground for grime, so let’s start here.
1. Clean the Range Hood Filter: This is probably the most overlooked spot in the entire kitchen. Grease and grime accumulate here, reducing its effectiveness and potentially becoming a fire hazard.
* Step 1: Carefully remove the range hood filter. Most filters have a latch or clip that you can release.
* Step 2: Fill your sink with hot, soapy water. Add a generous amount of dish soap.
* Step 3: Submerge the filter in the soapy water and let it soak for at least 30 minutes. For heavily soiled filters, you can add 1/2 cup of baking soda to the water.
* Step 4: After soaking, use a scrub brush or old toothbrush to scrub away the grease and grime. Rinse thoroughly with hot water.
* Step 5: If the filter is still greasy, you can try soaking it in a solution of equal parts white vinegar and hot water.
* Step 6: Once clean, allow the filter to air dry completely before replacing it in the range hood.
2. Clean the Dishwasher: Your dishwasher cleans your dishes, but it needs cleaning too! Food particles and mineral buildup can affect its performance.
* Step 1: Remove the lower rack and clean out any food debris from the drain.
* Step 2: Place a dishwasher-safe cup filled with white vinegar on the top rack.
* Step 3: Run the dishwasher on a hot cycle.
* Step 4: After the cycle is complete, sprinkle baking soda on the bottom of the dishwasher and run a short cycle. This will help to deodorize the dishwasher.
* Step 5: Clean the dishwasher door seals with a damp cloth to remove any food particles or mildew.
3. Clean the Microwave: Splatters and spills are inevitable in the microwave.
* Step 1: Place a microwave-safe bowl filled with 1 cup of water and a few slices of lemon or a tablespoon of vinegar in the microwave.
* Step 2: Microwave on high for 3-5 minutes, or until the water boils and the microwave is steamy.
* Step 3: Let the steam sit for a few minutes to loosen the grime.
* Step 4: Carefully remove the bowl and wipe down the interior of the microwave with a damp cloth. The steam should have loosened the splatters, making them easy to remove.
4. Clean Underneath Appliances: Crumbs, dust bunnies, and who-knows-what-else accumulate under the refrigerator, stove, and dishwasher.
* Step 1: Carefully pull out the appliance (if possible) or use a vacuum cleaner with a long attachment to reach underneath.
* Step 2: Vacuum up all the debris.
* Step 3: Use a damp cloth to wipe down the floor underneath the appliance.
5. Clean the Garbage Disposal: This can get pretty smelly if not cleaned regularly.
* Step 1: Run cold water into the disposal for about a minute.
* Step 2: Toss in a few ice cubes and a handful of citrus peels (lemon, lime, or orange).
* Step 3: Turn on the disposal for about 30 seconds. The ice cubes will help to scrub the blades, and the citrus peels will freshen the disposal.
* Step 4: For extra cleaning power, pour 1/2 cup of baking soda down the disposal, followed by 1 cup of white vinegar. Let it fizz for a few minutes, then flush with cold water.
Phase 2: Bathroom Blitz
The bathroom is another area prone to grime and mildew.
1. Clean the Showerhead: Mineral buildup can clog the showerhead and reduce water pressure.
* Step 1: Fill a plastic bag with white vinegar.
* Step 2: Secure the bag around the showerhead with a rubber band, ensuring that the showerhead is submerged in the vinegar.
* Step 3: Let it soak for at least 30 minutes, or preferably overnight.
* Step 4: Remove the bag and run hot water through the showerhead to flush out any remaining vinegar and mineral deposits.
2. Clean the Grout: Grout can become stained and discolored over time.
* Step 1: Mix equal parts baking soda and water to form a paste.
* Step 2: Apply the paste to the grout and let it sit for a few minutes.
* Step 3: Use an old toothbrush to scrub the grout.
* Step 4: Rinse with water.
* Step 5: For stubborn stains, you can try using a grout cleaner or a bleach solution (use with caution and proper ventilation).
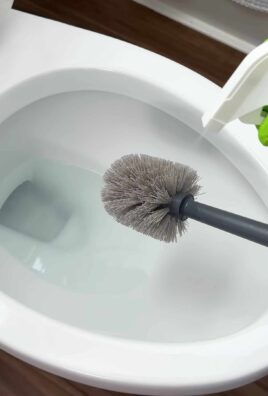
3. Clean Behind the Toilet: This area is often overlooked, but dust and grime accumulate here.
* Step 1: Use a vacuum cleaner with a crevice tool to vacuum up the dust and debris behind the toilet.
* Step 2: Wipe down the area with a damp cloth and all-purpose cleaner.
4. Clean the Bathroom Vents: Dust and moisture can accumulate in bathroom vents, leading to mold growth.
* Step 1: Turn off the power to the bathroom fan.
* Step 2: Remove the vent cover.
* Step 3: Vacuum the vent cover and the inside of the vent housing.
* Step 4: Wash the vent cover with soap and water.
* Step 5: Allow the vent cover to dry completely before replacing it.
Phase 3: Living Areas and Bedrooms
Let’s move on to the areas where we relax and unwind.
1. Dust Light Fixtures: Dust accumulates on light fixtures, reducing their brightness and potentially becoming a fire hazard.
* Step 1: Turn off the light fixture.
* Step 2: Use a duster with an extendable handle to dust the light fixture.
* Step 3: For glass fixtures, you can use a glass cleaner to wipe them down.
2. Clean Baseboards and Trim: These areas often get neglected, but they can accumulate dust and dirt.
* Step 1: Use a vacuum cleaner with a brush attachment to vacuum the baseboards and trim.
* Step 2: Wipe down the baseboards and trim with a damp cloth and all-purpose cleaner.
3. Clean Window Treatments: Curtains, blinds, and shades can accumulate dust and allergens.
* Step 1: Vacuum curtains and drapes with a brush attachment.
* Step 2: Wipe down blinds and shades with

Conclusion
So, there you have it! Unveiling those often-overlooked spots to clean and giving them the attention they deserve doesn’t have to be a daunting chore. By implementing these simple yet effective DIY tricks, you can transform your living space from seemingly clean to truly pristine. We’ve shown you how to tackle those hidden grime havens, from the depths of your dishwasher to the dusty tops of your door frames, all with readily available household items and a little elbow grease.
Why is this a must-try? Because a truly clean home isn’t just about surface appearances. It’s about creating a healthier, more comfortable, and more inviting environment for yourself and your loved ones. Removing hidden dust and grime reduces allergens, improves air quality, and even extends the lifespan of your appliances and fixtures. Plus, there’s a certain satisfaction that comes from knowing you’ve conquered those sneaky spots that often go unnoticed.
Consider these variations to personalize your cleaning routine:
* **Essential Oil Infusion:** Add a few drops of your favorite essential oil (like lemon, lavender, or tea tree) to your cleaning solutions for an extra boost of freshness and aromatherapy benefits. Lemon oil is particularly effective for cutting through grease, while tea tree oil boasts antibacterial properties.
* **Vinegar Alternatives:** If you’re not a fan of the vinegar smell, try using lemon juice or citric acid as a natural alternative. They offer similar cleaning power with a slightly different scent profile.
* **Microfiber Magic:** Invest in a good set of microfiber cloths. They’re incredibly effective at trapping dust and dirt, and they’re reusable, making them an eco-friendly choice. Use different colored cloths for different areas of your home to prevent cross-contamination.
* **Deep Cleaning Schedule:** Create a rotating schedule to tackle these overlooked spots on a regular basis. For example, clean your dishwasher filter monthly, dust your baseboards quarterly, and deep clean your grout annually.
We understand that cleaning isn’t everyone’s favorite activity, but these DIY tricks are designed to be manageable and rewarding. They’re not about spending hours scrubbing; they’re about incorporating small, targeted actions into your routine to achieve significant results.
Don’t underestimate the power of a truly clean home! It’s an investment in your well-being and a reflection of your care for your living space.
Now, it’s your turn! We encourage you to try these DIY tricks for cleaning those overlooked spots and experience the difference for yourself. Share your experiences, tips, and before-and-after photos in the comments below. We’d love to hear how these methods worked for you and any variations you discovered along the way. Let’s create a community of clean enthusiasts who are dedicated to making their homes the healthiest and happiest places they can be. Embrace the power of DIY and conquer those hidden grime zones!
Frequently Asked Questions (FAQs)
What are the most commonly overlooked spots to clean in a home?
The most frequently neglected areas often include the tops of door frames and window casings, baseboards, light fixtures (especially the inside of shades), under and behind appliances (refrigerator, stove, washing machine), the dishwasher filter, grout lines in bathrooms and kitchens, showerheads, and the inside of garbage disposals. These areas tend to accumulate dust, grime, and even mold over time, contributing to poor air quality and potential health issues.
Why is it important to clean these overlooked spots?
Cleaning these areas is crucial for several reasons. First, it improves indoor air quality by removing dust, allergens, and mold spores. Second, it helps prevent the buildup of grime and bacteria, which can contribute to unpleasant odors and even health problems. Third, it extends the lifespan of your appliances and fixtures by preventing corrosion and damage caused by accumulated dirt and debris. Finally, a thoroughly clean home simply feels more comfortable and inviting.
How often should I clean these overlooked spots?
The frequency of cleaning depends on the specific area and your lifestyle. High-traffic areas and those prone to dust accumulation, such as baseboards and door frames, should be cleaned at least quarterly. Appliances like dishwashers and refrigerators require monthly attention to filters and coils. Grout lines and showerheads may need more frequent cleaning, especially in humid environments. Creating a cleaning schedule can help you stay on track.
What are some natural cleaning solutions I can use for these areas?
Many effective and eco-friendly cleaning solutions can be made with common household ingredients. Vinegar is excellent for removing hard water stains, mildew, and grease. Baking soda is a gentle abrasive that can be used to scrub surfaces and deodorize. Lemon juice is a natural disinfectant and degreaser. Combining these ingredients with water can create powerful cleaning solutions for various surfaces. For example, a paste of baking soda and water can be used to clean grout, while a solution of vinegar and water can be used to clean showerheads.
How do I clean the inside of my dishwasher effectively?
To clean your dishwasher, start by removing and cleaning the filter. Then, place a dishwasher-safe cup filled with white vinegar on the top rack and run a normal cycle. This will help remove mineral deposits and odors. For a deeper clean, sprinkle baking soda on the bottom of the dishwasher before running a short cycle. You can also use a toothbrush to scrub around the door seals and spray arms.
What’s the best way to clean grout lines?
Grout lines can be challenging to clean due to their porous nature. A paste of baking soda and water is a good starting point. Apply the paste to the grout lines, let it sit for a few minutes, and then scrub with a stiff brush or old toothbrush. For stubborn stains, you can use a solution of bleach and water (always wear gloves and eye protection when using bleach). Alternatively, try a commercial grout cleaner specifically designed for this purpose.
How can I prevent these overlooked spots from getting dirty in the first place?
Prevention is key to minimizing the need for deep cleaning. Regularly dust surfaces, wipe up spills immediately, and ventilate your home to reduce humidity. Use doormats to trap dirt before it enters your home. Consider using air purifiers to reduce dust and allergens in the air. By incorporating these simple habits into your routine, you can keep those overlooked spots cleaner for longer.
Are there any safety precautions I should take when cleaning these areas?
Always wear gloves when using cleaning solutions, especially those containing bleach or harsh chemicals. Ensure adequate ventilation when cleaning in enclosed spaces. Avoid mixing different cleaning products, as this can create dangerous fumes. Test cleaning solutions on a small, inconspicuous area first to ensure they don’t damage the surface. And always keep cleaning products out of reach of children and pets.
What tools are helpful for cleaning these overlooked spots?
A variety of tools can make cleaning these areas easier and more effective. Microfiber cloths are excellent for dusting and wiping surfaces. A stiff brush or old toothbrush is useful for scrubbing grout lines and tight spaces. A vacuum cleaner with a hose attachment can be used to remove dust from hard-to-reach areas. A ladder or step stool is essential for cleaning high surfaces. And a good pair of gloves will protect your hands from harsh chemicals.
How can I make cleaning these areas less of a chore?
Make cleaning less daunting by breaking it down into smaller, manageable tasks. Focus on one or two overlooked spots each week rather than trying to tackle everything at once. Put on some music or a podcast to make the time more enjoyable. Enlist the help of family members to share the workload. And remember to reward yourself after completing a cleaning task!
Leave a Comment