

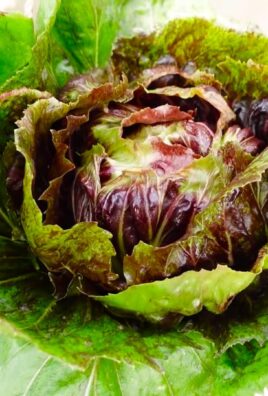
Pechay Pot Gardening Beginners, listen up! Have you ever dreamed of stepping outside your door and harvesting fresh, crisp pechay for your dinner, even if you only have a tiny balcony or patio? I know I have! For centuries, cultivating your own food has been a source of pride and sustenance, connecting us to the earth and providing healthy, delicious meals. From ancient civilizations tending their kitchen gardens to modern urban dwellers embracing container gardening, the desire to grow our own has always been strong.
But let’s be honest, getting started can feel overwhelming. Where do you begin? What if you don’t have a green thumb? That’s where this DIY guide comes in! I’m going to walk you through everything you need to know to successfully start pechay pot gardening beginners project, even if you’ve never grown anything before. We’ll cover choosing the right pot, preparing the soil, planting your seeds, and providing the care your pechay needs to thrive.
Imagine the satisfaction of harvesting your own homegrown pechay, knowing exactly where it came from and how it was grown. Not only will you enjoy fresh, healthy vegetables, but you’ll also save money, reduce your carbon footprint, and experience the therapeutic benefits of gardening. So, grab your gardening gloves, and let’s get started on this exciting journey together!
DIY Pechay Pot Gardening: A Beginner’s Guide to Growing Your Own Greens
Hey there, fellow gardening enthusiasts! Ever thought about growing your own fresh, crisp pechay right in your backyard (or even on your balcony)? It’s easier than you think, and I’m here to guide you through the whole process. Pechay, also known as Bok Choy, is a delicious and nutritious leafy green that’s perfect for stir-fries, soups, and salads. Plus, growing your own means you know exactly what’s going into your food – no nasty pesticides or hidden chemicals! So, grab your gardening gloves, and let’s get started!
What You’ll Need
Before we dive into the nitty-gritty, let’s gather all the supplies you’ll need. Trust me, having everything ready beforehand will make the whole process much smoother.
* Pechay Seeds: You can find these at most garden centers or online. Look for varieties that are well-suited to your climate.
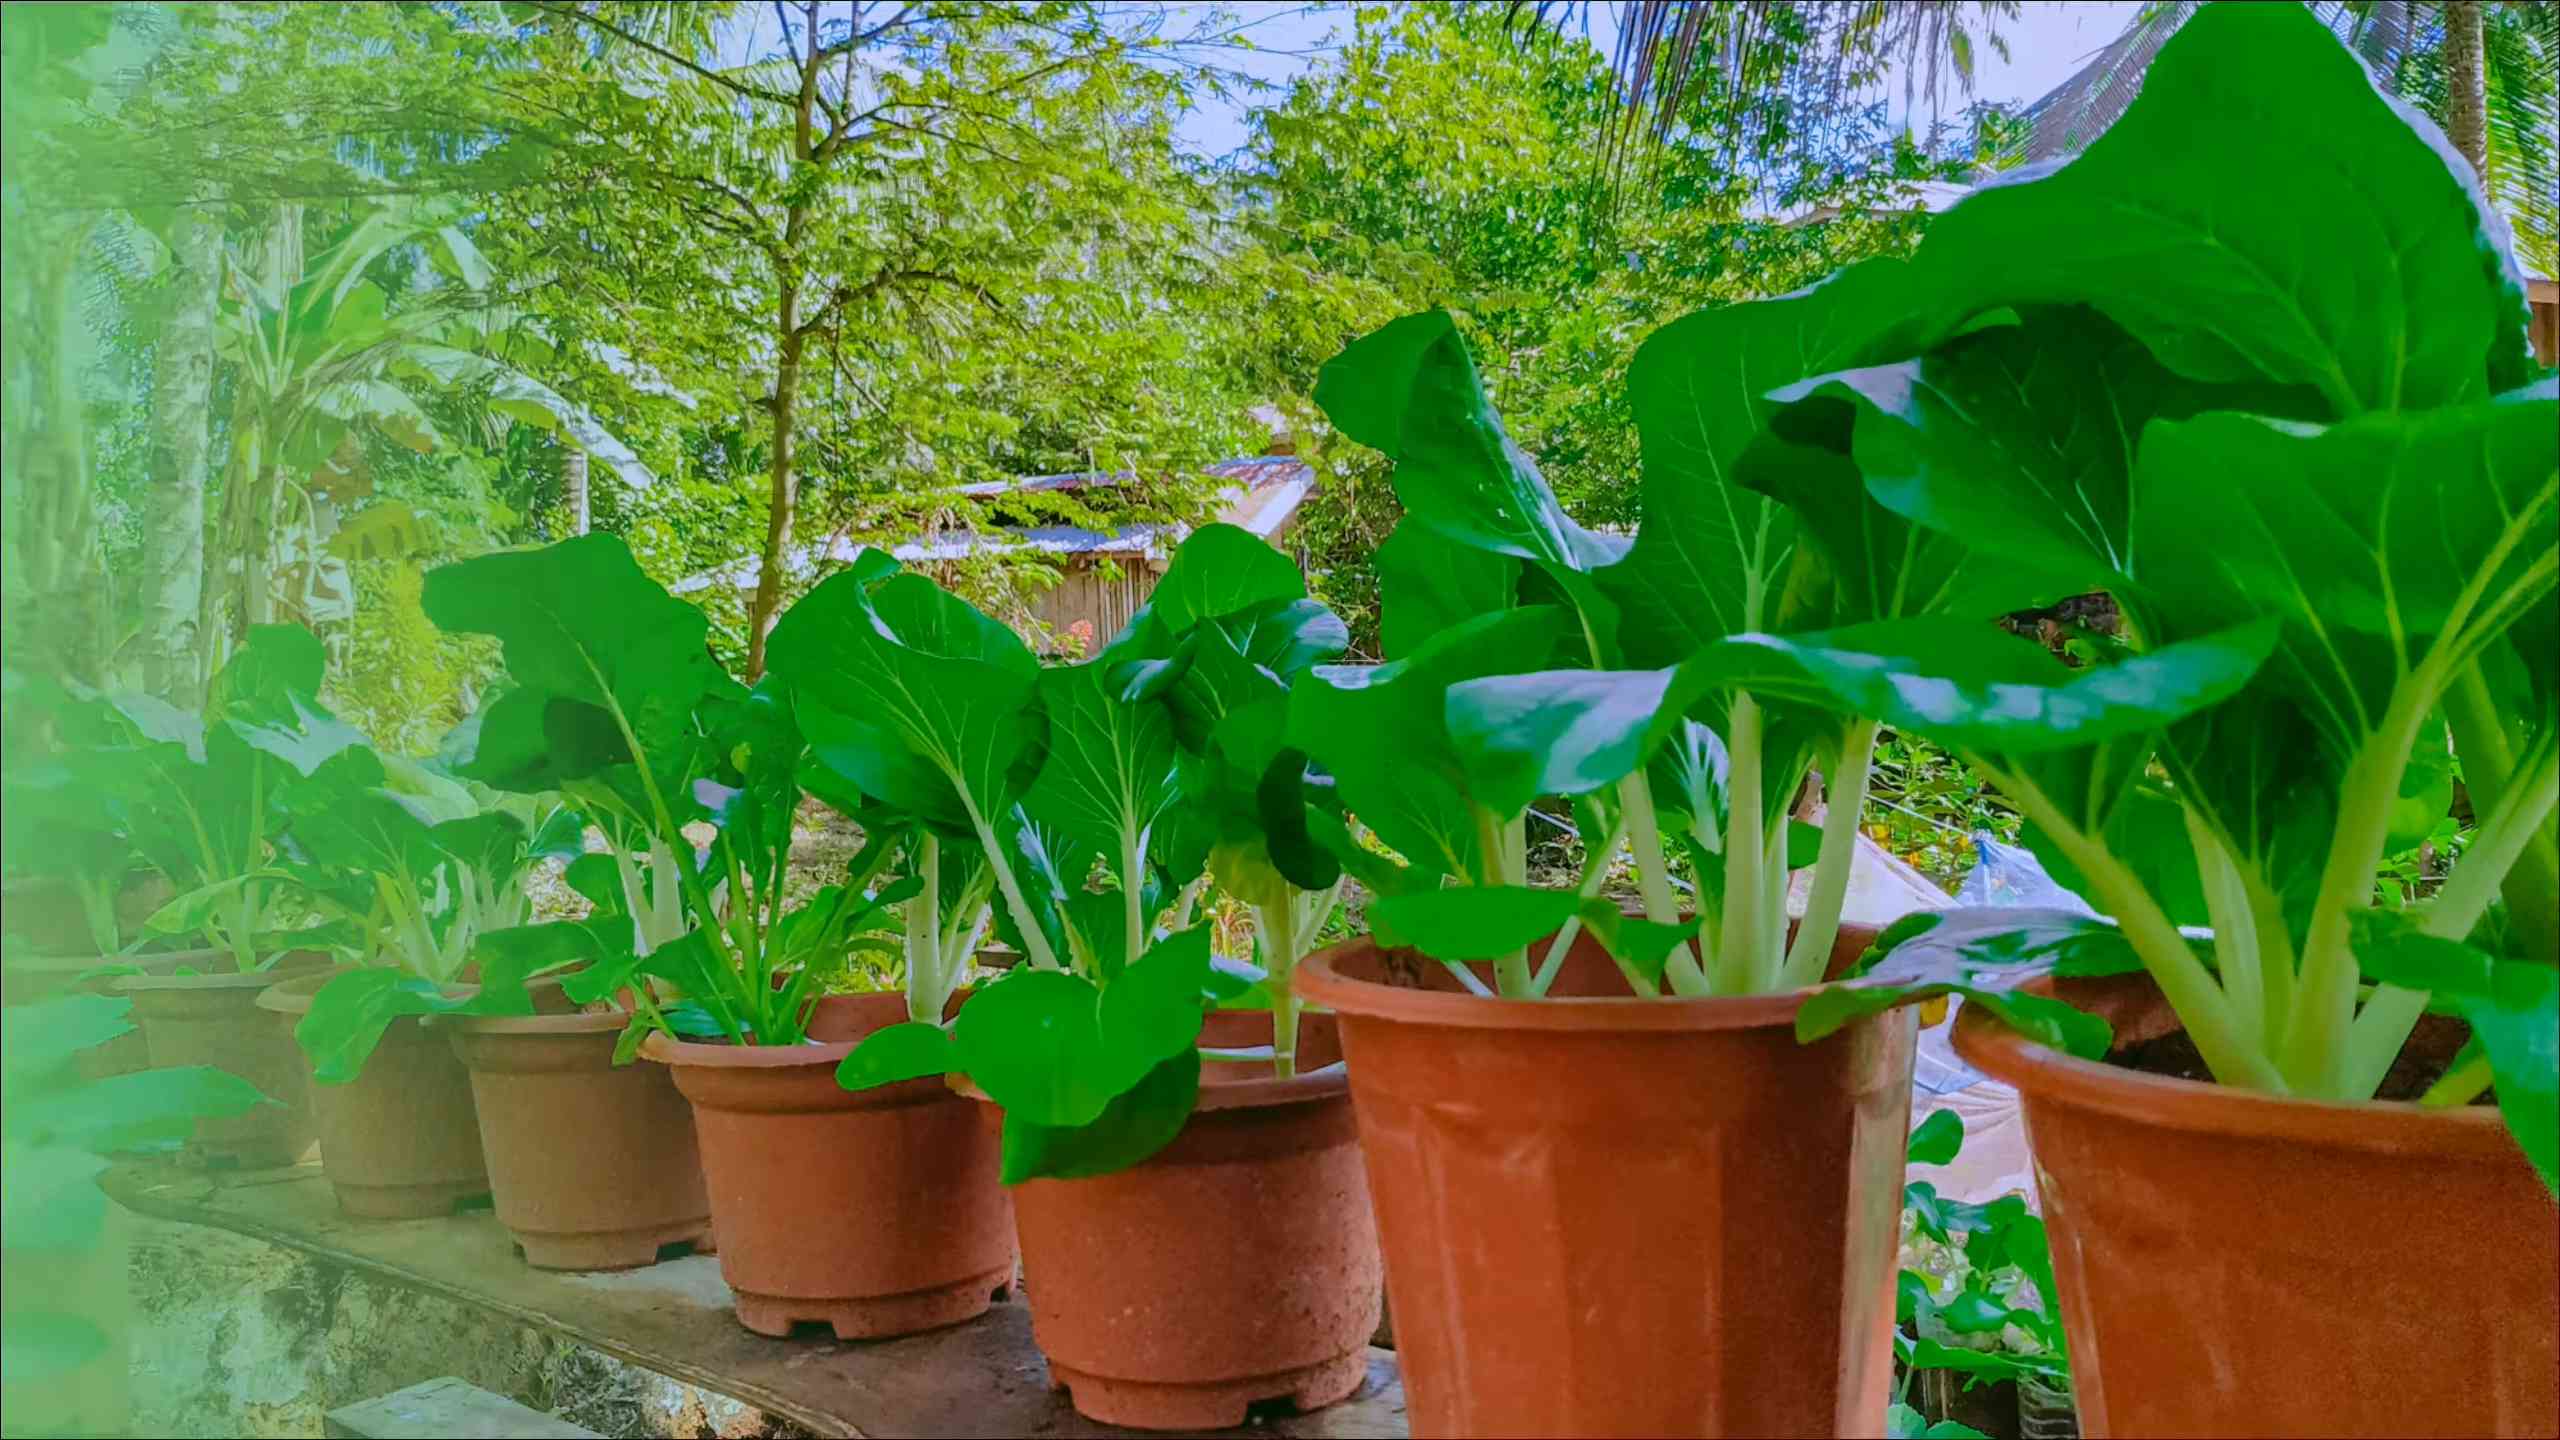
* Pots or Containers: Choose pots that are at least 6-8 inches deep and wide. Good drainage is crucial, so make sure they have drainage holes.
* Potting Mix: Don’t use garden soil directly in your pots. It’s too heavy and doesn’t drain well. Opt for a good quality potting mix that’s light and airy.
* Watering Can or Hose: Gentle watering is key, especially when the seedlings are young.
* Fertilizer (Optional): A balanced liquid fertilizer can help your pechay grow strong and healthy.
* Trowel or Small Shovel: For transplanting seedlings and mixing soil.
* Sunlight: Pechay needs at least 4-6 hours of sunlight per day.
* Spray Bottle (Optional): For misting seedlings and controlling pests.
Phase 1: Sowing the Seeds
Okay, let’s get our hands dirty! This is where the magic begins. We’re going to start by sowing the pechay seeds.
1. Prepare the Pots: Fill your pots with the potting mix, leaving about an inch of space from the top. Gently pat down the soil to remove any large air pockets.
2. Sow the Seeds: Sprinkle the pechay seeds evenly over the surface of the soil. You don’t need to bury them too deep – about ¼ inch is perfect. You can sow multiple seeds per pot, but remember you’ll need to thin them out later.
3. Cover the Seeds: Lightly cover the seeds with a thin layer of potting mix.
4. Water Gently: Use a watering can or hose with a gentle spray nozzle to water the soil thoroughly. Make sure the soil is moist but not waterlogged.
5. Find a Sunny Spot: Place the pots in a location that receives at least 4-6 hours of sunlight per day. A windowsill or balcony is ideal.
6. Keep the Soil Moist: Check the soil moisture daily and water as needed to keep it consistently moist. Avoid letting the soil dry out completely.
Phase 2: Nurturing the Seedlings
Now comes the waiting game! But don’t worry, it won’t be long before you see tiny green sprouts emerging from the soil.
1. Monitor Germination: Pechay seeds typically germinate within 5-10 days. Keep an eye on your pots and watch for the first signs of growth.
2. Thin the Seedlings: Once the seedlings have developed a few true leaves (the leaves that look like miniature pechay leaves), it’s time to thin them out. This means removing some of the seedlings to give the remaining ones enough space to grow. Choose the strongest and healthiest-looking seedlings and gently snip off the weaker ones at the base with scissors. Aim for about 2-3 inches of space between each seedling.
3. Water Regularly: Continue to water the seedlings regularly, keeping the soil consistently moist.
4. Fertilize (Optional): If you want to give your seedlings a boost, you can start fertilizing them with a balanced liquid fertilizer diluted to half strength. Follow the instructions on the fertilizer package. I usually fertilize every two weeks.
5. Protect from Pests: Keep an eye out for pests like aphids or slugs. If you spot any, you can try spraying them with a mixture of water and dish soap or using insecticidal soap.
Phase 3: Caring for Your Growing Pechay
Your pechay plants are growing! This is where you’ll need to provide ongoing care to ensure they thrive.
1. Watering: Water your pechay plants regularly, especially during hot and dry weather. The soil should be consistently moist, but avoid overwatering, which can lead to root rot. I usually check the soil moisture every morning and water if the top inch feels dry.
2. Sunlight: Make sure your pechay plants are getting enough sunlight. If they’re not getting at least 4-6 hours of sunlight per day, you may need to move them to a sunnier location.
3. Fertilizing (Optional): Continue to fertilize your pechay plants every two weeks with a balanced liquid fertilizer. This will help them grow strong and produce lots of delicious leaves.
4. Weeding: Keep your pots free of weeds, which can compete with your pechay plants for nutrients and water.
5. Pest Control: Continue to monitor your plants for pests and take action as needed. You can use organic pest control methods like insecticidal soap or neem oil.
6. Bolting Prevention: Pechay can bolt (go to seed) in hot weather. To prevent bolting, try to keep the soil cool and moist, and provide some shade during the hottest part of the day. You can also choose bolt-resistant varieties of pechay.
Phase 4: Harvesting Your Pechay
The moment you’ve been waiting for! It’s time to harvest your homegrown pechay.
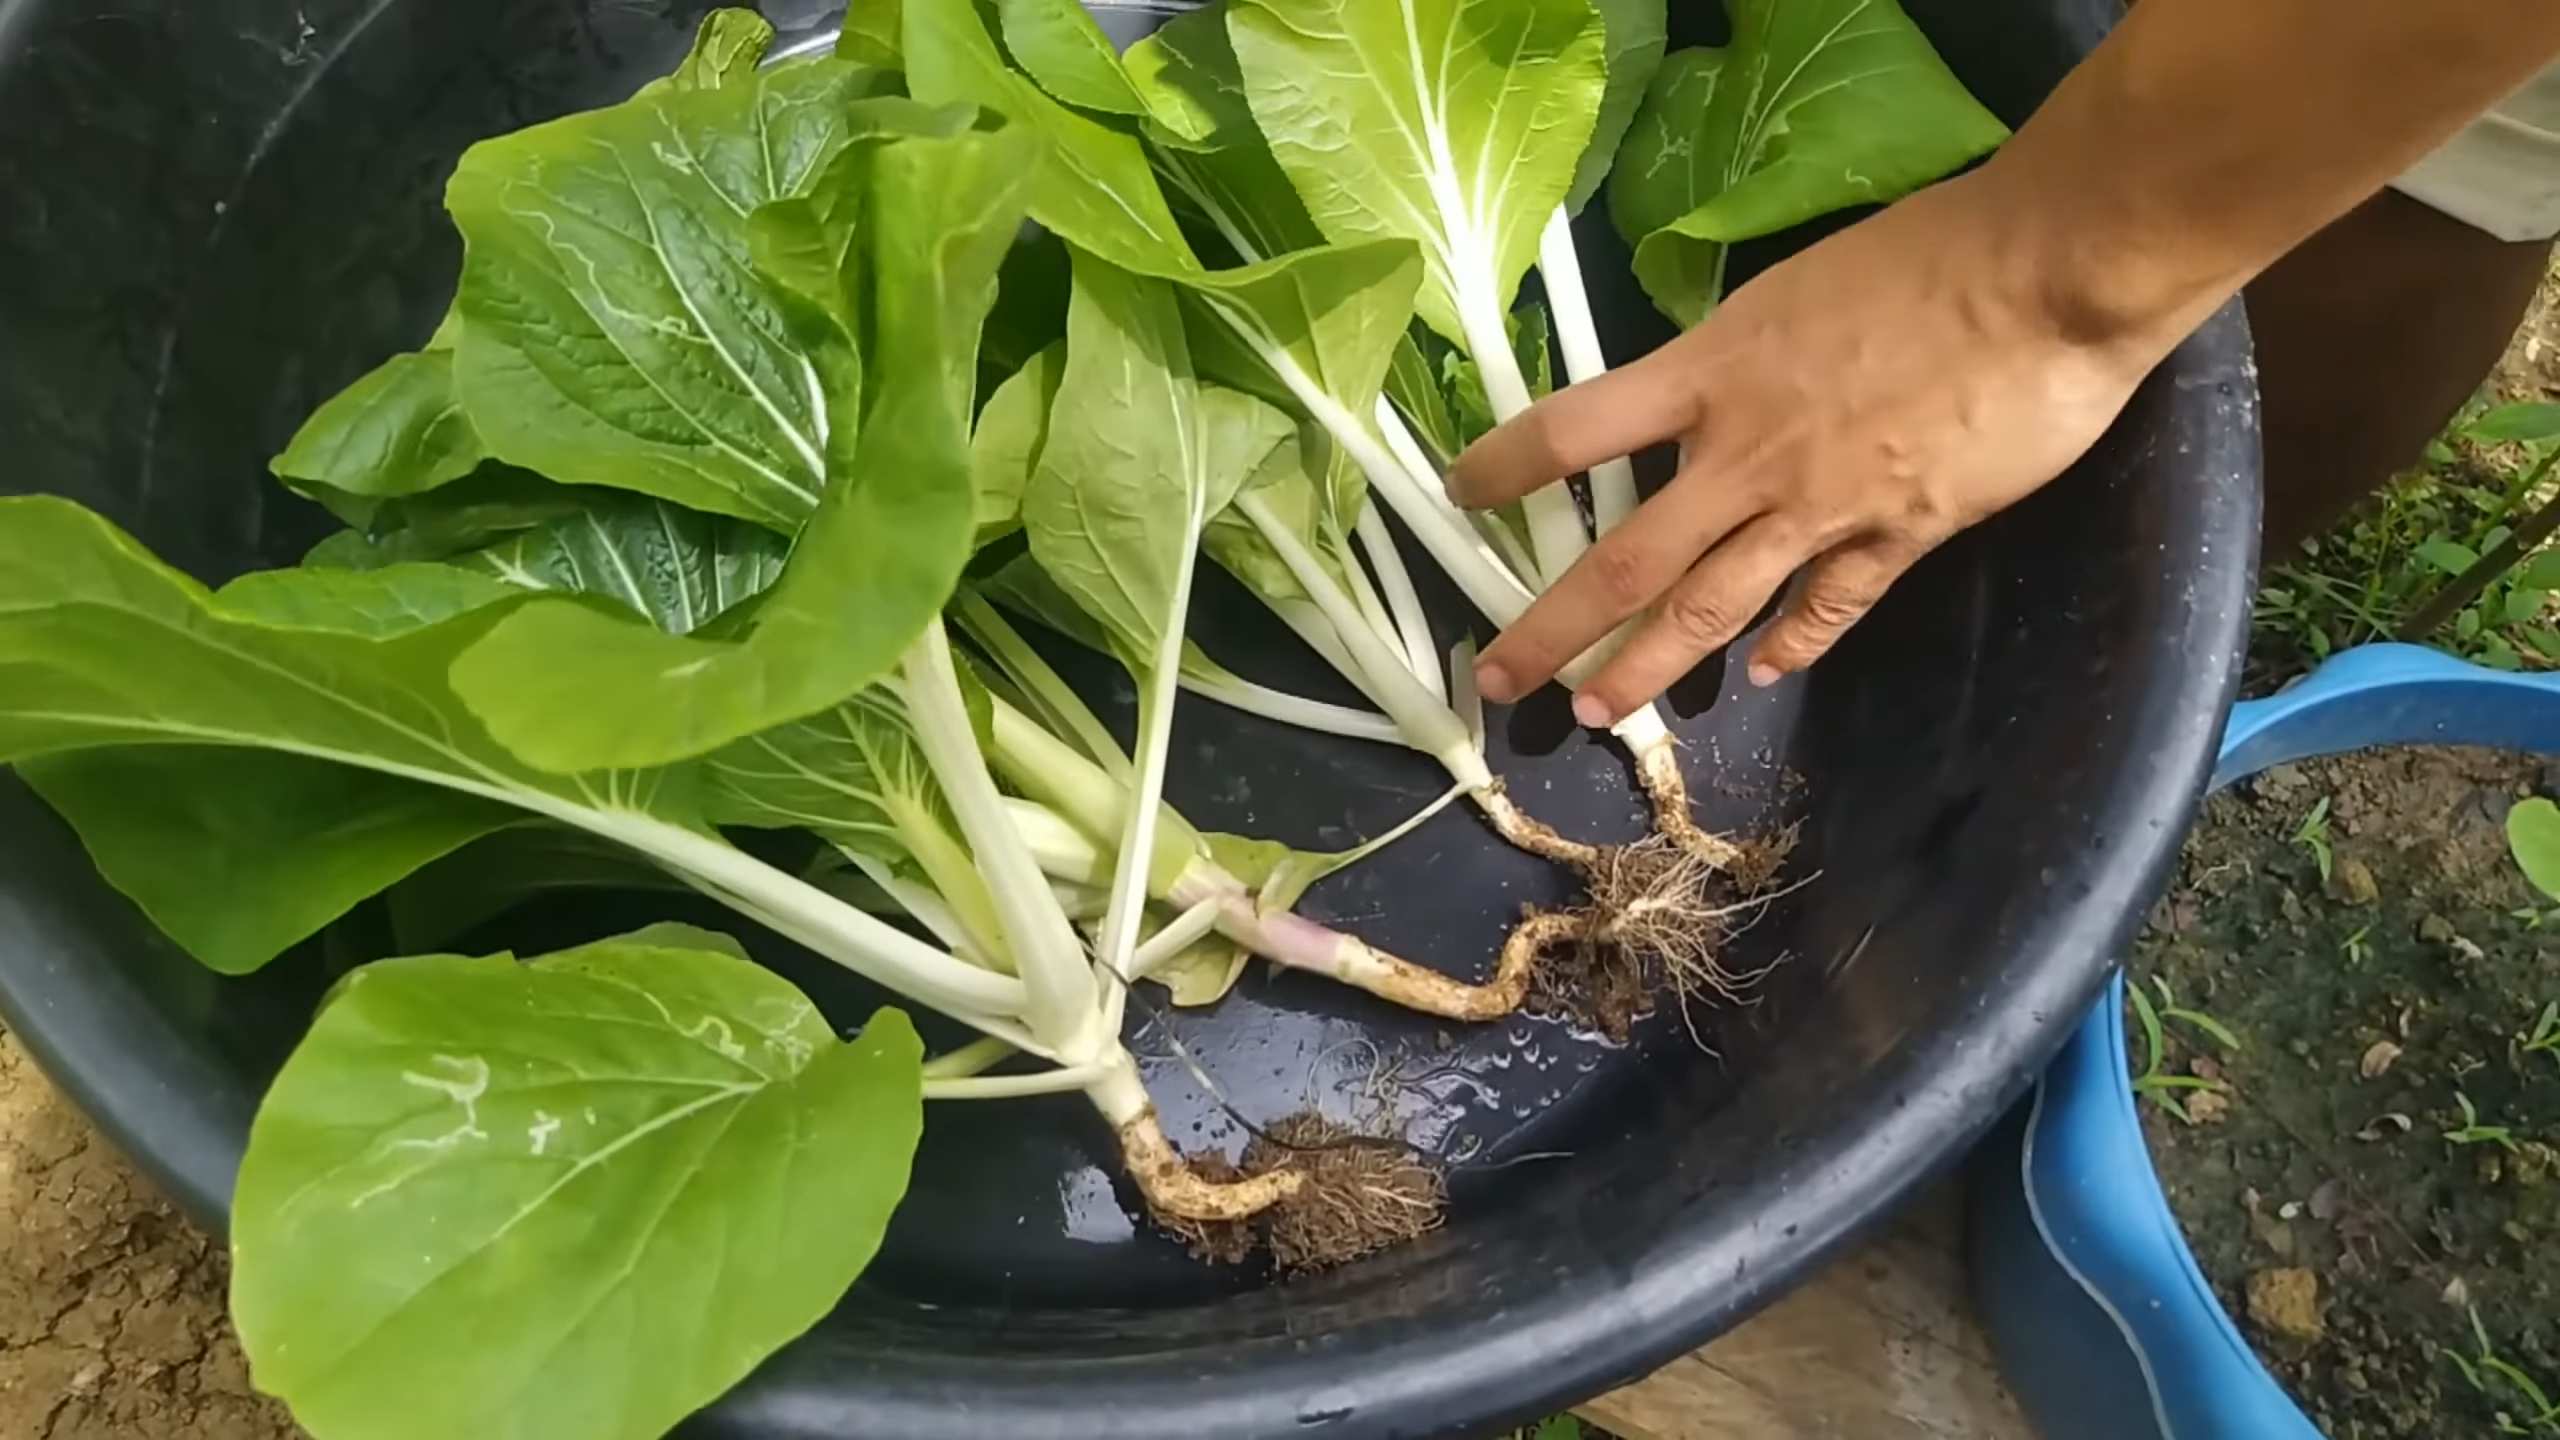
1. Harvest Time: You can start harvesting your pechay when the leaves are about 6-8 inches long. This usually takes about 45-60 days from sowing.
2. Harvesting Method: You can harvest the entire plant at once by cutting it off at the base, or you can harvest individual leaves as needed. If you harvest individual leaves, the plant will continue to produce new leaves. I prefer to harvest individual leaves so I can enjoy fresh pechay for a longer period.
3. Washing and Storing: After harvesting, wash the pechay leaves thoroughly and store them in the refrigerator in a plastic bag or container. They should stay fresh for several days.
Tips for Success
Here are a few extra tips to help you grow the best pechay possible:
* Choose the Right Variety: There are many different varieties of pechay available, so choose one that’s well-suited to your climate and growing conditions.
* Start with Good Quality Seeds: Using high-quality seeds will increase your chances of success.
* Don’t Overwater: Overwatering can lead to root rot, so make sure the soil is well-draining.
* Provide Adequate Sunlight: Pechay needs at least 4-6 hours of sunlight per day.
* Fertilize Regularly: Fertilizing will help your pechay grow strong and healthy.
* Protect from Pests: Keep an eye out for pests and take action as needed.
* Harvest Regularly: Harvesting regularly will encourage the plant to produce more leaves.
* Succession Planting: To have a continuous supply of pechay, sow new seeds every few weeks.
Troubleshooting
Even with the best care, you might encounter some problems along the way. Here are a few common issues and how to deal with them:
* Yellowing Leaves: This could be a sign of overwatering, nutrient deficiency, or pest infestation. Check the soil moisture, fertilize if needed, and inspect the plants for pests.
* Holes in Leaves: This is usually caused by pests like slugs or caterpillars. Use organic pest control methods to get rid of them.
* Bolting: As mentioned earlier, bolting can be caused by hot weather. Try to keep the soil cool and moist, and provide some shade.
* Slow Growth: This could be due to lack of sunlight, nutrient deficiency, or poor soil. Make sure your plants are getting enough sunlight, fertilize regularly, and use a good quality potting mix.
Growing your own pechay is a rewarding experience. With a little bit of care and attention, you can enjoy fresh, delicious greens right from your own backyard. Happy gardening!
Conclusion
So, there you have it! Transforming humble pechay seeds into a thriving pot garden is not only achievable for beginners but also incredibly rewarding. We’ve walked you through the simple steps, from selecting the right pot and soil to nurturing your pechay plants with sunlight and water. But why is this DIY trick a must-try?
Firstly, growing your own pechay offers unparalleled freshness. Imagine harvesting crisp, vibrant leaves just moments before adding them to your favorite dishes. The flavor is simply unmatched by store-bought varieties, which often suffer from transportation and storage. Secondly, it’s a fantastic way to connect with nature, even if you only have a small balcony or patio. The process of nurturing a plant from seed to harvest is deeply satisfying and can be a wonderful stress reliever. Thirdly, it’s economical! A packet of pechay seeds is inexpensive, and you can harvest multiple times from a single plant, making it a budget-friendly way to enjoy fresh vegetables. Finally, and perhaps most importantly, you have complete control over what goes into your pechay. No harmful pesticides or herbicides are necessary when you’re in charge of the growing process.
But the fun doesn’t stop with the basic method. Feel free to experiment with different varieties of pechay. Some have broader leaves, while others are more compact. You can also try companion planting. Marigolds, for example, can help deter pests, while basil can improve the flavor of your pechay. Consider adding a slow-release fertilizer to the soil for an extra boost of nutrients. And if you’re feeling adventurous, why not try growing other leafy greens alongside your pechay, such as spinach or kale?
Don’t be afraid to get your hands dirty and embrace the learning process. Gardening is all about experimentation, and even if you encounter a few challenges along the way, the rewards are well worth the effort. Remember to observe your plants closely and adjust your care routine as needed. Are the leaves turning yellow? Perhaps they need more sunlight or fertilizer. Are they wilting? They might be thirsty.
We are confident that with a little patience and attention, you’ll be enjoying your own homegrown pechay in no time. This simple pechay pot gardening method is a game-changer for anyone looking to add fresh, healthy greens to their diet.
So, what are you waiting for? Grab a pot, some soil, and a packet of pechay seeds, and get started today! We’d love to hear about your experiences. Share your photos and tips in the comments below. Let’s create a community of pechay pot gardening enthusiasts! We can’t wait to see your thriving gardens. Happy gardening!
Frequently Asked Questions (FAQ)
1. What is the best time of year to plant pechay in pots?
Pechay thrives in cooler weather, making it ideal for planting in early spring or late summer/early fall. Avoid planting during the hottest months of summer, as high temperatures can cause the plants to bolt (go to seed prematurely), resulting in bitter-tasting leaves. If you live in a region with mild winters, you can even grow pechay year-round. The ideal temperature range for pechay growth is between 15°C and 25°C (59°F and 77°F).
2. How much sunlight does pechay need when grown in pots?
Pechay requires at least 4-6 hours of direct sunlight per day. If you don’t have a sunny spot, you can supplement with grow lights. Insufficient sunlight can lead to leggy growth and reduced yields. Observe your plants closely. If they are stretching towards the light, it’s a sign that they need more sun.
3. What type of soil is best for growing pechay in pots?
Use a well-draining potting mix that is rich in organic matter. A mix of compost, peat moss, and perlite is a good option. Avoid using garden soil, as it can be too heavy and may not drain well, leading to root rot. The ideal pH level for pechay is between 6.0 and 7.5. You can amend the soil with lime if it is too acidic.
4. How often should I water my pechay plants in pots?
Water regularly, keeping the soil consistently moist but not waterlogged. Check the soil moisture by sticking your finger about an inch deep. If it feels dry, it’s time to water. Water deeply, allowing the excess water to drain out of the bottom of the pot. Avoid overhead watering, as this can promote fungal diseases. Water early in the morning to allow the leaves to dry before nightfall.
5. Do I need to fertilize my pechay plants in pots?
Yes, pechay is a heavy feeder and benefits from regular fertilization. Use a balanced fertilizer (e.g., 10-10-10) diluted to half strength every 2-3 weeks. You can also use organic fertilizers such as compost tea or fish emulsion. Avoid over-fertilizing, as this can burn the roots and damage the plants.
6. How do I deal with pests and diseases on my pechay plants?
Inspect your plants regularly for pests such as aphids, cabbage worms, and slugs. Handpick any pests you find or use insecticidal soap or neem oil. To prevent diseases, ensure good air circulation and avoid overhead watering. If you notice any signs of fungal diseases, such as powdery mildew, treat with a fungicide. Companion planting with marigolds can also help deter pests.
7. When is the best time to harvest pechay from pots?
You can start harvesting pechay leaves when they are about 6-8 inches long. Harvest the outer leaves first, allowing the inner leaves to continue growing. You can also harvest the entire plant at once. Pechay is best harvested in the morning when the leaves are crisp and fresh.
8. Can I grow pechay indoors?
Yes, you can grow pechay indoors, but you will need to provide adequate light. Place the pots near a sunny window or use grow lights. Ensure good air circulation and maintain a consistent temperature. Indoor-grown pechay may not grow as quickly or produce as many leaves as outdoor-grown pechay, but it is still a viable option for those with limited outdoor space.
9. How long does it take for pechay to grow from seed to harvest?
Pechay typically takes about 30-45 days to mature from seed to harvest. The exact time will depend on the variety, growing conditions, and climate.
10. Can I save seeds from my pechay plants?
Yes, you can save seeds from your pechay plants, but it requires allowing the plants to bolt (go to seed). This typically happens when the weather gets warmer. Allow the seed pods to dry on the plant, then harvest them and extract the seeds. Store the seeds in a cool, dry place until you are ready to plant them. Keep in mind that seeds saved from hybrid varieties may not produce plants that are true to type.
Leave a Comment