

Remove Pee Stains Effectively and reclaim your home from those lingering odors and unsightly marks! Let’s face it, accidents happen, especially if you have pets or little ones. But before you resign yourself to living with the evidence, know that you can banish those pee stains for good with some simple DIY tricks.
For centuries, people have been devising ways to combat the unpleasant effects of urine. From ancient remedies using natural enzymes to modern stain removers, the quest for a clean and fresh home has always been a priority. Think about it – our ancestors didn’t have access to the specialized cleaning products we do today, yet they found ways to maintain hygienic living spaces. We can learn from their resourcefulness and adapt it to our modern needs.
Why is it so important to remove pee stains effectively? Beyond the obvious aesthetic reasons, lingering urine can attract pests, encourage repeat offenses from pets, and even affect your indoor air quality. Plus, that lingering smell? It’s not exactly the welcoming aroma you want greeting guests at your door. I’m here to share some easy-to-follow DIY solutions that will not only eliminate the stain but also neutralize the odor, leaving your home smelling fresh and clean. Get ready to say goodbye to those embarrassing pee stains and hello to a spotless, odor-free home!
DIY Guide: Banishing Pee Stains and Odors Like a Pro!
Okay, let’s face it, accidents happen! Whether it’s a pet mishap, a little one’s oopsie, or even your own clumsy moment (hey, no judgment!), pee stains and their lingering odors are a real pain. But don’t despair! I’m here to share my tried-and-true method for tackling these messes effectively, using simple household ingredients. This guide will walk you through each step, ensuring you can restore your carpets, upholstery, and even mattresses to their former glory.
Understanding the Enemy: Why Pee Stains are So Stubborn
Before we dive into the cleaning process, it’s helpful to understand why pee stains are so persistent. Urine contains uric acid, which is what gives it that characteristic pungent smell. This acid binds tightly to fibers, making it difficult to remove with just water or ordinary cleaners. The longer the urine sits, the deeper it penetrates and the harder it becomes to eliminate. That’s why acting quickly is key!
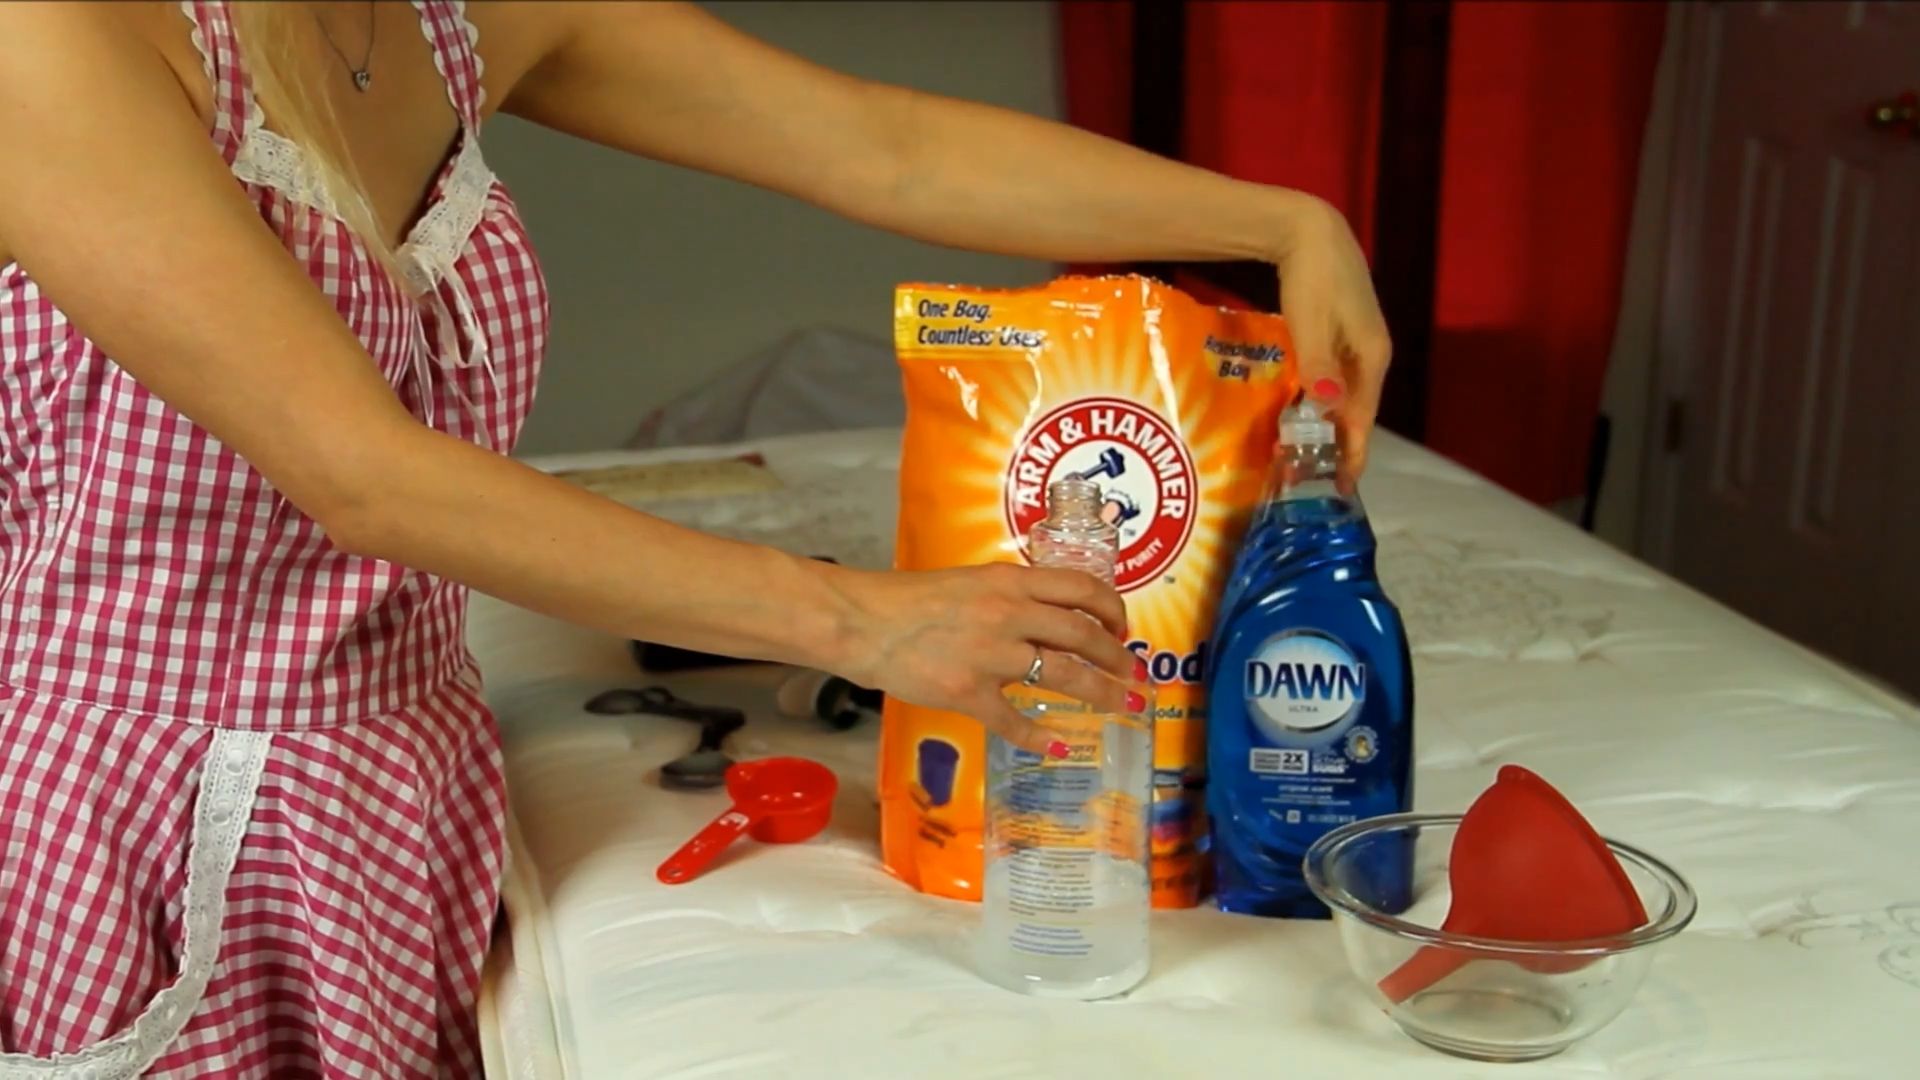
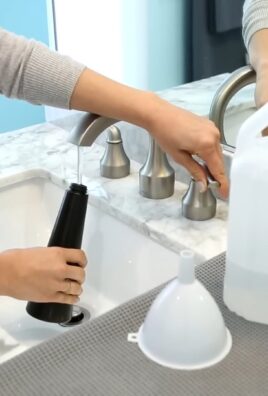
Materials You’ll Need: Your Arsenal Against Pee
Here’s a list of the supplies you’ll need to wage war on those pesky pee stains:
* **Paper towels or absorbent cloths:** For blotting up the initial mess.
* **Baking soda:** This is your odor-absorbing superhero!
* **White vinegar:** A natural disinfectant and stain remover.
* **Hydrogen peroxide (3% solution):** A mild bleaching agent that helps break down stains. *Always test in an inconspicuous area first!*
* **Dish soap (mild, clear):** To help lift the stain and break down grease.
* **Spray bottle:** For easy application of cleaning solutions.
* **Old toothbrush or soft-bristled brush:** For gentle scrubbing.
* **Vacuum cleaner:** To remove dried baking soda and any remaining residue.
* **Enzyme cleaner (optional, but highly recommended):** Specifically designed to break down uric acid.
Step-by-Step Guide: Eliminating Pee Stains and Odors
Alright, let’s get down to business! Follow these steps carefully for the best results.
1. **Blot, Blot, Blot! (Act Fast!)**
* The first and most crucial step is to blot up as much of the urine as possible. Use paper towels or absorbent cloths and press firmly into the affected area.
* Continue blotting until the area is as dry as you can get it. Don’t rub, as this will only spread the stain and push it deeper into the fibers.
* Replace the paper towels frequently as they become saturated.
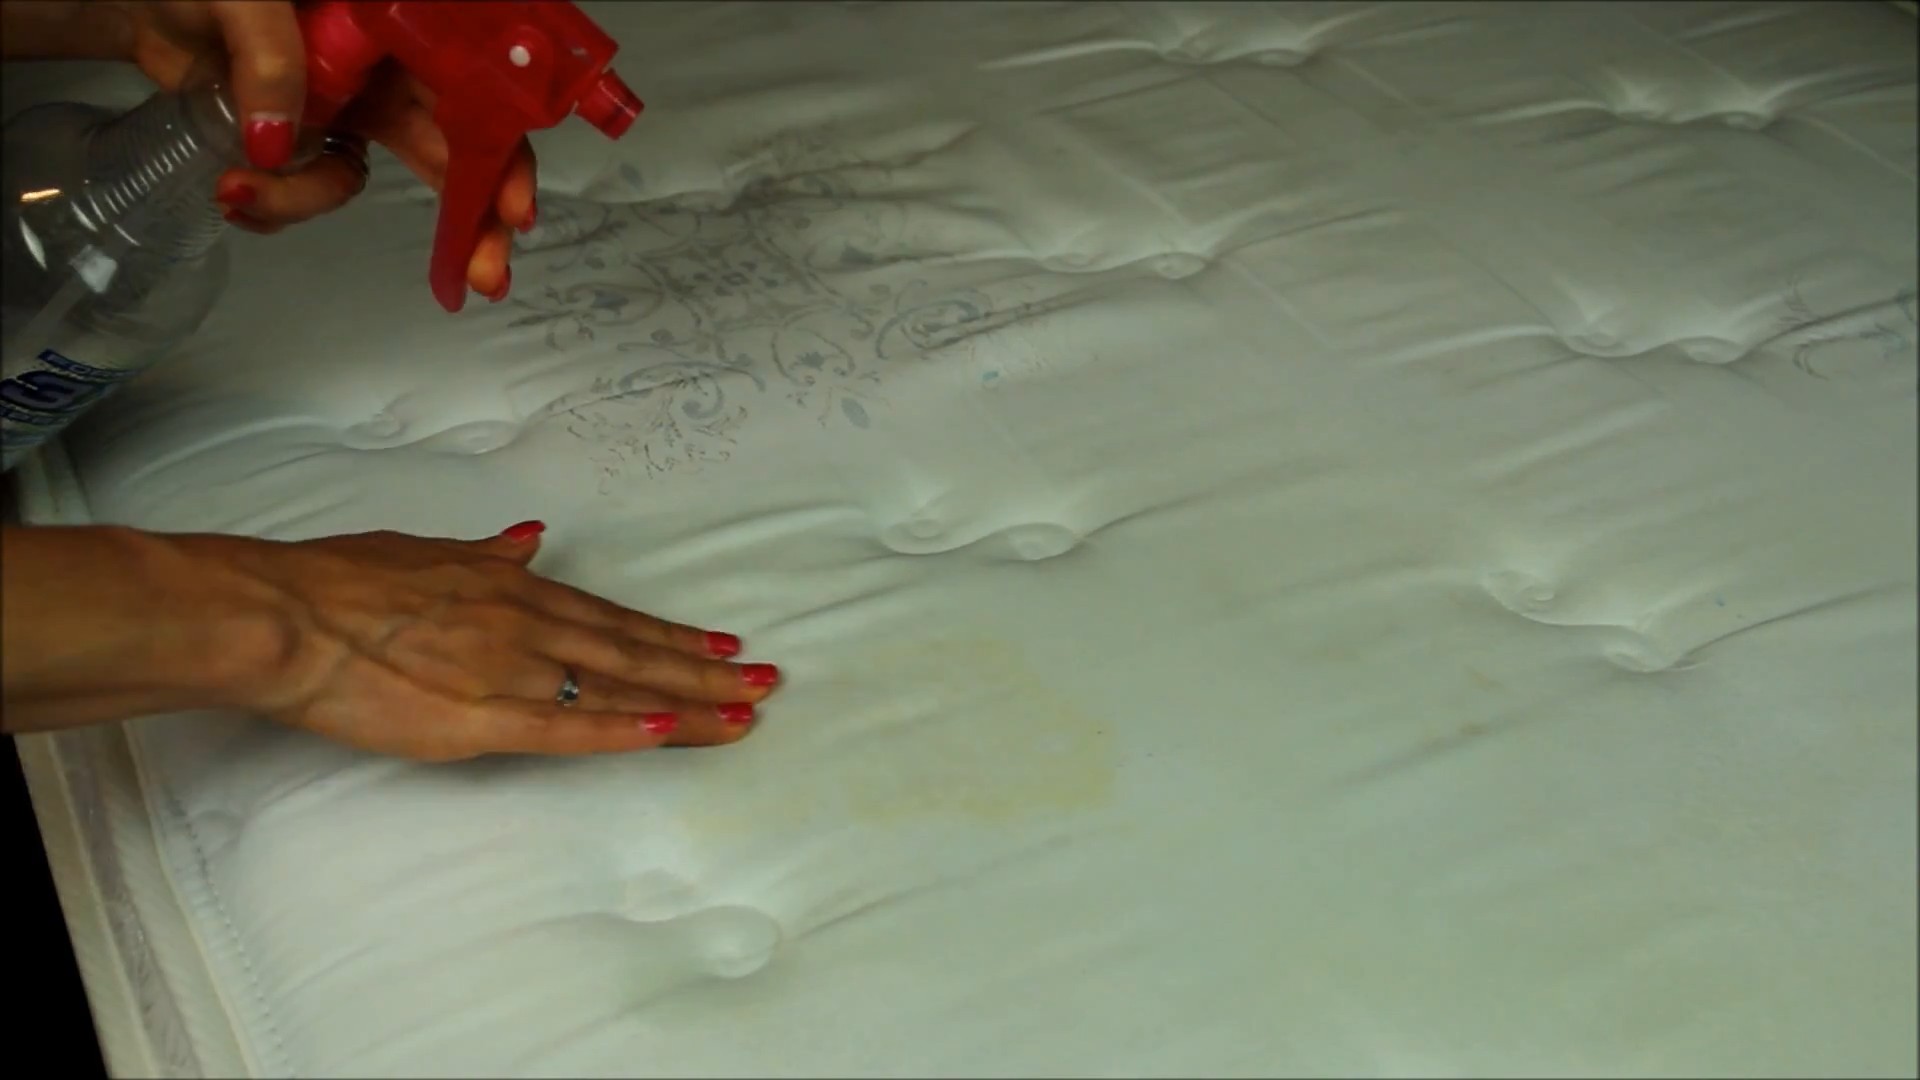
2. **Vinegar Power: Neutralizing the Odor**
* In a spray bottle, mix equal parts white vinegar and water.
* Generously spray the affected area with the vinegar solution. Make sure to saturate the stain, but don’t soak the material completely.
* Let the vinegar solution sit for 5-10 minutes. This will help neutralize the uric acid and break down the stain.
* Blot up the excess vinegar solution with clean paper towels or cloths.
3. **Baking Soda Magic: Absorbing Remaining Odors**
* Generously sprinkle baking soda over the entire affected area. Make sure to cover it completely.
* The baking soda will absorb any remaining moisture and odors.
* Let the baking soda sit for at least 2-3 hours, or even overnight for stubborn stains. The longer it sits, the more effective it will be.
4. **Vacuum Time: Cleaning Up the Baking Soda**
* Once the baking soda has had ample time to work its magic, vacuum it up thoroughly.
* Use the hose attachment to get into any crevices or hard-to-reach areas.
* Make sure to empty your vacuum cleaner bag or canister after vacuuming up the baking soda.
5. **Hydrogen Peroxide Boost (For Stubborn Stains):**
* Important: Test this solution in an inconspicuous area first to ensure it doesn’t discolor the material.
* In a clean spray bottle, mix 1/2 cup of 3% hydrogen peroxide with 1 teaspoon of mild, clear dish soap.
* Gently spray the affected area with the hydrogen peroxide solution.
* Use an old toothbrush or soft-bristled brush to gently scrub the stain.
* Let the solution sit for 1-2 hours.
* Blot up the excess solution with clean paper towels or cloths.
* Allow the area to air dry completely.
* Vacuum the area again to remove any remaining residue.
6. **Enzyme Cleaner (The Ultimate Weapon):**
* If the stain and odor persist after trying the above methods, an enzyme cleaner is your best bet.
* Follow the instructions on the enzyme cleaner bottle carefully.
* Generally, you’ll need to saturate the affected area with the enzyme cleaner and let it sit for the recommended amount of time (usually several hours or overnight).
* Do not use any other cleaning products in conjunction with the enzyme cleaner, as this can interfere with its effectiveness.
* Once the enzyme cleaner has had time to work, blot up any excess and allow the area to air dry completely.
Specific Surfaces: Tailoring Your Approach
The cleaning process may need to be slightly adjusted depending on the surface you’re dealing with. Here’s a breakdown for common surfaces:
Carpets:
* For carpets, it’s important to avoid over-wetting the area, as this can lead to mold and mildew growth.
* Use a wet/dry vacuum to extract as much moisture as possible after each step.
* Consider using a carpet cleaner with an upholstery attachment for a more thorough cleaning.
Upholstery:
* Always test any cleaning solution in an inconspicuous area before applying it to the entire piece of furniture.
* Use a soft cloth or sponge to apply the cleaning solutions, and avoid rubbing too vigorously.
* If possible, remove the cushion covers and wash them according to the manufacturer’s instructions.
Mattresses:
* Mattresses are particularly susceptible to moisture damage, so it’s crucial to avoid over-wetting them.
* Use a spray bottle to apply the cleaning solutions sparingly.
* After each step, blot up as much moisture as possible with clean towels.
* Consider using a mattress protector to prevent future stains.
* You can also use a fan to help speed up the drying process.
Preventing Future Accidents: Proactive Measures
While accidents are inevitable, there are steps you can take to minimize the risk of future pee stains:
* **For Pets:**
* Regularly take your pets outside to relieve themselves.
* Consider using potty training pads for puppies or older dogs with incontinence issues.
* Clean up accidents immediately to prevent stains and odors from setting in.
* **For Children:**
* Potty train your children at an appropriate age.
* Use waterproof mattress protectors and crib sheets.
* Keep a close eye on young children and take them to the bathroom frequently.
* **General Tips:**
* Avoid drinking excessive amounts of fluids before bed.
* Make sure your bathroom is easily accessible.
* Consider using a nightlight to help you navigate in the dark.
Important Considerations: Safety First!
* Always wear gloves when handling cleaning solutions.
* Avoid mixing different cleaning products, as this can create dangerous fumes.
* Keep cleaning products out of reach of children and pets.
* If you experience any irritation or allergic reaction, discontinue use immediately and consult a doctor.
* Ensure proper ventilation when cleaning, especially when using hydrogen peroxide or enzyme cleaners.
When to Call in the Professionals: Knowing Your Limits
Sometimes, despite your best efforts, a pee stain may be too stubborn to remove on your own. In these cases, it’s best to call in a professional cleaning service. They have the expertise and equipment to tackle even the most challenging stains and odors. Consider professional help if:
* The stain is very old or large.
* The material is delicate or valuable.
* You’ve tried multiple DIY methods without success.
* You’re concerned about damaging the material.
By following these steps and tips, you can effectively banish pee stains and odors from your home. Remember to act quickly, use the right tools, and be patient. With a little elbow grease and the right approach, you can restore your carpets, upholstery, and mattresses to their former glory! Good luck!
Conclusion
So, there you have it – a simple, effective, and budget-friendly way to tackle those dreaded pee stains! We’ve walked you through the process, highlighting why this DIY method is a game-changer for pet owners, parents, or anyone dealing with the occasional (or not-so-occasional) urine mishap.
But why is this DIY trick a must-try? Firstly, it’s incredibly cost-effective. Forget expensive, chemical-laden commercial cleaners that often mask the odor rather than eliminate it. This method utilizes ingredients you likely already have in your pantry: baking soda, vinegar, and dish soap. Secondly, it’s safer for your family and pets. You’re avoiding harsh chemicals that can irritate skin, lungs, and paws. And thirdly, it works! The combination of baking soda to absorb the stain and odor, vinegar to neutralize the ammonia, and dish soap to lift the residue creates a powerful cleaning synergy.
This isn’t just about removing the visible stain; it’s about eliminating the lingering odor that can tempt your furry friend to revisit the same spot. That’s where the real magic happens. By completely eradicating the scent, you’re breaking the cycle and preventing future accidents.
This DIY pee stain removal method is a true odor eliminator, not just a cover-up.
Now, let’s talk variations. While the basic recipe is highly effective, you can tailor it to your specific needs. For particularly stubborn stains, consider pre-treating the area with an enzyme cleaner designed for pet urine. These cleaners contain enzymes that break down the organic compounds in urine, making it easier to remove. You can find them at most pet stores or online.
Another variation involves the type of dish soap you use. Opt for a clear, dye-free dish soap to avoid potentially staining light-colored carpets or upholstery. A small amount goes a long way, so don’t overdo it.
For delicate fabrics, test the solution in an inconspicuous area first to ensure it doesn’t cause discoloration. You can also dilute the vinegar with water for extra caution.
And finally, remember that patience is key. Allow the baking soda to sit for at least several hours, or even overnight, to fully absorb the stain and odor. The longer it sits, the better the results.
We’re confident that this DIY trick will become your go-to solution for removing pee stains. It’s simple, safe, effective, and affordable. But don’t just take our word for it – try it yourself! We encourage you to give it a try and see the amazing results firsthand.
Once you’ve conquered those pesky pee stains, we’d love to hear about your experience. Share your before-and-after photos, tips, and variations in the comments below. Let’s build a community of stain-fighting experts and help each other keep our homes clean and fresh! Your insights could be invaluable to someone else struggling with the same problem. So, go ahead, unleash your inner cleaning guru and share your success story!
Frequently Asked Questions (FAQs)
What kind of vinegar should I use?
White distilled vinegar is the best choice for removing pee stains. It’s clear, inexpensive, and has a high acidity level, making it effective at neutralizing the ammonia in urine. Avoid using other types of vinegar, such as apple cider vinegar or balsamic vinegar, as they may contain pigments that could stain your carpet or upholstery. White vinegar is the workhorse of DIY cleaning for a reason, and it’s the perfect choice for this project.
Can I use this method on all types of surfaces?
While this method is generally safe for most surfaces, it’s always a good idea to test it in an inconspicuous area first, especially on delicate fabrics or dyed materials. For carpets and upholstery, test a small, hidden spot to ensure the solution doesn’t cause discoloration or damage. For hard surfaces like tile or wood, the method is usually safe, but be sure to wipe up any excess liquid promptly to prevent water damage. If you’re unsure about a particular surface, consult a professional cleaner.
How long should I leave the baking soda on the stain?
The longer you leave the baking soda on the stain, the better it will absorb the urine and odor. We recommend leaving it on for at least several hours, or even overnight. For particularly stubborn stains, you can leave it on for up to 24 hours. Just make sure to keep pets and children away from the area while the baking soda is working its magic. After the baking soda has done its job, vacuum it up thoroughly.
What if the stain is old and has already set in?
Old, set-in stains can be more challenging to remove, but don’t give up hope! You may need to repeat the process several times to achieve the desired results. You can also try pre-treating the area with an enzyme cleaner designed for pet urine. These cleaners contain enzymes that break down the organic compounds in urine, making it easier to remove. Follow the instructions on the enzyme cleaner carefully, and then proceed with the baking soda, vinegar, and dish soap method.
Will this method work on pet urine only, or can it be used for human urine as well?
This method is effective for removing both pet and human urine stains. The principles are the same: the baking soda absorbs the stain and odor, the vinegar neutralizes the ammonia, and the dish soap lifts the residue. However, the severity of the stain and odor may vary depending on the individual and the surface.
What if I don’t have vinegar? Can I use something else?
While vinegar is the most effective and readily available option, you can try using hydrogen peroxide as a substitute. However, hydrogen peroxide can bleach some fabrics, so it’s crucial to test it in an inconspicuous area first. Dilute the hydrogen peroxide with water (a 1:1 ratio) and apply it to the stain. Let it sit for a few minutes, then blot it up with a clean cloth. Follow with the baking soda and dish soap method.
How do I prevent my pet from urinating in the same spot again?
Preventing repeat offenses is key to keeping your home clean and fresh. Make sure to thoroughly clean the affected area to eliminate all traces of urine odor. You can also try using a pet repellent spray to discourage your pet from returning to the same spot. Ensure your pet has regular potty breaks and consider consulting with a veterinarian or animal behaviorist to address any underlying behavioral issues. Positive reinforcement training can also be helpful in teaching your pet to eliminate in the appropriate areas.
The smell is gone, but there’s still a faint stain. What should I do?
If the odor is gone but a faint stain remains, you can try using a carpet or upholstery cleaner specifically designed for stain removal. Follow the instructions on the cleaner carefully, and test it in an inconspicuous area first. You can also try using a steam cleaner to lift the remaining stain. If all else fails, you may need to consult a professional carpet or upholstery cleaner.
Is this method safe for children and pets?
Yes, this method is generally safe for children and pets, as it uses natural ingredients that are less harmful than harsh chemicals. However, it’s still important to keep children and pets away from the area while you’re cleaning and until the area is completely dry. Avoid allowing them to ingest the baking soda, vinegar, or dish soap. As with any cleaning product, it’s always best to exercise caution and keep these ingredients out of reach of children and pets.
How often should I clean areas where my pet has accidents?
It’s best to clean up accidents as soon as possible to prevent stains and odors from setting in. The frequency of cleaning will depend on the frequency of accidents. If your pet has frequent accidents, you may need to clean the affected areas daily or every other day. Regular cleaning will help to keep your home fresh and prevent your pet from developing a habit of urinating in inappropriate places.
Leave a Comment