

Senior cleaning hacks – let’s be honest, the words might not scream excitement, but trust me, the results will! Are you tired of spending hours scrubbing and bending, only to feel more exhausted than accomplished? I get it! Cleaning can become a real challenge as we navigate the golden years, and that’s precisely why I’ve compiled this treasure trove of DIY cleaning tricks designed specifically with seniors in mind.
For generations, resourceful homemakers have passed down cleaning secrets, often born out of necessity and a desire to maintain a comfortable and healthy living space. Think of your grandmother’s ingenious solutions – vinegar for everything, lemon juice for brightening, and baking soda for deodorizing. These weren’t just random concoctions; they were effective, affordable, and often gentler than harsh chemicals. We’re building on that legacy here!
But why do you *need* these senior cleaning hacks? Because life is too short to spend it struggling with tasks that can be simplified! These DIY solutions are all about working smarter, not harder. We’ll focus on techniques that minimize strain, utilize readily available ingredients, and deliver sparkling results without breaking the bank or your back. From tackling stubborn stains to maintaining a dust-free environment, these hacks will empower you to keep your home clean and comfortable, allowing you to enjoy your well-deserved relaxation and hobbies. Let’s dive in and reclaim your time and energy!
DIY Senior-Friendly Cleaning Hacks: Making Life Easier!
Hey everyone! As we (or our loved ones) get a little older, keeping up with household chores can become more challenging. But don’t worry, I’ve gathered some fantastic DIY cleaning hacks specifically designed to make cleaning easier and safer for seniors. These tips focus on minimizing strain, maximizing efficiency, and using readily available materials. Let’s dive in!
Hack 1: Extended Reach Cleaning Tools
This hack is all about bringing the cleaning to *you*, rather than you straining to reach it. We’re going to modify existing tools to give them extra length.
Materials You’ll Need:
* Old broom or mop handles (or purchase inexpensive replacements)
* Duct tape (heavy-duty is best)
* Strong adhesive glue (like Gorilla Glue or epoxy)
* Various cleaning tools: dusters, sponges, scrub brushes, microfiber cloths
* Scissors or utility knife
* Optional: PVC pipe connectors (for a more secure connection)
Step-by-Step Instructions:
1. Prepare the Handles: If you’re using old broom or mop handles, make sure they’re clean and dry. Remove any existing attachments. If you’re using new handles, you’re good to go!
2. Choose Your Cleaning Tool: Decide which cleaning tool you want to extend. This could be a duster for reaching high shelves, a sponge for cleaning the bathtub without bending, or a scrub brush for tackling floor stains.
3. Attach the Tool to the Handle (Method 1: Duct Tape): This is the simplest method. Position the cleaning tool at the end of the handle. Wrap duct tape tightly around the tool and the handle, overlapping the tape to create a strong bond. Use multiple layers of duct tape for extra security. Make sure the tool is firmly attached and doesn’t wobble.
4. Attach the Tool to the Handle (Method 2: Glue and Duct Tape): For a more permanent solution, apply a generous amount of strong adhesive glue to the end of the handle and the point of contact on the cleaning tool. Press the tool firmly onto the handle and hold it in place for a few minutes until the glue starts to set. Then, reinforce the connection with duct tape, wrapping it tightly around the tool and the handle. Allow the glue to dry completely according to the manufacturer’s instructions.
5. Attach the Tool to the Handle (Method 3: PVC Pipe Connector – Optional): This method provides the most secure connection. Find a PVC pipe connector that fits snugly over both the handle and the cleaning tool. Apply glue to the inside of the connector and slide it onto the handle. Then, apply glue to the other end of the connector and slide the cleaning tool into place. Secure with duct tape for extra reinforcement.
6. Test and Adjust: Once the adhesive is dry, test the extended reach cleaning tool. Make sure it’s sturdy and comfortable to use. If necessary, add more duct tape or glue to reinforce the connection. You can also adjust the angle of the cleaning tool for better reach and maneuverability.
7. Repeat for Other Tools: Repeat these steps for other cleaning tools that you want to extend. Consider creating a set of extended reach tools for different cleaning tasks.
Hack 2: DIY Grabber Tool for Cleaning Up Spills
Bending down to clean up spills can be difficult. This DIY grabber tool will help you pick up messes without straining your back.
Materials You’ll Need:
* Two wooden dowels (about 2-3 feet long)
* Strong rubber bands (thick ones work best)
* Foam padding or rubber grips (optional, for comfort)
* Duct tape
* Scissors or utility knife
Step-by-Step Instructions:
1. Prepare the Dowels: Make sure the wooden dowels are smooth and free of splinters. If desired, wrap the handles of the dowels with foam padding or rubber grips for added comfort. Secure the padding with duct tape.
2. Create the Gripping Mechanism: At one end of each dowel, attach a small piece of foam padding or rubber grip. This will provide a better grip on the items you’re picking up. Secure the padding with duct tape.
3. Connect the Dowels: Position the two dowels side by side. About 6-8 inches from the gripping ends, wrap a strong rubber band tightly around both dowels. This will create a pivot point.
4. Add More Rubber Bands: Add another rubber band a few inches above the first one. Continue adding rubber bands every few inches until you reach the end of the dowels. The more rubber bands you use, the stronger the gripping force will be.
5. Test and Adjust: Test the grabber tool by squeezing the handles together. The gripping ends should close and be able to pick up small objects. If the grip is too weak, add more rubber bands. If the grip is too strong, remove some rubber bands.
6. Reinforce with Duct Tape: For added durability, wrap duct tape around the rubber bands and the dowels. This will help prevent the rubber bands from slipping or breaking.
Hack 3: Homemade Cleaning Solutions with Natural Ingredients
Commercial cleaning products can contain harsh chemicals that can irritate sensitive skin and respiratory systems. These homemade cleaning solutions are gentle, effective, and use readily available ingredients.
A. All-Purpose Cleaner
Materials You’ll Need:
* Spray bottle
* 1 cup white vinegar
* 1 cup water
* 10-15 drops essential oil (lemon, lavender, or tea tree oil)
Step-by-Step Instructions:
1. Combine Ingredients: In the spray bottle, combine the white vinegar and water.
2. Add Essential Oil: Add the essential oil of your choice. Essential oils not only provide a pleasant scent but also have antibacterial and antifungal properties.
3. Shake Well: Shake the bottle well to mix the ingredients.
4. Use and Store: Spray the solution onto surfaces and wipe clean with a microfiber cloth. Store the cleaner in a cool, dark place.
B. Glass Cleaner
Materials You’ll Need:
* Spray bottle
* 1/4 cup white vinegar
* 2 cups water
* Optional: 1-2 drops dish soap
Step-by-Step Instructions:
1. Combine Ingredients: In the spray bottle, combine the white vinegar and water.
2. Add Dish Soap (Optional): If desired, add a drop or two of dish soap for extra cleaning power. Be careful not to add too much, as it can leave streaks.
3. Shake Well: Shake the bottle well to mix the ingredients.
4. Use and Store: Spray the solution onto glass surfaces and wipe clean with a microfiber cloth or newspaper. Store the cleaner in a cool, dark place.
C. Tub and Tile Cleaner
Materials You’ll Need:
* Spray bottle
* 1 cup baking soda
* 1/2 cup liquid dish soap
* 1/2 cup water
* Optional: 10 drops tea tree oil (for extra disinfecting power)
Step-by-Step Instructions:
1. Combine Ingredients: In a bowl, combine the baking soda, liquid dish soap, and water.
2. Add Tea Tree Oil (Optional): If desired, add tea tree oil for its antibacterial and antifungal properties.
3. Mix Well: Mix the ingredients until they form a smooth paste.
4. Transfer to Spray Bottle: Carefully transfer the paste to a spray bottle. You may need to add a little more water to make it easier to spray.
5. Use and Store: Spray the solution onto tub and tile surfaces and let it sit for 5-10 minutes. Then, scrub with a sponge or brush and rinse thoroughly with water. Store the cleaner in a cool, dark place.
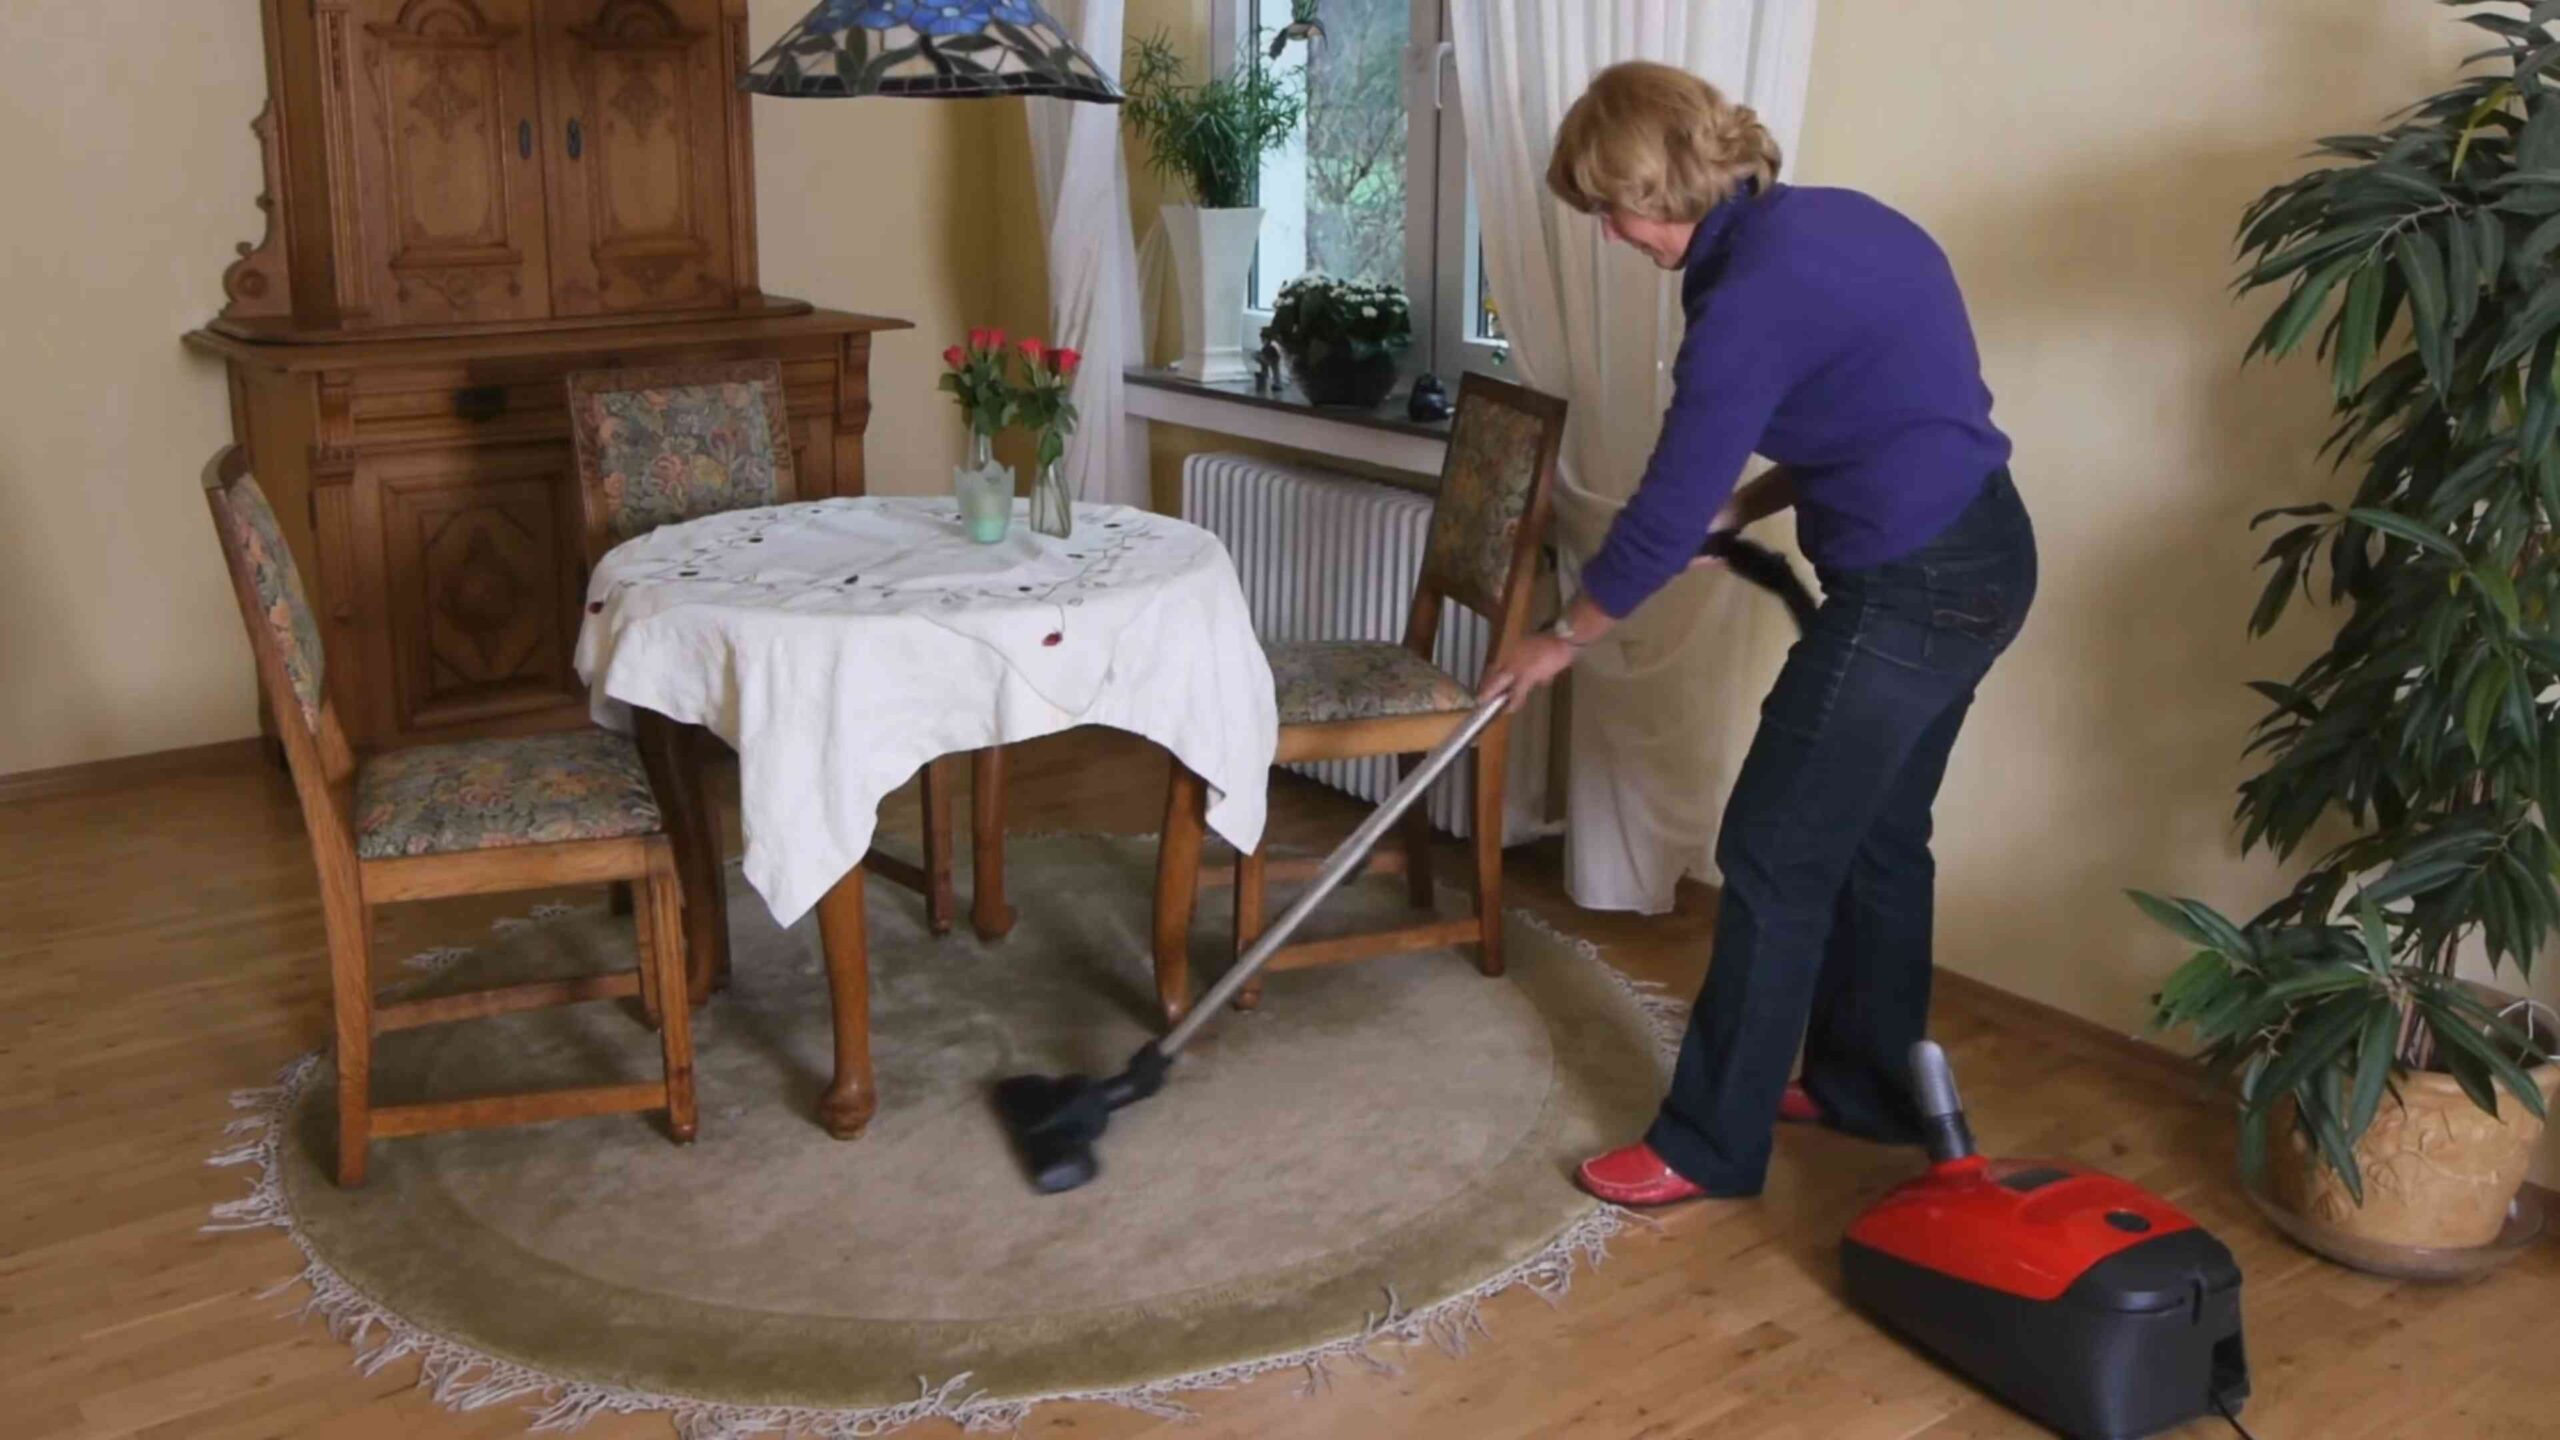
Hack 4: Lightweight Vacuum Cleaner Modification
Heavy vacuum cleaners can be difficult to maneuver, especially for seniors with mobility issues. This hack focuses on making your vacuum cleaner lighter and easier to use.
Materials You’ll Need:
* Lightweight vacuum cleaner (consider a stick vacuum or a handheld vacuum)
* Extension wand (if needed, to reach high areas)
* Shoulder strap (optional, for carrying a handheld vacuum)
* Bungee cords (optional, for securing the vacuum to a walker or wheelchair)
Step-by-Step Instructions:
1. Choose a Lightweight Vacuum: If you don’t already have one, invest in a lightweight vacuum cleaner. Stick vacuums and handheld vacuums are generally much lighter than traditional upright vacuums.
2. Attach Extension Wand (If Needed): If you need to reach high areas, attach an extension wand to your vacuum cleaner. This will allow you to clean ceilings, walls, and curtains without straining your back.
3. Add Shoulder Strap (For Handheld Vacuums
Conclusion
So, there you have it! These senior cleaning hacks aren’t just about making your home sparkle; they’re about reclaiming your independence, conserving energy, and enjoying a living space that truly supports your well-being. We’ve explored simple yet effective strategies, from leveraging the power of vinegar and baking soda to adapting cleaning tools for easier use. Remember, the goal isn’t perfection, but progress. Even incorporating one or two of these hacks into your routine can make a significant difference.
Why is this a must-try? Because these aren’t your average cleaning tips. They’re specifically designed with the needs and abilities of seniors in mind. They prioritize safety, minimize strain, and maximize results. Think about it: less bending, less scrubbing, and more time to enjoy the things you love. That’s a win-win!
Consider these variations to personalize your cleaning routine:
* **Scent Sensations:** If you’re sensitive to strong smells, opt for essential oils like lavender or lemon in your cleaning solutions. A few drops can add a refreshing aroma without being overpowering. You can also use fragrance-free cleaning products.
* **Tool Time:** Experiment with different types of long-handled tools to find what works best for you. A lightweight mop with a swivel head can be a game-changer for cleaning floors. Similarly, a duster with an extendable handle can reach high places without requiring you to climb on a stool.
* **Divide and Conquer:** Break down cleaning tasks into smaller, more manageable chunks. Instead of trying to clean the entire bathroom in one go, focus on the sink and countertop one day, the toilet another, and the shower on a separate day. This prevents fatigue and makes the task less daunting.
* **Embrace the Microfiber:** Microfiber cloths are incredibly effective at trapping dirt and dust, and they require less effort than traditional cloths. Invest in a set of microfiber cloths for various cleaning tasks.
* **Decluttering is Key:** The less clutter you have, the easier it is to clean. Regularly declutter your home to minimize the amount of surfaces you need to dust and clean. Donate or discard items you no longer need or use.
* **Safety First:** Always prioritize safety when cleaning. Wear non-slip shoes to prevent falls, and use grab bars in the bathroom if needed. Avoid using harsh chemicals that can irritate your skin or respiratory system.
We genuinely believe that these senior cleaning hacks can transform your cleaning experience. They’re not just about cleaning; they’re about empowering you to maintain a comfortable and healthy living environment with ease.
Now, we want to hear from you! Give these hacks a try and share your experiences in the comments below. What worked best for you? Do you have any additional tips to share? Your insights can help other seniors discover new and effective ways to keep their homes clean and comfortable. Let’s create a community of empowered seniors who are taking control of their cleaning routines!
Frequently Asked Questions (FAQ)
Q: Are these cleaning hacks safe for seniors with mobility issues?
A: Absolutely! In fact, safety is a primary consideration in all of these senior cleaning hacks. We focus on techniques that minimize bending, stretching, and heavy lifting. Using long-handled tools, breaking tasks into smaller chunks, and prioritizing decluttering are all designed to reduce strain and prevent falls. However, it’s always important to listen to your body and avoid pushing yourself beyond your limits. If you have specific mobility concerns, consult with your doctor or occupational therapist for personalized recommendations.
Q: What if I have allergies or sensitivities to certain cleaning products?
A: We understand that many seniors have allergies or sensitivities to harsh chemicals. That’s why we emphasize the use of natural cleaning solutions like vinegar, baking soda, and lemon juice. These ingredients are generally safe and effective for most people. However, if you have known allergies, always test a small, inconspicuous area before applying any new cleaning solution to a larger surface. You can also opt for fragrance-free cleaning products or consult with your doctor or allergist for recommendations on hypoallergenic cleaning products.
Q: I have arthritis. Are there any specific cleaning tools that can help me?
A: Yes, there are several cleaning tools specifically designed for people with arthritis. Look for tools with ergonomic handles that are easy to grip and hold. Power scrubbers can also be helpful for cleaning tubs, showers, and other surfaces that require scrubbing. Lightweight mops and dusters can reduce strain on your joints. Consider investing in a good pair of cleaning gloves that provide cushioning and support for your hands.
Q: How often should I clean my home?
A: The frequency of cleaning depends on your individual needs and preferences. However, as a general guideline, it’s recommended to do a light cleaning of high-traffic areas, such as the kitchen and bathroom, once or twice a week. A more thorough cleaning of the entire house can be done every two to four weeks. Remember, the goal is to maintain a clean and healthy living environment, not to achieve perfection. Don’t be afraid to adjust your cleaning schedule to fit your abilities and energy levels.
Q: What are some tips for preventing clutter from accumulating in my home?
A: Clutter can make cleaning more difficult and time-consuming. To prevent clutter from accumulating, try these tips:
* **One In, One Out:** For every new item you bring into your home, get rid of something similar.
* **Regular Decluttering:** Set aside a few minutes each day or week to declutter a specific area of your home.
* **Designated Storage:** Assign a specific place for everything you own.
* **Donation Station:** Keep a box or bag handy for items you want to donate.
* **Avoid Impulse Purchases:** Think carefully before buying anything new. Do you really need it?
* **Digital Decluttering:** Don’t forget to declutter your digital life as well. Delete unnecessary files, unsubscribe from unwanted emails, and organize your photos.
Q: Can I hire someone to help me with cleaning?
A: Absolutely! If you find it difficult to clean your home on your own, consider hiring a professional cleaning service. There are many reputable cleaning companies that offer services specifically tailored to the needs of seniors. You can also ask friends, family members, or neighbors for recommendations. When hiring a cleaning service, be sure to discuss your specific needs and preferences, and ask for references.
Q: What are some resources for seniors who need help with home maintenance?
A: There are many organizations and programs that offer assistance with home maintenance for seniors. These resources can help with tasks such as cleaning, repairs, yard work, and snow removal. Contact your local Area Agency on Aging or senior center for information on available resources in your area. You can also check with national organizations such as the National Council on Aging and the AARP.
Q: How can I make cleaning more enjoyable?
A: Cleaning doesn’t have to be a chore! Here are some tips for making it more enjoyable:
* **Listen to Music or Podcasts:** Put on your favorite tunes or listen to an interesting podcast while you clean.
* **Invite a Friend:** Clean with a friend or family member to make it more social.
* **Reward Yourself:** Treat yourself to something special after you finish cleaning.
* **Focus on the Benefits:** Remind yourself of the benefits of a clean home, such as improved health and well-being.
* **Be Mindful:** Pay attention to the sights, smells, and textures of cleaning. This can help you stay present and engaged in the task.
* **Celebrate Small Victories:** Acknowledge and celebrate your accomplishments, no matter how small.
We hope these senior cleaning hacks and FAQs have been helpful. Remember, cleaning is just one aspect of maintaining a healthy and fulfilling life. Don’t be afraid to ask for help when you need it, and focus on enjoying the things that matter most to you.

Leave a Comment