

Simple Cleaning Routine Home: Are you tired of spending your weekends scrubbing and stressing over a messy house? I know I used to be! It felt like I was constantly battling dust bunnies and grime, leaving me with little time to actually enjoy my home. But what if I told you there’s a better way? A way to maintain a clean and comfortable living space without sacrificing your precious free time?
For centuries, cultures around the world have developed their own unique cleaning rituals, often passed down through generations. From the ancient Egyptians using natron (a naturally occurring salt mixture) to clean their homes, to the Japanese tradition of ōsōji (a thorough year-end cleaning), the desire for a clean and organized home is deeply ingrained in human history. These traditions highlight not just cleanliness, but also the importance of creating a healthy and harmonious living environment.
That’s why I’ve put together this guide to help you establish a simple cleaning routine home that’s both effective and manageable. We’ll break down the overwhelming task of cleaning into smaller, bite-sized chunks, making it easy to stay on top of things. This isn’t about achieving spotless perfection; it’s about creating a sustainable system that allows you to enjoy a cleaner, more comfortable home with minimal effort. Ready to reclaim your weekends and say goodbye to cleaning overwhelm? Let’s dive in!
DIY Deep Cleaning Routine: Sparkling Home, Happy You!
Hey there, fellow cleaning enthusiasts! Let’s face it, cleaning isn’t always the most glamorous activity, but a clean home is a happy home, right? I’m going to walk you through my go-to deep cleaning routine that’s manageable, effective, and leaves your space feeling refreshed. We’ll break it down room by room, so you can tackle it at your own pace. Get ready to roll up your sleeves and get cleaning!
General Supplies Checklist
Before we dive into specific rooms, let’s gather our cleaning arsenal. Having everything ready beforehand will save you time and energy. Here’s what I usually keep on hand:
* Microfiber cloths: These are my absolute favorite! They’re super absorbent, reusable, and great for dusting and wiping surfaces.
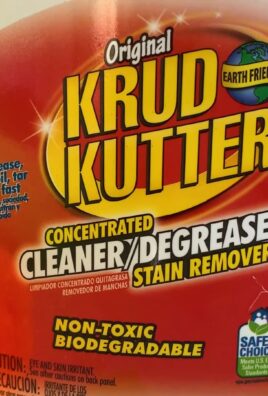
* All-purpose cleaner: Choose your favorite! I prefer a natural, eco-friendly option.
* Glass cleaner: For streak-free windows and mirrors.
* Bathroom cleaner: Specifically designed for tackling soap scum and grime.
* Toilet bowl cleaner: A must-have for a sparkling clean toilet.
* Disinfectant wipes or spray: For quick sanitizing of high-touch surfaces.
* Vacuum cleaner: With attachments for different surfaces.
* Mop and bucket: For cleaning hard floors.
* Baking soda: A natural deodorizer and mild abrasive cleaner.
* White vinegar: Another natural cleaning powerhouse!
* Rubber gloves: To protect your hands.
* Sponges: For scrubbing stubborn stains.
* Scrub brush: For grout and other tough-to-reach areas.
* Trash bags: For easy disposal of waste.
* Old toothbrush: Perfect for cleaning small crevices.
* Spray bottles: For diluting cleaning solutions.
Kitchen Deep Clean: From Grime to Gleam
The kitchen is often the heart of the home, but it can also be a magnet for dirt and grime. Let’s get it sparkling!
1. Clear the Clutter: Start by removing everything from your countertops. This includes appliances, utensils, and anything else that’s taking up space. Put away dishes, wipe down small appliances, and get ready for the real cleaning.
2. Clean the Sink:
* Rinse the sink thoroughly with water.
* Sprinkle baking soda all over the sink surface.
* Pour white vinegar over the baking soda. It will fizz!
* Let it sit for a few minutes.
* Scrub the sink with a sponge or scrub brush.
* Rinse thoroughly with water.
* For extra shine, use a stainless steel cleaner.
3. Wipe Down Countertops:
* Spray your countertops with all-purpose cleaner.
* Let it sit for a minute or two.
* Wipe clean with a microfiber cloth.
* Pay special attention to areas where food is prepared.
4. Clean the Microwave:
* Place a microwave-safe bowl filled with water and a few slices of lemon or a tablespoon of vinegar inside the microwave.
* Microwave on high for 3-5 minutes, or until the water boils and the microwave is steamy.
* Let it sit for a few minutes to allow the steam to loosen any stuck-on food.
* Carefully remove the bowl and wipe down the inside of the microwave with a sponge or cloth.
5. Clean the Oven:
* Important: Always follow the manufacturer’s instructions for cleaning your oven.
* Remove oven racks and soak them in hot, soapy water.
* Scrape away any loose debris from the inside of the oven.
* Apply oven cleaner according to the product instructions.
* Let it sit for the recommended time.
* Wipe clean with a damp cloth.
* Rinse thoroughly.
* Clean the oven racks and return them to the oven.
6. Clean the Stovetop:
* Remove grates and burner caps.
* Soak them in hot, soapy water.
* Wipe down the stovetop with all-purpose cleaner.
* Use a scrub brush to remove any stubborn stains.
* Rinse thoroughly.
* Clean the grates and burner caps and return them to the stovetop.
7. Clean the Refrigerator:
* Remove all food from the refrigerator.
* Discard any expired or spoiled items.
* Remove shelves and drawers and wash them in hot, soapy water.
* Wipe down the inside of the refrigerator with all-purpose cleaner.
* Pay special attention to spills and stains.
* Dry the shelves and drawers and return them to the refrigerator.
* Return the food to the refrigerator, organizing it as you go.
8. Clean the Dishwasher:
* Remove any food debris from the bottom of the dishwasher.
* Place a dishwasher-safe cup filled with white vinegar on the top rack.
* Run the dishwasher on a hot cycle.
* For extra cleaning power, sprinkle baking soda on the bottom of the dishwasher before running the cycle.
9. Sweep and Mop the Floor:
* Sweep the floor to remove any loose dirt and debris.
* Mop the floor with your favorite floor cleaner.
* Pay special attention to areas around the stove and sink.
Bathroom Blitz: Sparkling Clean from Top to Bottom
The bathroom is another area that requires regular deep cleaning. Let’s tackle the grime and make it shine!
1. Clear the Clutter: Remove everything from the countertops, shelves, and shower. This includes toiletries, towels, and anything else that’s taking up space.
2. Clean the Toilet:
* Pour toilet bowl cleaner into the toilet bowl.
* Let it sit for the recommended time.
* Scrub the toilet bowl with a toilet brush.
* Flush the toilet.
* Wipe down the exterior of the toilet with disinfectant wipes or spray.
3. Clean the Shower/Tub:
* Spray the shower/tub with bathroom cleaner.
* Let it sit for a few minutes.
* Scrub the shower/tub with a sponge or scrub brush.
* Pay special attention to soap scum and mildew.
* Rinse thoroughly with water.
* For stubborn stains, try using a paste of baking soda and water.
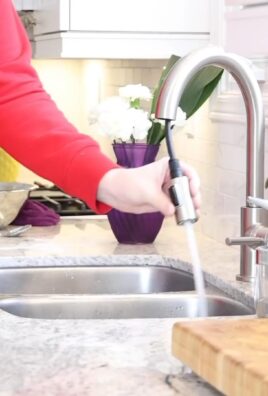
4. Clean the Sink and Countertop:
* Rinse the sink with water.
* Apply all-purpose cleaner to the sink and countertop.
* Wipe clean with a microfiber cloth.
* Pay special attention to areas around the faucet and drain.
5. Clean the Mirror:
* Spray the mirror with glass cleaner.
* Wipe clean with a microfiber cloth.
* For streak-free results, use a clean, dry microfiber cloth.
6. Clean the Floor:
* Sweep or vacuum the floor to remove any loose dirt and debris.
* Mop the floor with your favorite floor cleaner.
* Pay special attention to areas around the toilet and shower.
7. Clean the Grout:
* Mix baking soda and water to form a paste.
* Apply the paste to the grout.
* Let it sit for a few minutes.
* Scrub the grout with an old toothbrush or grout brush.
* Rinse thoroughly with water.
8. Replace Towels and Toiletries: Put back all your clean towels and toiletries.
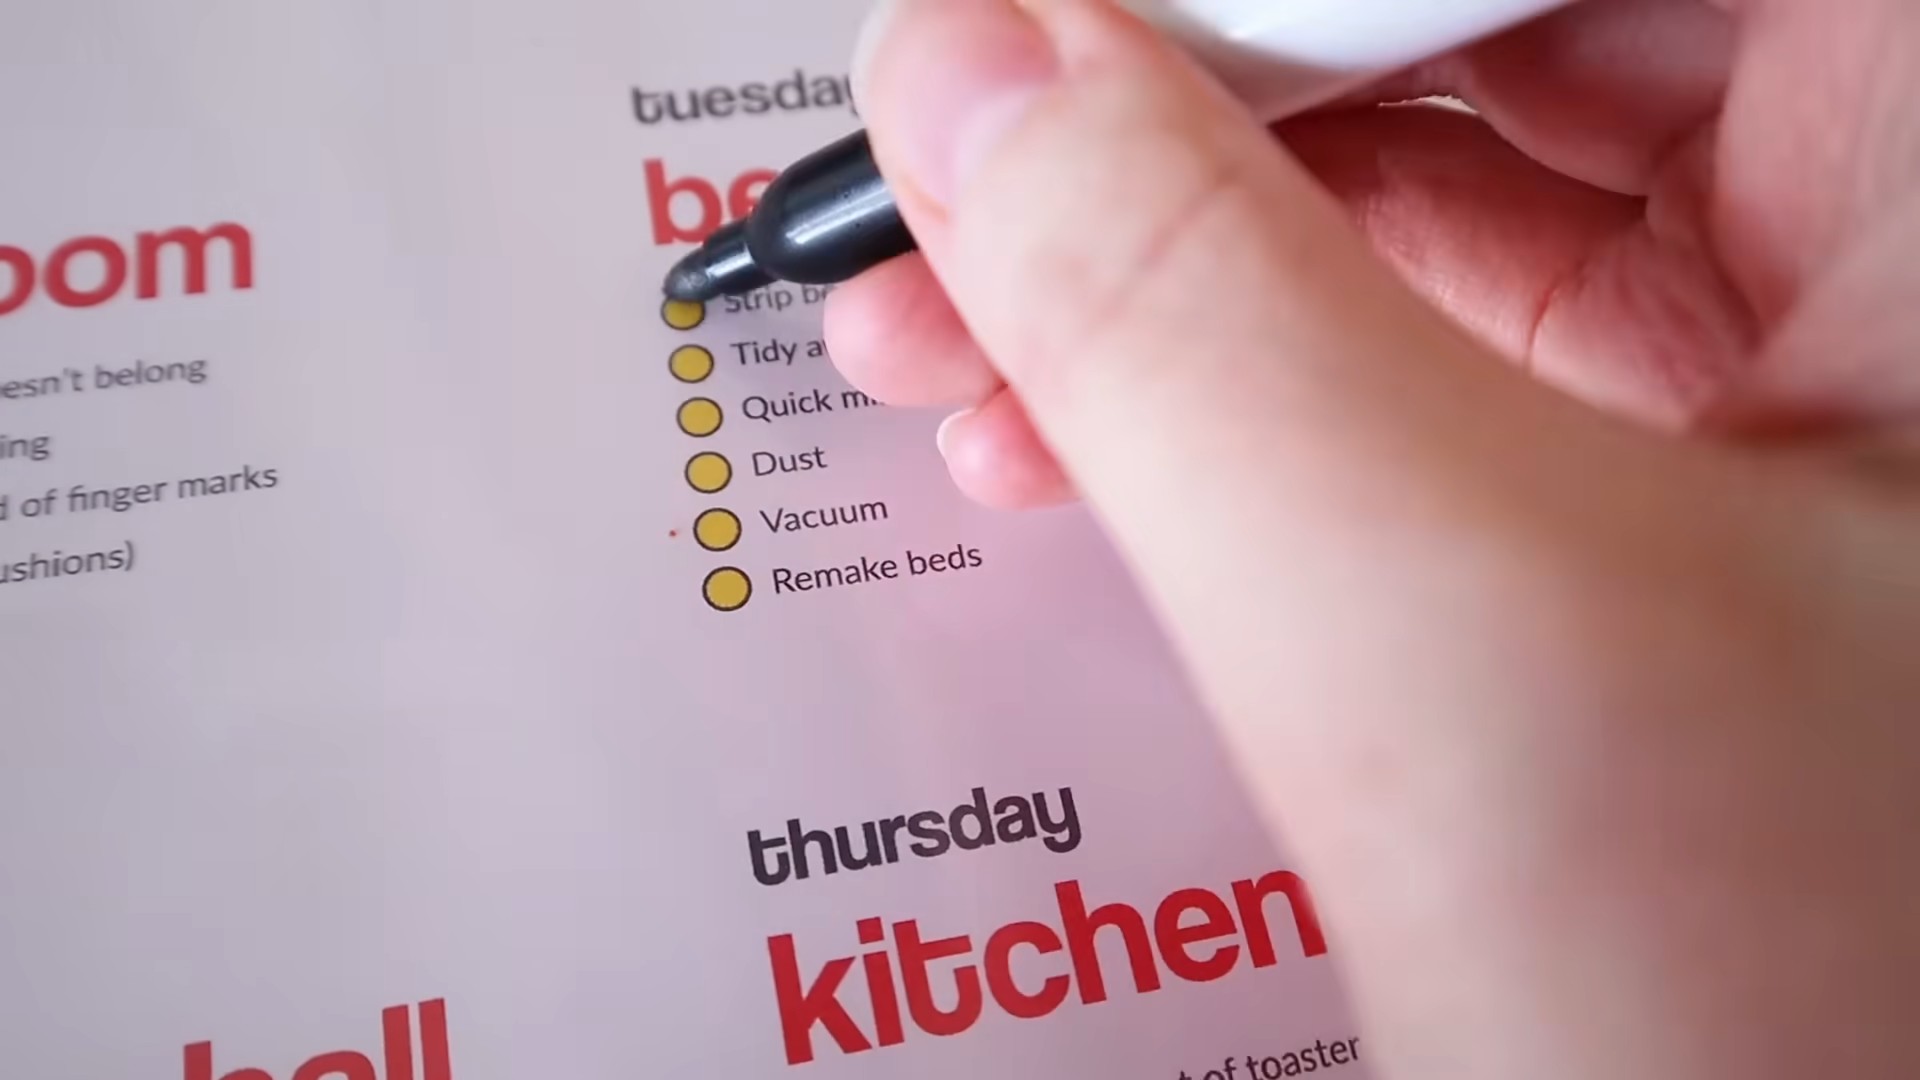
Living Room Refresh: Dust-Free and Cozy
The living room is where we relax and unwind, so let’s make sure it’s clean and inviting.
1. Declutter: Remove any items that don’t belong in the living room. This includes toys, books, and anything else that’s out of place.
2. Dust:
* Dust all surfaces, including furniture, shelves, and picture frames.
* Use a microfiber cloth or a duster.
* Pay special attention to hard-to-reach areas, such as ceiling fans and light fixtures.
3. Vacuum:
* Vacuum the carpets and rugs.
* Use the attachments to vacuum upholstery and hard-to-reach areas.
4. Clean Windows and Mirrors:
* Spray windows and mirrors with glass cleaner.
* Wipe clean with a microfiber cloth.
5. Fluff Pillows and Blankets:
Conclusion
So, there you have it! This simple cleaning routine for your home isn’t just another chore on your to-do list; it’s a game-changer for your well-being and the overall atmosphere of your living space. We’ve walked through a streamlined approach that tackles the essential areas, leaving you with a sparkling clean home without sacrificing your precious time.
Why is this DIY trick a must-try? Because it’s efficient, cost-effective, and customizable. You’re not relying on harsh chemicals or expensive cleaning services. Instead, you’re empowering yourself to create a healthier and more inviting environment using readily available ingredients and a straightforward plan. Think of the satisfaction of knowing you’ve created a clean and comfortable haven for yourself and your loved ones, all while saving money and reducing your environmental impact.
But the beauty of this simple cleaning routine lies in its adaptability. Feel free to tailor it to your specific needs and preferences. For instance, if you’re particularly sensitive to certain scents, experiment with different essential oils in your homemade cleaning solutions. Lavender, lemon, and eucalyptus are all excellent choices for their antibacterial properties and refreshing aromas.
If you have pets, you might want to focus on areas prone to pet hair and dander. A quick vacuuming session followed by a wipe-down with a pet-friendly cleaning solution can make a world of difference. Consider adding a baking soda sprinkle to carpets before vacuuming to neutralize odors.
For those with busy schedules, break down the routine into even smaller chunks. Dedicate 15 minutes each day to a specific task, such as cleaning the bathroom sink or wiping down kitchen counters. This approach makes the entire process less daunting and more manageable.
And don’t forget the power of decluttering! Before you even begin cleaning, take a few minutes to remove any unnecessary items from surfaces. This simple step can significantly reduce the amount of time you spend dusting and wiping.
We genuinely believe that incorporating this simple cleaning routine into your life will have a positive impact. It’s not just about having a clean house; it’s about creating a space that supports your physical and mental health. A clean and organized home can reduce stress, improve focus, and boost your overall mood.
So, what are you waiting for? Give this DIY cleaning routine a try and experience the difference for yourself. We’re confident that you’ll be amazed at how easy and effective it is.
We’d love to hear about your experiences! Share your tips, variations, and before-and-after photos in the comments below. Let’s create a community of clean home enthusiasts and inspire each other to maintain healthy and happy living spaces. Your insights could be invaluable to others who are just starting their cleaning journey. Let us know what worked best for you, any challenges you encountered, and how you adapted the routine to fit your lifestyle. Together, we can make cleaning less of a chore and more of a rewarding experience.
Now, let’s dive into some frequently asked questions to address any lingering concerns and provide further guidance.
FAQ
What if I don’t have all the ingredients for the homemade cleaning solutions?
Don’t worry! The beauty of DIY cleaning is its flexibility. If you’re missing an ingredient, you can often substitute it with something else. For example, if you don’t have white vinegar, you can use lemon juice as a substitute. If you don’t have essential oils, you can simply omit them or use a different scent that you enjoy. The key is to experiment and find what works best for you. Remember, the goal is to create a cleaning solution that is effective and safe for your home.
How often should I perform this simple cleaning routine?
The frequency of your cleaning routine will depend on your lifestyle and the size of your home. However, we recommend performing a thorough cleaning at least once a week. This will help to prevent dirt and grime from building up and keep your home looking its best. You can also incorporate smaller cleaning tasks into your daily routine, such as wiping down kitchen counters after meals or sweeping the floors.
Are these homemade cleaning solutions safe for all surfaces?
While most of the ingredients used in these cleaning solutions are generally safe for most surfaces, it’s always a good idea to test them in an inconspicuous area first. This is especially important for delicate surfaces like wood or marble. Avoid using abrasive cleaners on these surfaces, as they can scratch or damage them. If you’re unsure about whether a cleaning solution is safe for a particular surface, consult the manufacturer’s instructions or contact a professional cleaner.
I have allergies. Are these cleaning solutions safe for me?
If you have allergies, it’s important to be cautious when using any cleaning products, including homemade solutions. Before using a new cleaning solution, test it on a small area of your skin to see if you have any reaction. You can also wear gloves and a mask while cleaning to minimize your exposure to allergens. If you’re allergic to certain ingredients, such as essential oils, simply omit them from the recipe or use a different ingredient that you’re not allergic to.
How do I store the homemade cleaning solutions?
Store your homemade cleaning solutions in airtight containers, preferably glass bottles or spray bottles. Label each container clearly with the name of the solution and the date it was made. Store the solutions in a cool, dark place away from direct sunlight and heat. This will help to preserve their effectiveness and prevent them from spoiling. Most homemade cleaning solutions will last for several weeks or even months if stored properly.
What if I don’t have time to make my own cleaning solutions?
If you don’t have time to make your own cleaning solutions, you can still use this simple cleaning routine with store-bought products. Just be sure to choose products that are safe for your home and your family. Look for products that are labeled as “natural” or “eco-friendly.” You can also find many effective cleaning products that are made with plant-based ingredients.
How can I get my family involved in the cleaning routine?
Getting your family involved in the cleaning routine can make it less of a chore for you and teach your children valuable life skills. Assign age-appropriate tasks to each family member. For example, young children can help with dusting or putting away toys, while older children can help with vacuuming or cleaning the bathroom. Make cleaning a fun activity by playing music or turning it into a game. You can also reward your family members for their help with a special treat or activity.
What are some tips for making cleaning more enjoyable?
Cleaning doesn’t have to be a dreaded chore. Here are some tips for making it more enjoyable:
* Put on some music or a podcast that you enjoy.
* Break down the cleaning into smaller, more manageable tasks.
* Reward yourself after completing a cleaning task.
* Invite a friend or family member to help you clean.
* Focus on the positive aspects of cleaning, such as the feeling of accomplishment and the satisfaction of having a clean home.
How do I deal with stubborn stains?
Stubborn stains can be frustrating, but don’t give up! There are many effective ways to remove them. For example, you can try using a paste of baking soda and water to remove stains from countertops or sinks. You can also use a vinegar and water solution to remove stains from carpets or upholstery. For tougher stains, you may need to use a commercial stain remover. Always test the stain remover in an inconspicuous area first to make sure it doesn’t damage the surface.
How do I maintain a clean home between deep cleanings?
Maintaining a clean home between deep cleanings is all about establishing good habits. Make it a habit to wipe down kitchen counters after meals, sweep the floors regularly, and put away clutter as soon as possible. You can also use a daily cleaning checklist to stay on track. By incorporating these simple habits into your daily routine, you can keep your home looking clean and tidy with minimal effort.

Leave a Comment