

Sparkling baseboards DIY projects might not be the first thing that springs to mind when you think about home improvement, but trust me, they can make a HUGE difference! I’ve always been a bit obsessed with the details, and I’ve learned that clean, gleaming baseboards can instantly elevate the entire look of a room. Think of it like this: you can have the most stylish furniture and perfectly painted walls, but if your baseboards are dusty, scuffed, or just plain grimy, it’s like wearing a stunning outfit with muddy shoes.
Historically, baseboards served a practical purpose – protecting walls from furniture and foot traffic. But over time, they’ve become an important architectural detail, adding character and charm to homes. Whether you live in a modern minimalist space or a cozy Victorian cottage, your baseboards deserve some love! And that’s where this sparkling baseboards DIY guide comes in.
Let’s be honest, cleaning baseboards is nobody’s favorite chore. It’s often overlooked, leading to a build-up of dust, dirt, and grime that can be tough to tackle. But with a few simple tricks and DIY solutions, I’m going to show you how to achieve sparkling clean baseboards without breaking your back or spending a fortune on expensive cleaning products. Get ready to transform your home, one baseboard at a time!

DIY Sparkling Baseboards: A Guide to Gleaming Trim
Okay, let’s face it, baseboards are the unsung heroes of our homes. They protect our walls, add a touch of elegance, but they also collect dust, grime, and all sorts of mystery gunk. Cleaning them can feel like a chore, but trust me, with this DIY hack, you’ll actually *enjoy* the process (or at least not dread it!). I’m going to walk you through my tried-and-true method for getting your baseboards sparkling clean, leaving your whole room feeling fresher.
What You’ll Need: Your Arsenal of Clean
Before we dive in, let’s gather our supplies. Having everything ready will make the whole process smoother and faster.
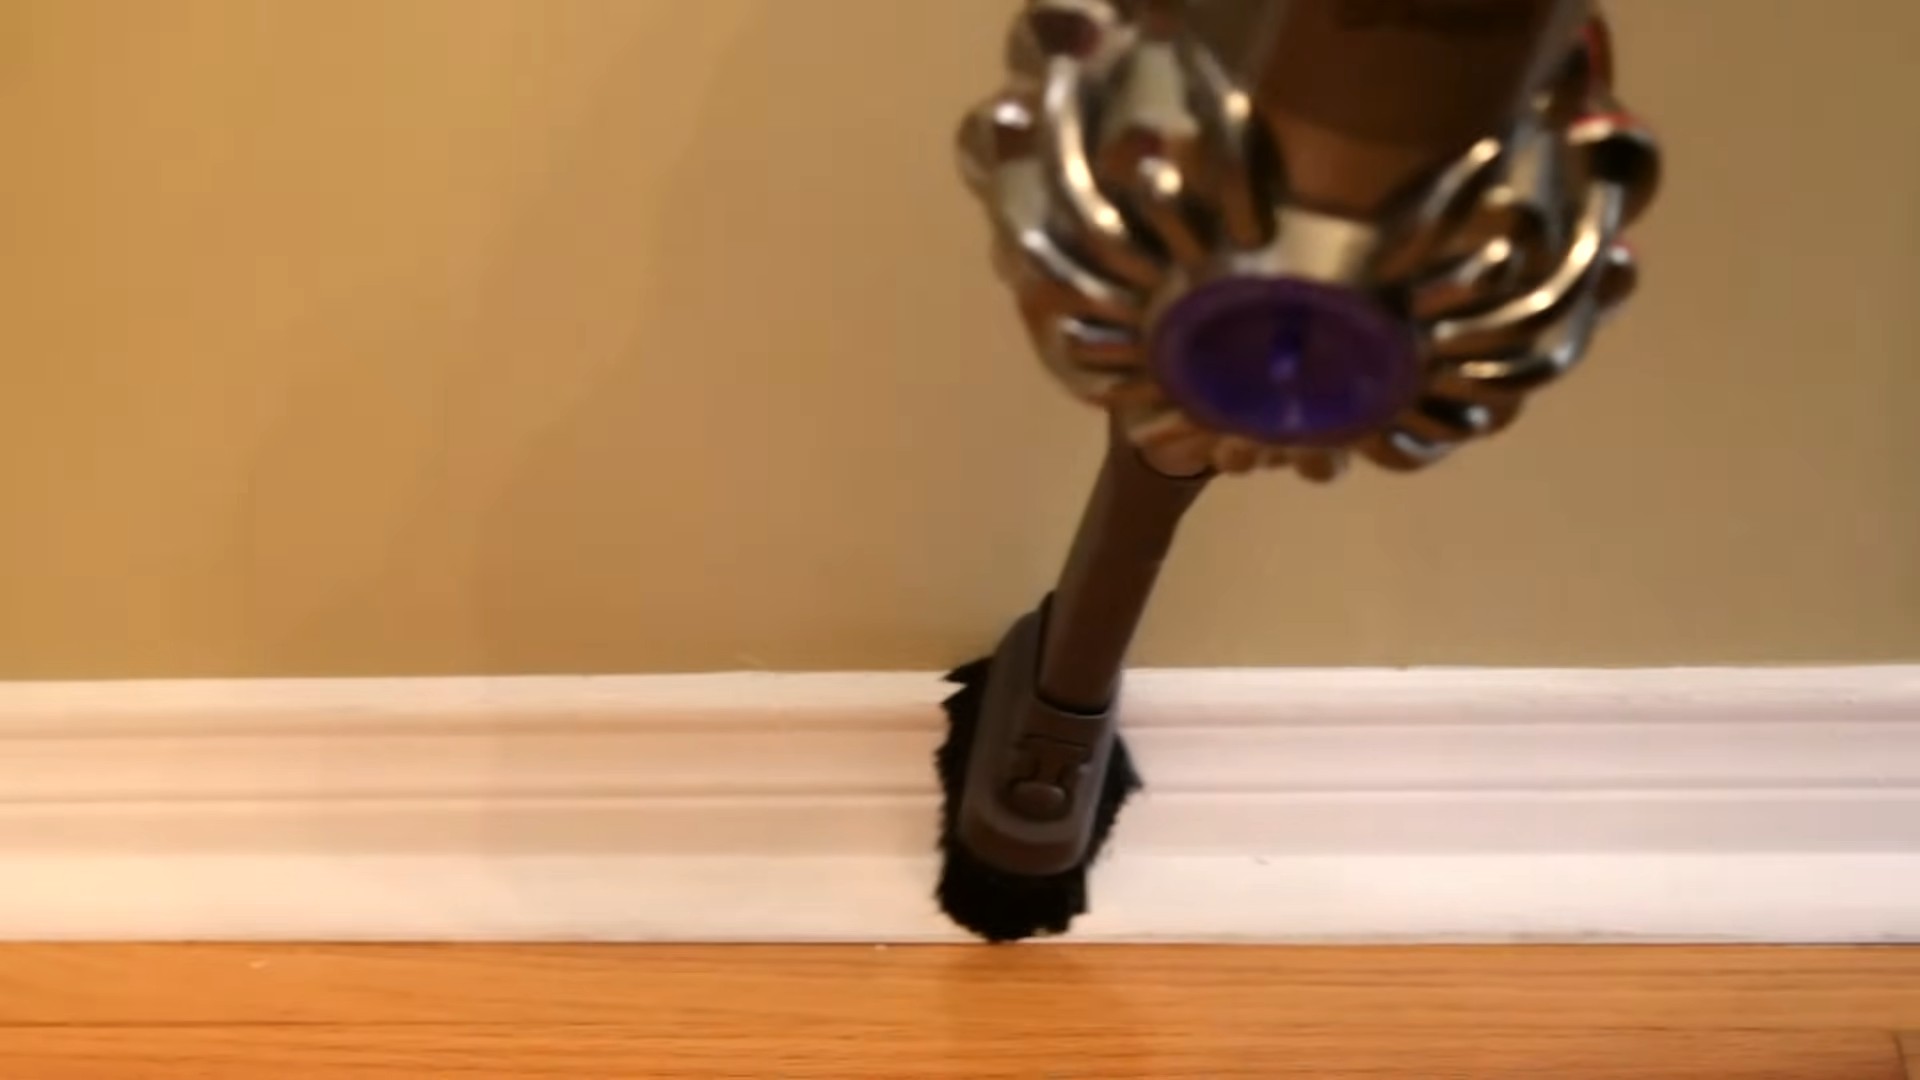
* Vacuum Cleaner with Brush Attachment: This is your first line of defense against dust bunnies and loose debris.
* Microfiber Cloths (Lots!): These are my go-to for cleaning almost everything. They’re gentle, absorbent, and reusable.
* Two Buckets: One for your cleaning solution and one for rinsing.
* Warm Water: The base of our cleaning power.
* Mild Dish Soap: A few drops go a long way in cutting through grime.
* White Vinegar: This is my secret weapon! It’s a natural disinfectant and helps remove stubborn stains.
* Spray Bottle: For applying a targeted cleaning solution.
* Old Toothbrush or Small Scrub Brush: Perfect for getting into those tight corners and crevices.
* Magic Eraser (Optional): For tackling scuff marks and stubborn stains. Use with caution, as it can be abrasive.
* Protective Gloves: To keep your hands clean and protected from the cleaning solution.
* Knee Pads or a Comfortable Cushion: Trust me, your knees will thank you!
* Dry Towel: For drying the baseboards after cleaning.
Prepping for Success: Setting the Stage
Before you start scrubbing, it’s important to prep the area. This will make the cleaning process more efficient and prevent any accidental damage.
1. Clear the Area: Move any furniture, rugs, or other items that might be in the way. This will give you plenty of room to maneuver and prevent you from accidentally bumping into things.
2. Protect Your Floors: Place a towel or drop cloth along the baseboards to protect your flooring from drips and spills. This is especially important if you have hardwood floors.
3. Open a Window: Ventilation is key! Open a window to allow fresh air to circulate and prevent the buildup of cleaning fumes.
The Cleaning Process: Step-by-Step to Sparkling
Now for the fun part! Follow these steps to get your baseboards looking their best.
1. Vacuum Away the Loose Debris: Using your vacuum cleaner with the brush attachment, thoroughly vacuum the baseboards to remove any loose dust, dirt, and debris. Pay special attention to corners and crevices where dust tends to accumulate. I like to go over each section a couple of times to make sure I get everything.
2. Prepare Your Cleaning Solution: In one of your buckets, mix warm water with a few drops of mild dish soap and a splash of white vinegar. The vinegar helps to cut through grime and disinfect the surface. Don’t overdo it with the soap, as too much can leave a residue.
3. Dampen Your Microfiber Cloth: Dip a microfiber cloth into the cleaning solution, wring it out thoroughly, and wipe down the baseboards. Work in small sections, and be sure to rinse the cloth frequently in the clean water bucket to remove any dirt and grime.
4. Tackle Stubborn Spots: For stubborn spots and stains, use your old toothbrush or small scrub brush to gently scrub the affected area. You can also try using a Magic Eraser, but be careful not to scrub too hard, as it can be abrasive and damage the finish. I usually test it in an inconspicuous area first.
5. Rinse with Clean Water: After cleaning, use a clean, damp microfiber cloth to rinse the baseboards with clean water. This will remove any remaining soap residue and leave them looking their best.
6. Dry the Baseboards: Use a dry towel to dry the baseboards thoroughly. This will prevent water spots and help to protect the finish.
7. Address Corners and Crevices: Use a cotton swab dipped in your cleaning solution to get into those hard-to-reach corners and crevices. This will ensure that every inch of your baseboards is sparkling clean.
8. Repeat as Needed: If your baseboards are particularly dirty, you may need to repeat the cleaning process. Don’t be afraid to give them a second scrub!
9. For Painted Baseboards: If you have painted baseboards, be extra careful not to scrub too hard, as you could damage the paint. Use a gentle touch and a mild cleaning solution.
10. For Wooden Baseboards: If you have wooden baseboards, you may want to use a wood cleaner instead of dish soap and vinegar. Follow the manufacturer’s instructions for the best results.
11. Dealing with Scuff Marks: For scuff marks, I’ve found that a damp Magic Eraser works wonders. Just be gentle and test it in an inconspicuous area first. You can also try using a pencil eraser for lighter scuff marks.
12. Preventative Measures: To keep your baseboards clean for longer, consider placing mats or rugs in high-traffic areas to catch dirt and debris. You can also dust them regularly with a microfiber cloth to prevent dust from building up.
Extra Tips and Tricks: Level Up Your Baseboard Game
Here are a few extra tips and tricks that I’ve learned over the years to make baseboard cleaning even easier and more effective:
* Use a Paint Scraper for Dried Paint: If you have dried paint splatters on your baseboards, use a plastic paint scraper to gently remove them. Be careful not to scratch the surface.
* Add Essential Oils for a Fresh Scent: Add a few drops of your favorite essential oil to your cleaning solution for a fresh, clean scent. Lavender, lemon, and eucalyptus are all great options.
* Consider a Baseboard Buddy: There are tools specifically designed for cleaning baseboards, like the Baseboard Buddy. These tools can make the job easier and faster.
* Regular Maintenance is Key: The more often you clean your baseboards, the easier it will be to keep them clean. Try to incorporate baseboard cleaning into your regular cleaning routine. I aim for once a month, but even a quick wipe-down every couple of weeks makes a difference.
* Don’t Forget the Top Edge: The top edge of your baseboards can accumulate a lot of dust. Be sure to wipe it down with a microfiber cloth.
* Check for Gaps and Cracks: While you’re cleaning, take a look for any gaps or cracks in your baseboards. These can be filled with caulk to prevent dust and dirt from accumulating.
* Test Your Cleaning Solution: Before cleaning your entire baseboard, test your cleaning solution in an inconspicuous area to make sure it doesn’t damage the finish.
* Be Patient: Cleaning baseboards can be a time-consuming task, but the results are worth it. Be patient and take your time to do a thorough job.
* Listen to Music or a Podcast: To make the task more enjoyable, put on some music or listen to a podcast while you clean.
* Enlist Help: If you have a lot of baseboards to clean, enlist the help of a friend or family member. Many hands make light work!
Maintaining Your Sparkling Baseboards: Keeping the Shine
Once you’ve achieved sparkling baseboards, you’ll want to keep them that way! Here’s how:
* Dust Regularly: A quick dusting with a microfiber cloth once a week will prevent dust from building up.
* Wipe Up Spills Immediately: Clean up any spills or splatters as soon as they happen to prevent staining.
* Use Doormats: Place doormats at all entrances to your home to trap dirt and debris before they get tracked inside.
* Consider a Robot Vacuum: A robot vacuum can help to keep your floors clean and prevent dust from accumulating on your baseboards.
* Deep Clean Seasonally: Even with regular maintenance, you’ll still want to deep clean your baseboards a few times a year.
By following these tips and tricks, you can keep your baseboards sparkling clean and enjoy a fresher, more inviting home. Happy cleaning!
Conclusion
So, there you have it! Achieving sparkling baseboards doesn’t require expensive cleaning products or hours of back-breaking labor. This simple, yet incredibly effective DIY trick is a game-changer for anyone looking to elevate the cleanliness and overall aesthetic of their home. We’ve shown you how to harness the power of readily available household items to create a cleaning solution that’s both gentle on your baseboards and tough on grime.
Why is this a must-try? Because it’s efficient, cost-effective, and environmentally conscious. You’re likely already stocked with the necessary ingredients, saving you a trip to the store and reducing your reliance on harsh chemicals. Plus, the satisfaction of seeing your baseboards transform from dull and dusty to gleaming and pristine is truly rewarding. It’s a small detail that makes a big difference in the overall feel of your living space.
But don’t stop there! Feel free to experiment with variations to tailor this DIY trick to your specific needs and preferences. For instance, if you’re dealing with particularly stubborn stains, consider adding a tablespoon of baking soda to your cleaning solution for extra scrubbing power. Or, if you prefer a more fragrant cleaning experience, a few drops of your favorite essential oil (lemon, lavender, or tea tree are excellent choices) can be added to the mixture. Just be sure to test any new additions on an inconspicuous area of your baseboard first to ensure they don’t cause any discoloration.
Another variation to consider is the application method. While we recommend using a microfiber cloth for its gentle yet effective cleaning properties, you could also try using an old toothbrush for tackling hard-to-reach crevices or textured baseboards. A soft-bristled brush can help dislodge dirt and grime that’s embedded in the details.
Remember, consistency is key. Incorporating this simple baseboard cleaning routine into your regular cleaning schedule will prevent dirt and grime from building up, making future cleanings even easier. Aim to clean your baseboards at least once a month, or more frequently in high-traffic areas.
We are confident that this DIY trick will revolutionize your baseboard cleaning routine. It’s a simple, effective, and affordable way to achieve sparkling baseboards that will make your entire home shine. So, ditch the expensive cleaning products and embrace the power of DIY!
Now, it’s your turn. We encourage you to try this DIY trick and experience the difference for yourself. And most importantly, we want to hear about your results! Share your before-and-after photos, tips, and variations in the comments below. Let’s create a community of sparkling baseboard enthusiasts! Your experiences can inspire others to transform their homes and discover the joy of DIY cleaning. We can’t wait to see your sparkling results!
Frequently Asked Questions (FAQ)
What exactly is the benefit of having clean baseboards?
Clean baseboards contribute significantly to the overall cleanliness and aesthetic appeal of your home. They act as a visual frame for your rooms, and when they’re clean and well-maintained, they create a sense of polish and attention to detail. Dirty baseboards, on the other hand, can make even a clean room look dingy and neglected. Regularly cleaning your baseboards also helps to prevent the buildup of dust, allergens, and mold, contributing to a healthier indoor environment.
What kind of cleaning solution is best for baseboards?
The best cleaning solution for baseboards is often a simple mixture of warm water and a mild dish soap. This combination is effective at removing dirt, grime, and everyday stains without damaging the baseboard material. Avoid using harsh chemicals or abrasive cleaners, as these can strip the paint or finish from your baseboards. For tougher stains, you can add a small amount of baking soda or vinegar to the solution. Always test any cleaning solution on an inconspicuous area of your baseboard first to ensure it doesn’t cause any discoloration or damage.
How often should I clean my baseboards?
The frequency of baseboard cleaning depends on several factors, including the amount of foot traffic in your home, the presence of pets, and the overall level of dust and dirt. As a general guideline, aim to clean your baseboards at least once a month. In high-traffic areas, such as hallways and entryways, you may need to clean them more frequently, perhaps every two weeks. Regular cleaning will prevent the buildup of dirt and grime, making future cleanings easier and more effective.
What is the best way to clean baseboards without bending over?
Bending over to clean baseboards can be uncomfortable and even painful, especially for those with back problems. Fortunately, there are several ways to clean baseboards without straining your back. One option is to use a long-handled cleaning tool, such as a mop or a sponge mop. You can also attach a microfiber cloth to a Swiffer-type sweeper for easy baseboard cleaning. Another option is to use knee pads or a rolling stool to get closer to the baseboards without having to bend over completely.
Can I use a magic eraser on baseboards?
Magic erasers can be effective at removing stubborn stains and scuff marks from baseboards, but it’s important to use them with caution. Magic erasers are abrasive and can potentially damage the finish of your baseboards if used too aggressively. Always test the magic eraser on an inconspicuous area first to ensure it doesn’t cause any discoloration or damage. When using a magic eraser, apply gentle pressure and avoid scrubbing too hard.
What if my baseboards are painted with a glossy paint?
Glossy painted baseboards are generally easier to clean than baseboards with a matte finish. The smooth surface of glossy paint resists dirt and grime, making it easier to wipe clean. You can use the same cleaning solution of warm water and mild dish soap, but you may not need to scrub as hard. Avoid using abrasive cleaners, as these can dull the shine of the glossy paint.
How do I clean baseboards with intricate designs or molding?
Baseboards with intricate designs or molding can be more challenging to clean, as dirt and grime can accumulate in the crevices and details. To clean these types of baseboards, use a soft-bristled brush, such as an old toothbrush, to dislodge dirt and grime from the details. You can also use a cotton swab dipped in your cleaning solution to reach tight spaces. Be patient and thorough, and you’ll be able to restore your intricate baseboards to their former glory.
What can I do to prevent baseboards from getting dirty so quickly?
There are several things you can do to prevent baseboards from getting dirty so quickly. One of the most effective strategies is to regularly vacuum or sweep your floors to remove dust and dirt before it has a chance to settle on your baseboards. You can also use doormats at entrances to trap dirt and debris from shoes. Consider using a sealant on your baseboards to create a protective barrier that repels dirt and makes cleaning easier. Finally, be mindful of activities that can cause dirt and grime to splash onto your baseboards, such as mopping or watering plants.

Leave a Comment