

Wood Heat Stain Removal: Has your beautiful wooden furniture fallen victim to unsightly white rings and cloudy marks left by hot mugs or dishes? Don’t despair! I know the feeling – it’s heartbreaking to see those blemishes on your cherished pieces. But before you resign yourself to living with them or, worse, consider replacing your furniture, let me tell you a secret: you can often banish those heat stains yourself with some simple DIY magic!
For generations, wood has been a prized material, gracing our homes with warmth and elegance. From rustic farmhouses to grand estates, wood furniture has always been a symbol of comfort and enduring style. But let’s face it, wood and heat aren’t the best of friends. Those pesky heat stains are a common problem, and while professional furniture restoration is an option, it can be costly and time-consuming.
That’s where these DIY wood heat stain removal tricks come in! I’m going to share some easy-to-follow methods using common household items that you probably already have in your pantry. These hacks are not only budget-friendly but also empower you to take control and restore the beauty of your wooden furniture. So, grab your supplies, and let’s get started on rescuing your wood from those heat-induced woes!
DIY Wood Heat Stain Removal: Reviving Your Furniture Like a Pro
Okay, so you’ve got a dreaded white heat stain on your beautiful wood furniture. Don’t panic! I’ve been there, done that, and I’m here to tell you it’s usually fixable. These ghostly rings are caused by moisture trapped in the finish, not necessarily damage to the wood itself. This means we can often coax that moisture out and restore your furniture to its former glory. I’m going to walk you through a few methods, starting with the gentlest and working our way up. Let’s get started!
Understanding the Enemy: Heat Stains
Before we dive in, it’s helpful to understand what we’re dealing with. Heat stains, those milky white rings, are essentially moisture trapped *within* the finish of your wood furniture. Hot cups, plates, or even humid conditions can cause this. The goal is to gently reintroduce heat and absorb that trapped moisture.
Method 1: The Iron and Cloth Trick (Our First Line of Defense)
This is my go-to method because it’s non-abrasive and often does the trick. It’s all about using gentle heat to draw out the moisture.
What you’ll need:
* A clean, dry cotton cloth (an old t-shirt works great!)
* An iron (set to low, DRY heat – NO STEAM!)
* Water (optional, for a slightly damp cloth if needed)
Step-by-step instructions:
1. Prepare the area: Make sure the surface of your furniture is clean and dry. Wipe away any dust or debris with a clean, dry cloth.
2. Position the cloth: Lay the clean cotton cloth directly over the heat stain. Make sure the cloth is smooth and covers the entire stain.
3. Ironing time: Turn your iron on to the LOWEST heat setting. It’s crucial that there’s NO STEAM. We want dry heat only.
4. Gentle ironing: Gently iron over the cloth in a circular motion. Don’t leave the iron in one spot for too long. Keep it moving! I usually go for about 30 seconds to a minute at a time.
5. Check your progress: Lift the cloth and check the stain. Has it faded at all? If so, great! Repeat the ironing process. If not, don’t worry, we’ll move on to the next step.
6. Slightly damp cloth (optional): If the dry cloth isn’t working, you can try *very slightly* dampening the cloth. Wring it out thoroughly so it’s barely damp. Repeat steps 4 and 5. Be extra careful not to use too much moisture!
7. Repeat as needed: Keep repeating the ironing process, checking your progress each time. It might take several attempts, but be patient. Sometimes, stubborn stains need a little persistence.
8. Buff it out: Once the stain has faded or disappeared, buff the area with a clean, dry cloth to remove any residue.
Method 2: The Hair Dryer Approach (Gentle and Gradual)
If the iron seems too intense, a hair dryer offers a gentler approach. This is especially good for delicate finishes.
What you’ll need:
* A hair dryer
* A clean, soft cloth
Step-by-step instructions:
1. Clean the area: As always, start with a clean and dry surface.
2. Hair dryer setting: Set your hair dryer to the lowest heat setting and the lowest fan speed. We want gentle heat and airflow.
3. Apply heat: Hold the hair dryer a few inches away from the heat stain and move it back and forth in a sweeping motion. Don’t hold it in one spot for too long, as this could damage the finish.
4. Check progress: After a minute or two, check the stain. Is it fading? If so, keep going.
5. Wipe down: Every few minutes, wipe the area with a clean, soft cloth. This helps to absorb any moisture that’s being drawn out.
6. Repeat: Continue the process for 10-15 minutes, or until the stain fades significantly. Patience is key here!
7. Buff: Finish by buffing the area with a clean, dry cloth.
Method 3: Mayonnaise (Believe it or Not!)
This sounds crazy, I know, but mayonnaise contains oils that can help to rehydrate the finish and draw out the moisture. It’s worth a shot if the other methods haven’t worked.
What you’ll need:
* Real mayonnaise (not light or low-fat)
* A clean, soft cloth
* A plastic scraper or spoon (optional)
Step-by-step instructions:
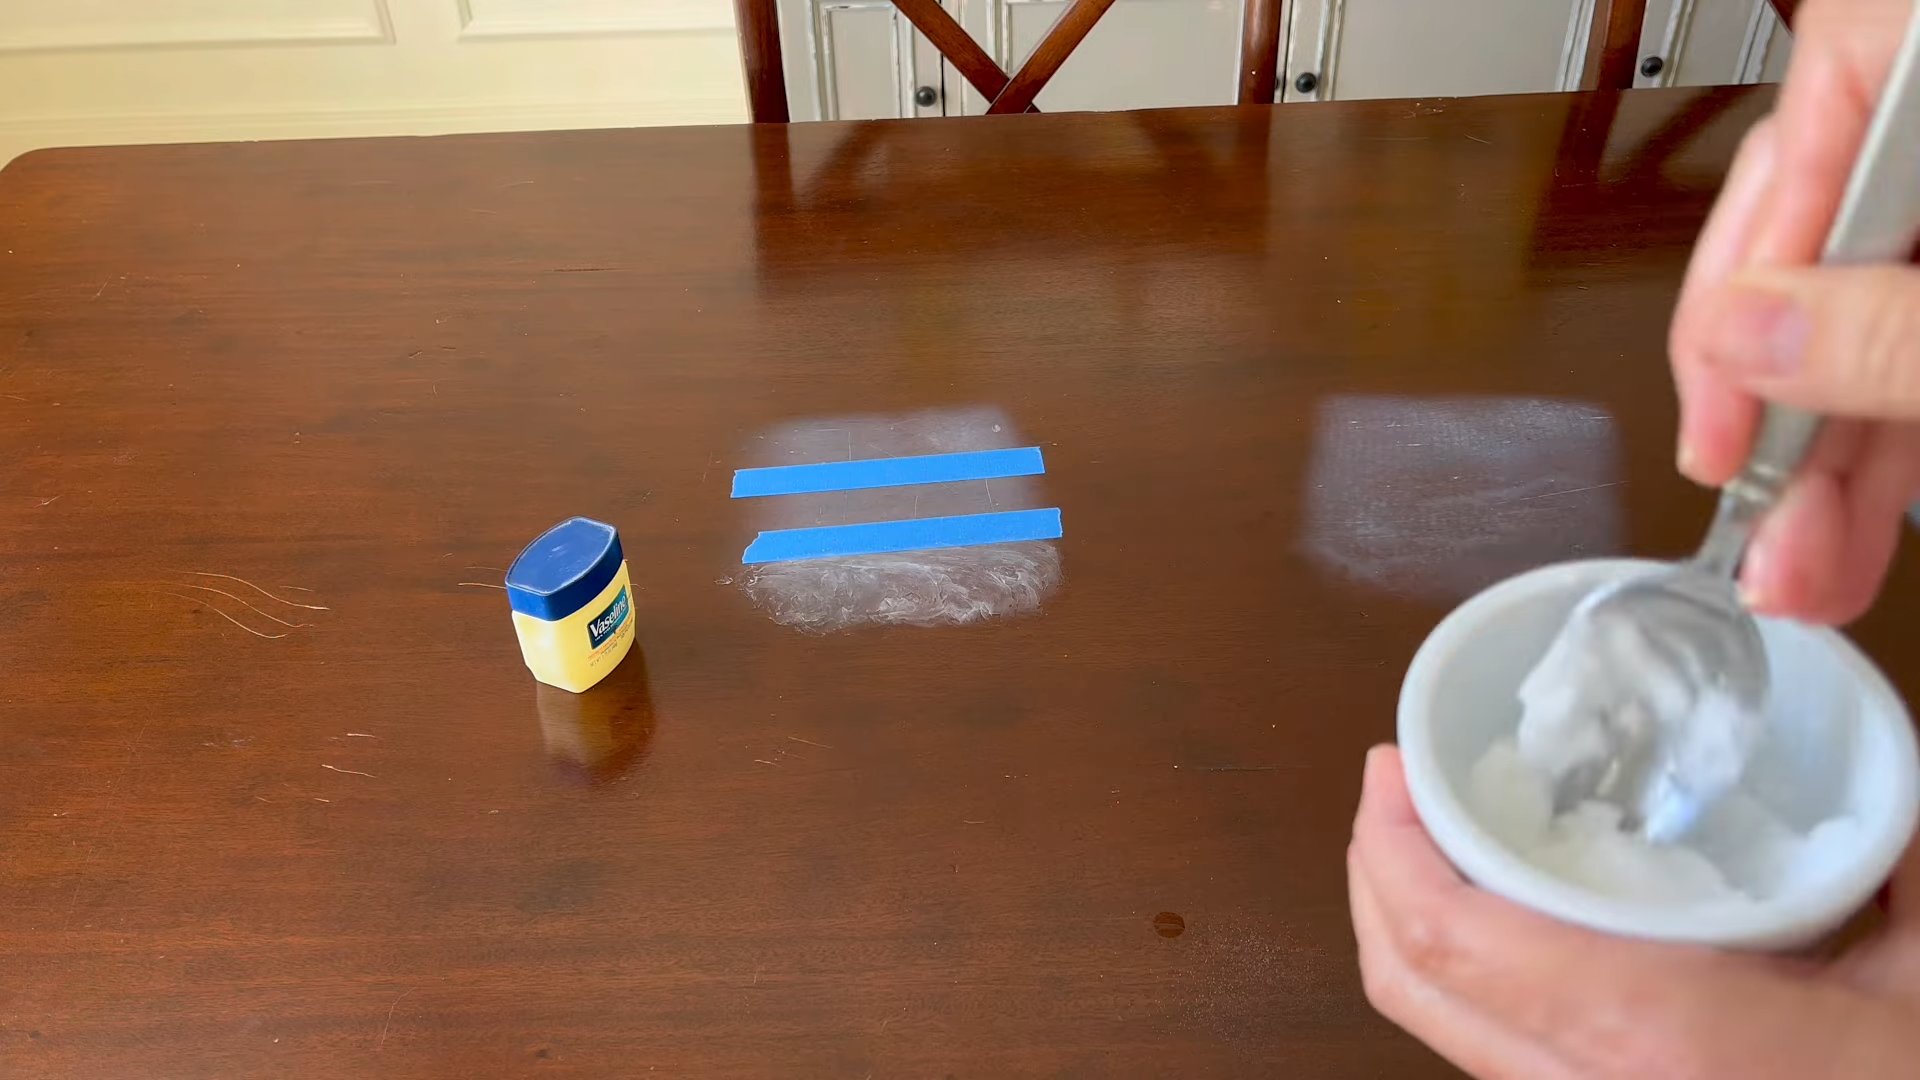
1. Apply the mayonnaise: Generously apply a thick layer of mayonnaise directly onto the heat stain.
2. Let it sit: Cover the stain completely and let the mayonnaise sit for at least a few hours, or even overnight. The longer it sits, the better chance it has of working.
3. Remove the mayonnaise: Use a clean, soft cloth or a plastic scraper to gently remove the mayonnaise.
4. Clean the area: Wipe the area clean with a damp cloth to remove any remaining mayonnaise residue.
5. Dry and buff: Dry the area thoroughly with a clean, dry cloth and then buff it to restore the shine.
Method 4: Toothpaste (A Mild Abrasive)
This method uses a very mild abrasive to gently buff away the stain. Be careful and test it in an inconspicuous area first!
What you’ll need:
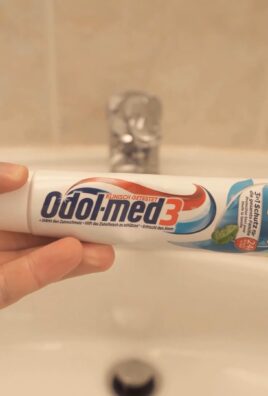
* Non-gel toothpaste (plain white toothpaste)
* A soft cloth
* Water
Step-by-step instructions:
1. Apply the toothpaste: Put a small amount of toothpaste on a soft cloth.
2. Gently rub: Gently rub the toothpaste onto the heat stain in a circular motion. Use very light pressure.
3. Wipe away: After a minute or two, wipe away the toothpaste with a damp cloth.
4. Dry and buff: Dry the area thoroughly with a clean, dry cloth and then buff it to restore the shine.
5. Inspect: Check the area carefully. If the stain is still visible, you can repeat the process, but be very gentle.
Method 5: Mineral Spirits (For More Stubborn Stains)
This is a stronger method and should be used with caution. Mineral spirits can strip the finish, so test it in an inconspicuous area first!
What you’ll need:
* Mineral spirits
* Two clean, soft cloths
* Rubber gloves
Step-by-step instructions:
1. Ventilation: Work in a well-ventilated area.
2. Protection: Wear rubber gloves to protect your hands.
3. Apply mineral spirits: Dampen one of the cloths with mineral spirits.
4. Gently rub: Gently rub the cloth over the heat stain in a circular motion.
5. Wipe clean: Immediately wipe the area clean with the second, dry cloth.
6. Inspect: Check the area carefully. If the stain is still visible, you can repeat the process, but be very careful not to overdo it.
7. Dry completely: Allow the area to dry completely.
8. Wax or polish: After the mineral spirits have dried, you may need to apply a coat of wax or polish to restore the shine.
Important Considerations and Precautions
* Test in an inconspicuous area: Before trying any of these methods, always test them in a hidden area of your furniture to make sure they don’t damage the finish.
* Be gentle: Use light pressure and avoid rubbing too hard, as this could scratch or damage the finish.
* Patience is key: Some stains are more stubborn than others and may require multiple treatments. Don’t give up too easily!
* Know your finish: The type of finish on your furniture can affect how it responds to these treatments. If you’re not sure what type of finish you have, it’s best to start with the gentlest methods.
* When to call a professional: If you’ve tried all of these methods and the stain is still visible, or if you’re concerned about damaging your furniture, it’s best to call a professional furniture restorer.
Preventing Future Heat Stains
Of course, the best way to deal with heat stains is to prevent them in the first place! Here are a few tips:
* Use coasters and placemats: Always use coasters under hot or cold drinks and placemats under hot dishes.
* Avoid placing hot items directly on wood furniture: Even
Conclusion
So, there you have it! Removing wood heat stains doesn’t have to be a daunting task involving harsh chemicals or expensive professional services. This simple, DIY trick offers an effective and affordable solution, allowing you to restore the natural beauty of your wood surfaces with minimal effort. The beauty of this method lies in its accessibility – you likely already have the necessary ingredients in your pantry.
Why is this DIY trick a must-try? Because it’s gentle on your wood, tough on stains, and easy on your wallet. Unlike some commercial stain removers that can strip the finish or damage the wood fibers, this method utilizes the power of readily available household items to lift the stain without causing harm. It’s a win-win!
But don’t just take our word for it. We encourage you to experiment and adapt the technique to suit your specific needs. For instance, if you’re dealing with a particularly stubborn stain, you might try increasing the concentration of the cleaning agent or extending the dwell time. Remember to always test in an inconspicuous area first to ensure compatibility with your wood finish.
Variations and Suggestions:
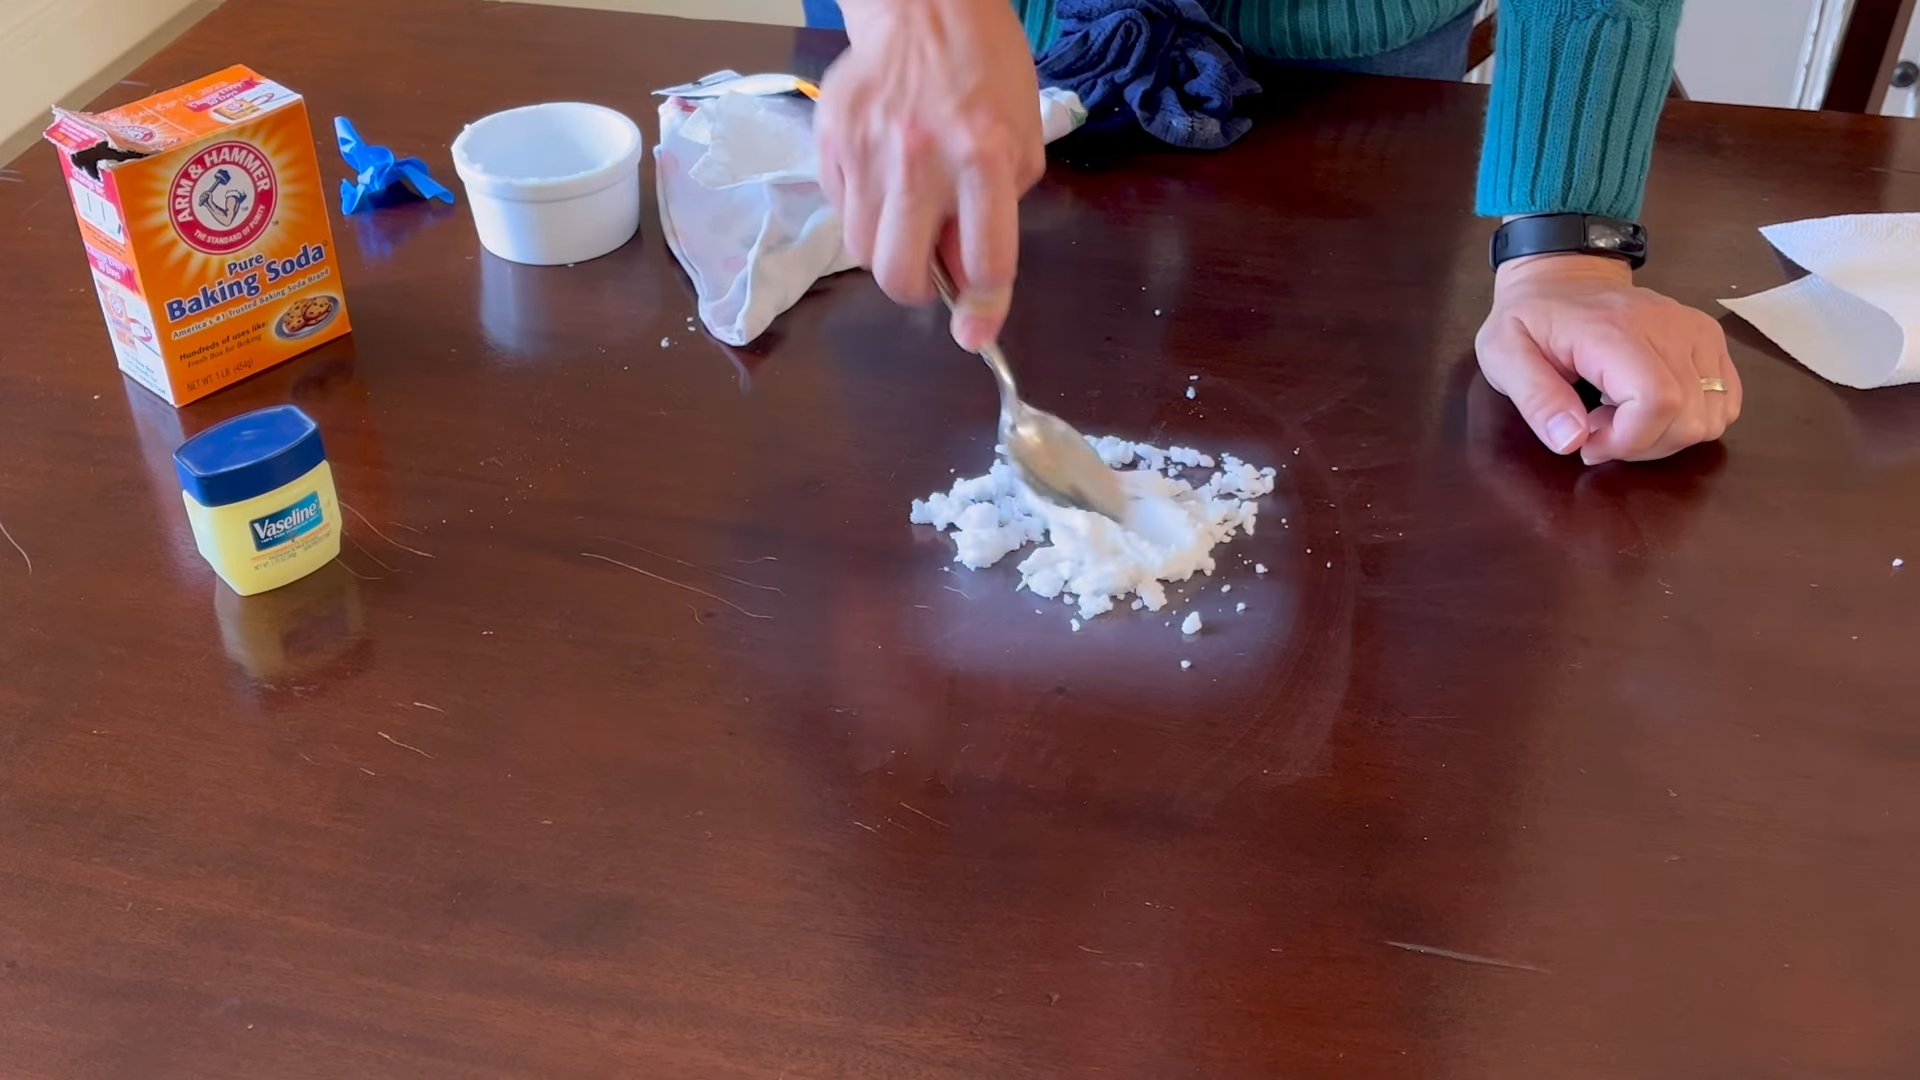
* For lighter stains: A simple paste of baking soda and water might be sufficient. Apply, let it sit for a few minutes, and gently wipe away.
* For darker, more persistent stains: Consider adding a few drops of lemon juice to your cleaning solution. The citric acid can help to brighten the wood and further lift the stain.
* Preventative measures: Once you’ve successfully removed the stain, consider applying a protective sealant or wax to your wood surface. This will help to prevent future stains and keep your wood looking its best. Regular dusting and cleaning with a wood-friendly cleaner will also go a long way in maintaining its beauty.
* Type of Wood: Different types of wood react differently. Hardwoods like oak and maple are generally more resistant to staining than softwoods like pine. Adjust your approach accordingly. For delicate or antique wood, proceed with extra caution and consider consulting a professional.
Ultimately, the best way to determine the effectiveness of this DIY trick is to try it yourself. We’re confident that you’ll be pleasantly surprised by the results. And once you’ve successfully banished those unsightly wood heat stains, we’d love to hear about your experience! Share your tips, tricks, and before-and-after photos in the comments section below. Let’s build a community of stain-busting experts!
Don’t let those wood heat stains diminish the beauty of your home. Take control and restore your wood surfaces to their former glory with this simple and effective DIY solution. You’ll be amazed at the difference it makes!
Frequently Asked Questions (FAQs)
What exactly are wood heat stains, and why do they occur?
Wood heat stains are discolorations that appear on wood surfaces due to prolonged exposure to heat. This can happen from hot dishes, cups, or even appliances placed directly on the wood. The heat can cause a chemical reaction in the wood finish or even the wood itself, leading to a white, cloudy, or darkened stain. The severity of the stain depends on the intensity and duration of the heat exposure, as well as the type of wood and finish.
Will this DIY trick work on all types of wood and finishes?
While this DIY trick is generally safe and effective, it’s essential to exercise caution and test it in an inconspicuous area first. Different types of wood and finishes react differently to cleaning agents. Hardwoods like oak and maple are typically more resilient, while softwoods like pine are more porous and may require a gentler approach. Similarly, delicate or antique finishes may be more susceptible to damage. If you’re unsure about the compatibility of the cleaning solution with your wood or finish, consult a professional before proceeding.
What ingredients do I need for this DIY wood heat stain removal trick?
The specific ingredients will vary depending on the severity of the stain and the materials you have on hand. However, some common and effective options include:
* Baking soda: A mild abrasive that can help to lift stains without scratching the wood.
* Water: Used to create a paste or solution with the other ingredients.
* White vinegar: A natural cleaning agent that can help to dissolve stains and remove odors.
* Lemon juice: Contains citric acid, which can help to brighten the wood and further lift the stain.
* Olive oil: Can help to moisturize the wood and restore its natural luster.
* A soft cloth or sponge: For applying and wiping away the cleaning solution.
How long should I leave the cleaning solution on the stain?
The dwell time will depend on the severity of the stain. For lighter stains, a few minutes may be sufficient. For darker, more persistent stains, you may need to leave the solution on for up to an hour. However, it’s essential to monitor the area closely and check for any signs of damage or discoloration. If you notice any adverse effects, remove the solution immediately and try a different approach.
What if the stain doesn’t come out after the first attempt?
Don’t be discouraged if the stain doesn’t disappear completely after the first attempt. You may need to repeat the process several times, or try a different combination of ingredients. Patience and persistence are key. However, if you’ve tried multiple times without success, it may be time to consult a professional furniture restorer.
Can I use a hairdryer or heat gun to help remove the stain?
While heat can sometimes help to loosen stains, using a hairdryer or heat gun is generally not recommended. Excessive heat can damage the wood finish or even cause the wood to warp or crack. It’s best to stick to gentle, natural methods for removing wood heat stains.
How can I prevent wood heat stains in the future?
Prevention is always better than cure. Here are some tips for preventing wood heat stains:
* Use coasters and placemats: Always use coasters and placemats under hot dishes, cups, and appliances.
* Avoid placing hot items directly on wood surfaces: Even if you’re using a coaster or placemat, avoid placing extremely hot items directly on wood surfaces for extended periods.
* Apply a protective sealant or wax: A protective sealant or wax can help to create a barrier between the wood and potential heat sources.
* Regularly dust and clean your wood surfaces: Regular dusting and cleaning with a wood-friendly cleaner will help to remove dirt and grime that can contribute to staining.
Is there a specific type of cloth I should use?
Yes, using the right type of cloth is important to avoid scratching or damaging the wood finish. Opt for a soft, lint-free cloth, such as microfiber or cotton. Avoid using abrasive cloths or scrub brushes, as these can scratch the surface.
What if I accidentally scratch the wood while trying to remove the stain?
If you accidentally scratch the wood, don’t panic. Minor scratches can often be repaired with a wood touch-up marker or crayon that matches the color of your wood finish. For deeper scratches, you may need to consult a professional furniture restorer.
Is this DIY trick safe for children and pets?
The safety of this DIY trick depends on the ingredients you use. Baking soda, water, and lemon juice are generally considered safe for children and pets. However, white vinegar can be irritating if ingested or comes into contact with the skin. Always keep cleaning solutions out of reach of children and pets, and ensure proper ventilation when using them.
Leave a Comment