

Yardlong Bean Growing Guide: Unlock the secrets to bountiful harvests right in your own backyard! Have you ever dreamed of harvesting beans so long they practically touch the ground? Well, dream no more! This DIY guide is your passport to cultivating these fascinating and delicious legumes with ease.
The yardlong bean, also known as the asparagus bean or Chinese long bean, boasts a rich history, particularly in Southeast Asian cuisine. For centuries, it’s been a staple ingredient, adding a unique texture and flavor to stir-fries, curries, and salads. But you don’t have to travel to Asia to enjoy these culinary delights. With the right knowledge, you can grow them yourself, no matter where you live!
Why should you embark on this yardlong bean growing adventure? Because fresh, homegrown produce simply tastes better! Plus, knowing exactly where your food comes from gives you peace of mind. This yardlong bean growing guide will provide you with simple, step-by-step instructions, clever hacks, and troubleshooting tips to ensure a successful and rewarding gardening experience. Imagine the satisfaction of sharing your homegrown yardlong beans with friends and family – they’ll be amazed! So, grab your gardening gloves, and let’s get started on this exciting journey together!
DIY Vertical Yardlong Bean Trellis: From Seed to Spectacular Harvest
Okay, so you’re ready to grow yardlong beans! These amazing, ridiculously long beans are not only delicious but also a conversation starter in any garden. But let’s be honest, they need support. A DIY trellis is the perfect solution, and I’m going to walk you through building one that’s both functional and visually appealing. This guide will cover everything from choosing the right materials to planting your seeds and maintaining your bean jungle.
Choosing Your Trellis Design
Before we dive into the construction, let’s consider the type of trellis that will work best for you. Yardlong beans are vigorous climbers, so you’ll need something sturdy. Here are a few options:
* A-Frame Trellis: This is a classic and relatively easy design. It provides excellent support and allows for good airflow. Plus, it looks great!
* Teepee Trellis: Another simple and attractive option. It’s perfect for smaller gardens and adds a whimsical touch.
* Netting Trellis: This is a more budget-friendly option, using netting stretched between posts. It’s lightweight but can still support a good amount of beans.
* Arch Trellis: A more advanced project, but the result is stunning. An arch trellis creates a beautiful entryway or focal point in your garden.
For this guide, I’m going to focus on building a sturdy A-Frame Trellis. It’s a good balance of ease of construction and robust support.
Materials You’ll Need
Gathering your materials beforehand will make the building process much smoother. Here’s what you’ll need for an A-Frame Trellis that’s approximately 6 feet tall and 4 feet wide at the base:
* Lumber:
* Four 8-foot long 2x4s (for the legs)
* One 4-foot long 2×4 (for the top support)
* Several 1-inch thick wooden slats or bamboo poles (for the climbing surface – the quantity depends on how closely spaced you want them)
* Fasteners:
* 3-inch exterior wood screws
* 1 1/4-inch exterior wood screws (for attaching the slats)
* Tools:
* Measuring tape
* Pencil
* Saw (circular saw or hand saw)
* Drill with drill bits
* Screwdriver or drill with screwdriver bits
* Level
* Safety glasses
* Work gloves
* Optional: Wood stain or sealant (to protect the wood)
Building the A-Frame Trellis: Step-by-Step
Alright, let’s get building! Remember to always wear safety glasses and gloves when working with power tools.
1. Cut the Lumber:
* If you want a shorter trellis, you can cut the 8-foot 2x4s to your desired height. I’m sticking with 8 feet for maximum bean-growing potential.
* The 4-foot 2×4 for the top support should already be the correct length.
* Cut your wooden slats or bamboo poles to the desired length. I recommend making them slightly longer than the width of the A-frame (around 4.5 feet) so they extend slightly beyond the legs. This gives the beans more to grab onto.
2. Assemble the A-Frames:
* Take two of the 8-foot 2x4s. These will form one side of the A-frame.
* At the top of the 2x4s, create an angle. This is where the two legs will meet. You can use a protractor or simply eyeball it. A 30-45 degree angle usually works well.
* Pre-drill pilot holes through the angled ends of the 2x4s. This will prevent the wood from splitting when you drive in the screws.
* Join the two 2x4s at the angled ends using 3-inch wood screws. Make sure the joint is secure.
* Repeat this process with the remaining two 8-foot 2x4s to create the second A-frame.
3. Connect the A-Frames:
* Place the two A-frames upright, facing each other.
* Position the 4-foot 2×4 horizontally across the top of the A-frames, connecting them. This will provide stability and prevent the trellis from collapsing.
* Pre-drill pilot holes through the 4-foot 2×4 and into the top of each A-frame.
* Secure the 4-foot 2×4 to the A-frames using 3-inch wood screws. Make sure the connection is strong and stable.
4. Attach the Climbing Surface:
* This is where the wooden slats or bamboo poles come in. These will provide the beans with something to climb.
* Start at the bottom of the A-frame and work your way up.
* Space the slats or poles evenly apart. I recommend spacing them about 6-8 inches apart.
* Pre-drill pilot holes through the slats or poles and into the legs of the A-frame.
* Attach the slats or poles using 1 1/4-inch wood screws.
* Make sure the slats or poles are securely attached. You don’t want them to come loose when the beans start climbing.
5. Reinforce the Base (Optional):
* For added stability, you can add horizontal supports at the base of the A-frame.
* Cut two pieces of lumber to the desired length (usually around 2 feet).
* Attach these pieces horizontally to the legs of the A-frame, near the ground.
* This will help prevent the trellis from tipping over in strong winds.
6. Finishing Touches (Optional):
* If you want to protect the wood from the elements, you can apply a wood stain or sealant.
* Follow the manufacturer’s instructions for application.
* Allow the stain or sealant to dry completely before planting your beans.
Planting Your Yardlong Beans
Now that your trellis is built, it’s time to plant your yardlong beans!
1. Choose Your Location:
* Yardlong beans need plenty of sunlight (at least 6-8 hours per day).
* Choose a location with well-drained soil.
* Make sure the trellis is positioned in a way that it won’t shade other plants.
2. Prepare the Soil:
* Amend the soil with compost or other organic matter. This will improve drainage and provide nutrients for the beans.
* Loosen the soil to a depth of at least 6 inches.
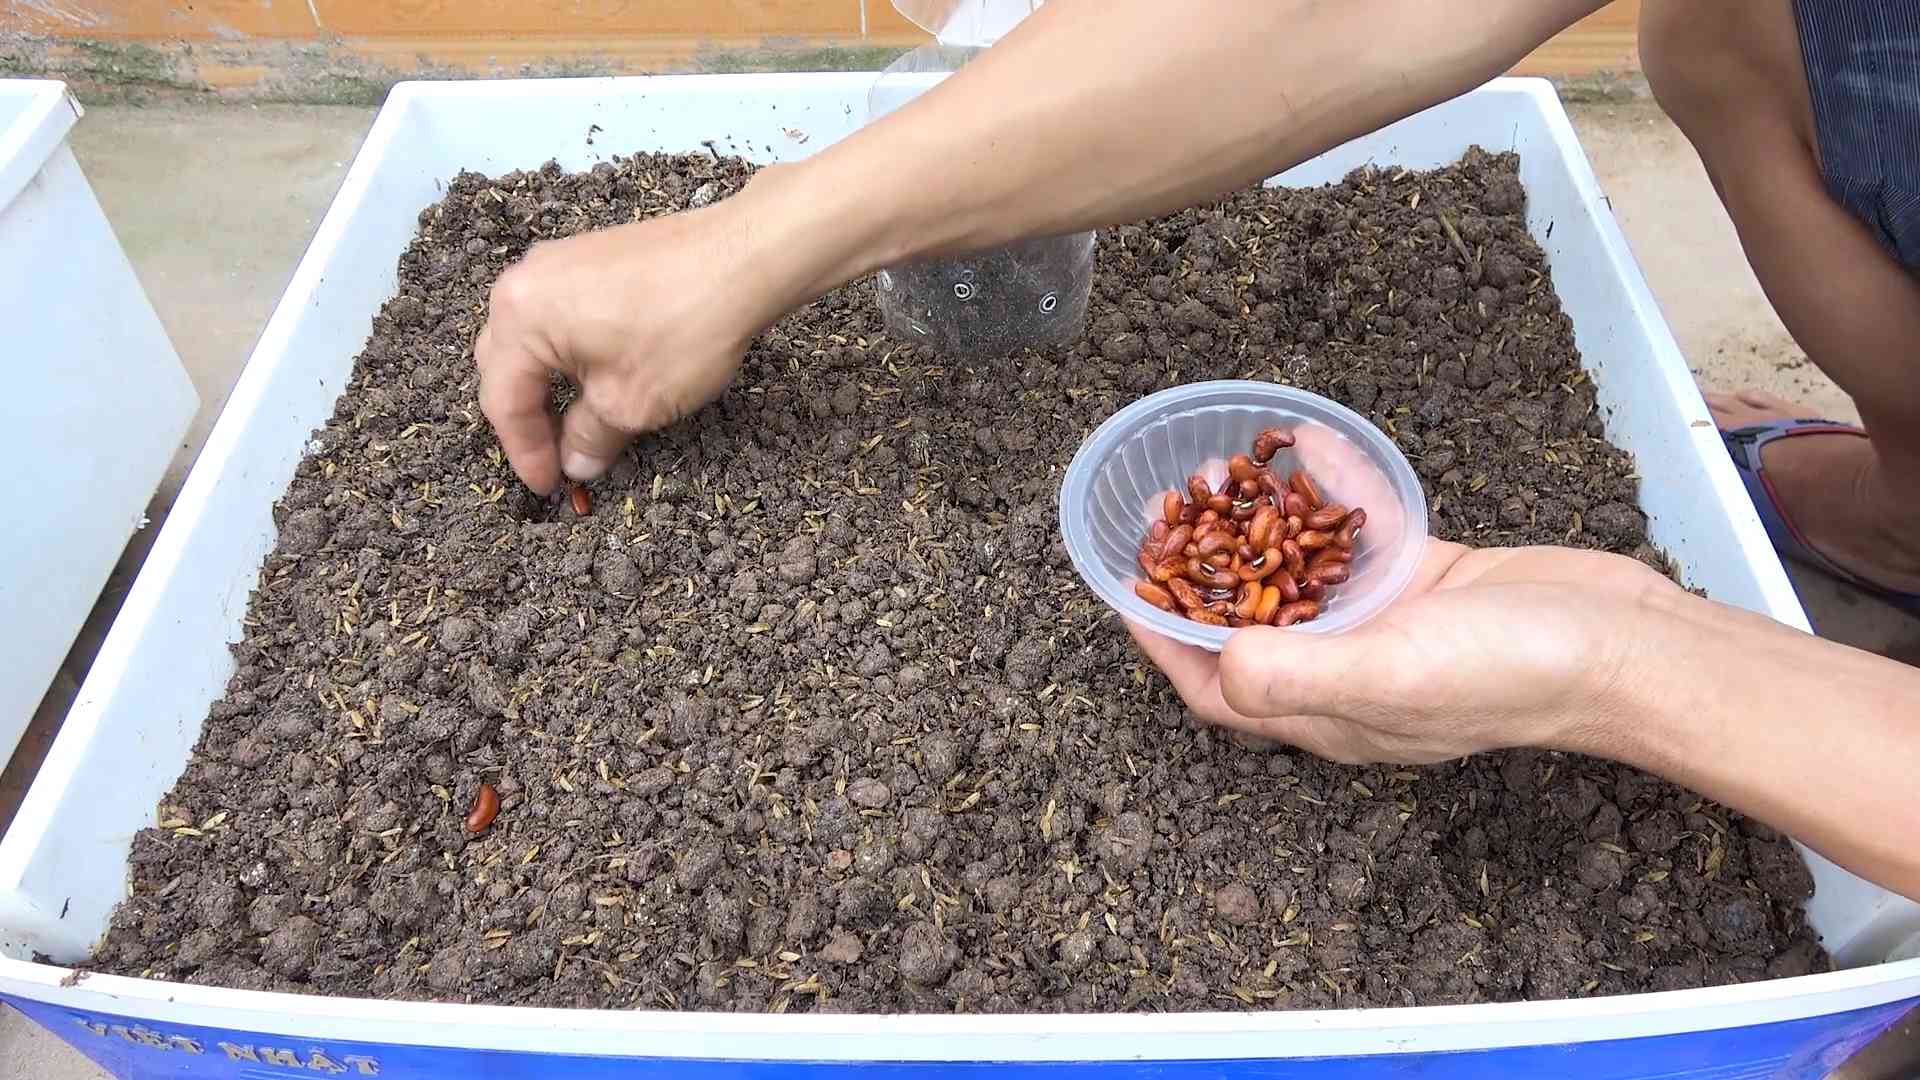
3. Sow the Seeds:
* Sow the seeds directly into the ground, about 1 inch deep.
* Space the seeds about 4-6 inches apart.
* Water the seeds thoroughly.
4. Provide Support:
* As the beans start to grow, gently guide them towards the trellis.
* They will naturally start to climb, but you may need to help them along at first.
Caring for Your Yardlong Beans
Yardlong beans are relatively easy to care for, but here are a few tips to ensure a bountiful harvest:
* Watering: Water regularly, especially during dry periods. Keep the soil consistently moist, but not waterlogged.
* Fertilizing: Fertilize every few weeks with a balanced fertilizer.
* Pest Control: Keep an eye out for pests, such as aphids and bean beetles. Treat infestations promptly with insecticidal soap or other organic pest control methods.
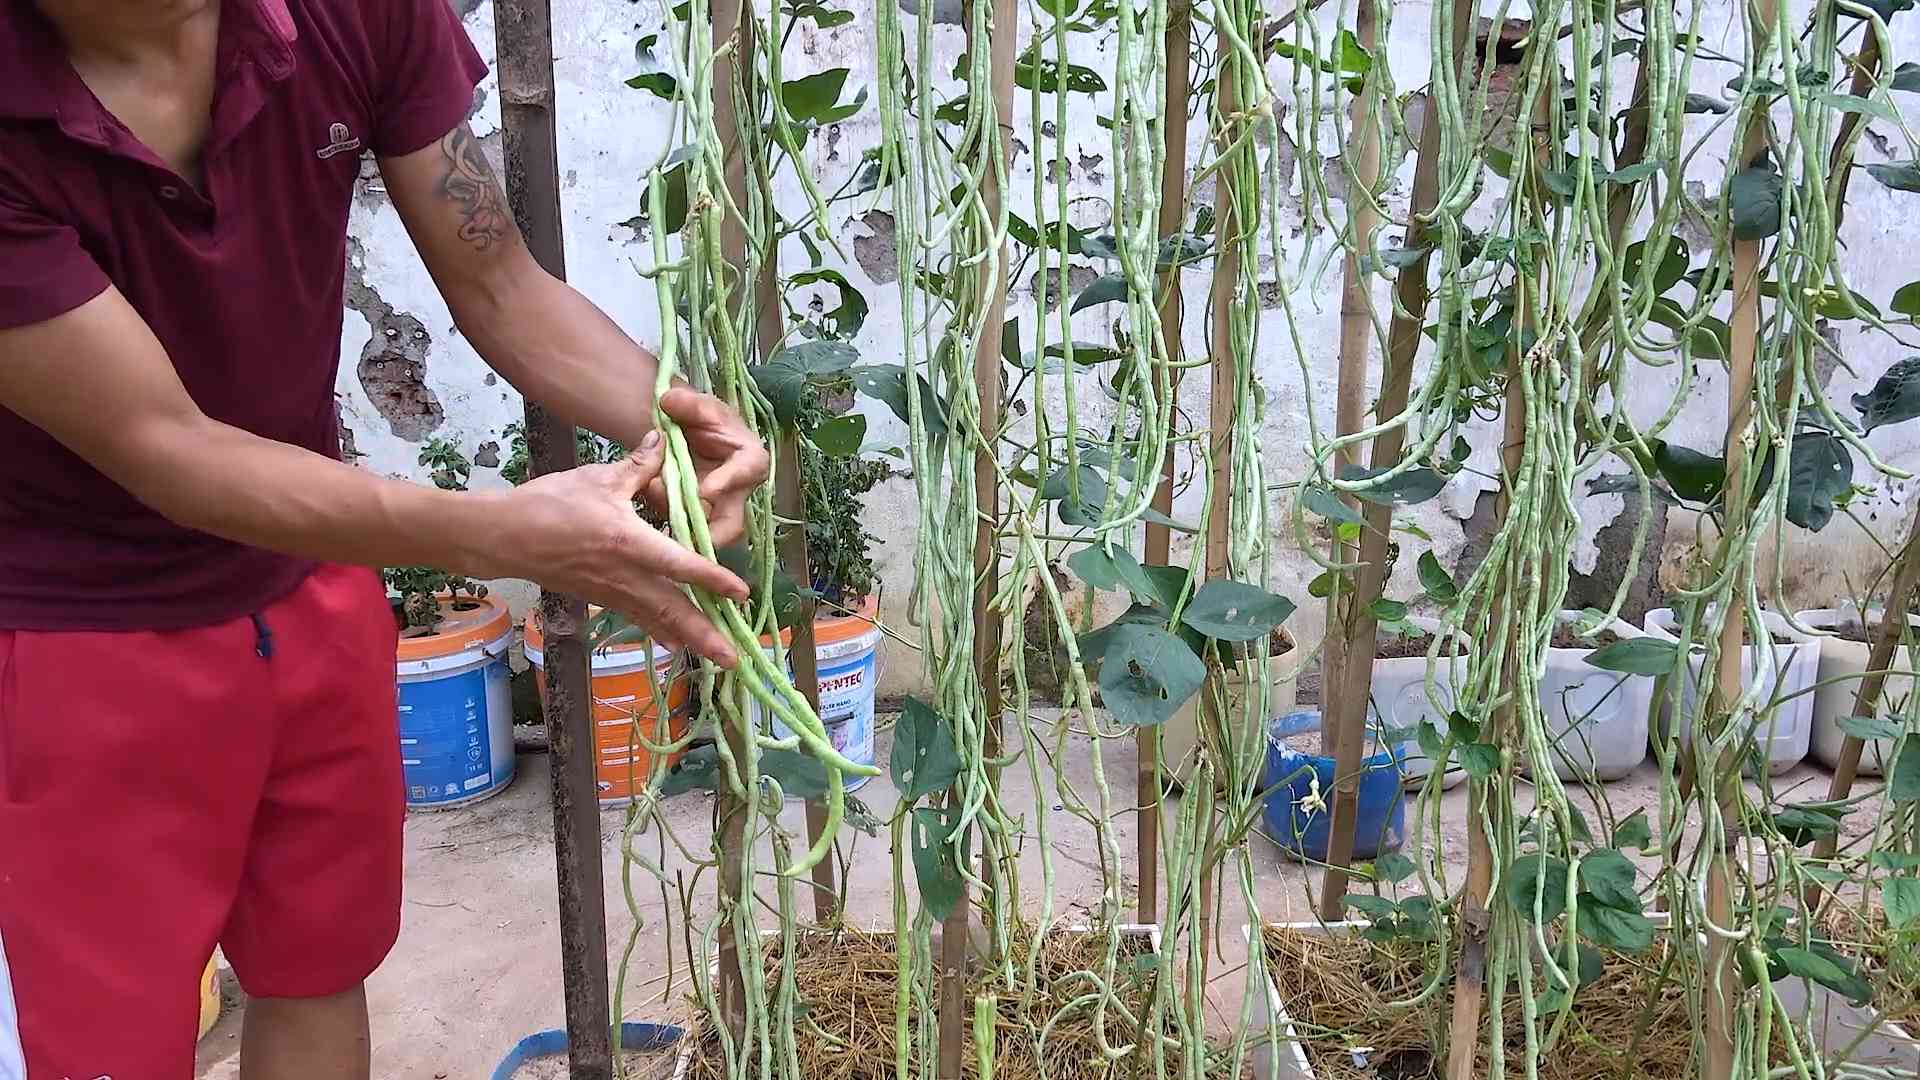
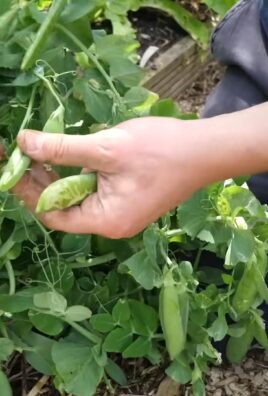
* Harvesting: Harvest the beans when they are about 12-18 inches long. The more you harvest, the more the plant will produce.
Troubleshooting
* Beans not climbing: Make sure the beans have something to grab onto. You may need to gently tie them to the trellis at first.
* Yellowing leaves: This could be a sign of overwatering or nutrient deficiency. Adjust your watering schedule and fertilize as needed.
* Pest infestations: Identify the pest and treat accordingly.
Enjoy Your Harvest!
Growing yardlong beans is a rewarding experience. With a little bit of effort, you can enjoy a delicious and abundant harvest. And your DIY trellis will be a beautiful and functional addition to your garden. Happy gardening!
Conclusion
So, there you have it! Mastering the art of growing yardlong beans doesn’t require a green thumb of mythical proportions. It’s about understanding their needs, providing the right support (literally!), and being patient. This comprehensive guide has armed you with the knowledge to cultivate your own thriving yardlong bean patch, right in your backyard.
Why is this DIY approach a must-try? Because fresh, homegrown yardlong beans are simply unparalleled in flavor and texture. Forget the limp, often-traveled beans you find at the grocery store. Imagine snapping off a vibrant, crisp bean, still warm from the sun, and adding it to your stir-fries, salads, or simply enjoying it as a healthy snack. The difference is night and day. Plus, growing your own food is incredibly rewarding, connecting you to the natural world and providing a sense of accomplishment that’s hard to beat.
But the benefits extend beyond just taste. You control the growing process, ensuring your beans are free from harmful pesticides and herbicides. You’re also contributing to a more sustainable food system by reducing your reliance on commercially grown produce. And let’s not forget the sheer joy of watching your plants flourish and produce an abundance of delicious beans!
Ready to take your yardlong bean game to the next level? Consider these variations and suggestions:
* Experiment with different varieties: Explore the diverse world of yardlong beans! Try different cultivars with varying colors, lengths, and flavors. Some popular options include ‘Red Noodle,’ ‘Chinese Red Long Bean,’ and ‘Orient Wonder.’
* Companion planting: Enhance your yardlong bean patch by planting beneficial companion plants. Marigolds can deter pests, while basil can improve the flavor of your beans.
* Succession planting: Extend your harvest season by planting new seeds every few weeks. This will ensure a continuous supply of fresh yardlong beans throughout the growing season.
* Vertical gardening: If you’re short on space, consider growing your yardlong beans vertically on a trellis or fence. This not only saves space but also improves air circulation and reduces the risk of disease.
* Seed saving: Save seeds from your best-performing plants to ensure a consistent supply of high-quality seeds for future growing seasons.
Don’t be intimidated by the length of this guide. Growing yardlong beans is a relatively straightforward process, and the rewards are well worth the effort. We encourage you to embrace the challenge, get your hands dirty, and experience the satisfaction of harvesting your own homegrown yardlong beans.
Now, it’s your turn! We’re eager to hear about your experiences growing yardlong beans. Share your tips, tricks, and successes in the comments below. Let’s build a community of passionate yardlong bean growers and learn from each other. Happy gardening!
Frequently Asked Questions (FAQ)
What is the ideal soil pH for growing yardlong beans?
Yardlong beans thrive in slightly acidic to neutral soil, with a pH range of 6.0 to 7.0. Before planting, it’s always a good idea to test your soil pH using a soil testing kit. If your soil is too acidic, you can amend it with lime. If it’s too alkaline, you can add sulfur or organic matter.
How often should I water my yardlong bean plants?
Yardlong beans need consistent moisture, especially during hot and dry weather. Water deeply and regularly, aiming to keep the soil consistently moist but not waterlogged. A good rule of thumb is to water when the top inch of soil feels dry to the touch. Mulching around the plants can help retain moisture and reduce the need for frequent watering.
What are some common pests and diseases that affect yardlong beans?
Yardlong beans can be susceptible to various pests and diseases, including aphids, bean beetles, spider mites, powdery mildew, and bean rust. Regularly inspect your plants for signs of infestation or disease. Use organic pest control methods, such as insecticidal soap or neem oil, to control pests. Ensure good air circulation and avoid overhead watering to prevent fungal diseases.
How long does it take for yardlong beans to mature?
Yardlong beans typically take 60 to 80 days to mature from seed. However, the exact time can vary depending on the variety, growing conditions, and climate. You can start harvesting beans when they reach about 12 to 18 inches in length.
Can I grow yardlong beans in containers?
Yes, you can successfully grow yardlong beans in containers, provided you choose a large enough container (at least 12 inches in diameter and depth) and provide adequate support for the vines. Use a well-draining potting mix and ensure the container receives plenty of sunlight. Water regularly and fertilize as needed.
Do yardlong beans need full sun?
Yes, yardlong beans require at least 6 to 8 hours of direct sunlight per day to thrive. Choose a sunny location in your garden or on your patio for optimal growth and bean production.
How do I know when to harvest yardlong beans?
Harvest yardlong beans when they are young, tender, and about 12 to 18 inches long. The beans should be firm and snap easily. Avoid letting the beans become too mature, as they can become tough and stringy. Harvest regularly to encourage continued production.
Can I eat the leaves of yardlong bean plants?
While the beans are the primary edible part of the plant, the young leaves and shoots of yardlong beans are also edible and can be used in salads or stir-fries. However, it’s best to harvest them sparingly, as removing too many leaves can weaken the plant.
How do I store yardlong beans after harvesting?
Freshly harvested yardlong beans can be stored in the refrigerator for up to a week. Place them in a plastic bag or container to prevent them from drying out. You can also freeze yardlong beans for longer storage. Blanch them in boiling water for a few minutes, then cool them in ice water before freezing.
What are some good companion plants for yardlong beans?
Good companion plants for yardlong beans include marigolds, basil, rosemary, carrots, cucumbers, and corn. These plants can help deter pests, improve soil health, and enhance the flavor of your beans. Avoid planting yardlong beans near onions or garlic, as they can inhibit growth.
Leave a Comment